You may encounter blank rows when deleting the contents of the row, or when pasting information from an external source into your Excel spreadsheet. Too many empty rows in your spreadsheet can make your data look incoherent, so you may want to remove empty rows that add no value to your spreadsheet.
You can always delete a row by using the Ctrl + Shift + –, or Ctrl + – if you have a number pad. However, Excel has some amazing tools for you to use if you wish to clear these values out. You can either clear empty rows individually or delete all empty rows at the same time.
Delete Rows Individually
If you only have a few empty rows in your worksheet, you can avoid the hassle of using other tools. Simply select the empty row and use Ctrl + Shift + – to delete the row. If you’re not as fond of using shortcuts, you may also delete a row from the Home ribbon.
- Select a cell from the row you wish to delete.
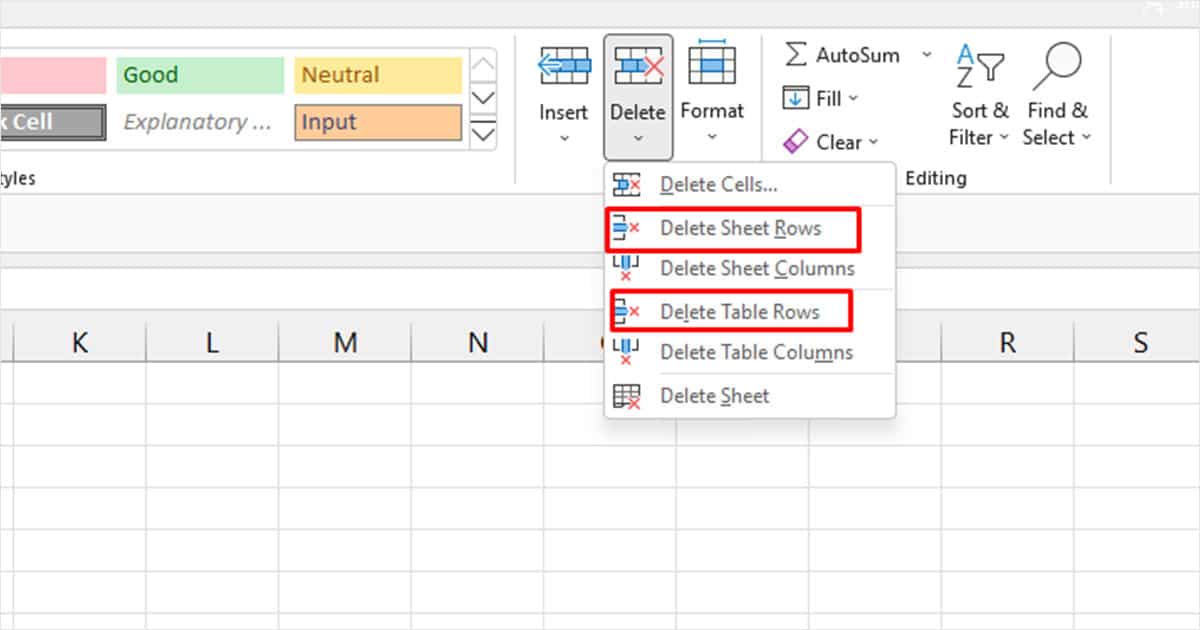
- Head to the Home tab and select the fly-out menu for Delete in the Cells section.
- From the fly-out menu,
- If you wish to delete a row from a table, select Delete Table Rows.
- To delete a row from the entire sheet, choose Delete Sheet Rows.
Use the Find and Select Option
For a spreadsheet with plenty of empty rows, you can use Find and Select to locate and select empty rows. Once the rows are selected, you can delete all empty rows from the worksheet.
- Select the range/table with blank rows in your sheet.
- From the home tab, click on Find & Select > Go to Special.
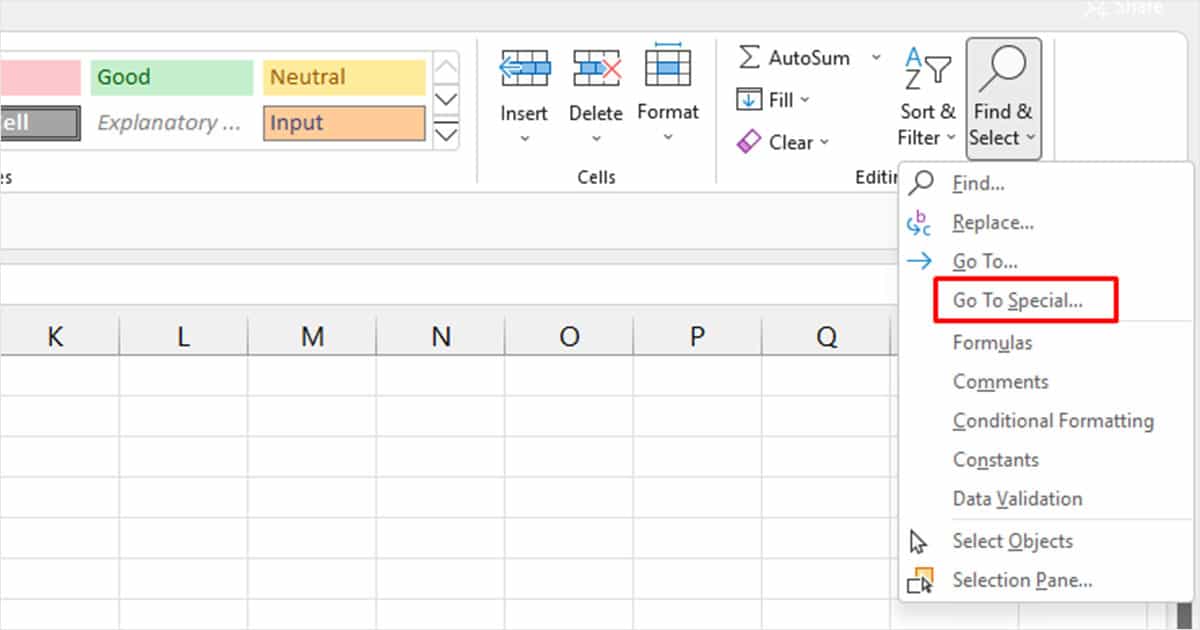
- Check the box next to Blanks and click OK.

- Remove the selected rows (Ctrl + Shift + –).
Sort & Filter Tool
Sort & Filter is a great tool in Excel that helps you organize your data. While you can use this tool to hide or filter certain values, you could also use it to delete empty rows. Using the Sort & Filter tool also comes in handy when you have a lot of empty rows in your range.
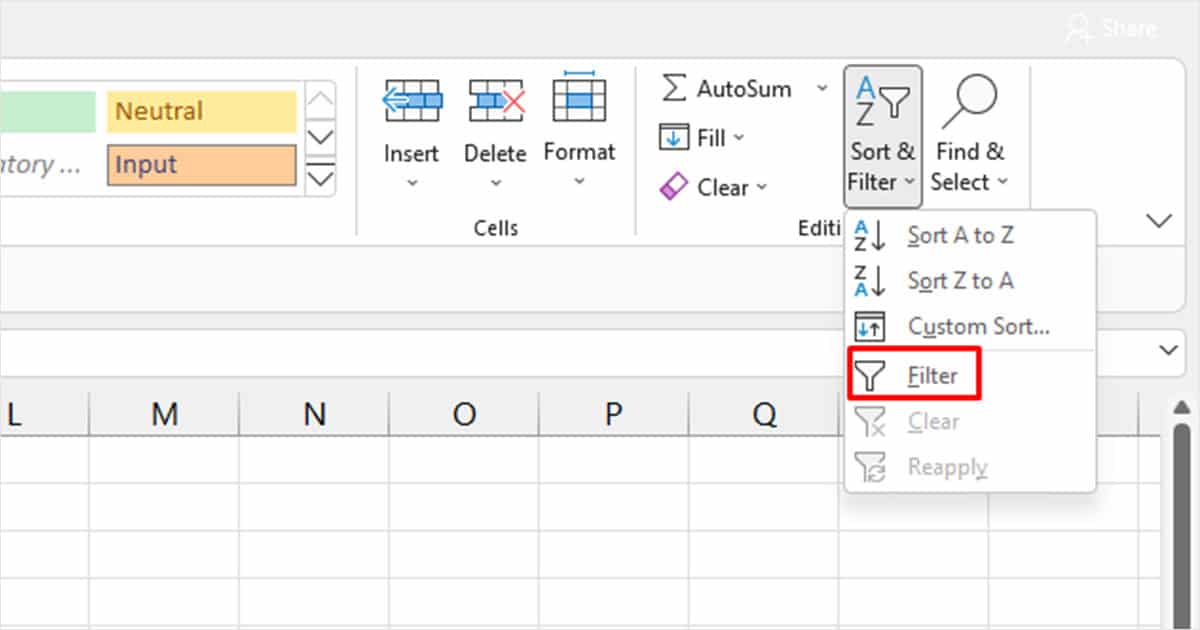
- Select your range from the spreadsheet.
- From the Home tab, select Sort & Filter > Filter.
- Click on the drop-down icon from the column header.
- Deselect the Select All option.
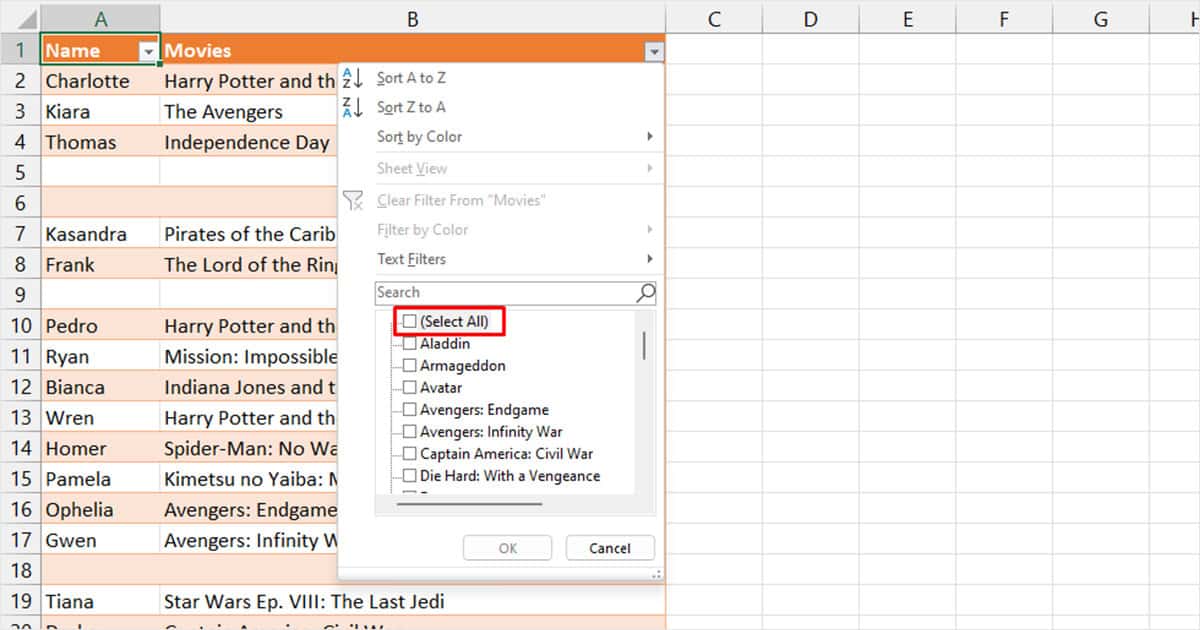
- Select the box next to (Blanks) and click OK.
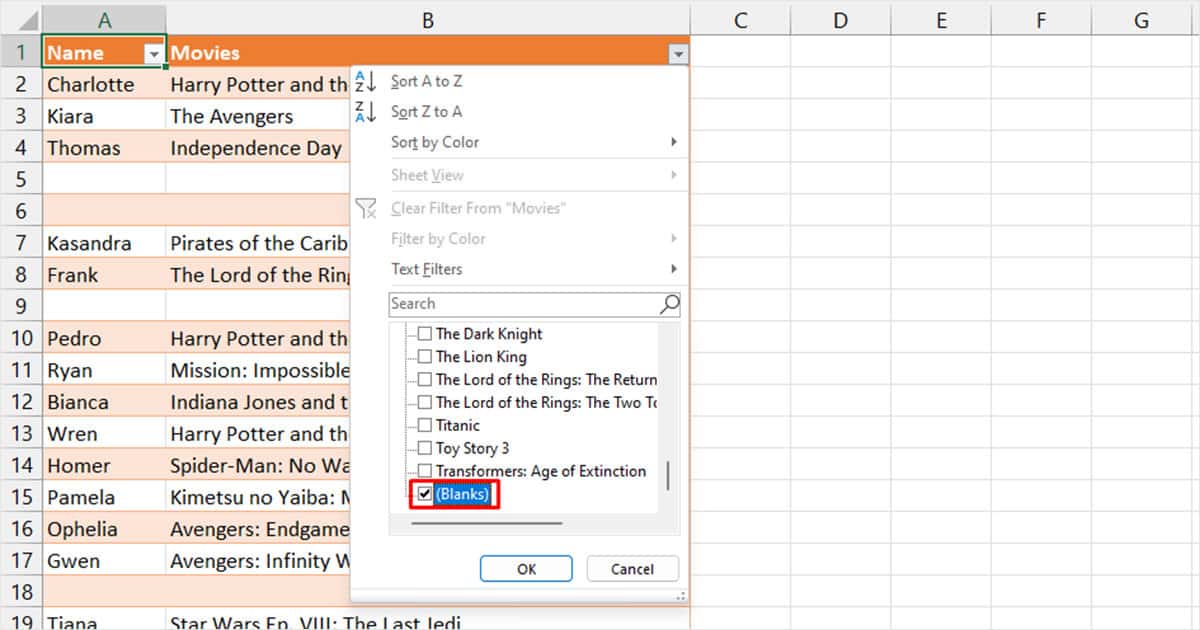
- Click OK in the confirmation box.
- The tool will filter all rows with data from the range. Select all empty rows.

- Use Ctrl + Shift + – to delete the rows.
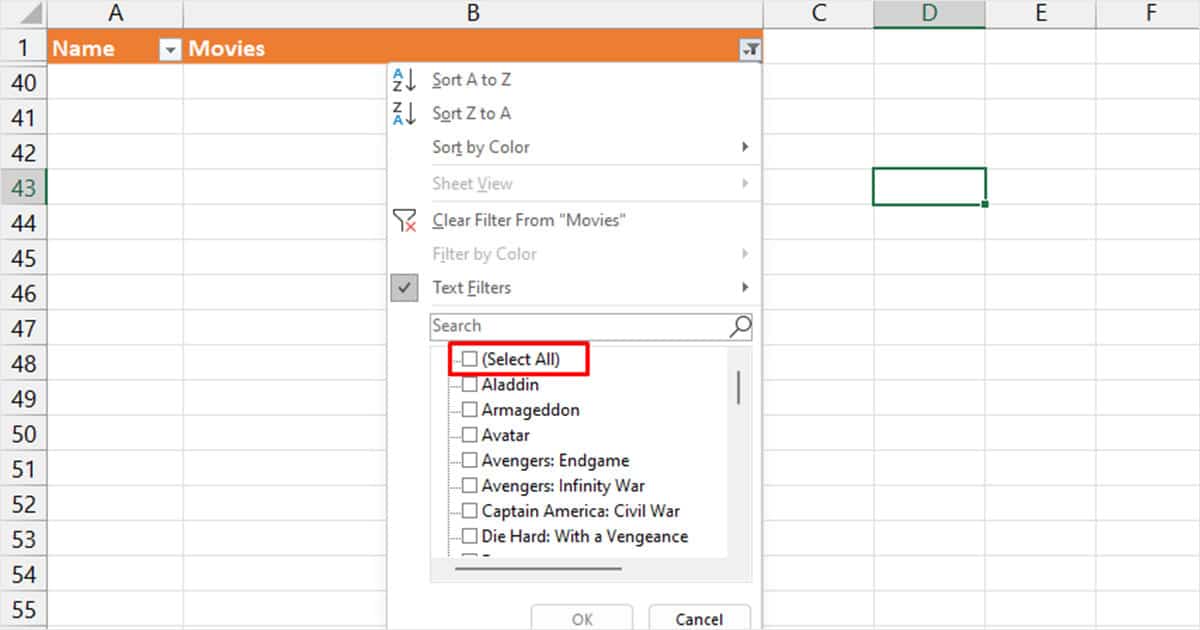
- Click on the drop-down icon on the header again to select the box next to Select All > OK.
Delete Rows Using Power Query
Although using Power Query may sound a bit intimidating, you don’t have to be an expert to use it.
Power Query is probably the best method you can use to delete empty rows from a spreadsheet with a lot of empty rows. Unlike other methods, you do not have to go through a long list of steps to eliminate the blank rows.
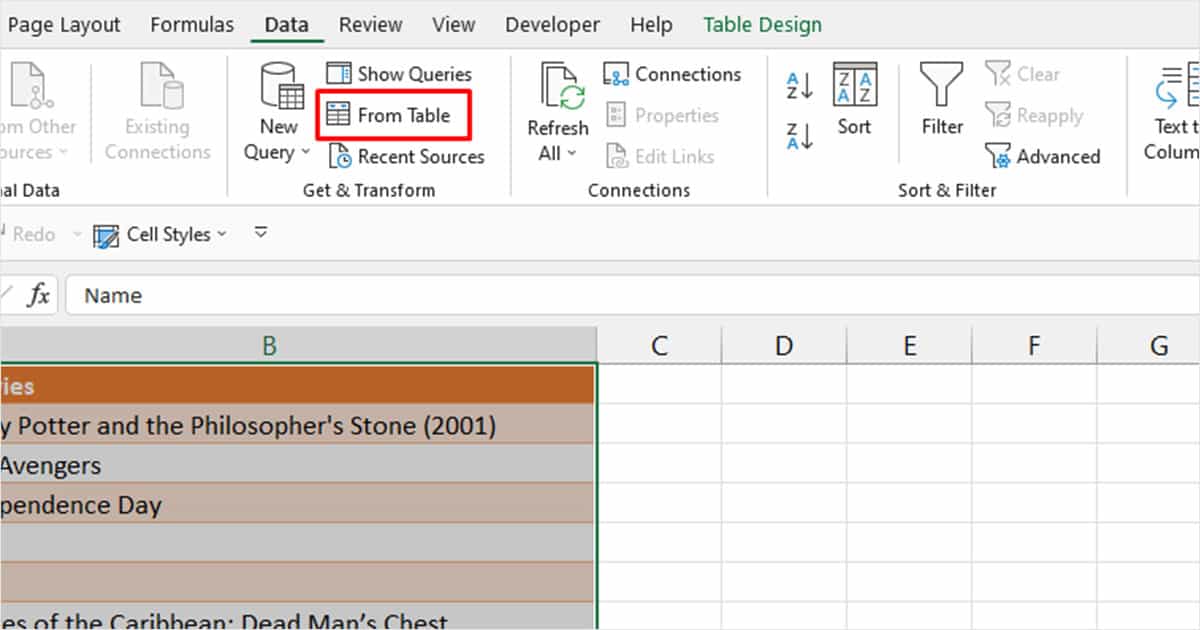
- Select your range.
- From the menu bar, hop on to Data > From Table.
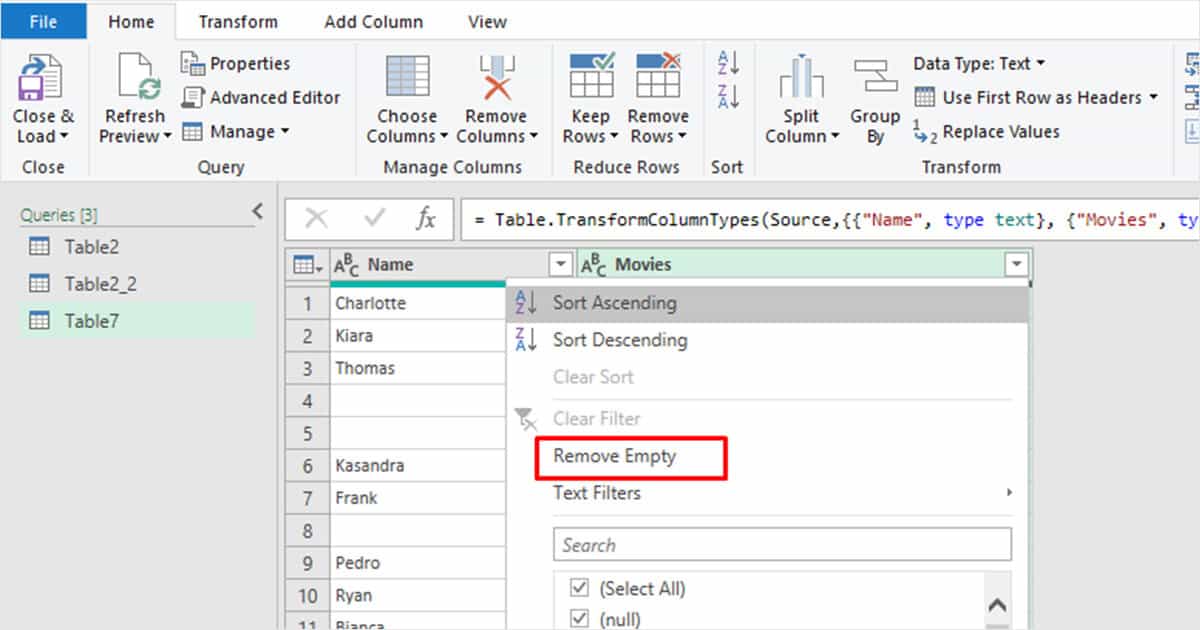
- In the Power Query Editor, select the drop-down menu on the column header.
- Choose Remove Empty.
- From the Home tab, select the drop-down menu for Close & Load.
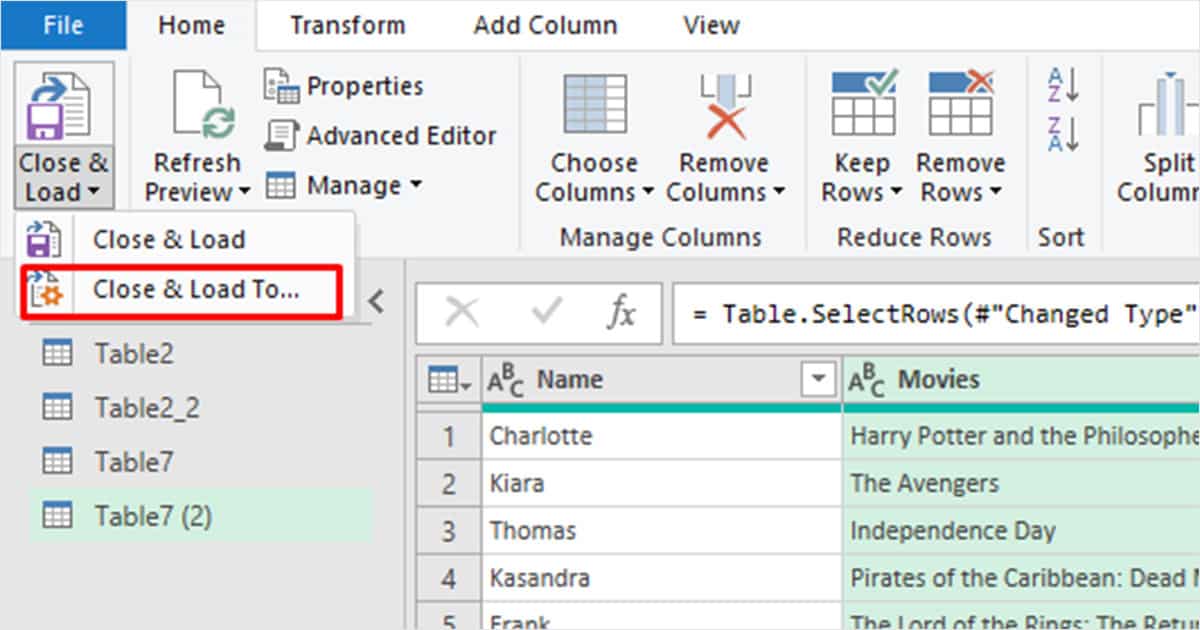
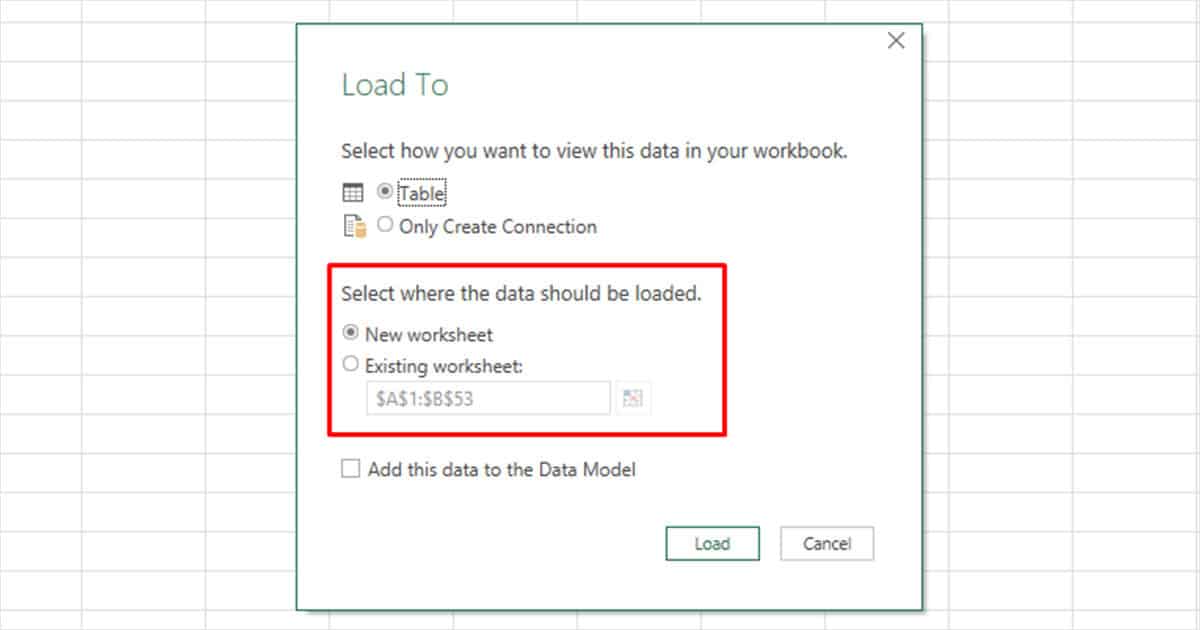
- In the Load To window, choose:
- New Worksheet if you wish to paste your data in a new sheet.
- Existing Worksheet if you want to load your data in a sheet that already exists. If you select this option, you will be prompted to specify the location you wish to load the data.