We’ve all been in situations where we’ve made extra column entries into our grid. If they’re just a few extra columns, simply select them and use the Excel shortcut, Ctrl + – to get rid of the m. However, if you have inserted multiple columns, even the idea of manually deleting the entries is tiring.
Excel offers numerous features that cover everything from deleting all columns to columns with specific entries. Keep reading as we make the process of deleting columns swifter!
Delete All Columns
Deleting all sheet columns in Excel essentially means clearing the entire worksheet. However, you could also be referring to deleting table columns, which again will clear the entire table.
To delete all sheet columns from your grid, select all columns using Ctrl + A. You can use the Then on your keyboard, select the Ctrl + – keys. You can also use the ribbon to delete columns in Excel.
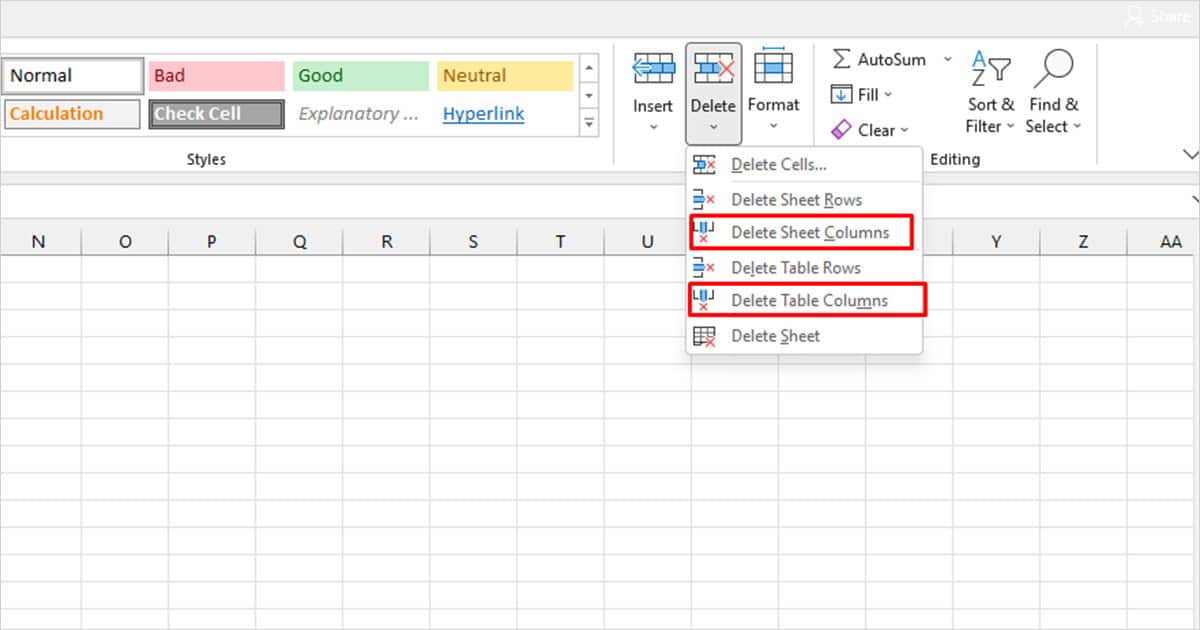
- Select the columns you wish to delete (for table columns) or select all.
- Open the Home tab of your worksheet.
- From the editing section, choose Delete.
- Choose Delete Table Columns or Delete Sheet Columns from the fly-out menu.
Delete Blank Columns
You could have left several columns empty to potentially add information you no longer require. In cases as such, you are very likely to go through the process of deleting the blank columns. We do not want you to stress over a few blank columns, so you can simplify the process using the Sort tool.
Step 1: Use COUNTA Function
We will first have to give the Sort command a criterion to separate the empty columns. We will be using the COUNTA function in this case.
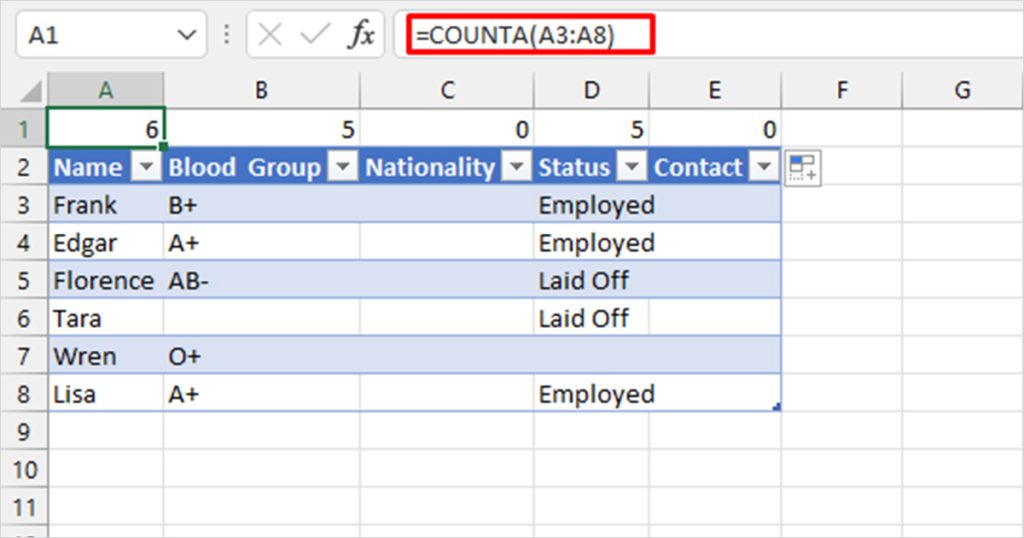
In this example, we inserted a new row (Ctrl + Shift + =) on top of the range. This will be our helper row. In column A, we used the =COUNTA(A3:A8). We discarded the first two rows as A1 is our helper row and A2 is the header, which is not empty.
After running the formula, all empty columns returned the value 0.
Step 2: Sort Empty Columns
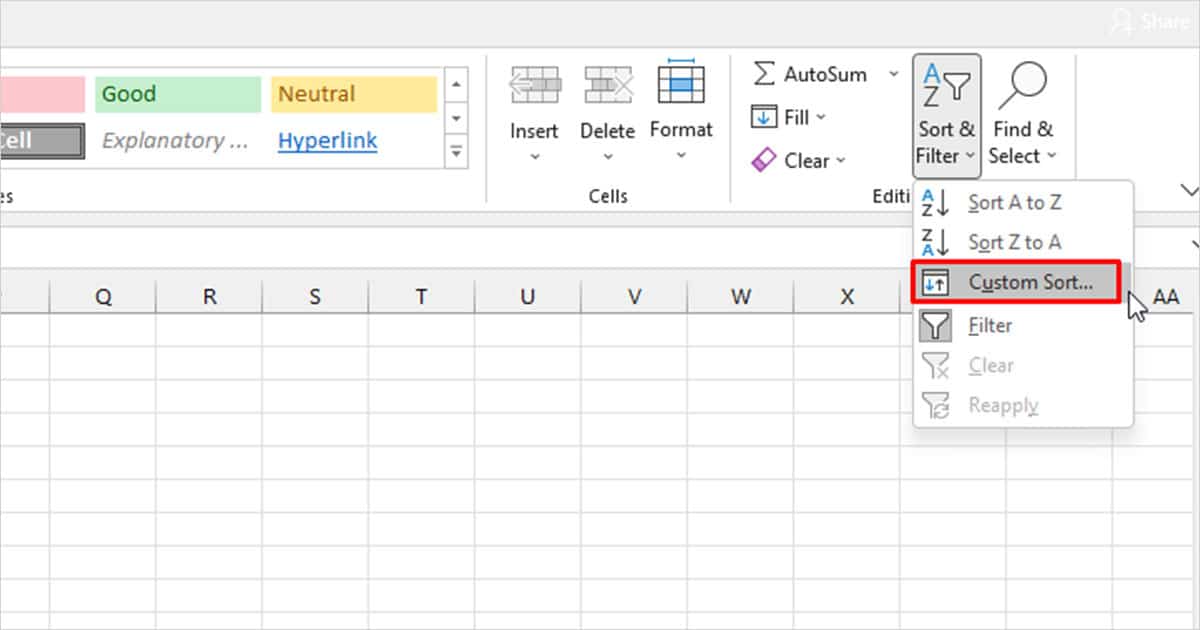
- Select your range including the helper row and head to the Home tab.
- From the ribbon, click Sort and Filter > Custom Sort.
- Click the Options button to choose Sort left to right.
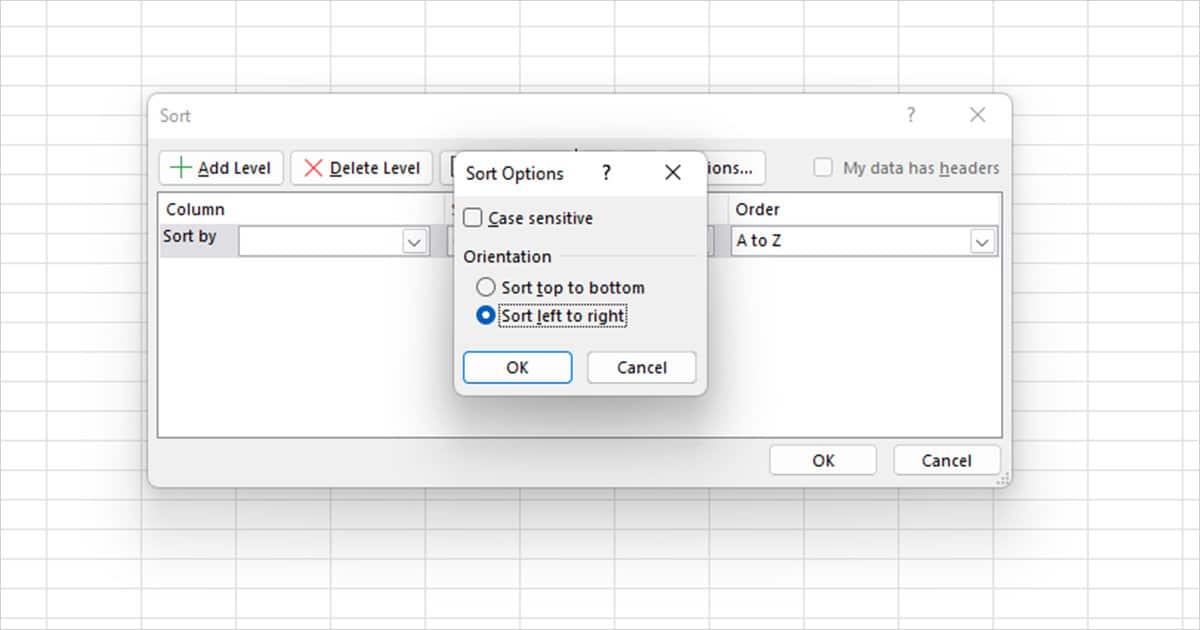
- Click Ok.
- Next to Sort by, configure the following settings:
- Row: Row 1
- Sort On: Cell Values
- Order: Smallest to Largest
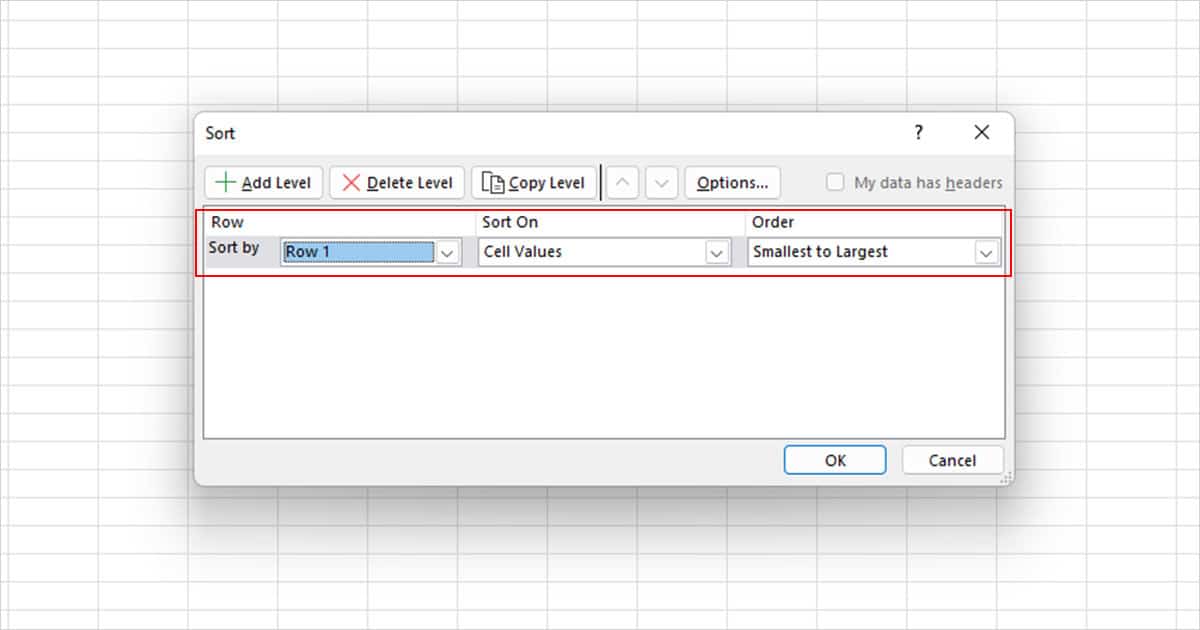
- Click Ok.
Step 3: Delete Columns
All empty columns will now be pushed to the left side of the grid. Select the columns serially and use Ctrl + – to remove the columns. You can also delete the columns through the Home ribbon by selecting Delete > Delete Sheet/Table Columns.
Delete Columns With Specific Text
You can use the Find and Replace command to select cells with specific text. You can then proceed to delete the entire column after you make that selection. However, this method can be a bit tricky as you might end up deleting columns you wished to keep in the first place. So we suggest you look through the selection before you find and delete them.
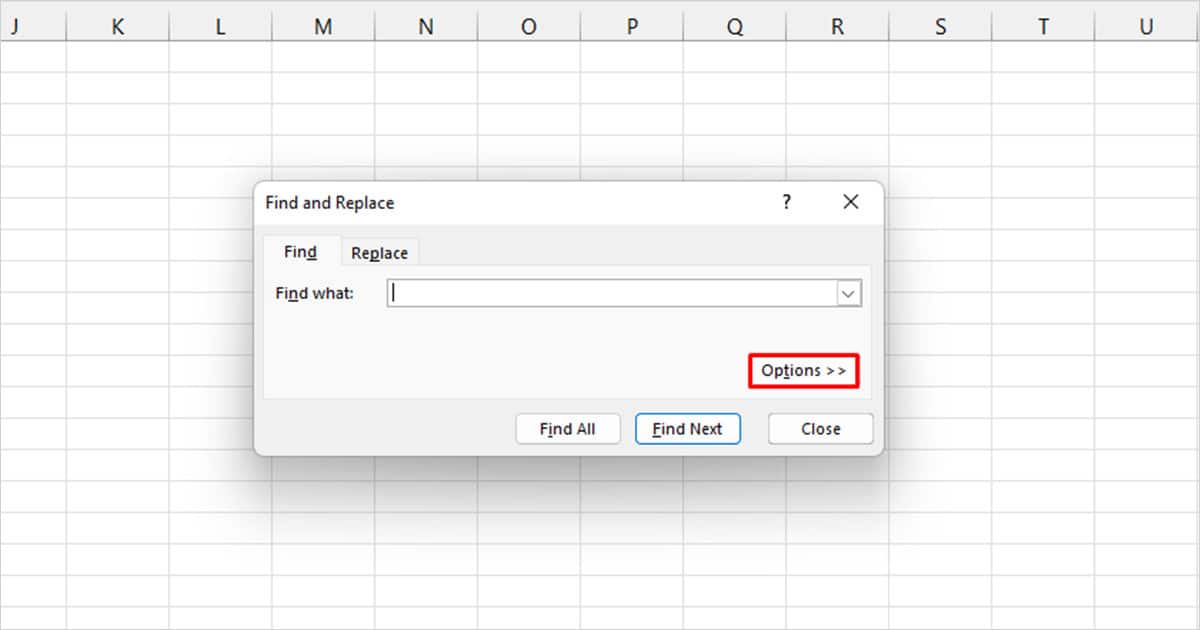
- On your keyboard, use Ctrl + F to open the Find command.
- Select the Options >> button.
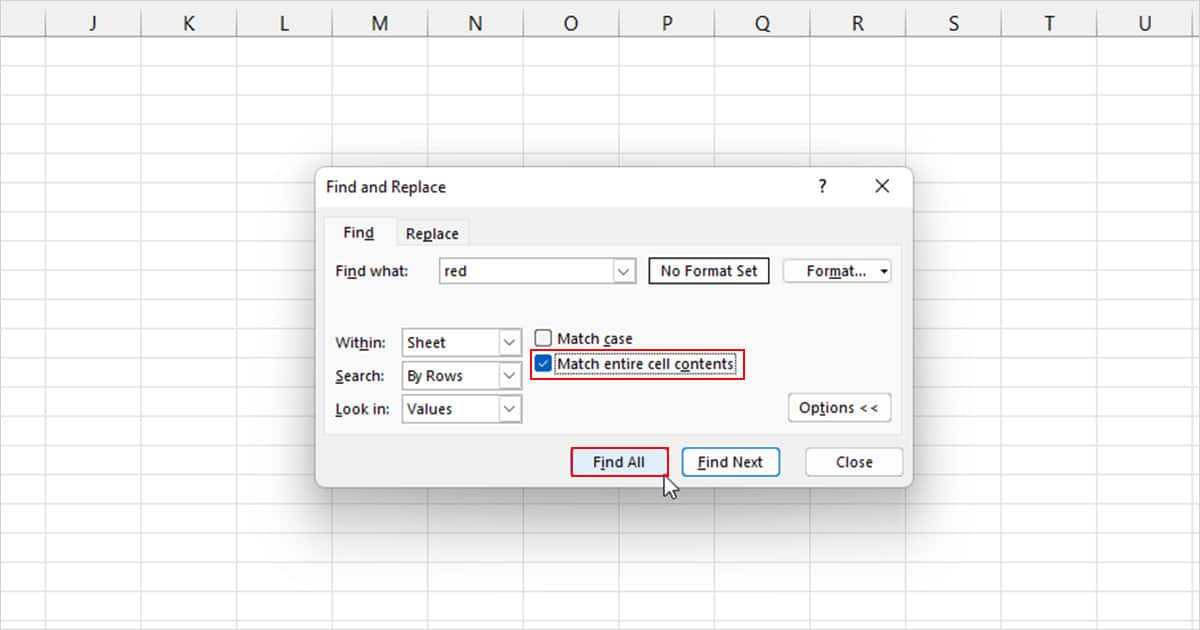
- Next to Find what, enter the specific value you wish to delete in a column.
- Select the fly-out menu next to Find in and select Values, and select Match all cell contents.
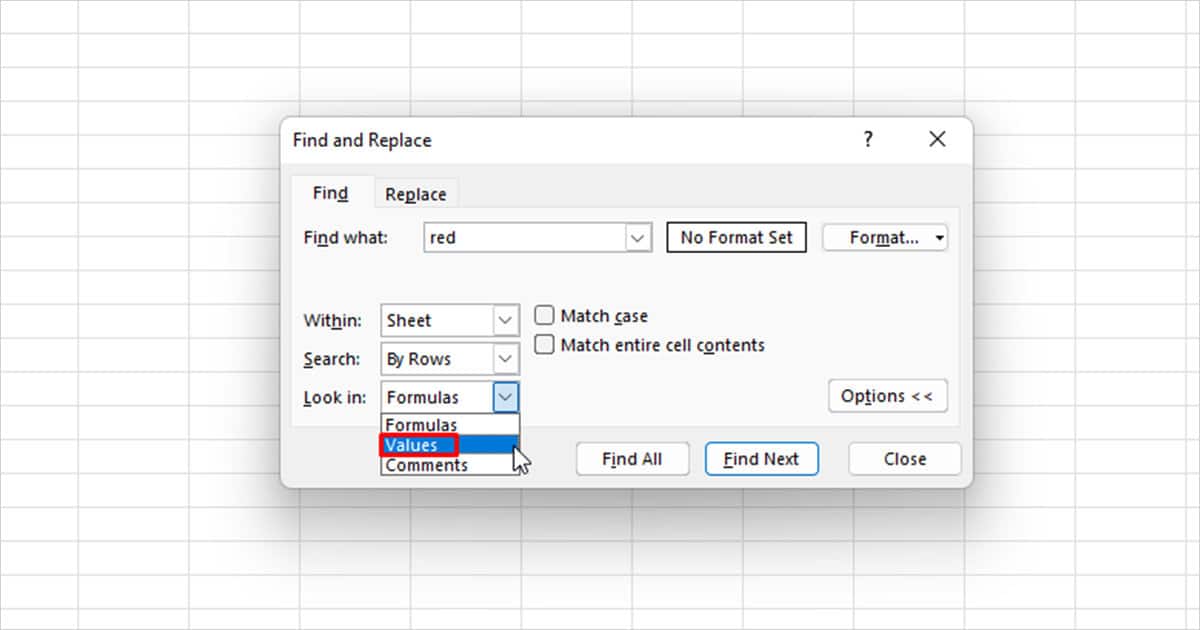
- Click on the Find All button.
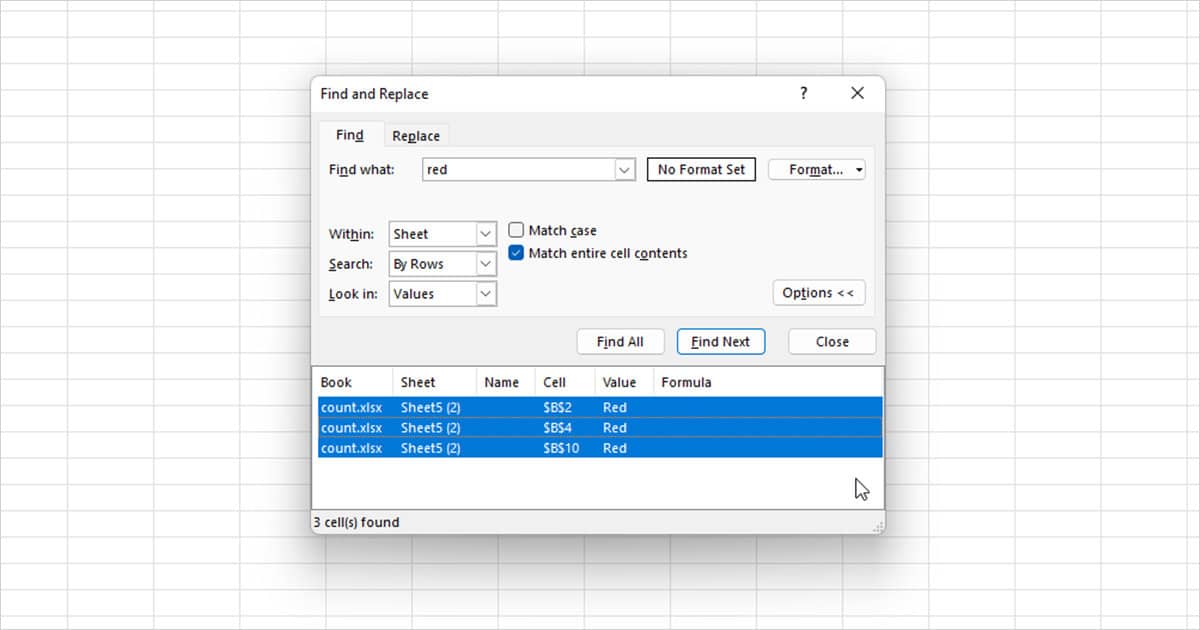
- The Find command will display all cells containing that value in your grid. Select them all from the window and close the Find command window.
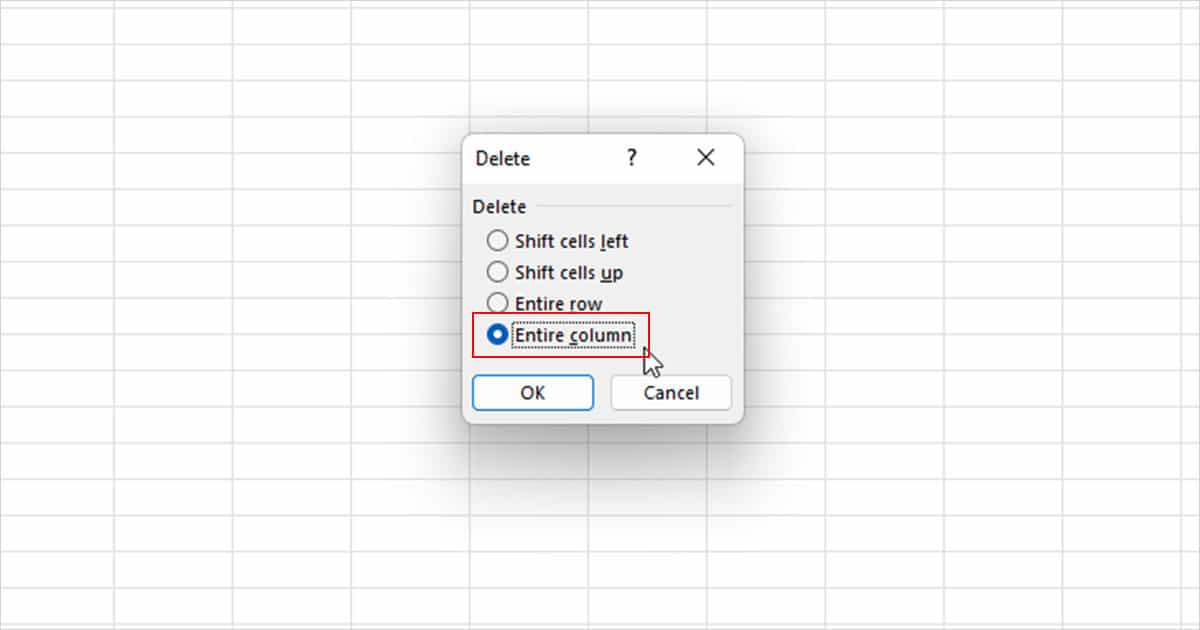
- Use Ctrl + –. In the window, choose Entire Column > OK.
Delete Columns that Include Cells with Special Formatting
If you wish to delete columns that have at least one cell with special formatting, you can use the Go To Special window to first make the selection. You can then delete the column by using a shortcut or navigating through the Home ribbon.
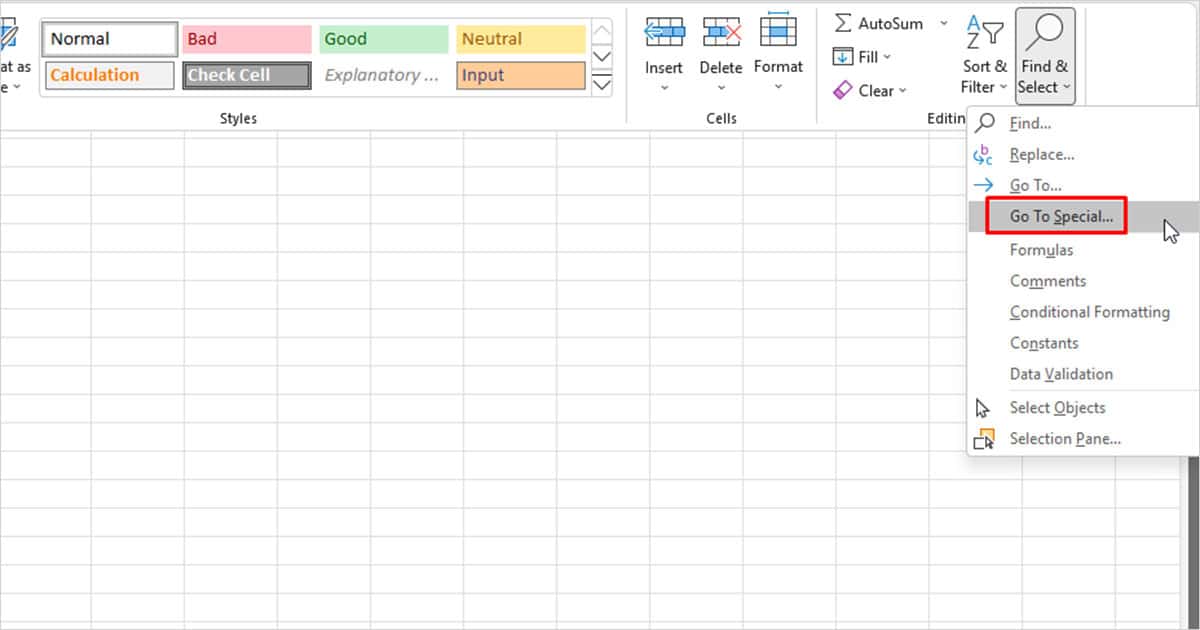
- In the Home ribbon, select Find & Select.
- From the fly-out menu, choose Go To Special.
- From the window, select an option then select OK.
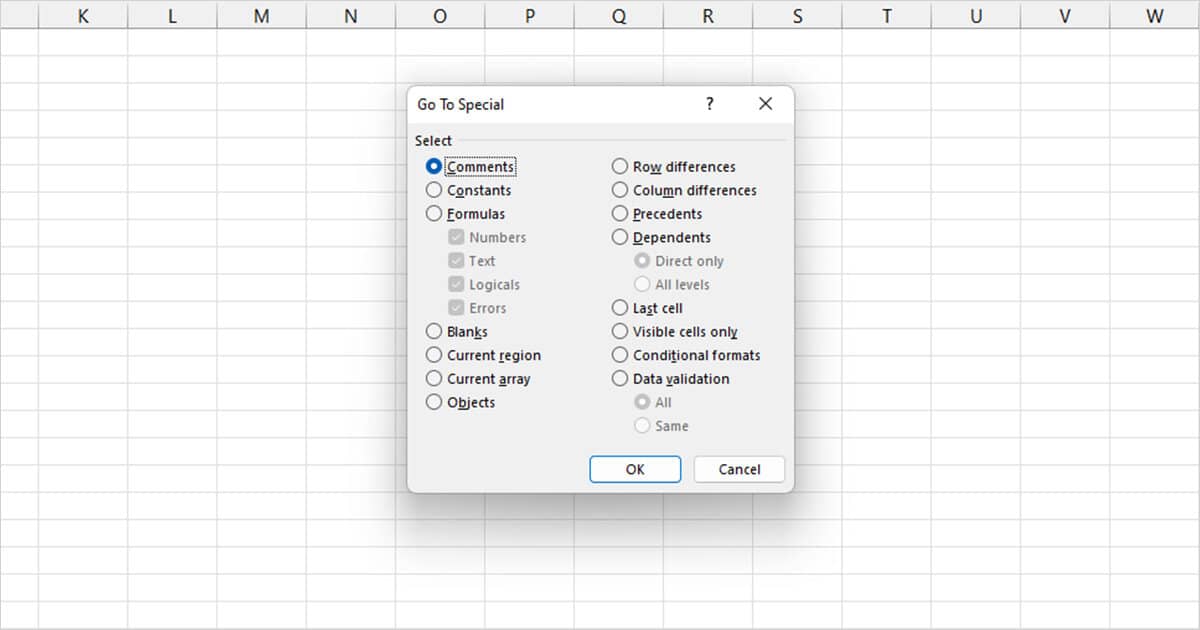
- After Excel selects the cells, click Ctrl + –.
- From the Delete window, choose Entire Column > OK.
Delete Multiple Columns Using Power Query
Although Power Query sounds like a difficult tool to use, it’s rather the opposite!
I personally use Power Query for almost everything! I find it easier to navigate through the spreadsheet and make slight changes. What I love about Power Query is that you can filter columns out using the headers which makes it extremely convenient to filter unwanted columns.
- Select your range and header to the Data tab.
- From the Get & Transform section, select From Table.
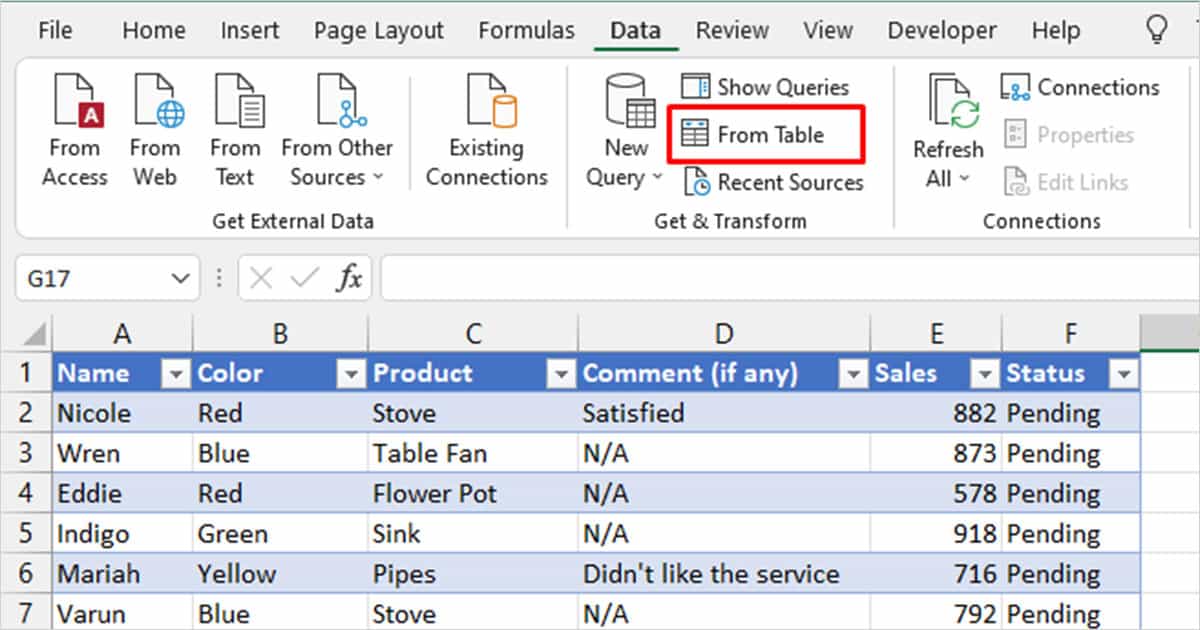
- If you haven’t already, convert your range to a table.
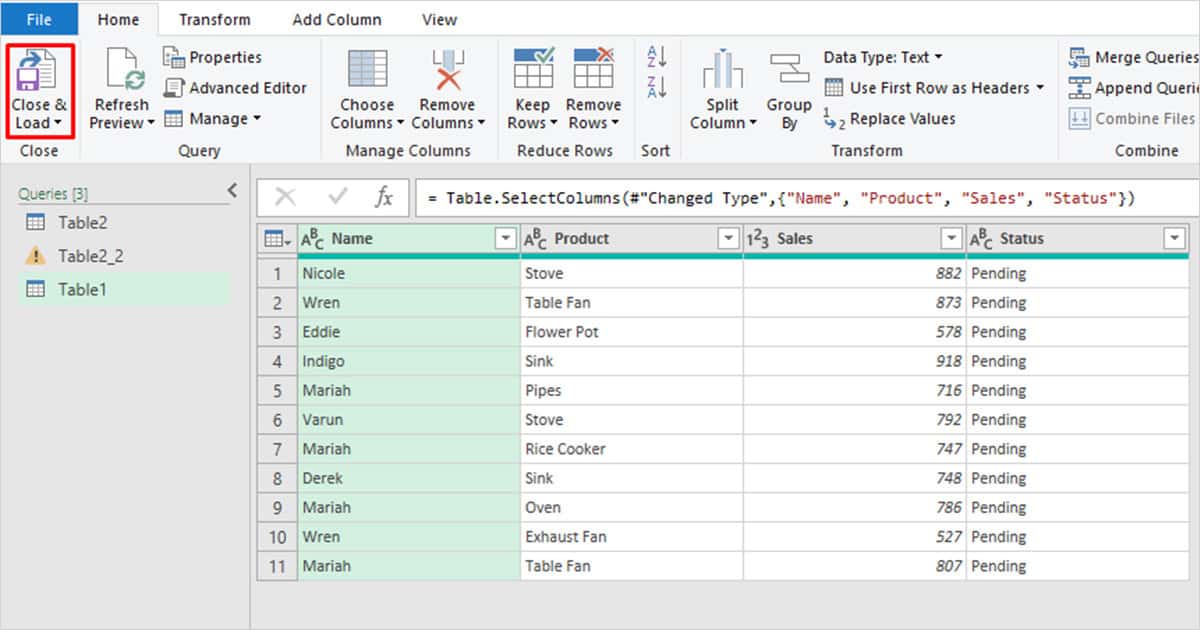
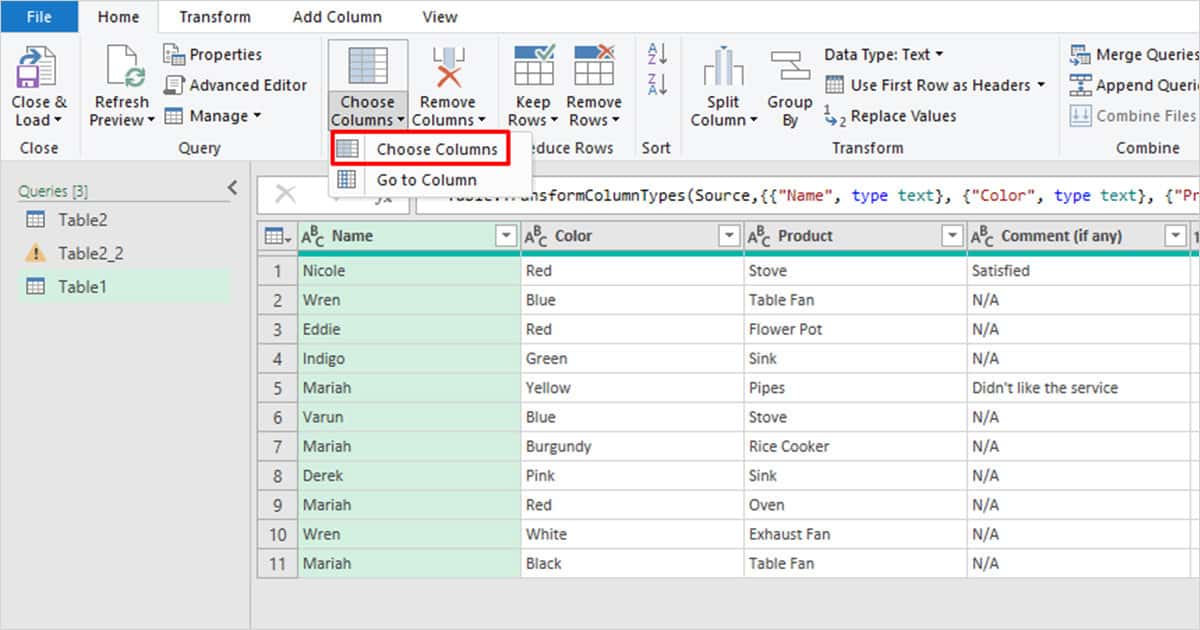
- From the Home tab, select Choose columns > Choose Columns.
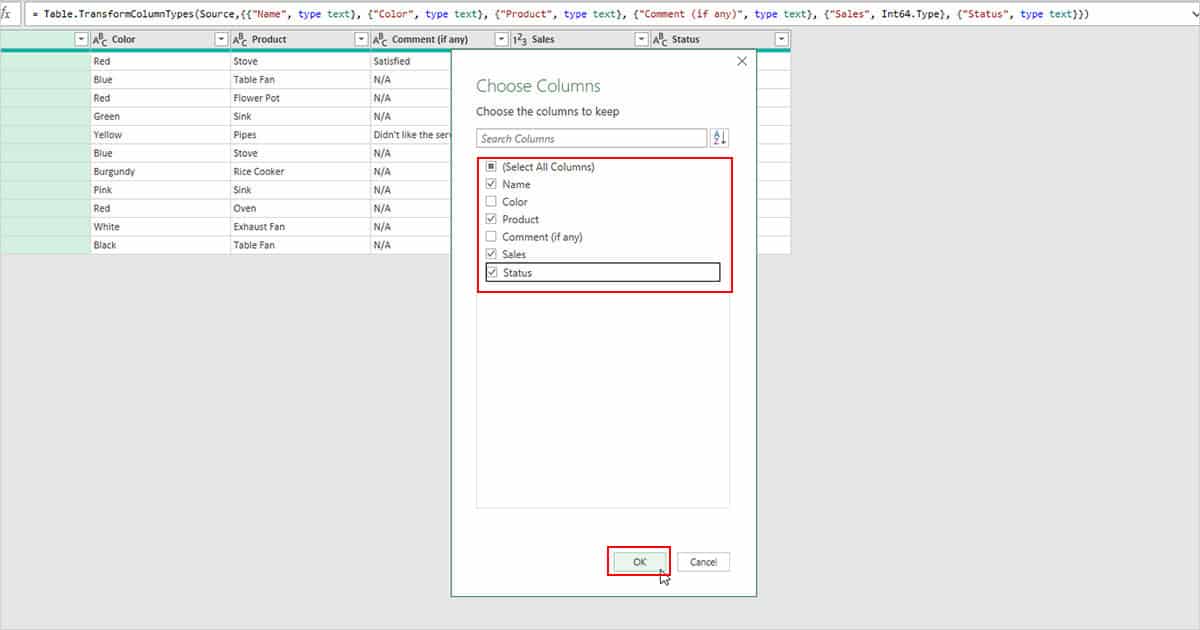
- Deselect the box for (Select All Columns).
- Select the box next to the columns you wish to keep then click OK.
- From the Home tab, select Close & Load.