While printing massive spreadsheets, the print page tends to span. During such cases, other pages do not have a row or column title which makes data reading difficult.
In the following example, without the heading, it is difficult to identify whether the data is of Calories or Proteins on Page 2.
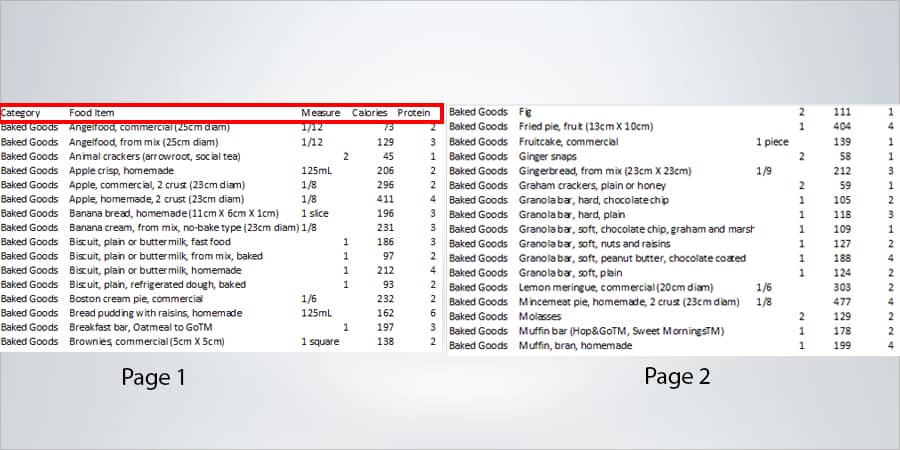
To address this, you can define specific Print Titles to repeat on every page to print.
You could even set Print headings for your worksheet. However, if you have small data, simply fitting them into 1 page can do the work.
Method 1: Set Print Titles
Excel has a default Print Titles option in the Page Layout Tab. Using this, you can pick specific rows or columns which you want to print on every page.
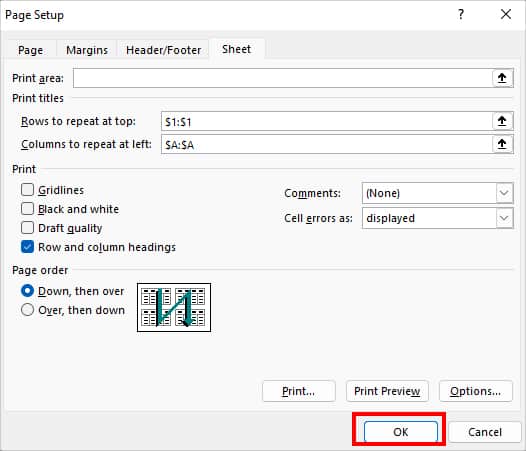
In this example, I want to repeat the first column and first row on print. So, I am selecting Row $1:$1 and Column $A:$A as a reference. You can choose any other cells to your liking.
You could also select multiple ranges to repeat. For Instance, enter $1:$2 reference if you wish to repeat two rows.
- On your spreadsheet, go to Page Layout.
- From Page Setup, click on Print Titles.

- Now, Under Print titles, you can see two options.
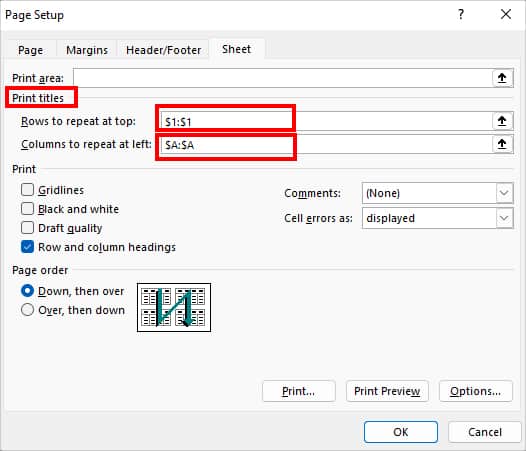
- Rows to repeat at top: This option will repeat the row title on every print page. To select Row title, click on the Arrow icon next to it and select a Row.
- Columns to repeat at left: It will repeat the Column titles on every print page. Click on the Arrow icon and select a Column title to repeat.
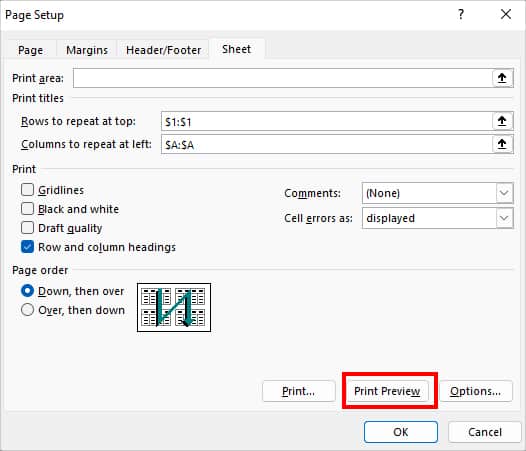
- Select Print Preview. (This is optional. Click on this option if you want to see what repeating rows and columns looks like while printing.)
- Hit Print or OK.
Note: If the worksheet is in Editing mode, the Print Title option will be grayed out.Method 2: Set Print Headings
Similar to the Row and Columns, you can also define print headings for every document. Here, the Print Heading refers to the Column and Row Header. For Example, the Column Header is A, B, C, D, and Row Header is 267, 268, 269, 270.
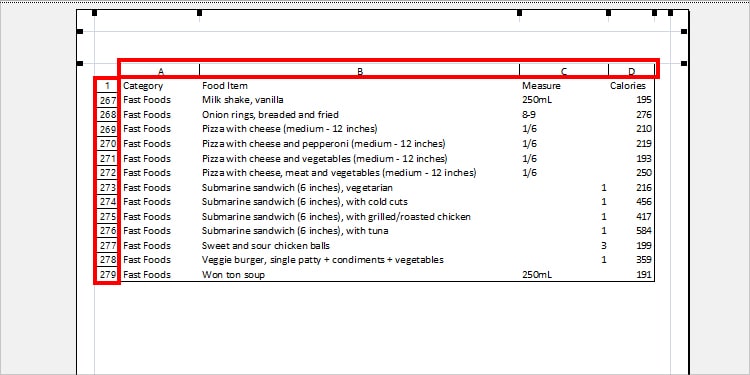
You can set print headings with or without the Print Titles. Repeating headers makes it easier to track data, especially if you have 100+ rows on the worksheet like above.
To do so,
- On your worksheet, click Page Layout Tab.

- Then, hover over Sheet Options group. On Headings, check the box for Print.

Method 3: Using VBA Code
By any chance, if the Print Title option is grayed out or not working on your worksheet, you could use an alternative way to define them. In this approach, all you need to do is open Visual Basic, paste the given code, and run it. This method is also effective for users having multiple worksheets in a workbook.
If you see Developer Tab in your worksheet, you can directly proceed with the steps. But, if you cannot find the tab, you would have to enable it first.
- Navigate to Developer Tab.
- On Code Group, click Visual Basic.

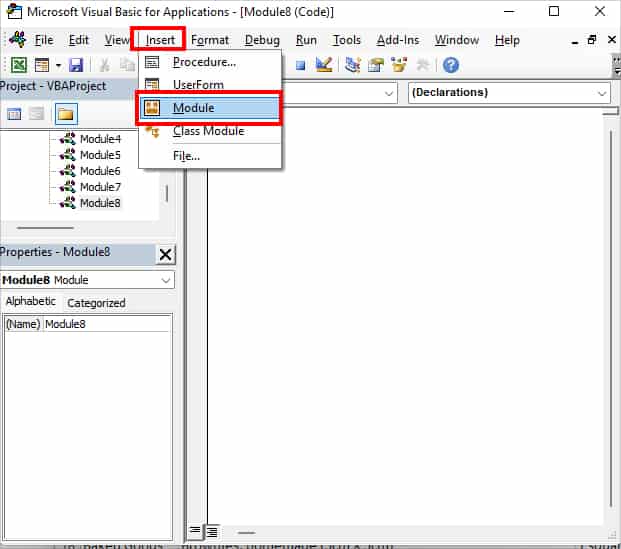
- Go to Insert > Module.
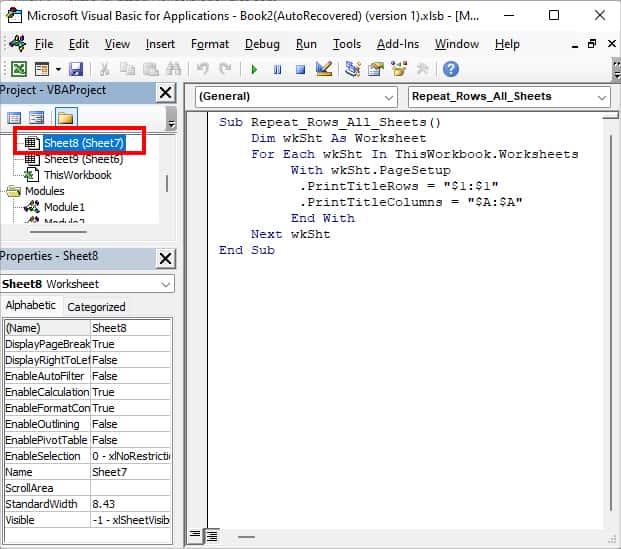
- Copy and Paste the Code. This code will repeat the first column and row titles. You can replace the cell reference of $1:$1 rows and $A:$A columns as per your wish.
Sub Repeat_Rows_All_Sheets()
    Dim wkSht As Worksheet
    For Each wkSht In ThisWorkbook.Worksheets
         With wkSht.PageSetup
          .PrintTitleRows = "$1:$1"
          .PrintTitleColumns = "$A:$A"
         End With
    Next wkSht
End Sub- Under Microsoft Excel Objects, pick your Sheet. Then, Enter F5.
- End VBA window. Click on File > Print.
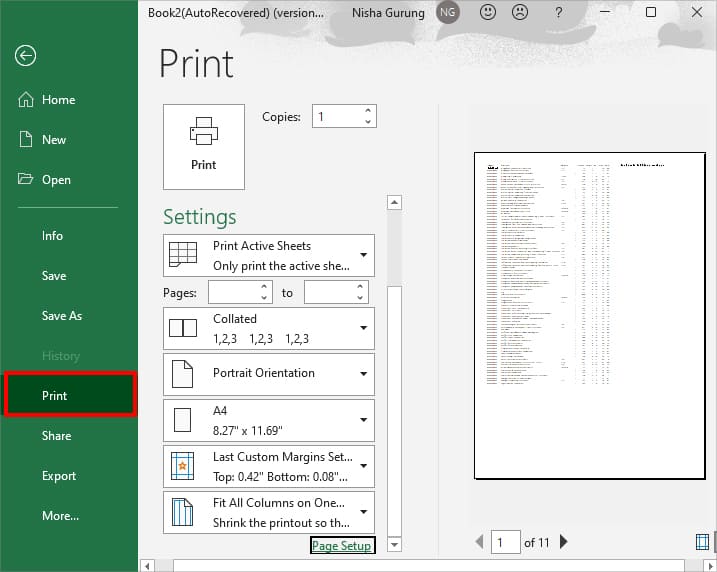
Method 4: Fit to Page
We learned the steps for setting print titles and headings above. But, if you have relatively small data, you can shrink everything into one document instead. This way, all the rows and column titles will show up in one document.
For this,
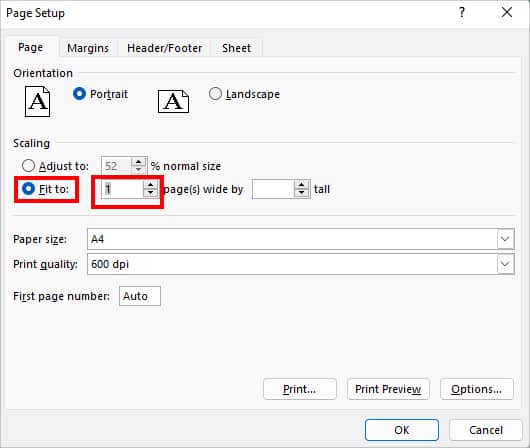
- Navigate to Page Layout.

- Hover over Page Setup group and click on Dialog launcher for more menu.

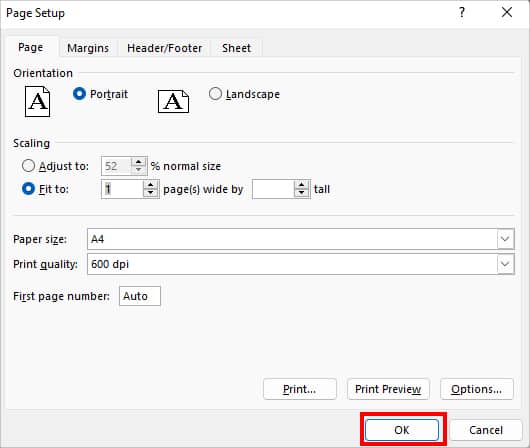
- On Page Tab, click on Fit to and set it to 1. (You can set the fit to page number according to your data size.)
- Click OK.
