A Gmail signature is a customized piece of information automatically added as a footer at the end of any outgoing email. It can be text with your name, a favorite quote, an image with your logo, or a readymade signature template.
While it might not always be necessary for personal mail, incorporating a signature in your work emails reflects your professionalism.
Once set up, there’s no need to create a signature for every single email, as you can use it as a default signature for new emails.
Step1: Create a Signature
If you are on Windows or Mac, here’s how you can create a signature in Gmail.
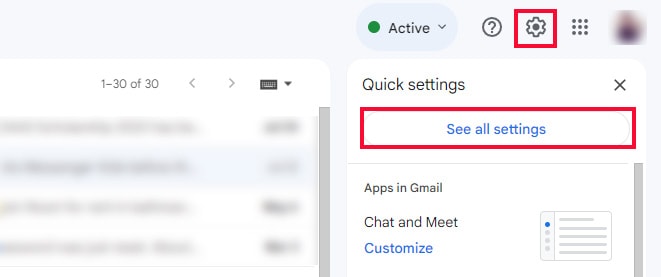
- Open your Gmail and click the Settings icon on the top right.
- Select See all Settings.
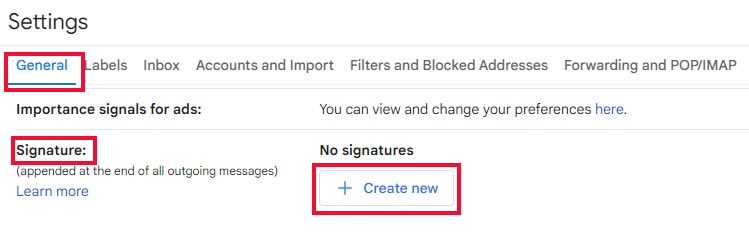
- Go to the General option in the Settings bar.
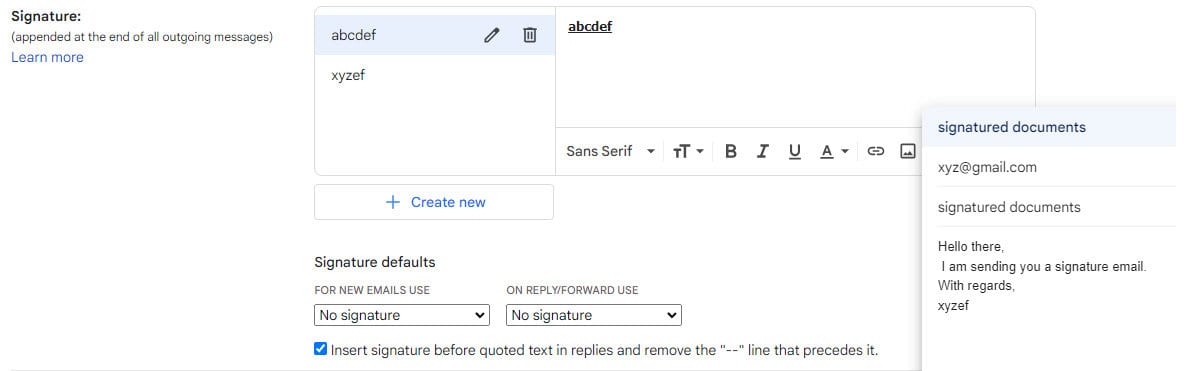
- Scroll down to reach the Signature section and click on Create new.
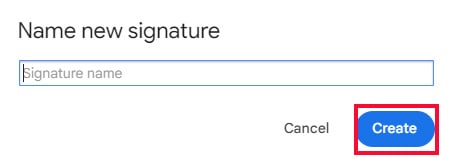
- Input the Signature name in the dialog box. Tap on Create.
- Now add signature information and links in the box. You can format your signature’s font, size, alignment, and typography.

- Click on the Image icon to insert signature templates or logos.

- Then choose a location to import the Image from the Web, Google Drive, or PC.

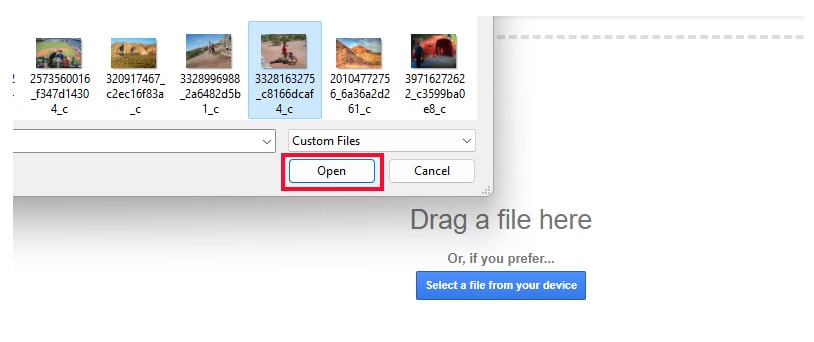
- If you are inserting from Pc, drag an image or tap on Select a file from your device. Choose the image and click on Open to upload it.
For Web and google drive, choose the image and click on Select.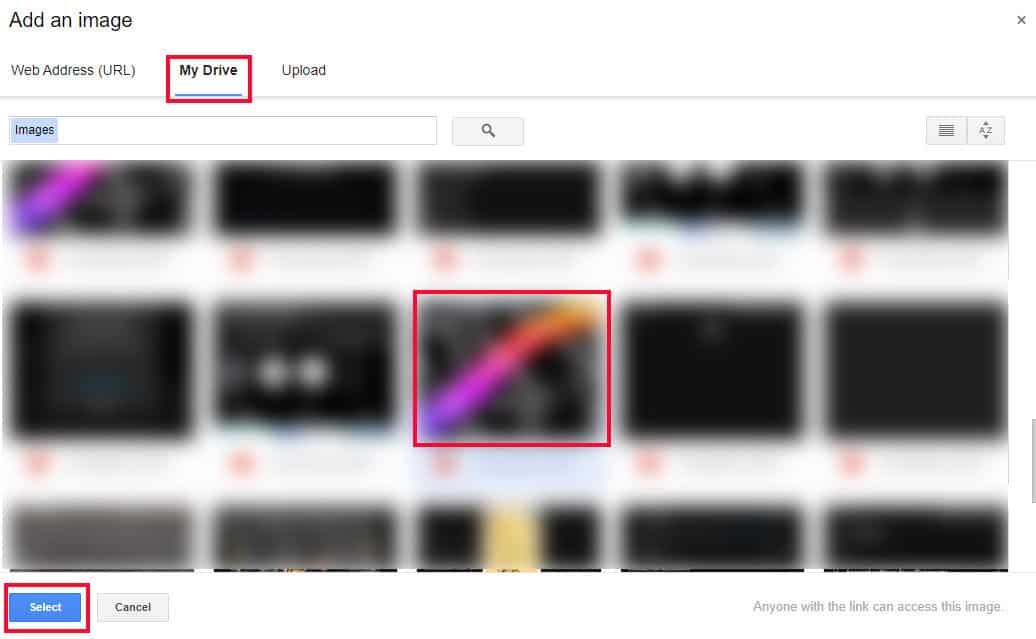
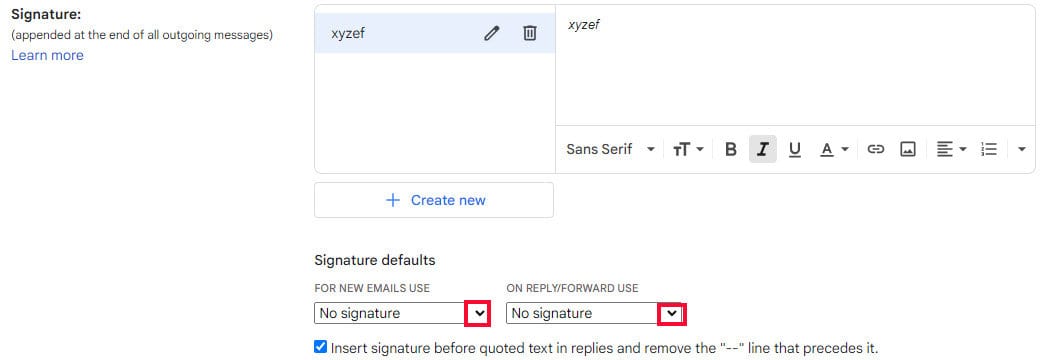
- Expand the drop-down menu on NEW EMAILS USE or ON REPLY/FORWARD USE to set up Signature default. Select the signature.
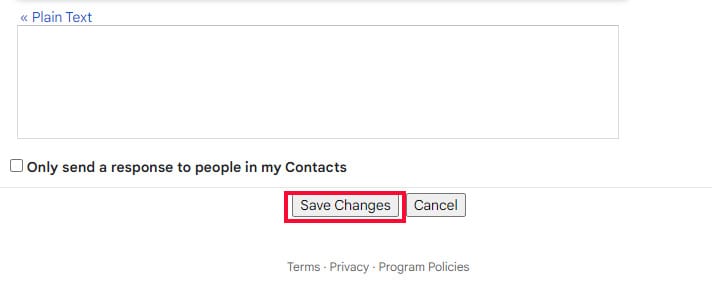
- Scroll down and select Save Changes.

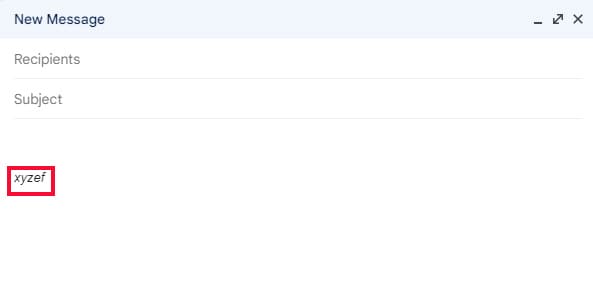
- You have created your Gmail signature. If you have set up the default signature, it will automatically appear in compose dialog.
Step 2: Insert the Signature
Once the signature is created, you can directly go to the Gmail account and insert it into your email. Follow these simple steps to do so:
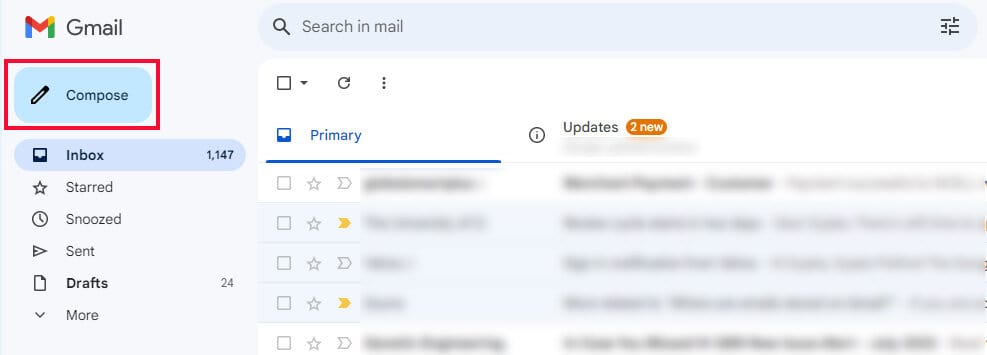
- Go to your Gmail homepage.
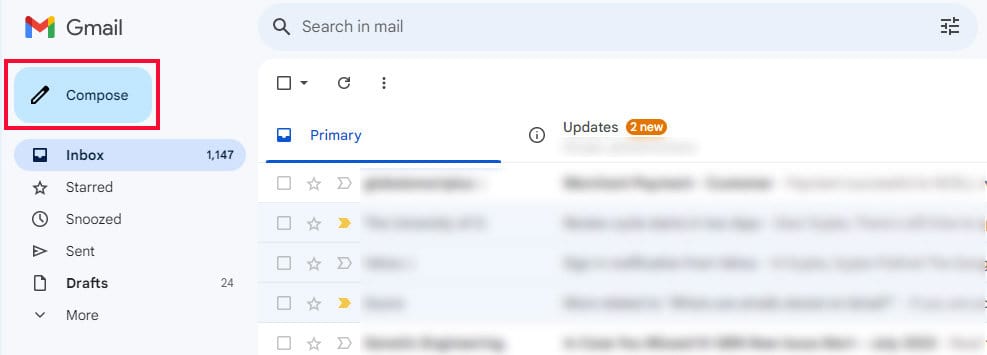
- Select Compose bubble on the top left.
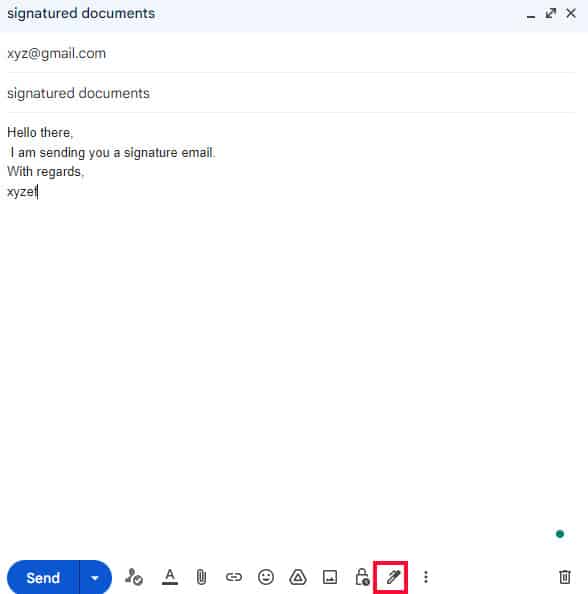
- Compose your email. Add the recipient’s email address and Subject.
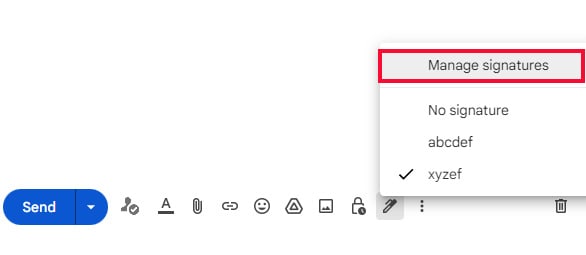
- Hover over the menu bar at the bottom of compose dialog.
- Click on the Insert signature option (a pen-like icon).
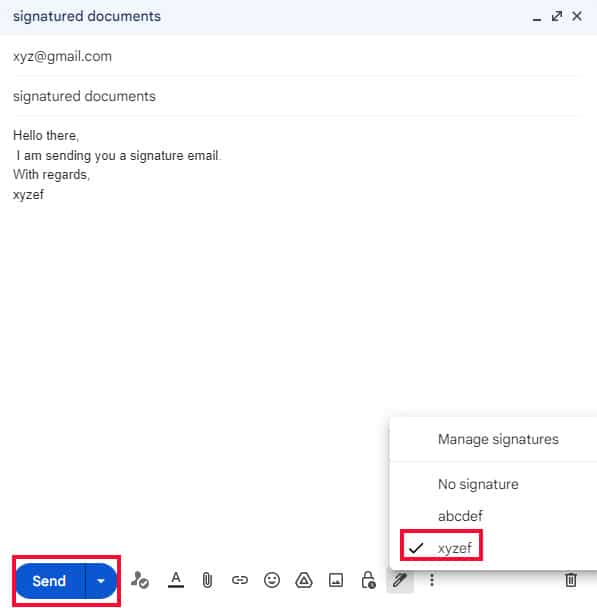
- Choose the signature that you want to insert.
- Hit the Send button.
Add a Gmail Signature on Mobile Devices
If you are someone who uses a mobile device for business emails, reaching out to PC just for a Gmail signature can be inconvenient. In such cases, you can set also up a mobile signature on your mobile phone.
Moreover, if you are an Android user, you might need to create a separate signature if you plan to use it on mobile devices. But on iOS devices, your email will automatically embed the default signature created on your PC.
On Android
- Go to Gmail app on your Android device. If you don’t have it, download it through Google Play Store.
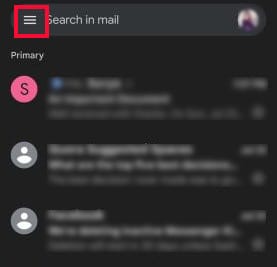
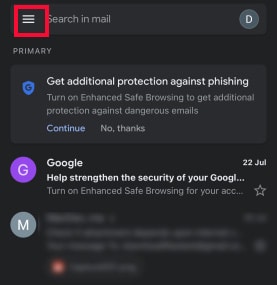
- Tap on the Menu bar on the top left.
- Scroll down and select the Settings option.
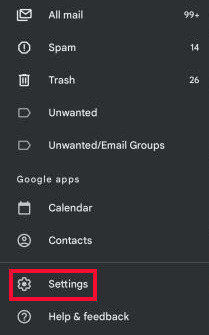
- Select the Gmail account to which you want to add your signature.
- Scroll and tap on Mobile signature.

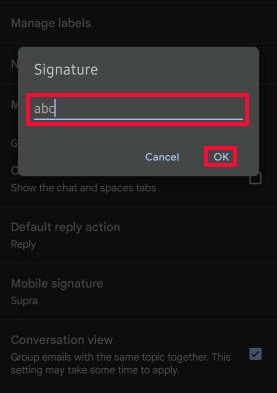
- Add the text for your Signature in the dialog box.
- Click Ok. You have set a Mobile signature.
On iOS
- Open the Gmail app on your iPhone or iPad.
- Click on the Menu bar on the top left.
- Scroll the menu and go to the Settings icon. It will lead you to Gmail Settings dashboard.
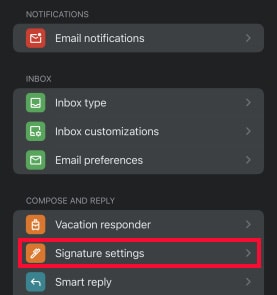
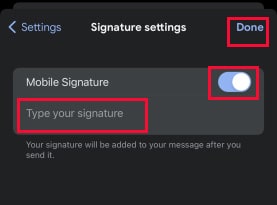
- Select Signature Settings just below ‘Compose and Reply.’
- On the Mobile Signature bar, slide the Toggle button to the right.
- Now write the text on Type your signature.
- Tap on Done.
- The mobile signature is automatically inserted when you compose and send emails.
How to Manage Multiple Signatures in Gmail?
Gmail also offers a feature to create multiple signatures that can be used for new emails, forwards, and replies. You can easily switch between these signatures on different types of emails using the Manage Signature option in compose window. Here’re the steps.
- Open your Gmail.
- Tap on Compose bubble on the top left of your Gmail.
- Click on the Insert signature icon on compose window.
- Select the Manage signatures option.
- It will lead you to the signature settings page. Now, you can change signature settings as required.
- Select Save Changes. The changed signature will now add to your compose body.