Grammarly has undoubtedly made it easier to compose and do grammatical edits on your emails. However, there is no distinct Grammarly application designed for Gmail.
You will have to install and add Grammarly extension for your browser. Once you enable it’s access to your Gmail, Grammarly can automatically scan your emails.
If you prefer composing emails on Gmail app on your mobile devices, download a Grammarly keyboard and allow full access to it.
Step 1: Set Up Your Grammarly Account
If you do not have a Grammarly account yet, then sign up and set up your account first. You can choose a free or premium paid version, depending on your requirements.
Once you set it up, you can use it to edit documents on Google Docs, Excel, and other apps using Gmail.
- Go to Grammarly.com.
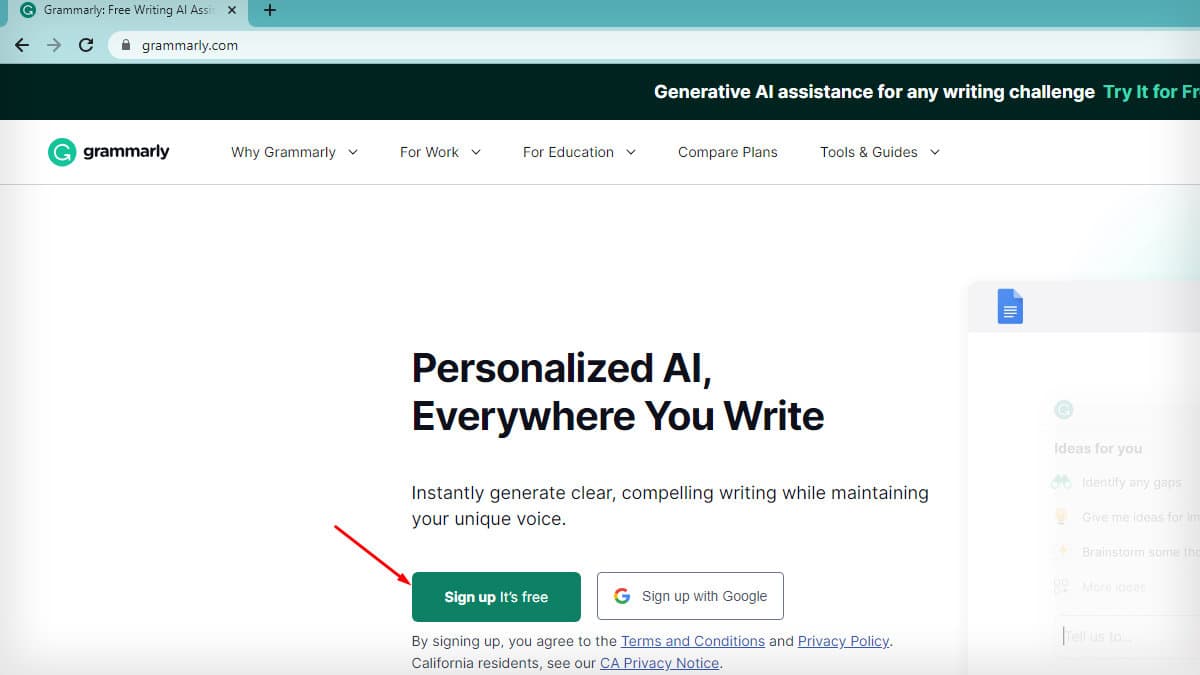
- Click on Sign Up It’s free.
- Input your Email address and set up a password and Username. You can sign up using your Google, Facebook or Apple.
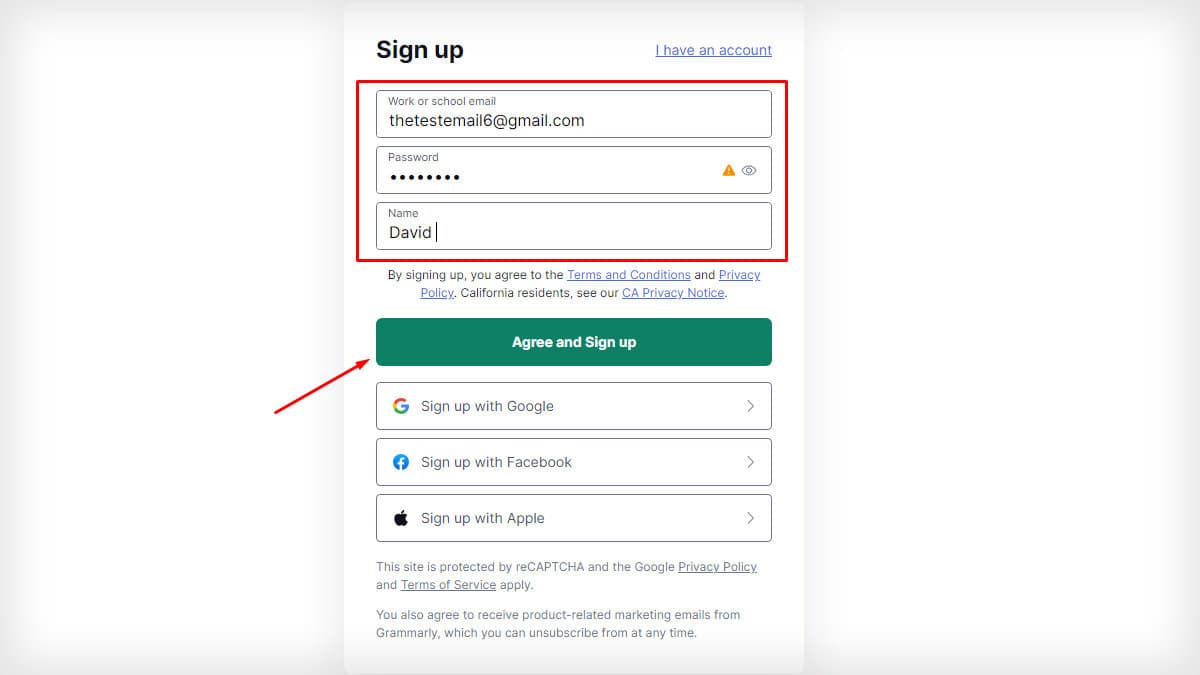
- Tap on Agree and Sign up.
- If you already have an account, you can proceed by clicking on I have an account.
Step 2: Add Grammarly Extension to Your Browser
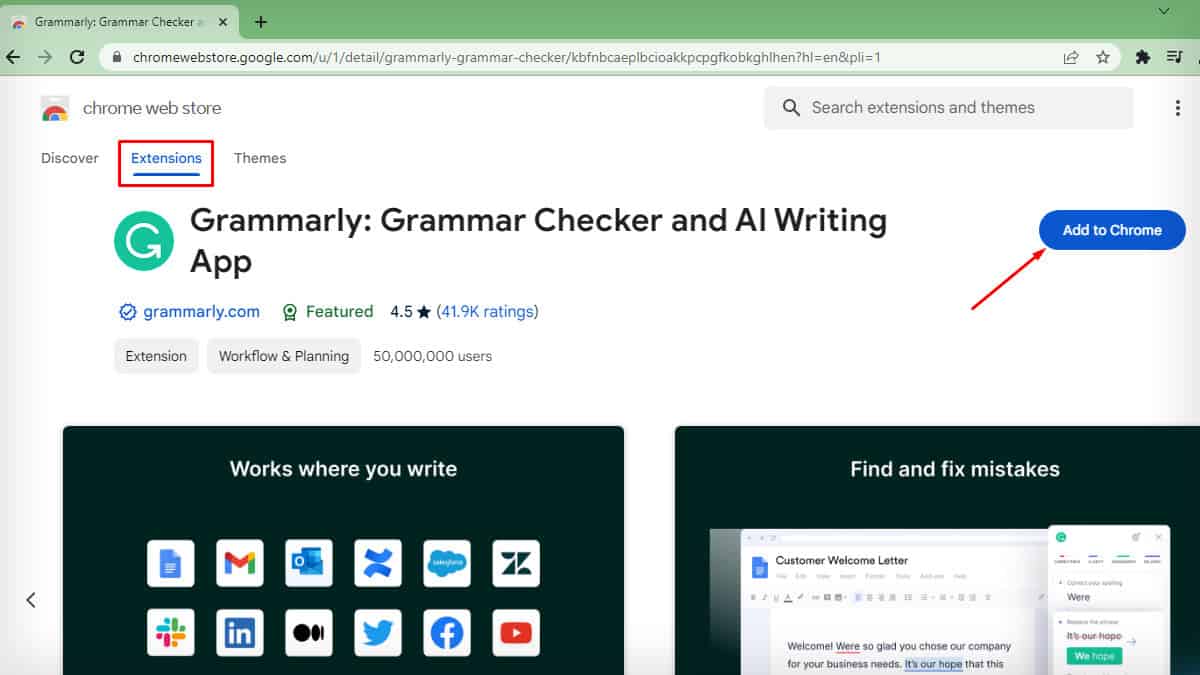
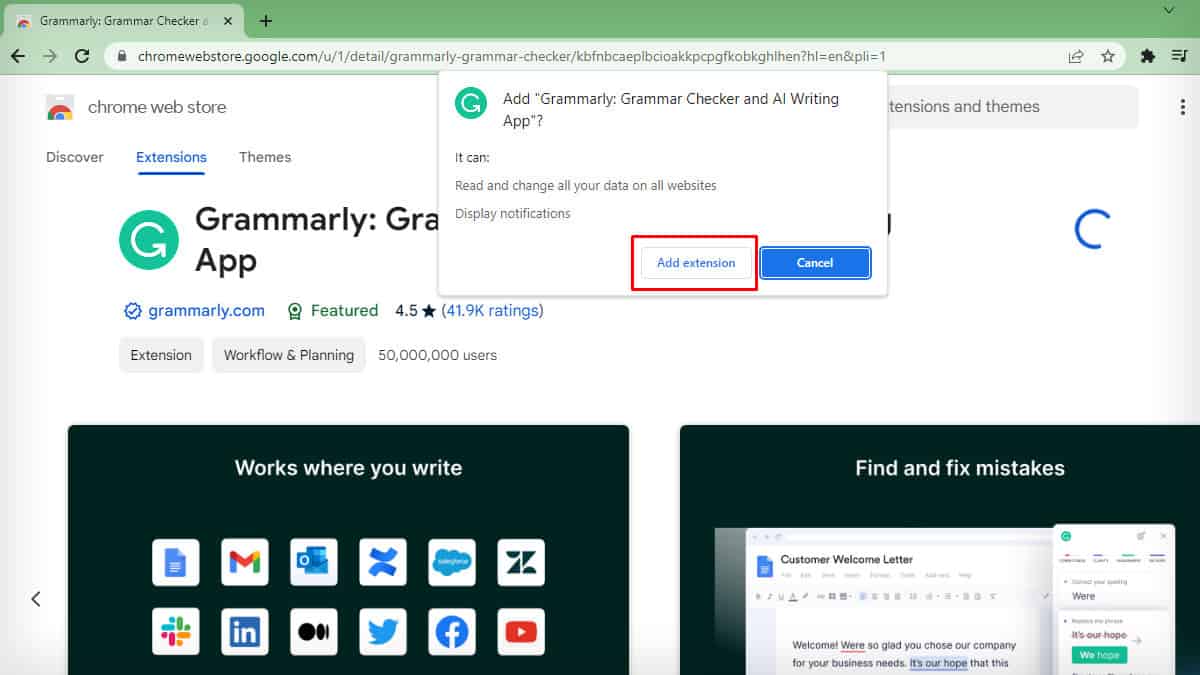
- Go to the Chrome Webstore and search Grammarly.
- Click open Grammarly. Tap on Add to Chrome.
- Click on Add extension on the pop-up window.
- The free plan will be added. You can update to Premium by clicking on Grammarly from your extensions.
How to Add Grammarly to the Gmail App?
Unlike web browsers, the Gmail app has no extension for Grammarly. However, you can install the Grammarly keyboard app and use it to edit your emails.
Add Grammarly on iOS
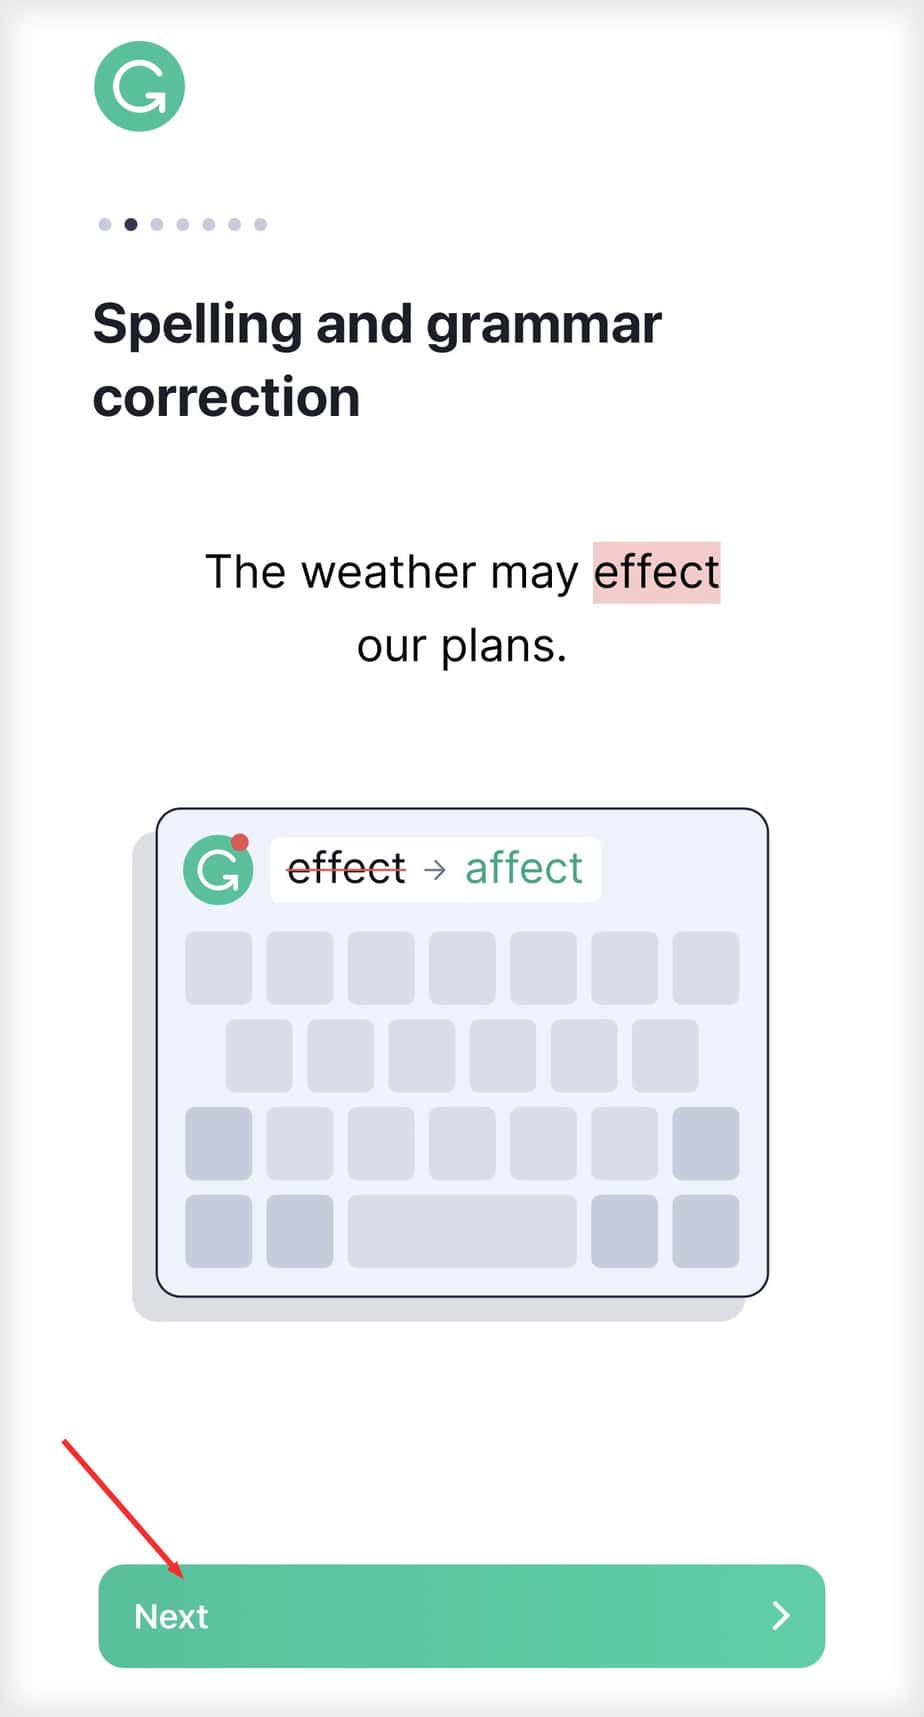
- Open the app, read the messages and tap Next. Repeat it until you see the notifications page.
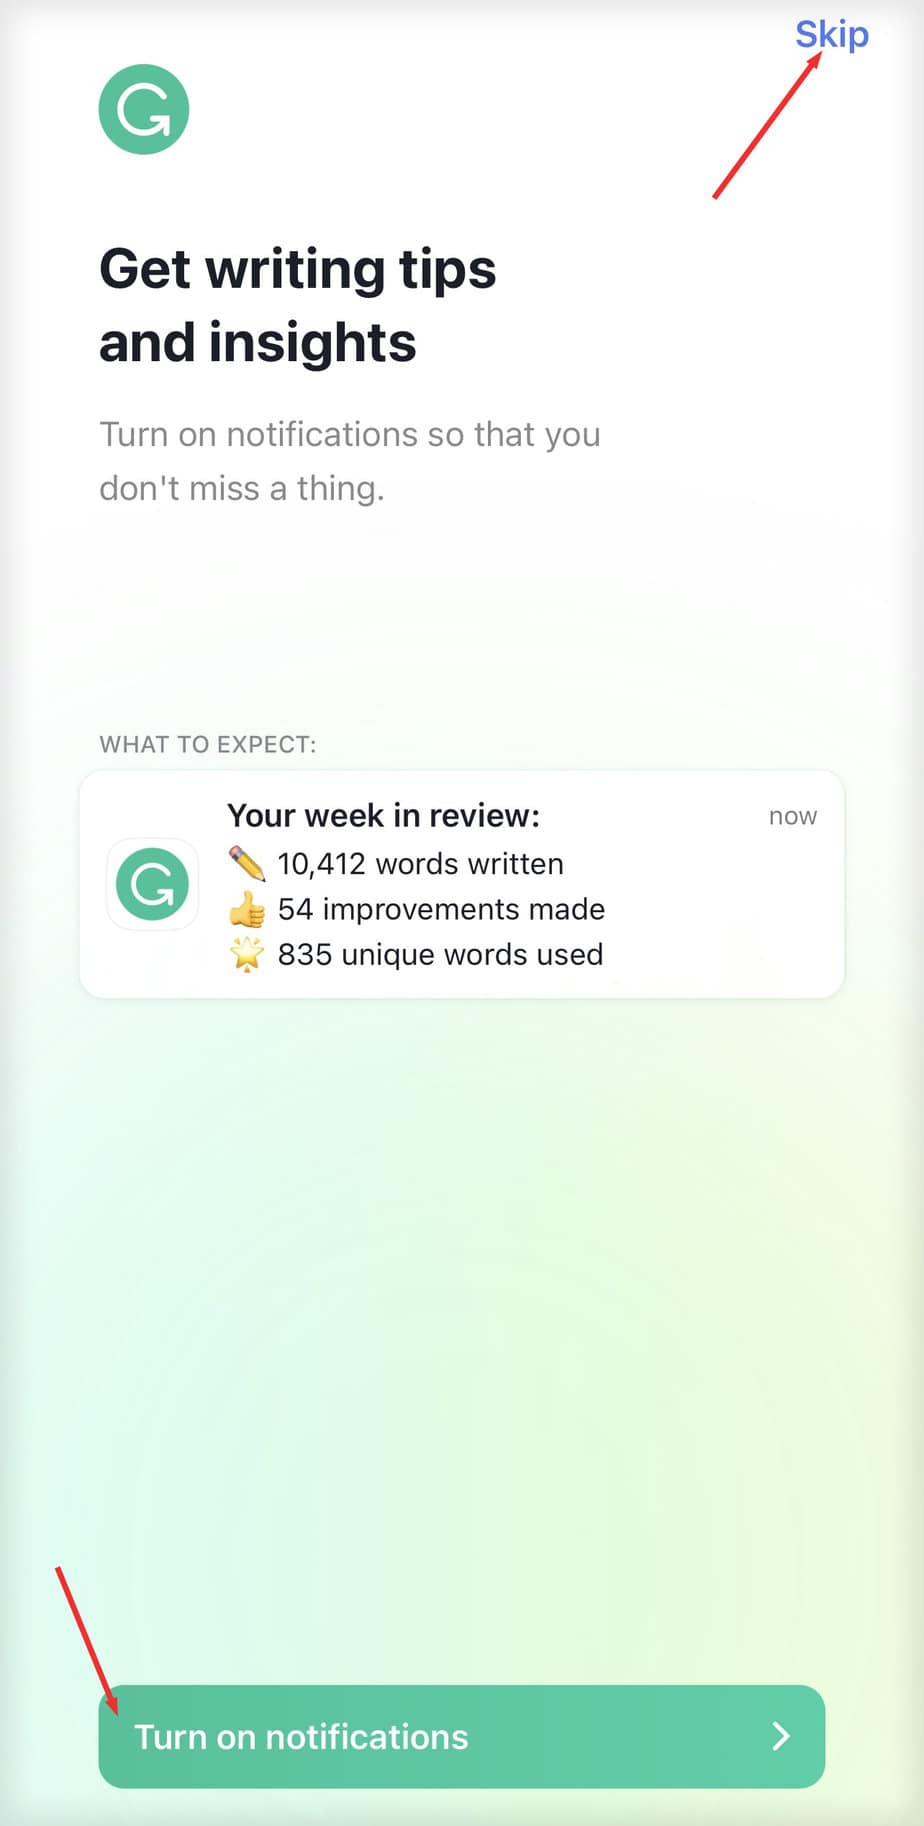
- Tap on Turn on Notifications button or click Skip to avoid notifications.
- Select Continue with Apple, Google, or Gmail. For existing accounts, click on Already have an accout? Sign in and proceed.

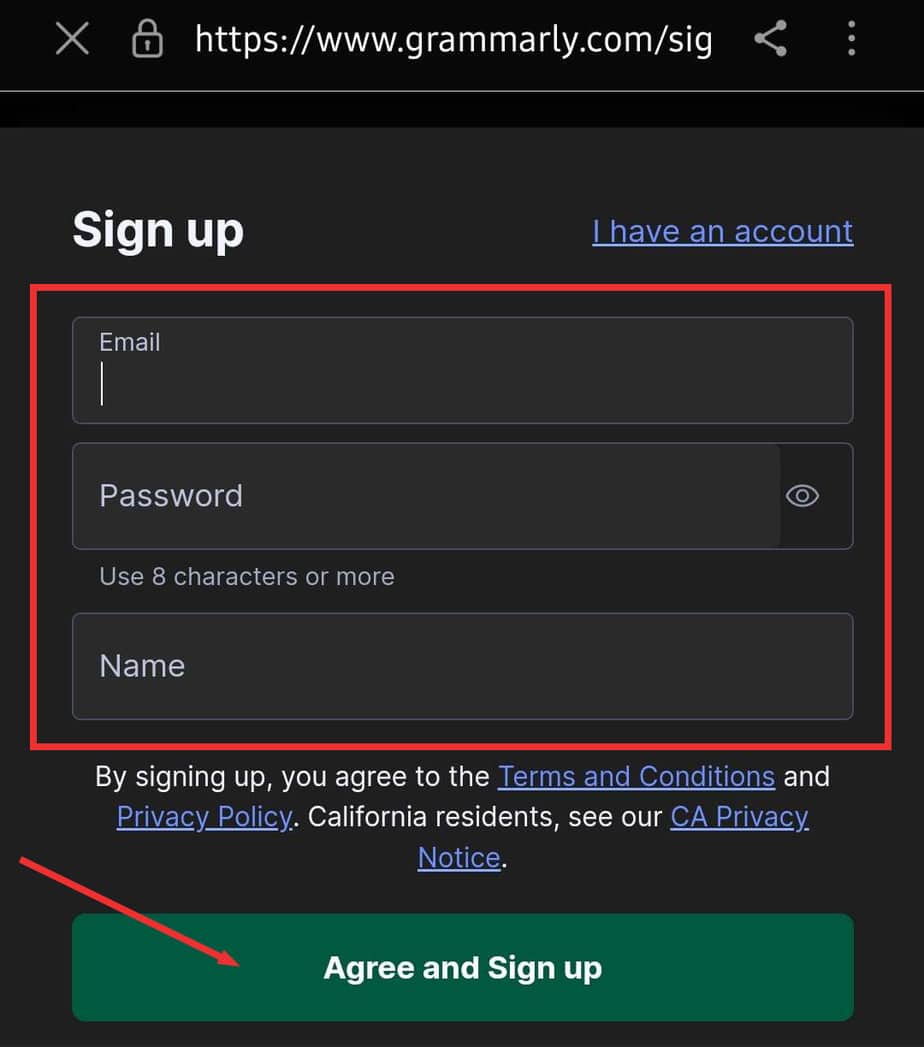
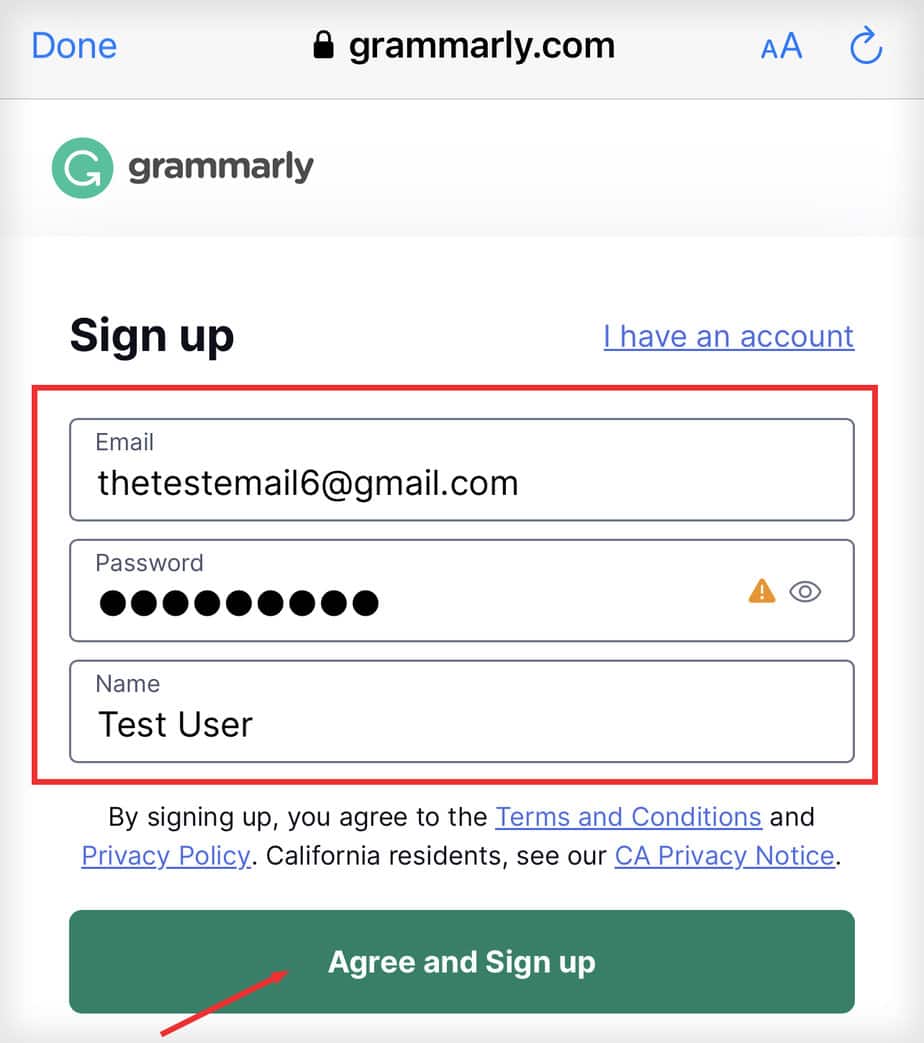
- Input Email, Password and Name. Then click on Agree and sign up.
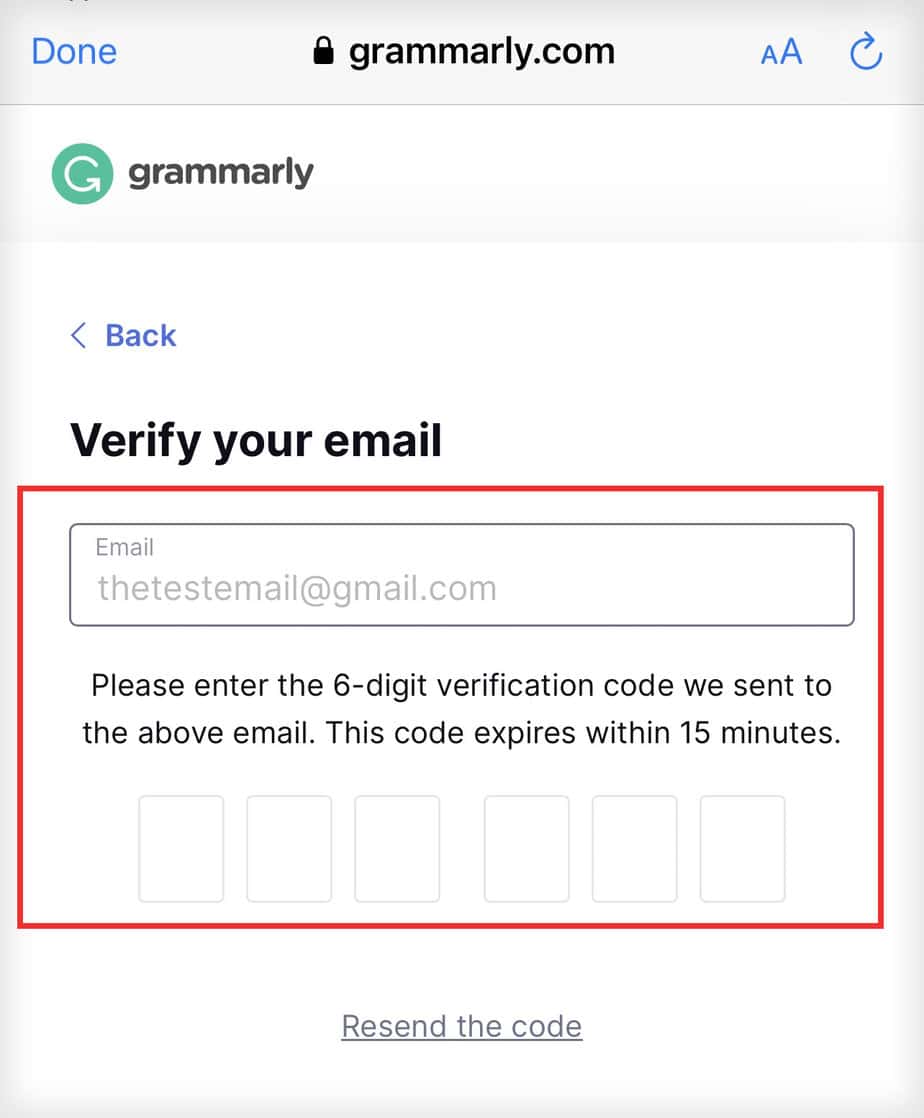
- Verify your email by inserting the code sent to your email.
- Now, click on Add Grammarly Keyboard.

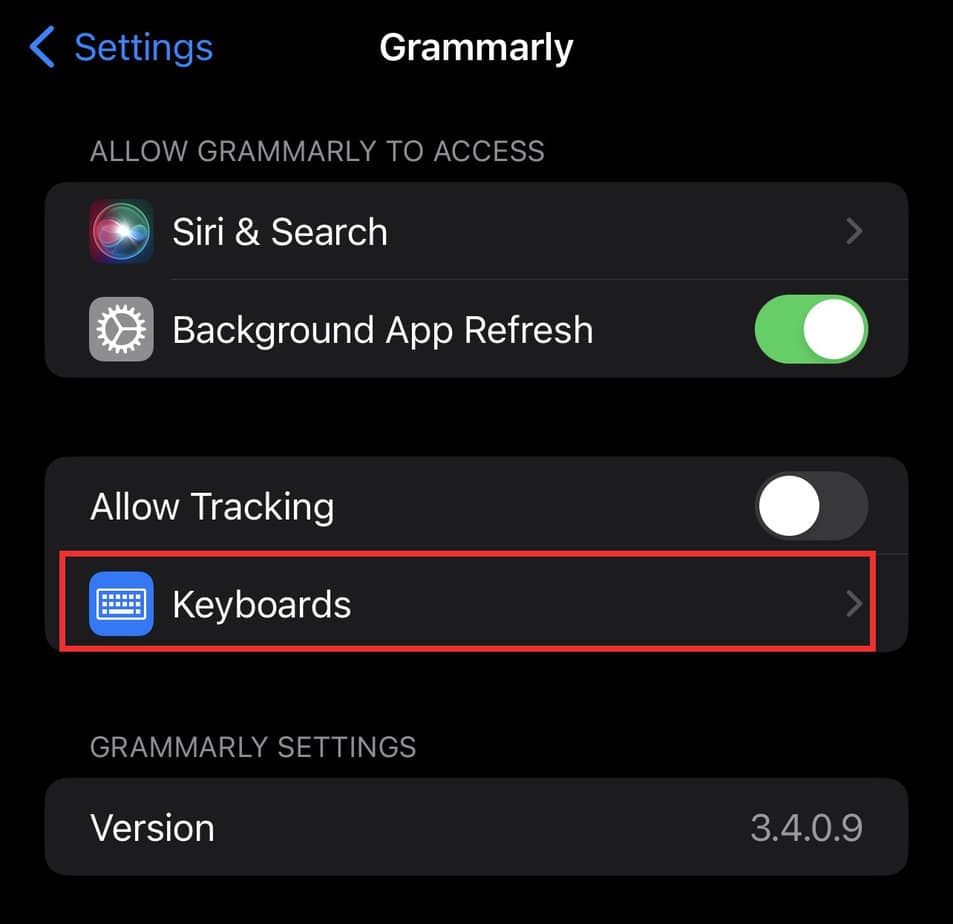
- On iOS, the Settings page opens up. Click on Keyboards.
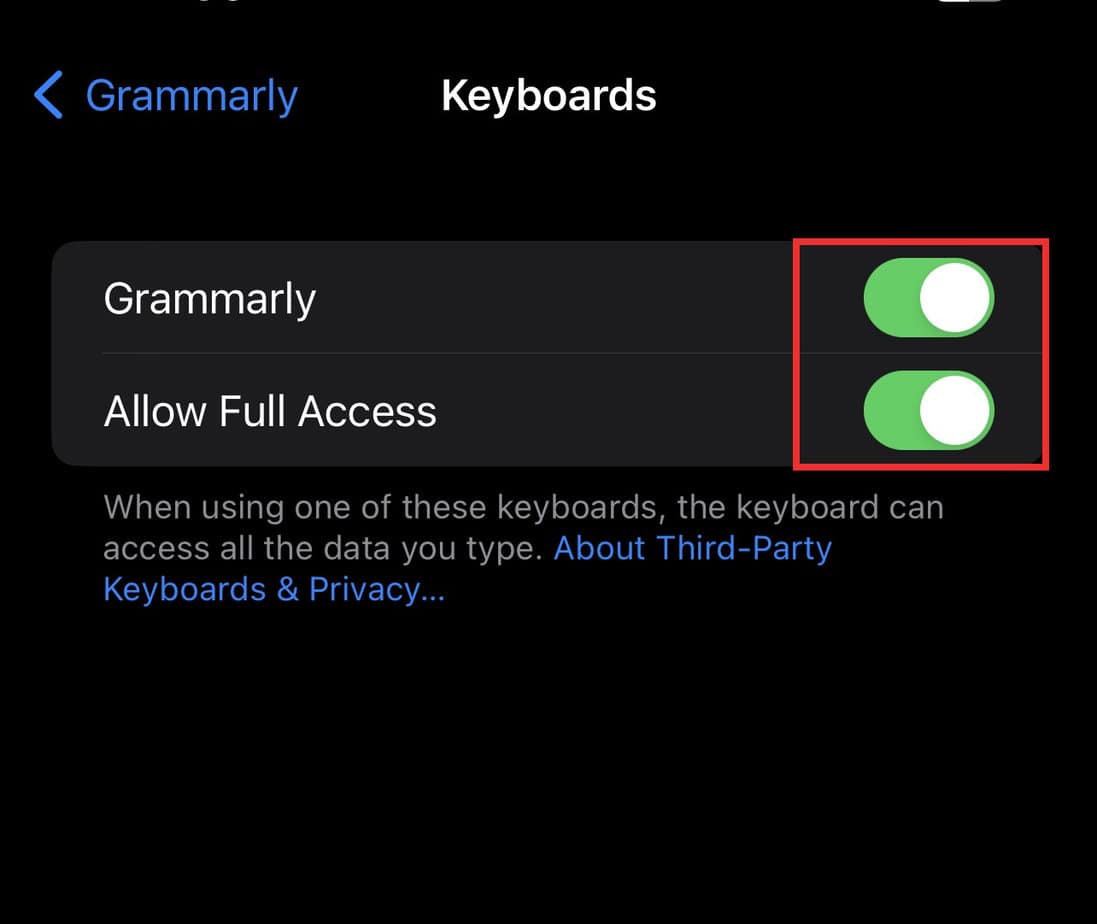
- Turn on the toggle button for Grammarly. If required, turn on toggle for Allow Full Access.
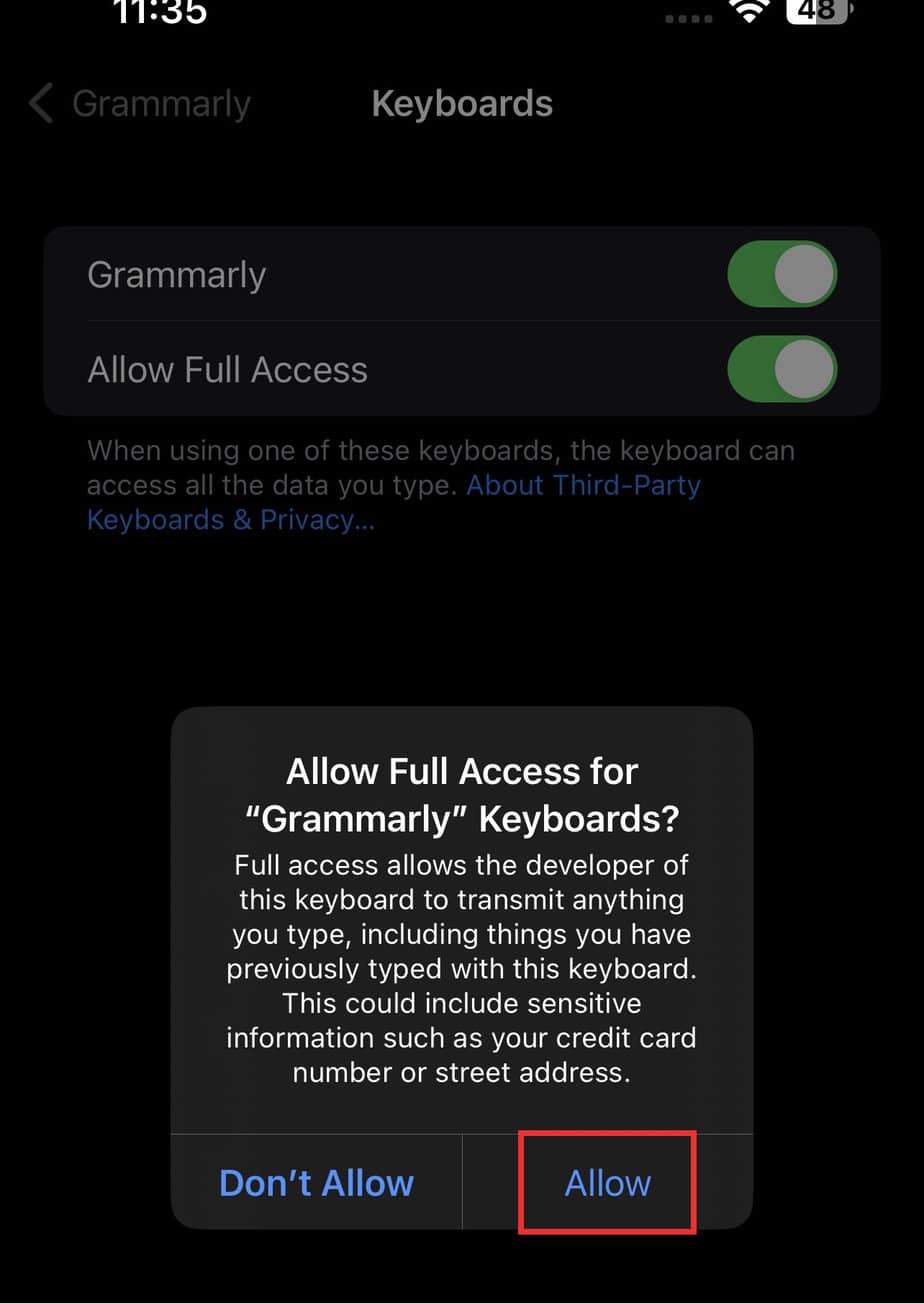
- Select Allow for confirmation.
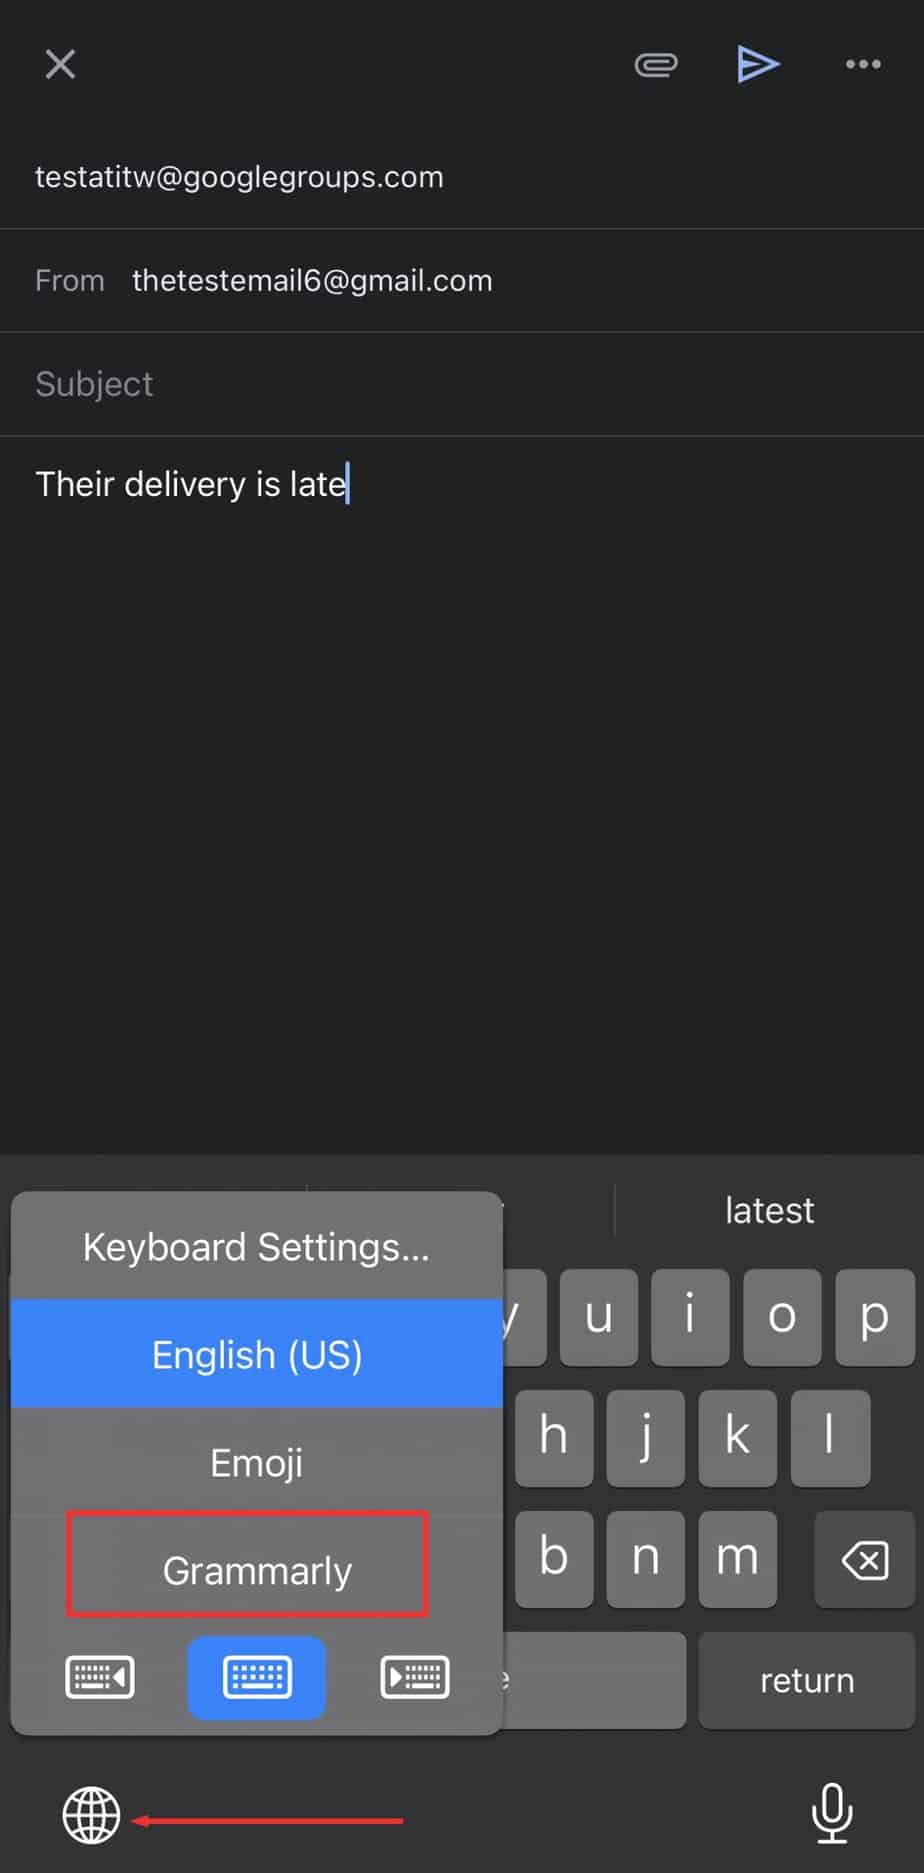
- To use Grammarly, tap on the Globe key and select Grammarly.
Add Grammarly on Android
- Once you open the app, click on Get started.

- Tap Agree on Terms and Conditions.

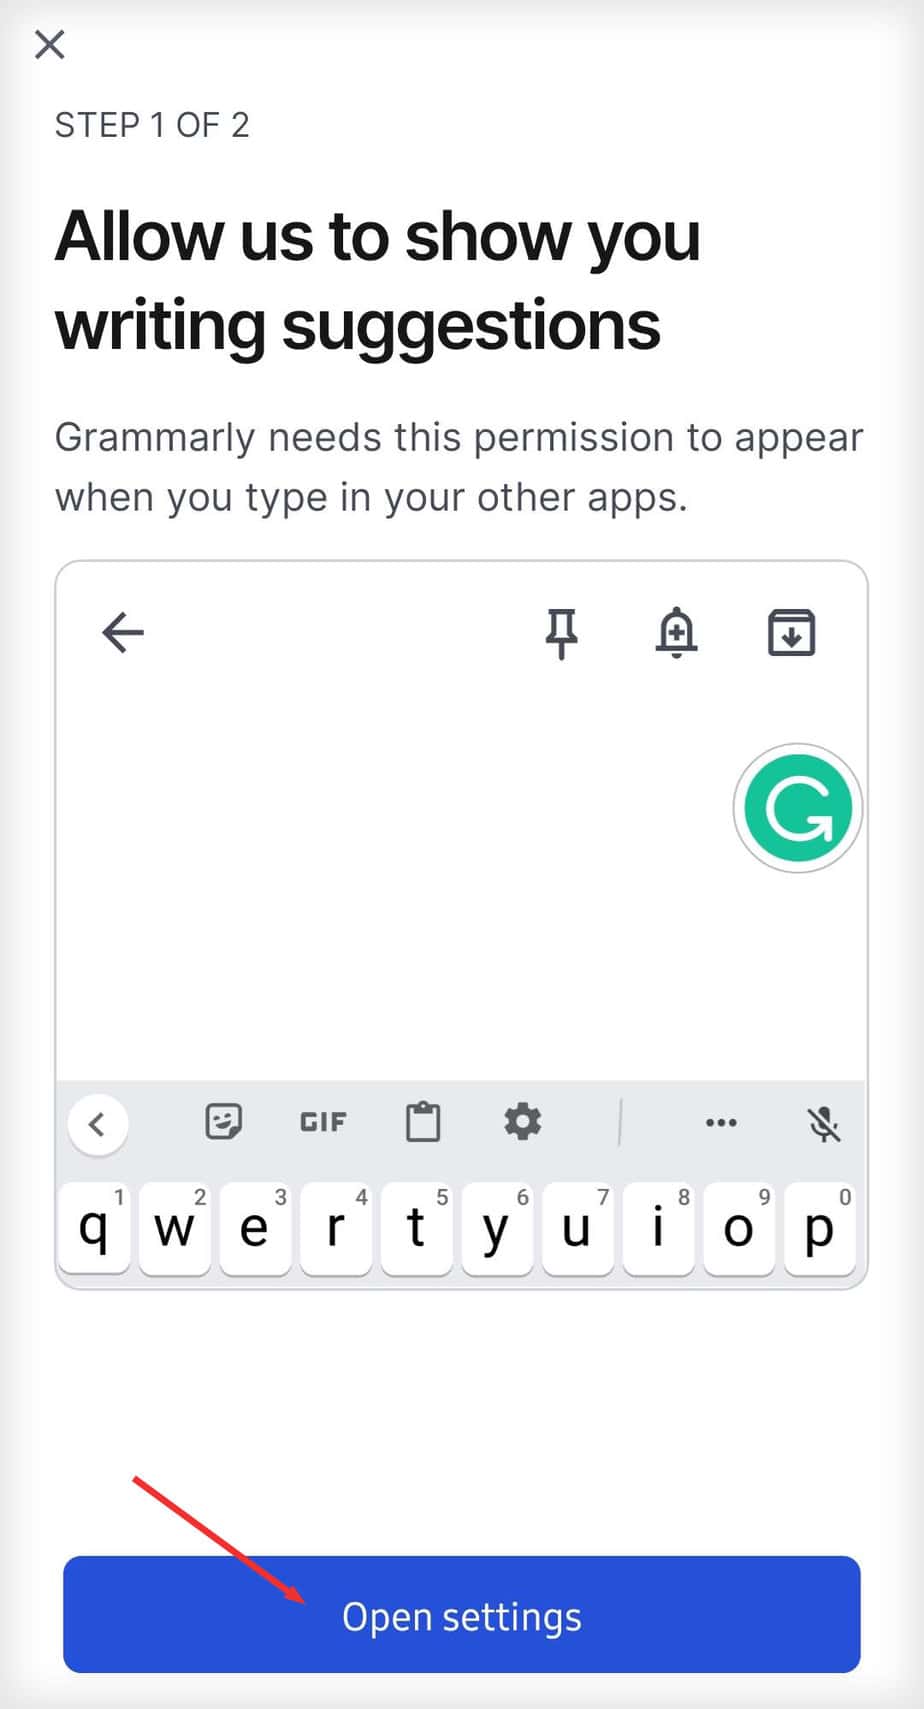
- On step 1, select Open settings.
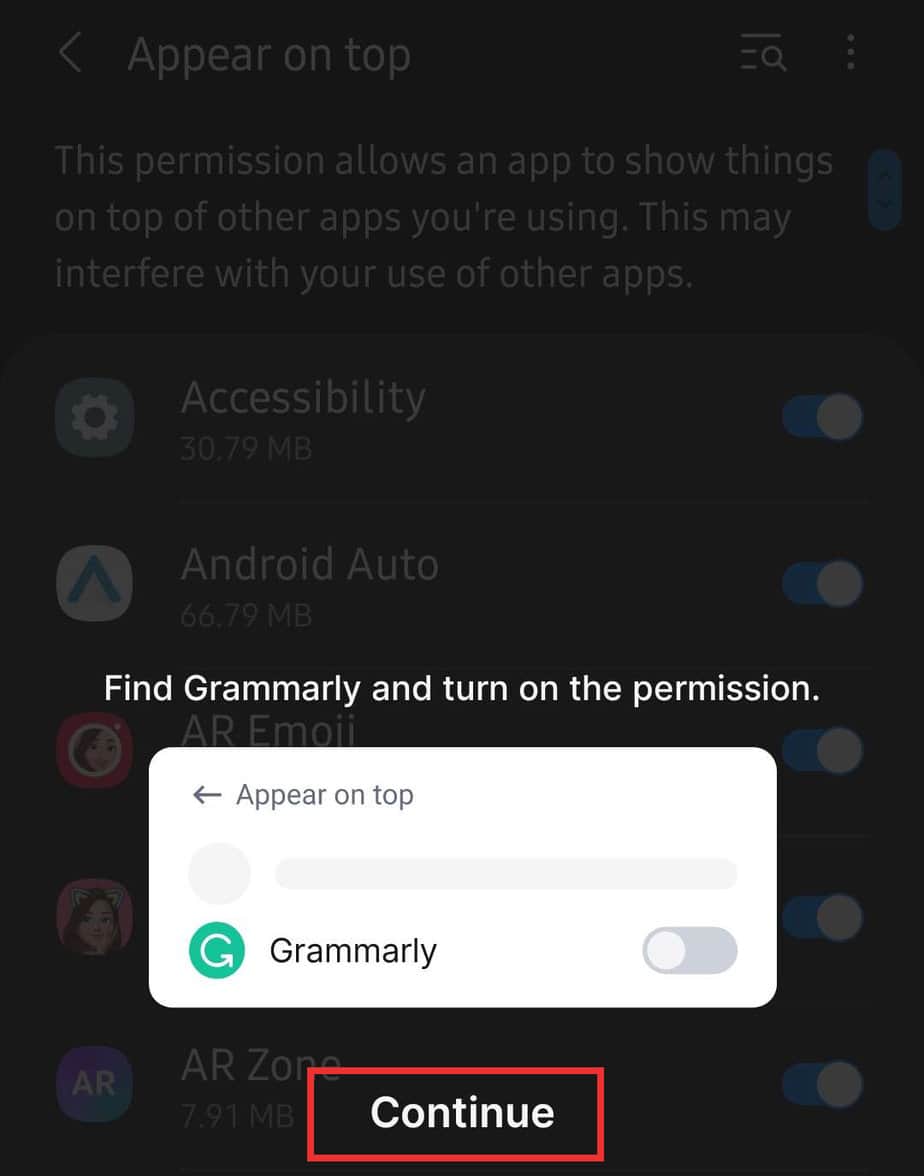
- Tap on Continue to open Appear on top settings.
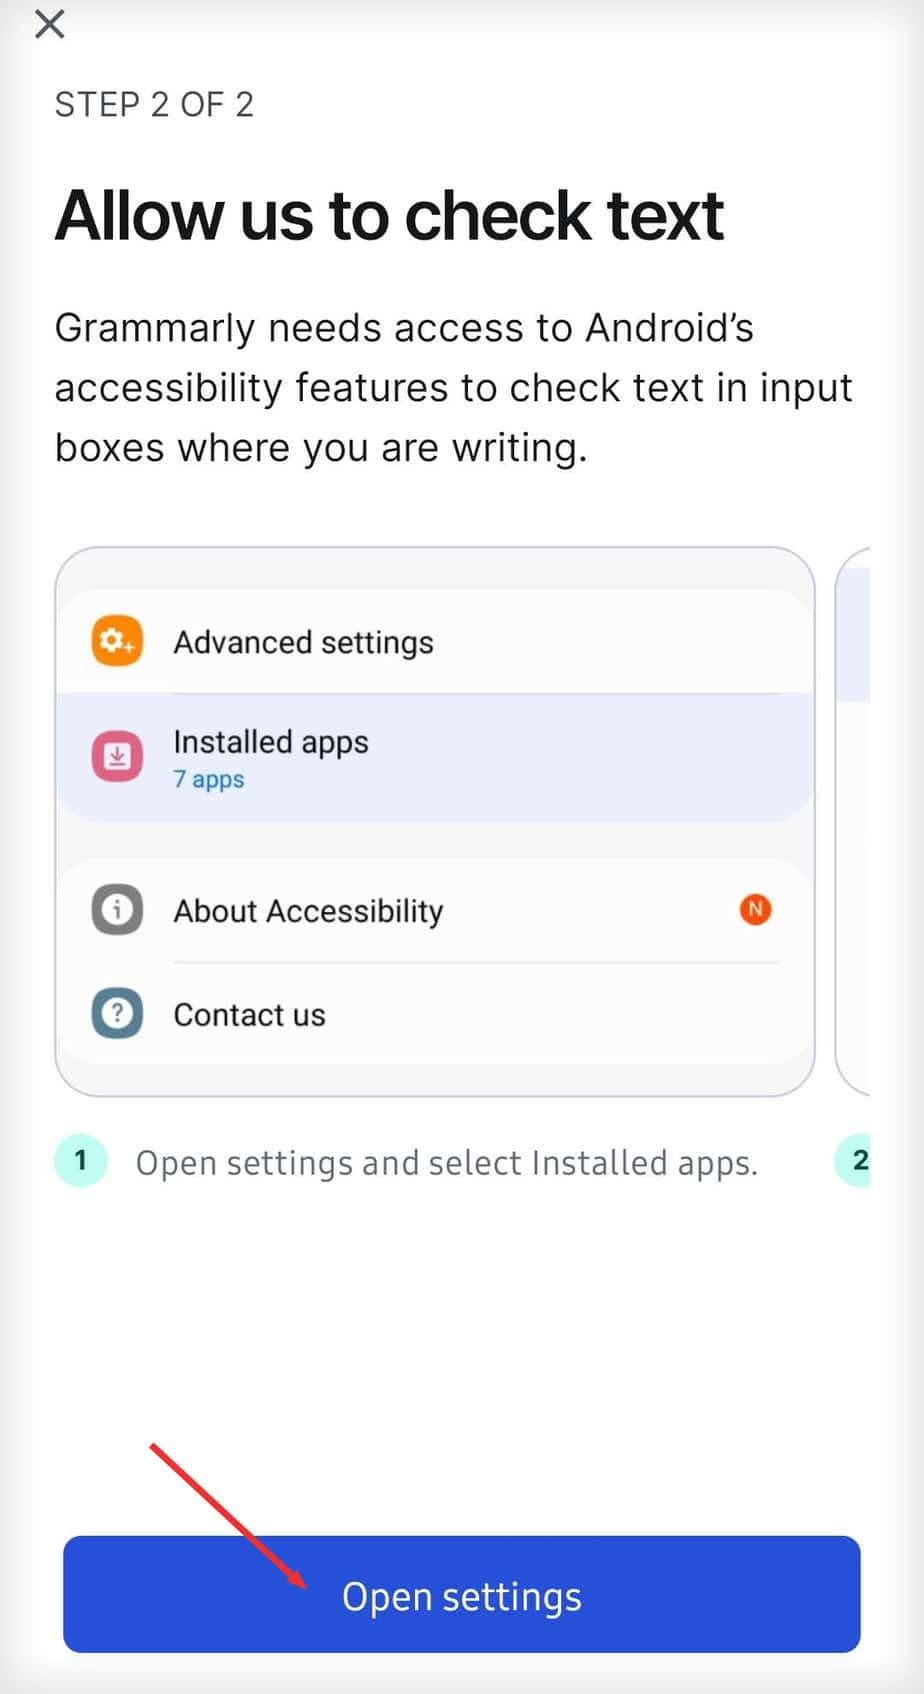
- Click Open settings again on step 2.
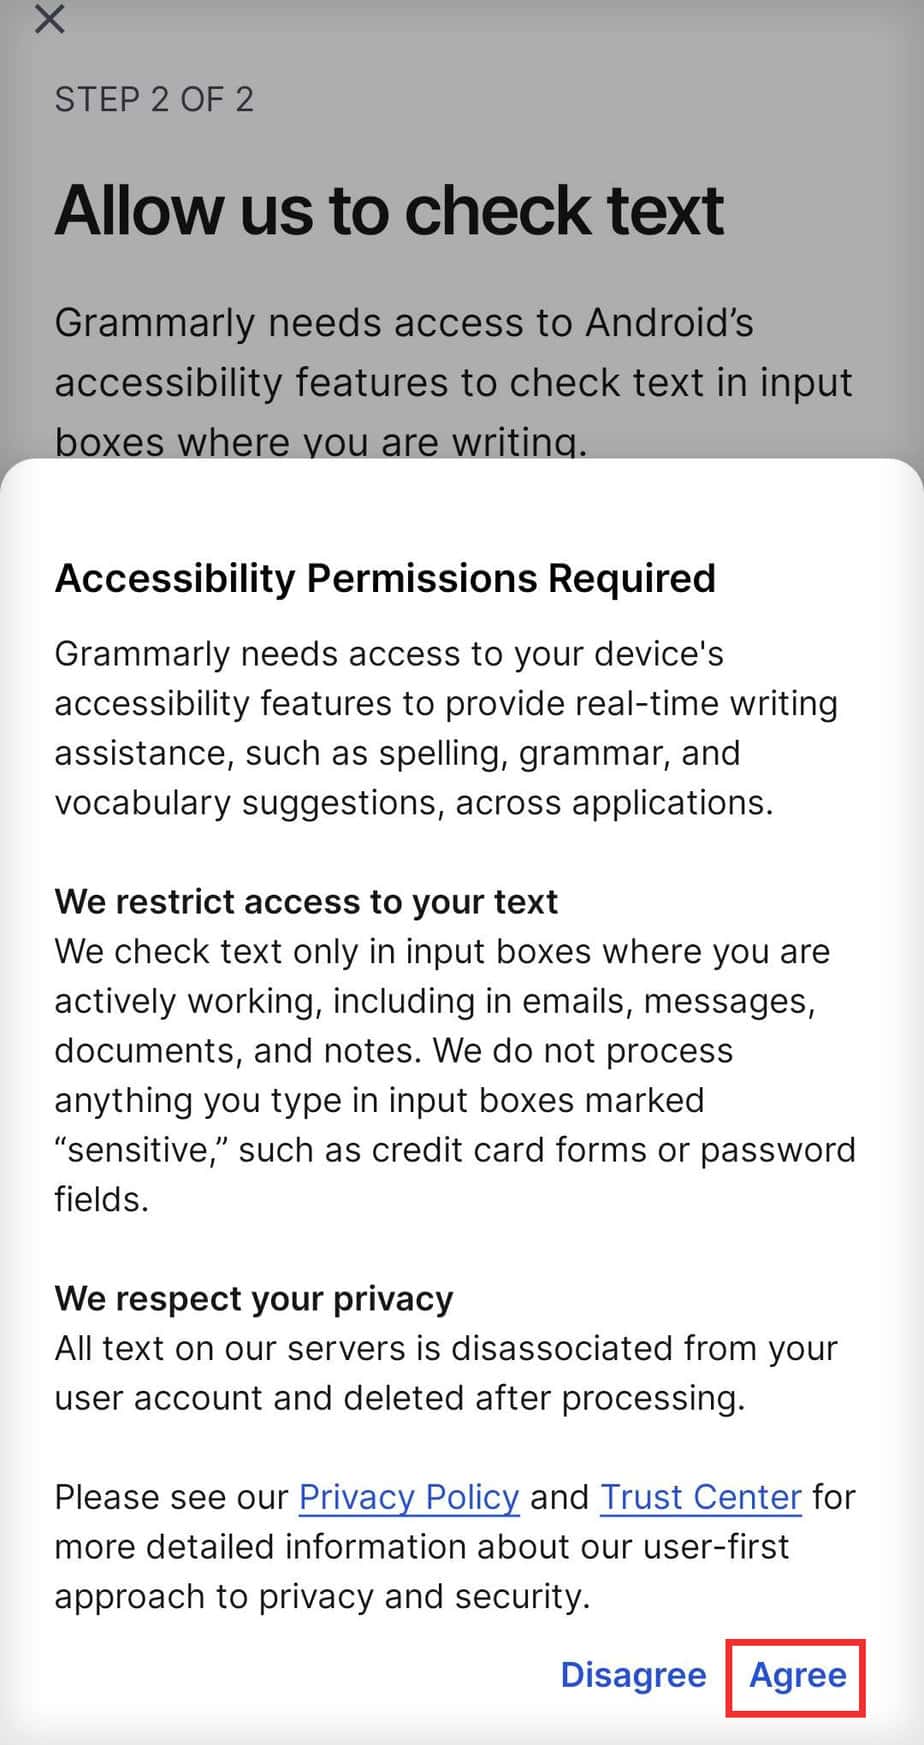
- Select Agree to enable app permissions.
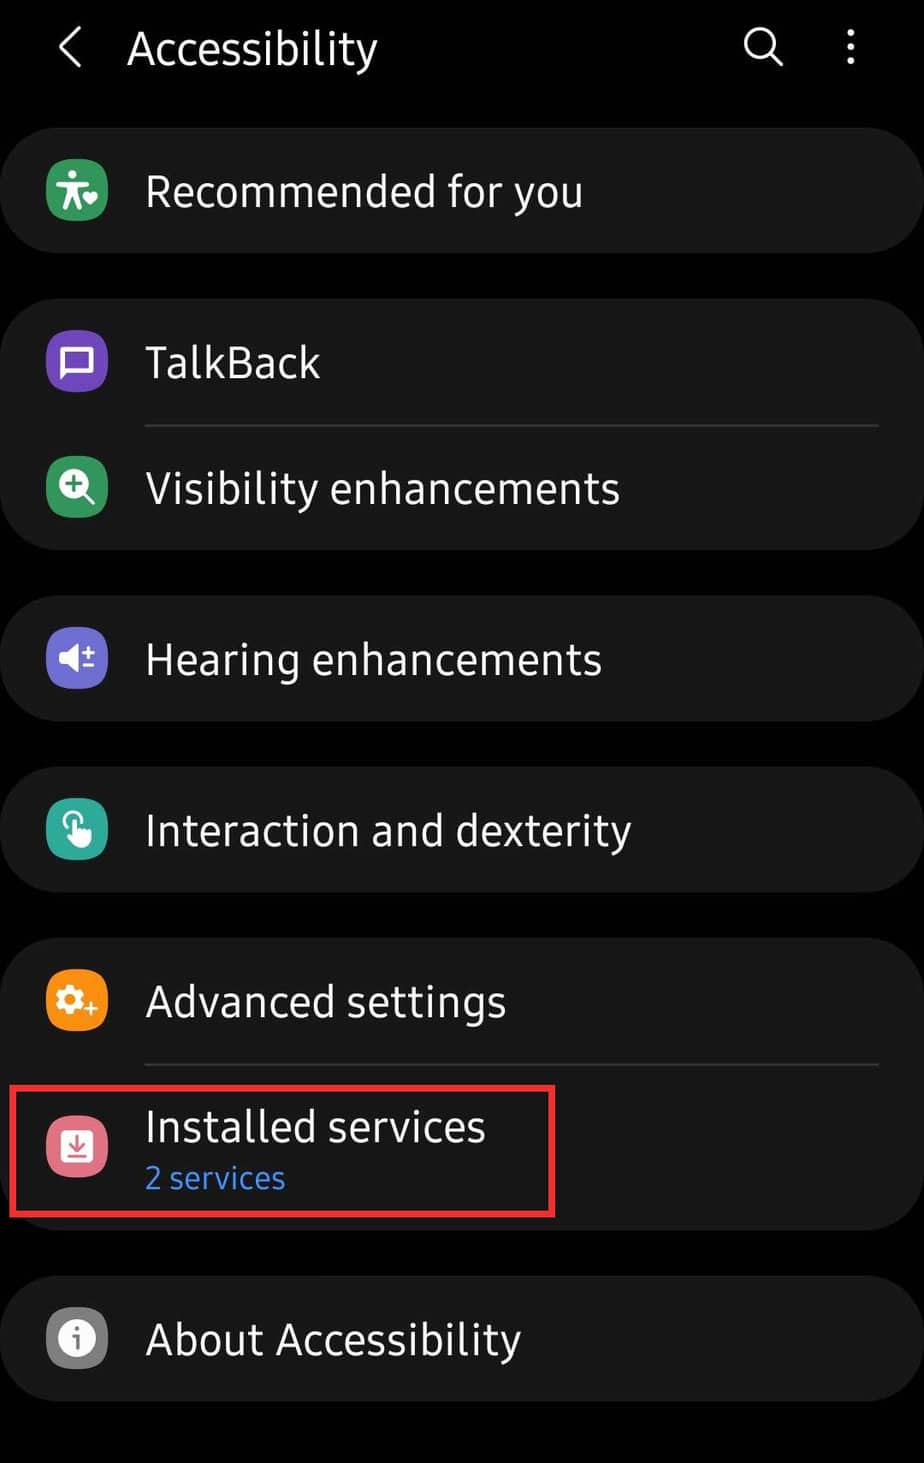
- It leads to Accesibility setting. Tap on Installed services.
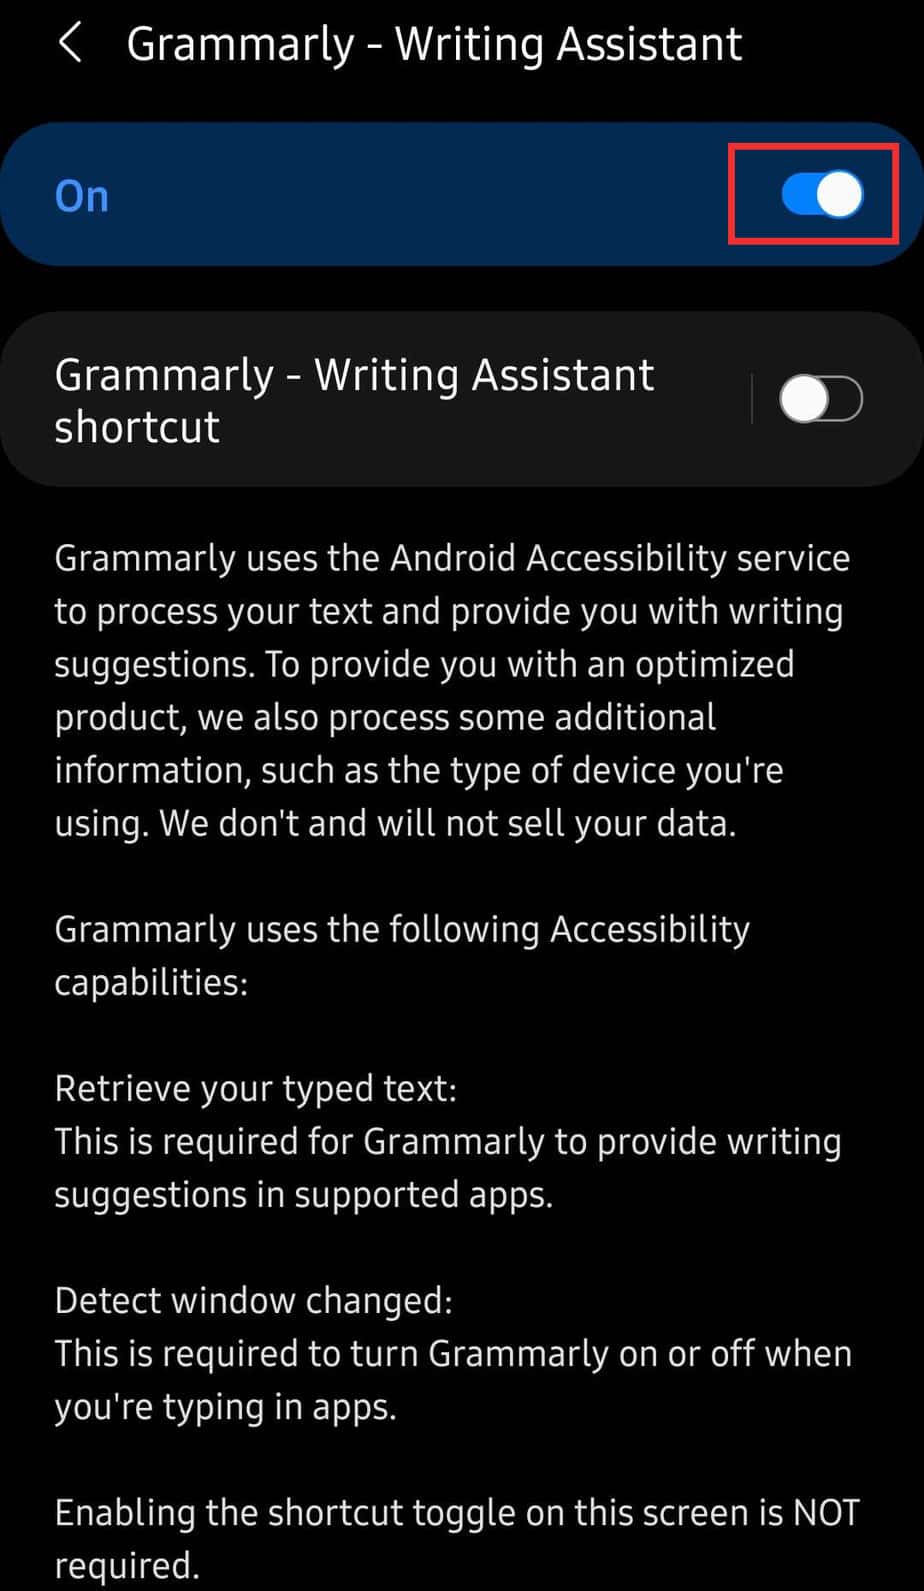
- Tap on Grammarly-Writing Assistant and turn on toggle.
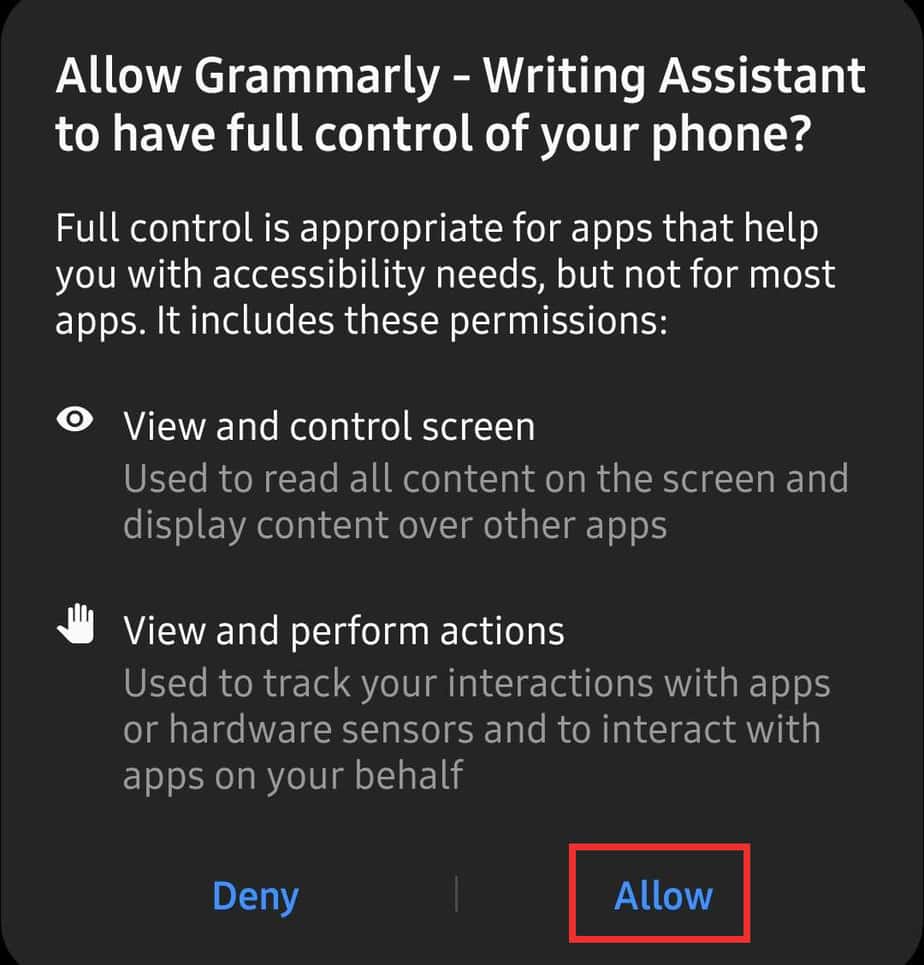
- Select Allow for confirmation.
- Click on Log in. It will lead to sign in page.
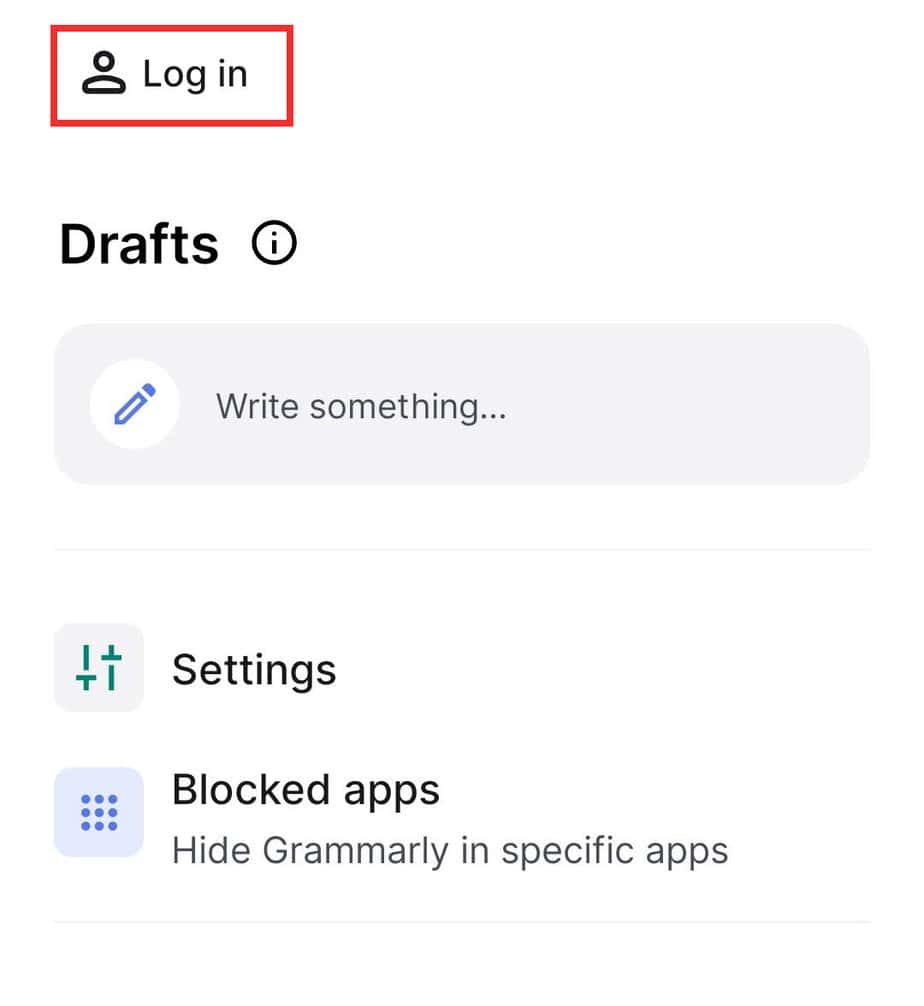
- Enter your email and click Continue. You can also sign in with Google, Facebook or Apple.
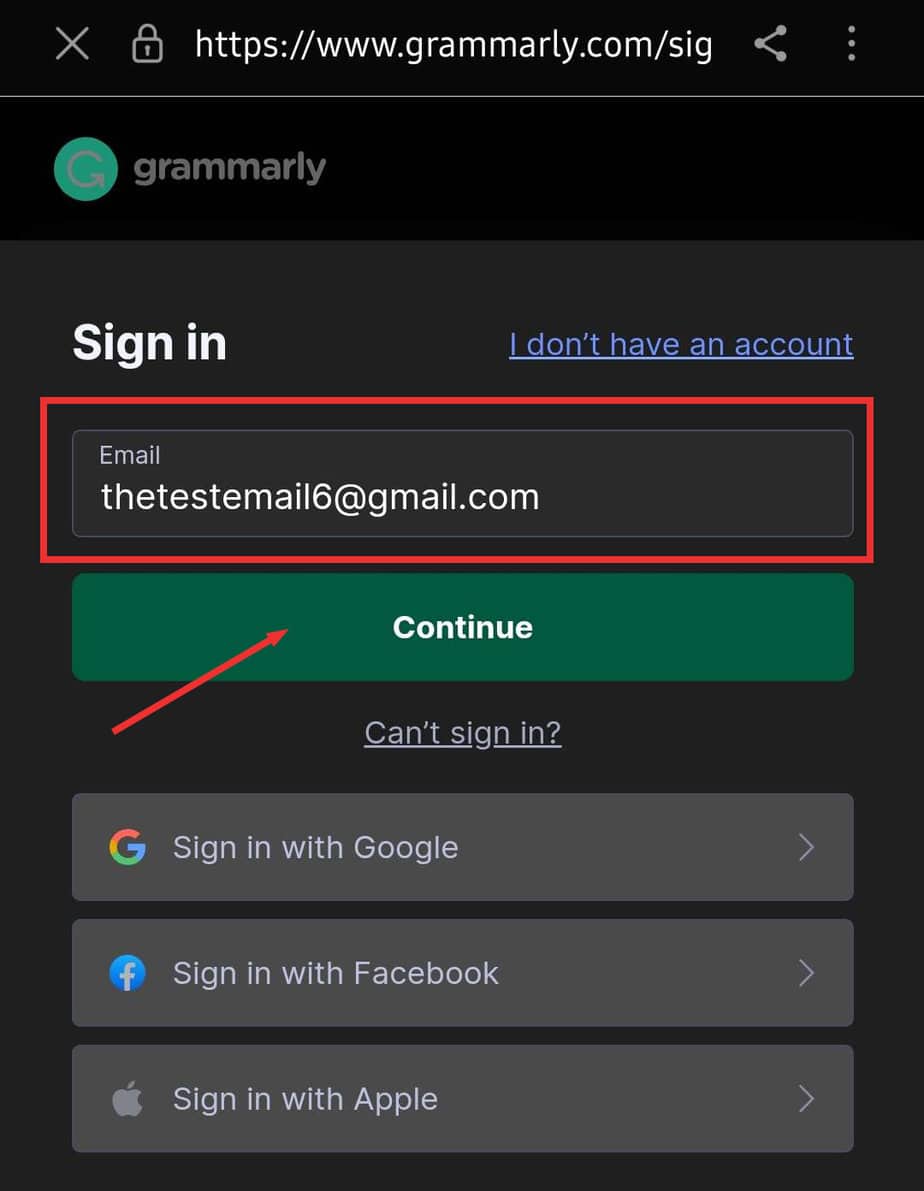
- If you don’t have an account, tap on I don’t have an account. Input Email, Password, and Name. Click on Agree and Sign up.