The read receipts on Outlook simply won’t work if the recipient intentionally chooses to not send one.
However, if that’s not the case, you can find their read receipts inside the “Inbox” or “Sent Items” folder. Other than that, the recipients may have missed the option to send the read receipt because of Outlook settings configured in their system.
Now, whether you aren’t receiving read receipts from the recipients or are unable to send one yourself as the recipient, you can resolve them by configuring the Outlook options mentioned below.
How Does the Read Receipt Actually Work?
For the read receipt to work, the recipient must click Yes on the prompt that lets him/her choose whether to send a read receipt. However, the prompt won’t appear in the first place if the message isn’t marked as read.
By default, Outlook marks an email as read when the selection changes. Meaning, he/she has to click somewhere else on the Outlook interface after opening the message for Outlook to mark it as read.
With this, let’s go through the fixes below if the read receipt feature is not working on your Outlook.
Check the Reading Pane Settings
As mentioned above, the email must be marked as read for the read receipt prompt to appear. So, if a recipient selects only that particular message and closes Outlook, the prompt won’t appear until the selection changes.
Also, it’s possible that the recipients may have configured the Reading pane settings. As a result, the message is marked as read only if the message stays open on the reading pane for a specified time (can be up to 59 seconds).
To avoid such issues, you need to disable such an option and configure the Reading pane settings as follows.
- Open the Outlook app.
- Then, select File > Options.
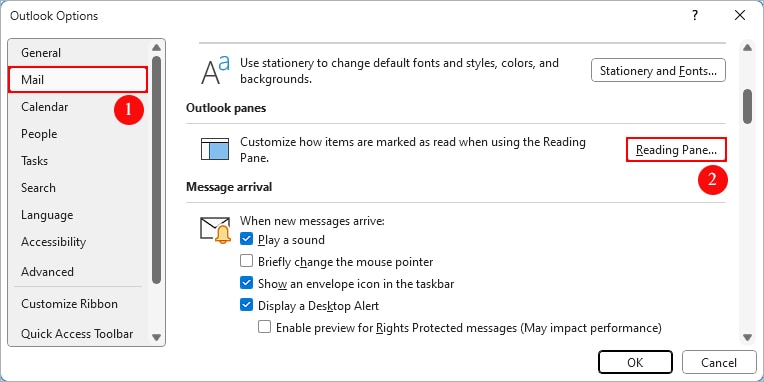
- On the next window, select the Mail tab in the sidebar.
- In the right pane, click the Reading pane under the Outlook panes section.
- On the next prompt, enable the Mark item as read when selection changes option.
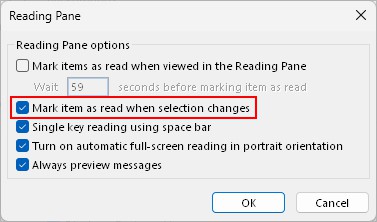
- Alternatively, reduce the number of seconds under the first option to mark a message as read.
Allow Read Receipt Request on Outlook Options
If the recipient has set Outlook to automatically reject each message requesting read receipts, you won’t receive any of them.
On the flip side, if you don’t get the option to send a Read receipt option as a recipient, make sure you have configured Outlook options appropriately.
To enable read receipts,
- Open the Outlook app.
- Click the File menu.
- Then, select Options in the bottom right corner.
- On the next window, select Mail on the sidebar.
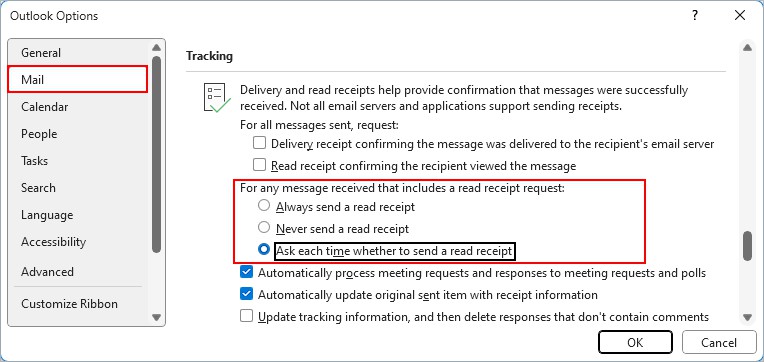
- In the right pane, scroll down to the Tracking section.
- Below “For any message received that includes a read receipt request”, choose any other option among the three except the “Never send a read receipt” option.
Check if the Read Receipts Feature is Supported
The read receipt feature is only available in the Outlook desktop app and Outlook on the web version (with Microsoft 365 subscription and not the free Outlook.com online version).
Also, note that such an option doesn’t exist on other email clients like Gmail when requesting from Outlook.
So, make sure you are using the supported version to send/request a read receipt.