By default, Outlook proofreads every message you compose with its built-in spell checker tool and displays the possible errors with red squiggly or blue underlines.
However, it can sometimes fail to work as expected, exposing you to embarrassing typos.
In some instances, the tool doesn’t detect any error whatsoever, even when you can clearly see an error in the message. And, in some cases, it seems to overlook a particular type of grammar mistake (s) or spelling error.
This usually happens when some essential Outlook settings aren’t configured correctly. So, you just need to tweak some of them to resolve the spell-check issue.
Meanwhile, it could be an occasional glitch. So consider restarting the Outlook app to resolve the issue. If you use the Outlook web version, try signing in from a different browser or in incognito mode.
Enable the Spell Checker
While it sounds obvious, you must enable the necessary spell-checker settings first for it to work properly.
By default, Outlook provides options to detect writing errors in two different cases — as you are writing the mail and before sending the mail. So, if either one of them or both aren’t working, make sure you turn on the required options in the Outlook settings as follows.
- Launch the Outlook app.
- Click the File menu at the top.
- Select Options in the bottom left corner.
- Click the Mail tab from the sidebar.
- In the right pane, make sure the Always check spelling before sending checkbox is enabled.
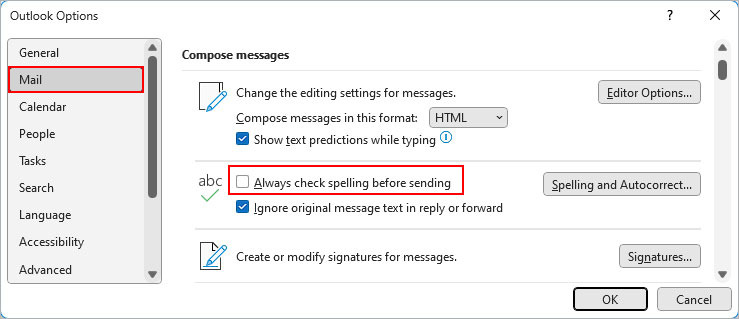
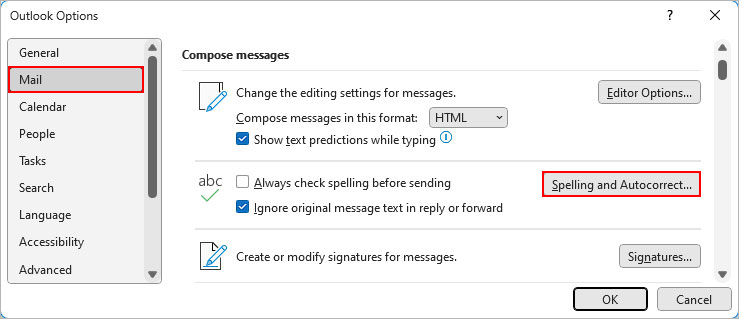
- Additionally, click the Spelling and Autocorrect button next to it.
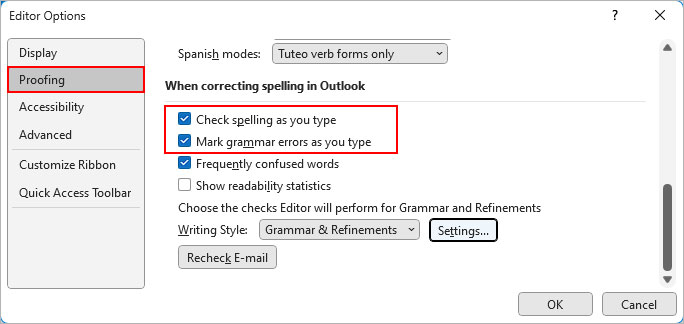
- Next, scroll down to the When correcting spelling in Outlook section.
- Enable the Check spelling as you type and Mark grammar errors as you type options.
- Click OK.
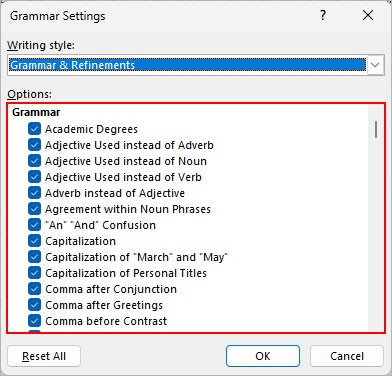
- If you want Outlook to proofread for specific types of grammar rules, click Settings next to the Writing Style field.
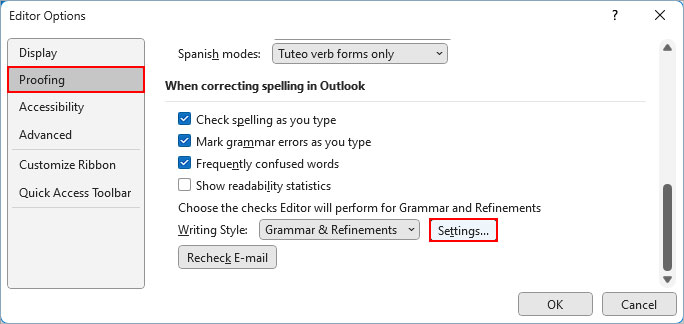
- On the next prompt, enable/disable the grammar rules to apply while proofreading your emails on Outlook.
Set the Correct Language
If you constantly switch between several languages in Outlook, the spell checker is likely using a different language.
For instance, if the Outlook spell checker is using German as its default language, it may not be able to detect errors in an English text message.
To fix it,
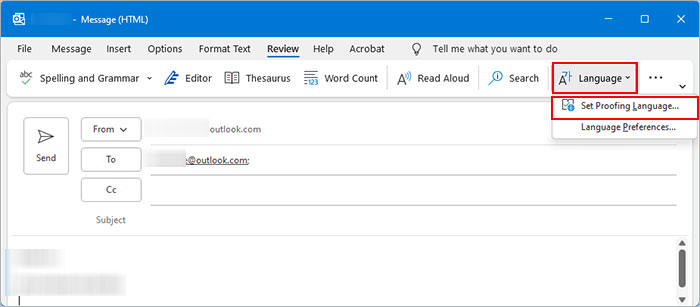
- Select the Review tab on the window where you are writing the mail.
- Click Language and select Set Proofing Language.
- Select the preferred language and click Set As Default. Alternatively, enable the Detect language automatically checkbox.
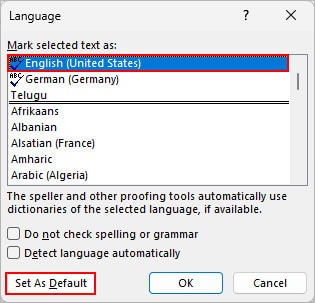
- Uncheck the Do not check spelling or grammar checkbox if enabled.
- Click OK.
Review the Spell-Check Dictionary
Any incorrect word (misspelled) you add to the spell-check dictionary won’t show up as an error the next time you use it.
Now, this becomes more of an issue, especially if you are a Microsoft 365 user, as all their apps like Word and Outlook, share the same dictionary.
To remove incorrect words from the dictionary, follow the steps below.
- Open the Outlook app.
- Go to File > Options.
- Select the Mail tab from the sidebar.
- Now, in the right pane, click the Spelling and Autocorrect option under the Compose messages section.

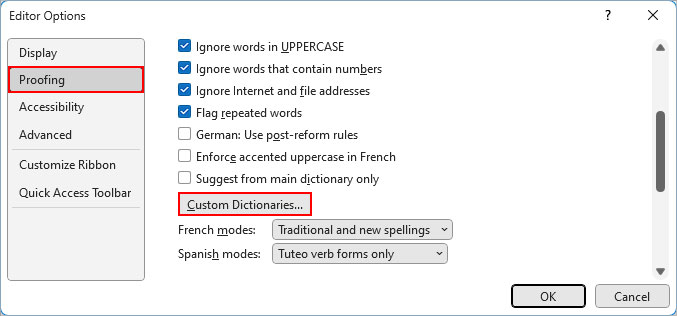
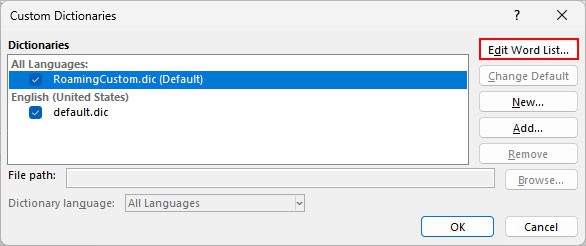
- Select the Proofing tab, and click Custom Dictionaries under the When correcting spelling in the Microsoft Office programs section.
- On the Custom Dictionaries prompt, click Edit Word List.
- Select the word you want to remove and click Delete. Use the search bar to find them quickly.
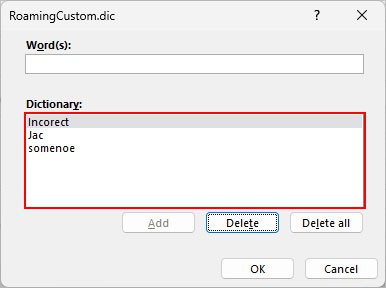
- Alternatively, click Delete all to remove all the added words in the dictionary at once.
Use the Microsoft Editor
While all the Microsoft 365 apps like Outlook on desktop use the built-in Microsoft Editor to check grammar and spelling, the option is greyed out on the Outlook web version.
Nonetheless, its browser extension is freely available for download on the Microsoft Official site. But, note that it’s only available for Google Chrome and Microsoft Edge users as of now.
For other browsers, you can still find and use several other spell-checker extensions as an alternative.
In case, your Microsoft Editor doesn’t work even when it’s available, follow the steps below.
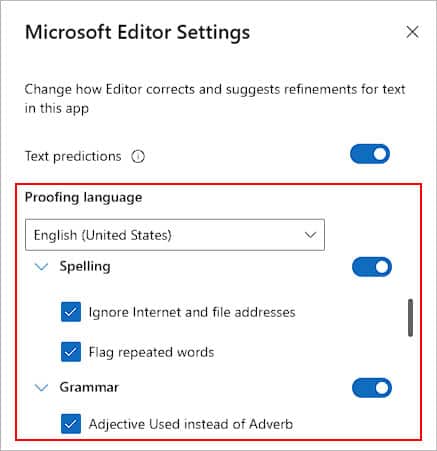
- Go to the Options tab, and select Editor > Editor Settings.
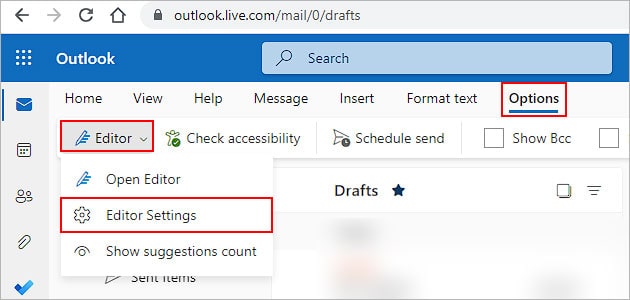
- Choose the correct proofing language and toggle on the preferred Spelling and Grammar settings.
Update or Repair the Outlook App
Like any other application, the Outlook app might contain some unresolved bugs, especially if you are using an older version of Outlook. So, to avoid such issues, install the latest updates for the Outlook app.
- Launch the Outlook app.
- Click the File menu.
- In the bottom left corner, select Office Account.
- In the right pane, click Update Options and select Update Now.
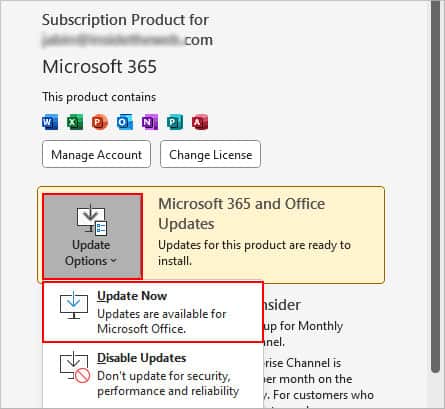
- Follow the on-screen prompts and install the new updates.
- Relaunch the app and check if the spell checker is working as expected.
If the issue still persists, repair the Outlook app as follows.
- Open Outlook and select File > Info.
- Then, select Account Settings > Account Settings.
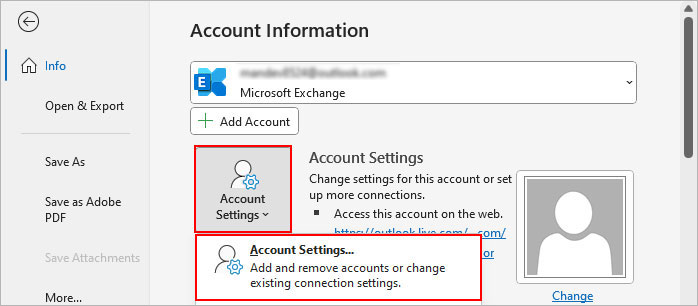
- Choose the Outlook account where you are having problems.
- Click Repair on the top bar.
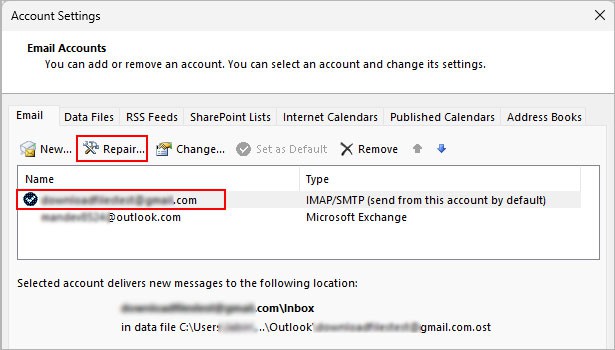
- Wait until the repair process is finished and restart Outlook.