If you’ve come across the “Excel File is Locked for Editing by your username” error while opening the workbook, it means the file is password-protected. In most cases, you might be able to access the file in read-only mode. However, you still won’t be able to edit or save the workbook.
In case you haven’t locked your file, another most probable chance is that the same Excel file is already running in the background. However, the error could also occur due to the following reasons:
- Workbook is in Read-Only Mode
- Malicious Third-party add-ins
- Files saved in unsupported co-authoring locations
- Excel’s temporary files
- Buggy AntiVirus Software
- Error in Excel App
The error is temporary and mostly solvable with minor fixes. Check out some of the proven fixes below.
End App Background Processes
One of the primary reasons you’ll encounter the “Excel File Locked for Editing by Me” error is when your workbook is already open on a background or a different device. To address this, you can force-stop the Excel file and reopen them. Make sure to save the open workbooks before you begin.
- Enter Ctrl + Alt + Del keys. Then, click on Task Manager.
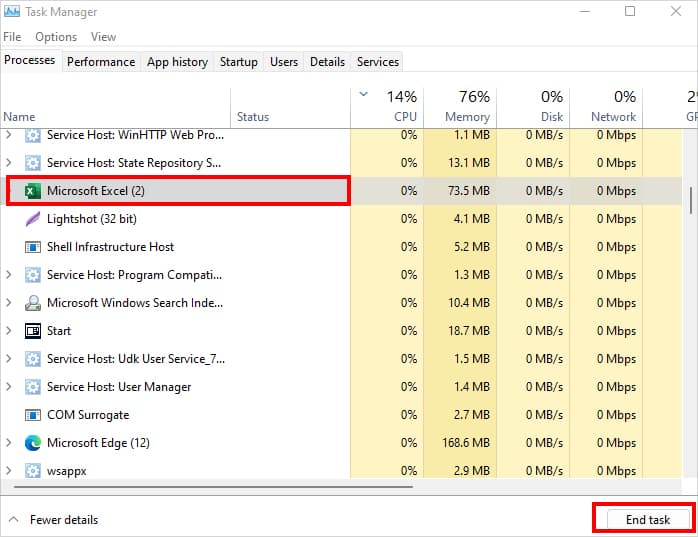
- On the Task Manager window, select Excel and click on End task.
- Relaunch Excel and open the Workbook.
Unprotect Workbook
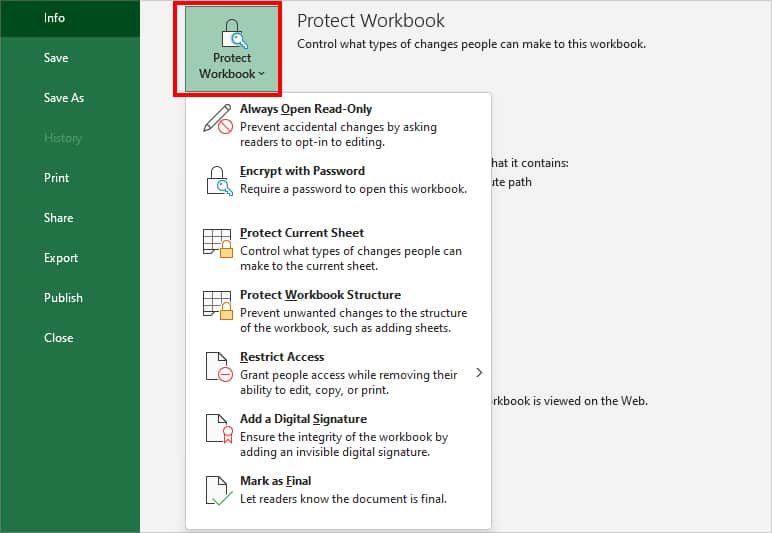
If you’ve protected your Workbook, Excel will lock the file for the author too. For instance, when you set the workbook to Always Open Read-Only, this effect will apply to you too. Before accessing files, Excel will prompt you to confirm the viewing mode. It could be another possible reason why you keep getting Files locked for editing.
To solve this, unprotect the Workbook temporarily and see if the error is gone.
- On your worksheet, click on File Tab.
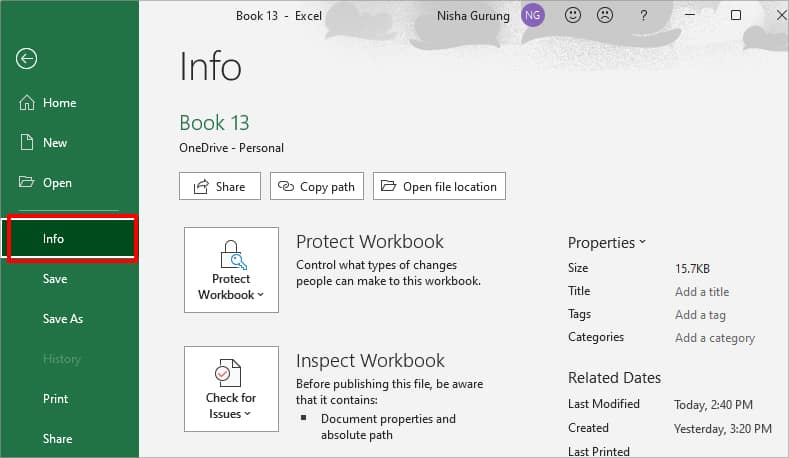
- Select Info in the left panel.
- Click on Protect Workbook and make sure all the options are unchecked.
Unprotect Sheet and Unlock Cells
If you haven’t protected the workbook but still encounter error, it could be due to locked cells. For users who are unable to edit only a few cell ranges, unprotect the sheets to unlock cells of your workbook.
To so do, Navigate to Review Tab on your workbook. Then, click on Unprotect Sheet.

Delete Temporary Files in Excel
While saving workbooks, Excel generates a temporary file of the original one in the destination location. Generally, Excel does this to ensure the original files are intact while saving. However, stored temporary files can lock the workbook when opening them. So, to fix this, you can locate and clear out these temporary files.
- Press Windows + R keys to open the Run command.
- Type in
%appdata%\Microsoft\Excel\in the box and click OK.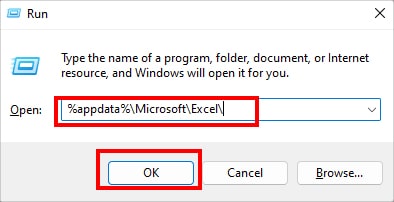
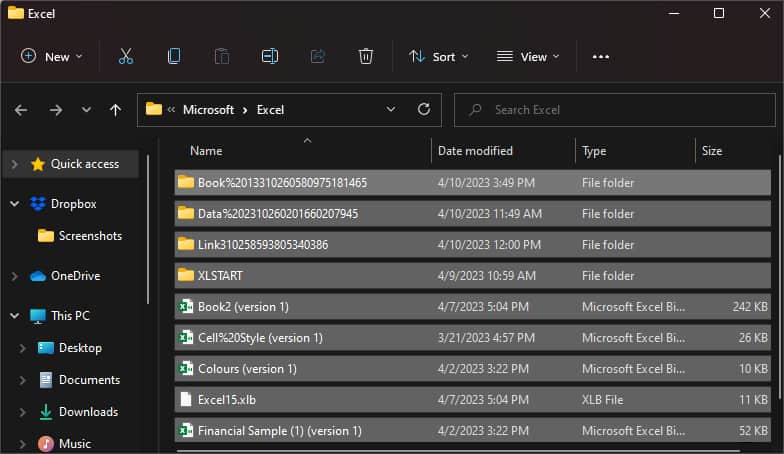
- Select all Excel files and enter Ctrl + C to Copy. Then, paste them into another location.
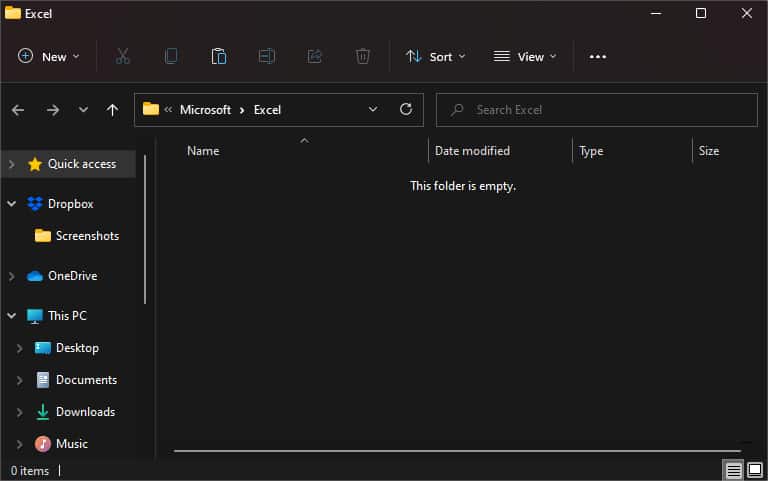
- Delete all files and empty the folder.
Save Files in Cloud
If you’ve encountered the error while co-authoring the Excel workbook, it is most likely due to the file location. Excel workbooks that are saved locations like DropBox, Google Drive, local PC folders, \\server\folder, and smb://sever/folder, etc do not support co-authoring. To solve this, save the files in OneDrive or Microsoft 365 SharePoint instead.
Disable Add-Ins
Sometimes, third-party Excel add-ins can lock the file. To check this, while holding down the Ctrl key, click on the Excel application. Release the Ctrl key only when you see a Safe Mode confirmation dialogue box. The Excel app should start without any errors.
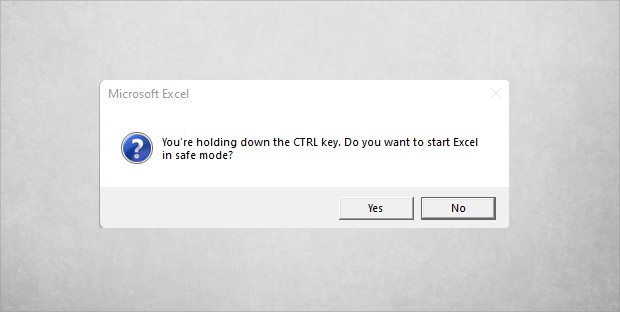
If it doesn’t, it may be the time you disable the add-ins. Here’s how you do it.
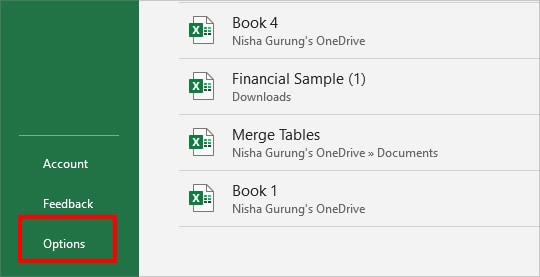
- Go to File Tab > Options.
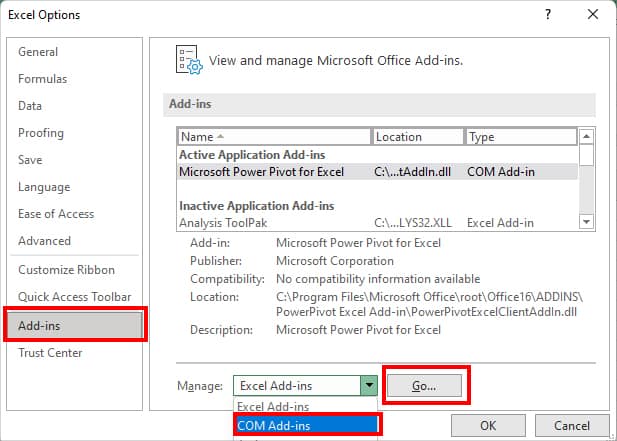
- Click on Add-Ins. On Manage, select COM Add-ins and click Go.
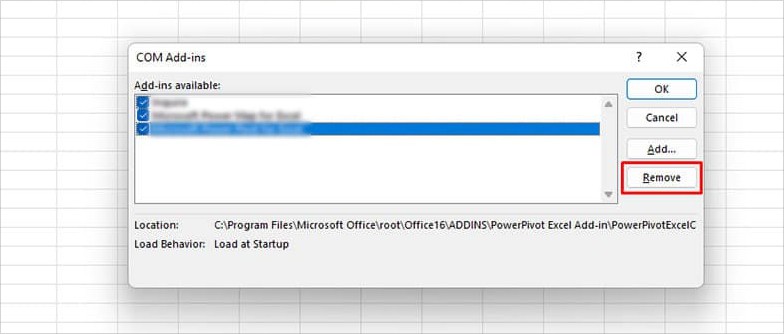
- Choose your Add-In and click on Remove.
Disable AntiVirus
Some Excel users reported AntiVirus such as Malwarebytes locked the workbook for editing. If you’ve enabled similar antivirus tools on your PC, disable them and try launching the Excel workbook again. There could be a bug in the software which is interfering with the Excel file.
Quick Repair Microsoft Office
If the error still persists, the problem may lie within the Excel itself. To solve this, perform a quick repair for the Excel application.
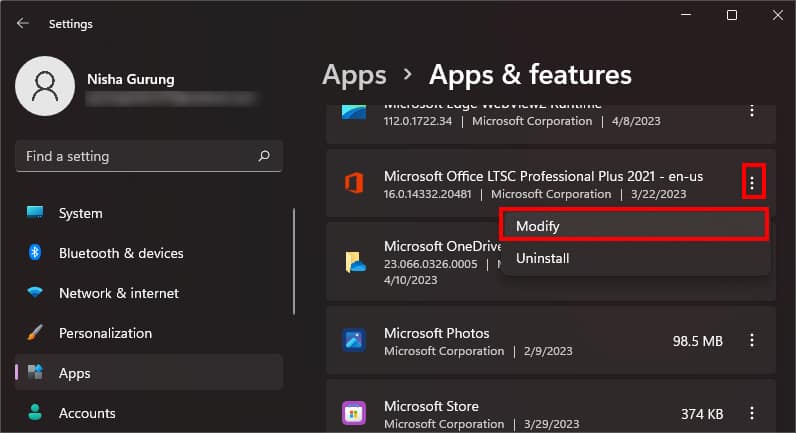
- Right-click on the Windows Start button. From the menu, pick Apps and Features.
- Locate Microsoft Office. Click on the More icon > Modify.
- If prompted, pick Yes.
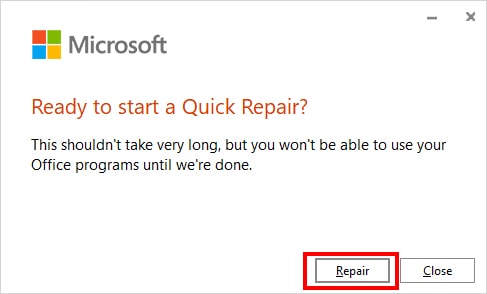
- Now, Microsoft will prompt you to choose between Quick Repair and Online Repair. Pick Quick Repair and hit Repair.
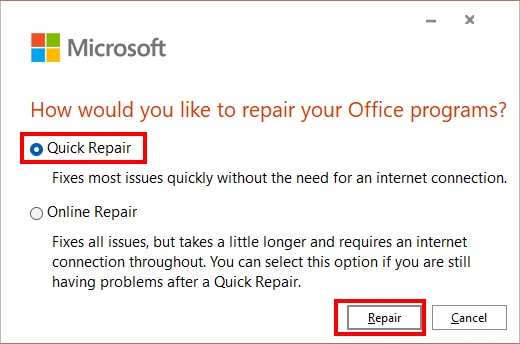
- Again, click on Repair to confirm.
