Whether you want to save a copy of an important email or reuse a draft to send to several people, you can do both by creating duplicate emails.
If you are using the Outlook desktop version on Windows, you can use the Ctrl + C/Ctrl + V shortcut to quickly copy/paste and create a duplicate email. However, this doesn’t work on all Outlook versions.
In this article, we go through various other ways to duplicate one or more emails to a different folder and send personalized emails to multiple recipients.
Using the Copy to Folder Option
Outlook already contains a built-in option called “Copy to Folder” to copy an entire email into a different folder.
The good thing is it’s available across all platforms— Windows, Mac, and web.
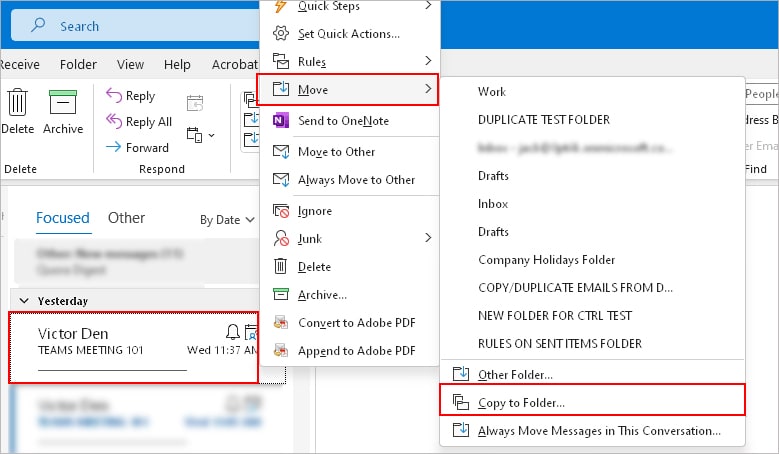
- Open Outlook and select the Inbox tab in the top left corner.
- Select the message (s) you want to copy/duplicate inside the Draft or other preferred folder.
- Then, right-click and select Move > Copy to Folder option. You can also access the same option under the Home tab.
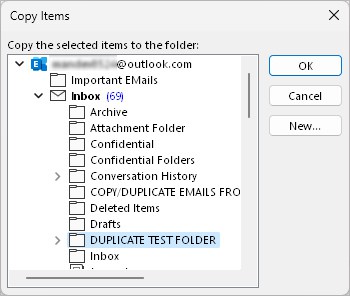
- On the next prompt, select the folder where you want to store a copy of the selected email. Or, click New to create a new folder and select it.
Using Mail Merge
In case, you are trying to duplicate one of the draft emails to make a few changes and send it to other people, consider using the Mail merge feature.
It generates multiple emails while automatically changing the fields like name, address, company name, etc for each recipient.
As a result, you can send multiple personalized emails without even having to manually create duplicate emails and make changes for each one of them.
However, note that you need to have the Microsoft Word app installed on your system.
- Copy the draft message from Outlook and paste it into a new Microsoft Word document.
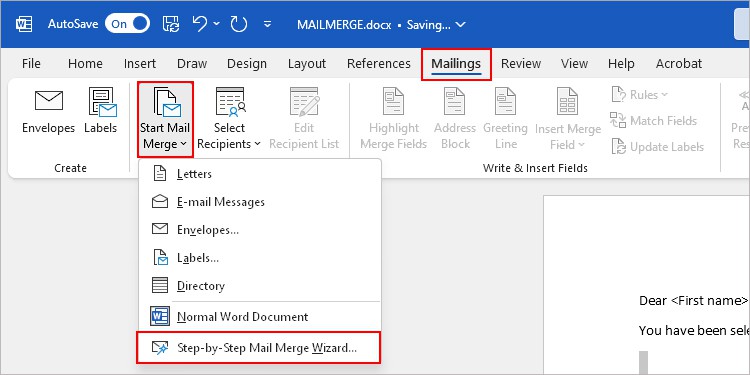
- Under the Mailings tab, click Start Mail Merge and select the Step-by-Step-Mail Merge Wizard option.
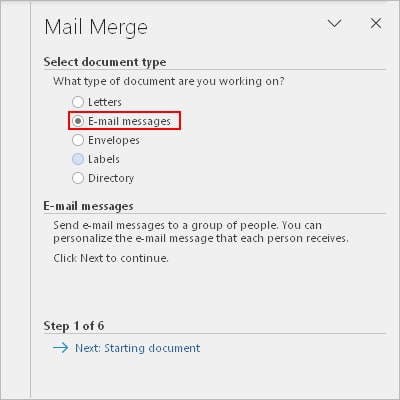
- Once Mail Merge appears on the sidebar, select the Email messages option and click Next: Starting document.
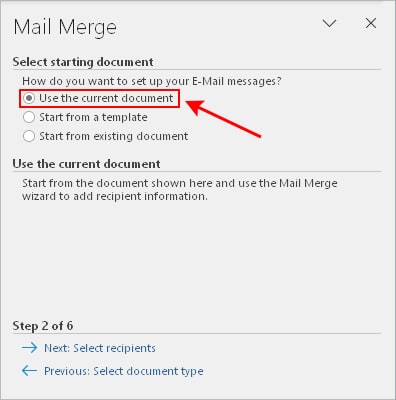
- Then, select Use current document under the Select starting document section and click Next: Select recipients.
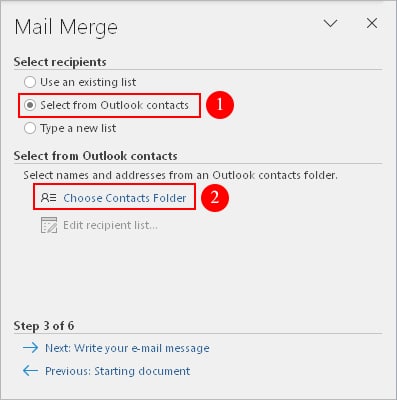
- Under Select recipients, choose the Select from Outlook contacts option. Below it, click Choose Contacts Folder.
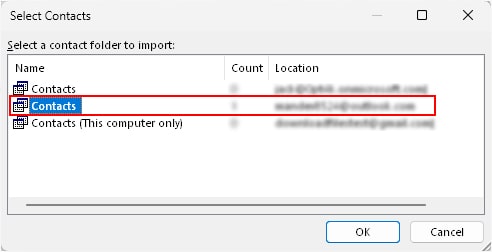
- On the Select contacts prompt, choose the contacts folder that contains the recipients to whom you are trying to send the message and click OK.
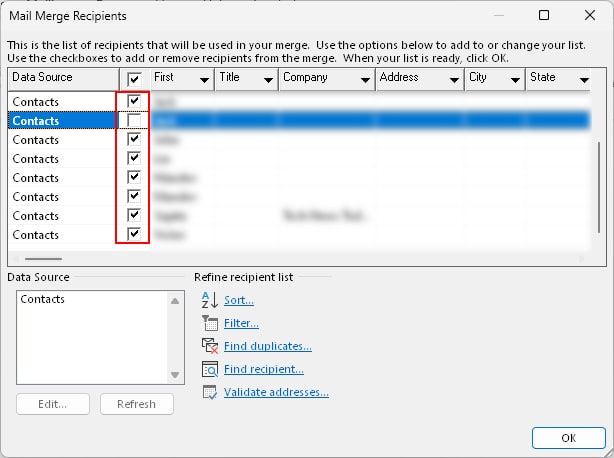
- Next, enable only the checkbox next to the contacts to whom you want to send the message.
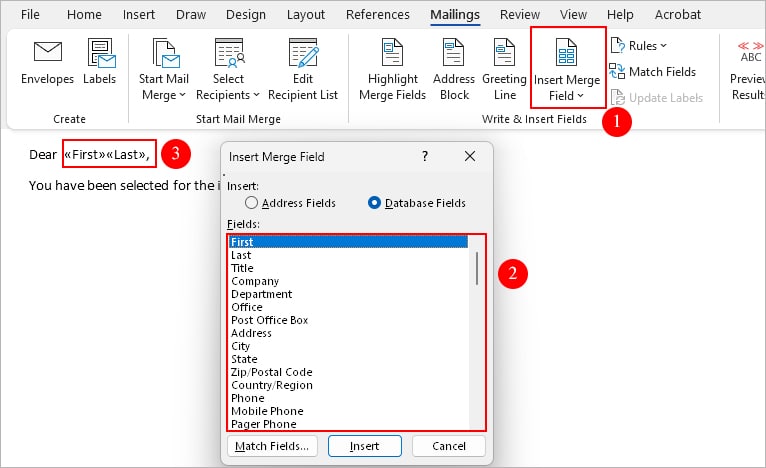
- Select Insert Merge Fields and replace the text fields unique for each recipient like their names, phone numbers, addresses, etc with the respective merge fields option.
- Under Preview your email messages section, click the double-arrow icon to preview the email with each recipient.
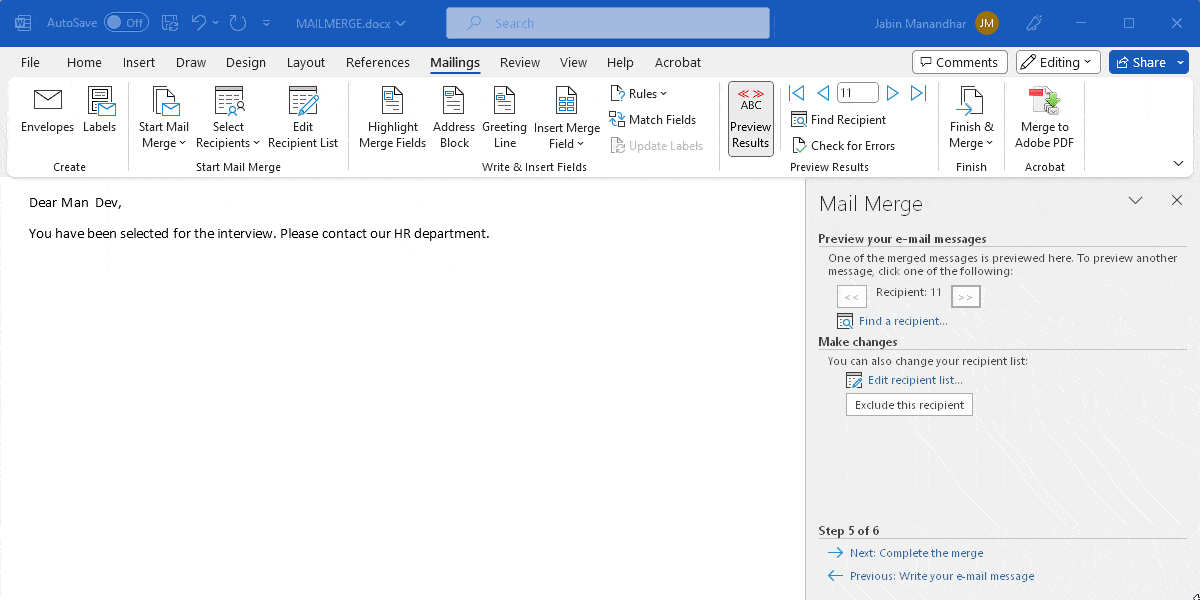
- When done, click Next: Complete the merge.
- Then, click Electronic Mail under the Merge section to start the mail merge.
- On the next prompt, make sure you have selected the Email_Addres option next to the To field and HTML for the Mail format.
- Wait for Microsoft Word to generate and send personalized emails on Outlook.
Create a Rule
With an Outlook rule, you can quickly select multiple emails that match specific criteria and save a copy to the specified folder.
Also, you can leave the rule turned on to let Outlook automatically duplicate all the future incoming/outgoing emails matching your specific criteria.
- Open the Outlook app.
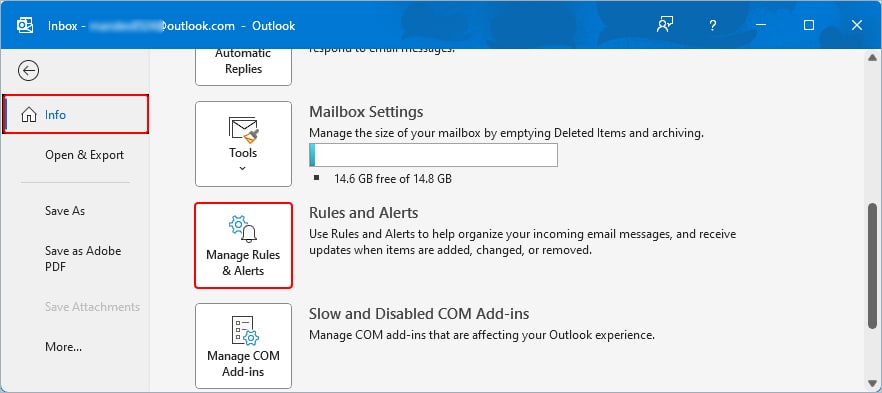
- Select the File > Info and click Manage Rules & Alerts.
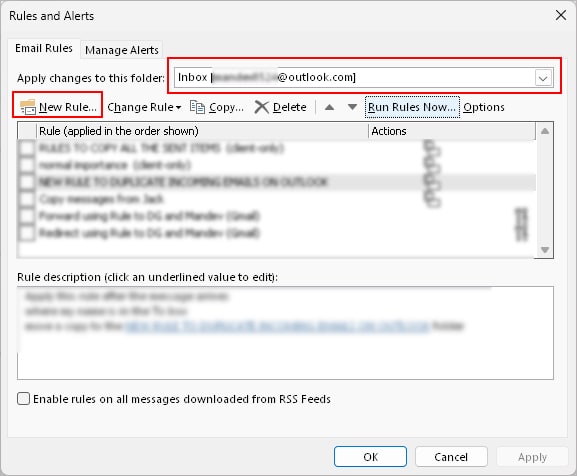
- On the Rules and Alerts window, click New Rule. If you have multiple Outlook accounts, select the one where you want to create the rule.
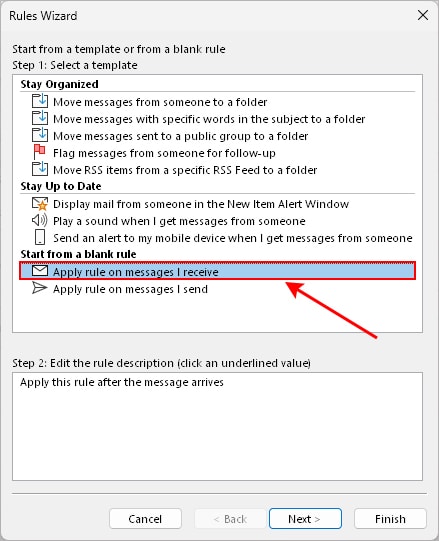
- Next, select the Apply rule on messages I receive option. This rule will apply to every incoming message.
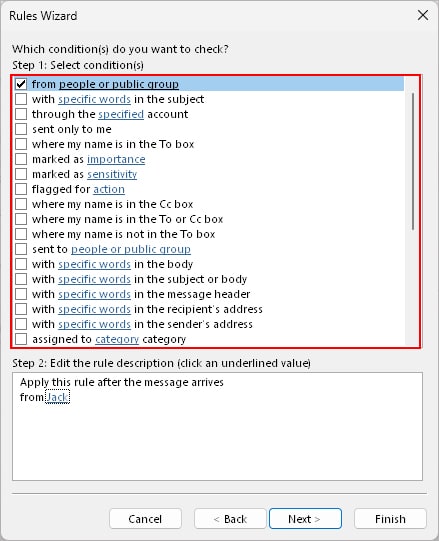
- Select the conditions that match your specific criteria such as emails from a specific email, emails containing specific words, etc.
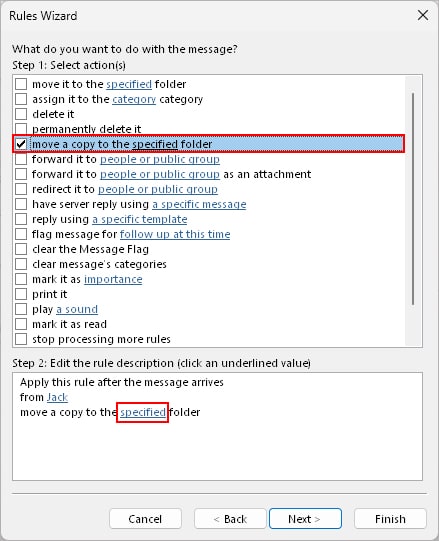
- Enable the checkbox next to move a copy to the specified folder action. Click Specified and select the preferred folder.
- Select exception conditions to exclude certain types of emails from this rule. If not required, click Next to skip it.
- Provide a name for the rule.
- Under Step 2, enable the Run this rule now on messages already in “Inbox” checkbox.
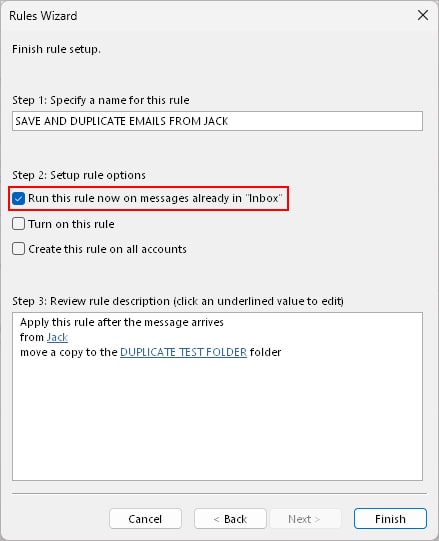
- When done, click Finish.
- Click Apply and OK.