To be honest, a spreadsheet grid has always reminded me of an empty calendar! You can easily insert a calendar in Excel using a macro code. This code, however, is not supported in Google Sheets. Instead, Google has simplified the task even further by providing access to extensions or add-ons that will automate the task for you!
If you don’t want to use third-party extensions, you can manually create a calendar on Google Sheets.
In this article, I have covered both methods of creating a calendar in Google Sheets, manually or using an extension.
Automate Creating a Calendar in Google Sheets
Google made it very simple to use extensions in Sheets. To insert a calendar into Google Sheets, simply add the Calendar Templates extension to your program. Then, simply enter the year to generate a calendar.
Step 1: Add the Extension
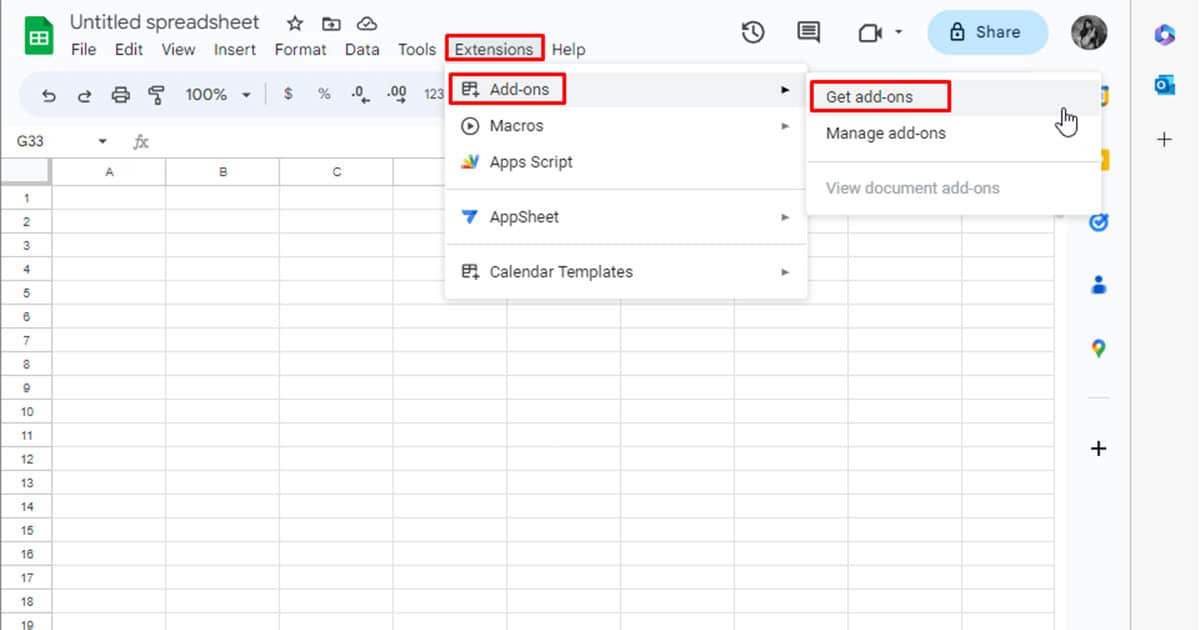
- From the menubar, select Extensions/ Add-ons.
- Select Add-ons > Get add-ons.
- Click on the magnifying glass icon.
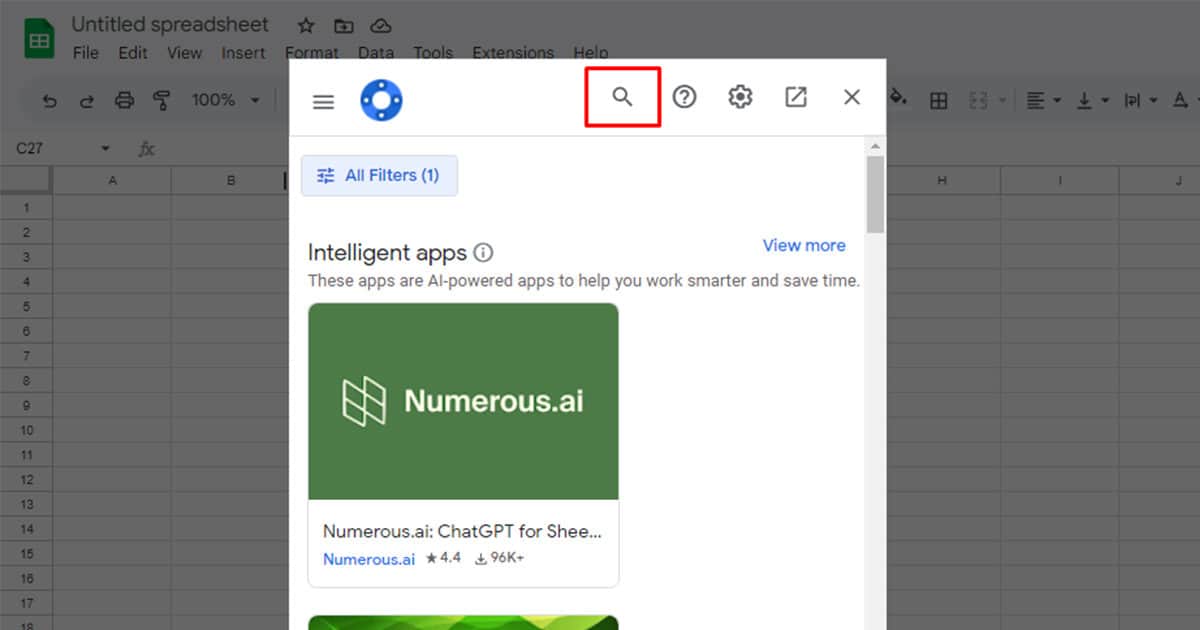
- Enter Calendar Templates and hit Enter.

- Select the first option > Install.
- Confirm your action by selecting Continue.
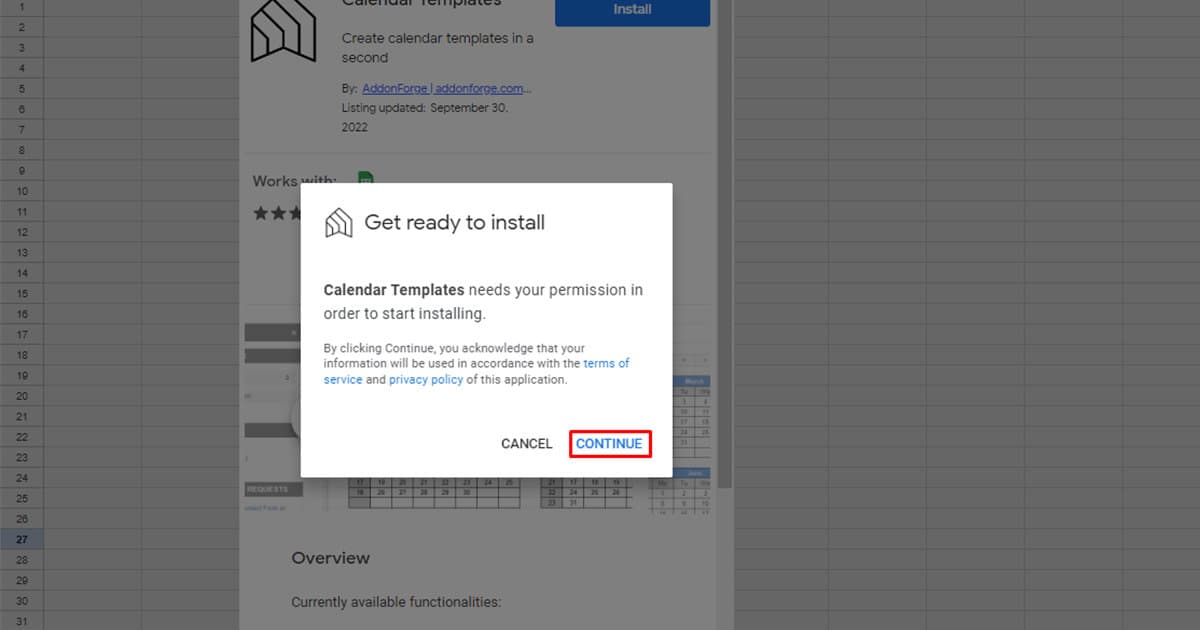
- Log in to your account and Allow access.
Step 2: Use the Extension to Create a Calendar
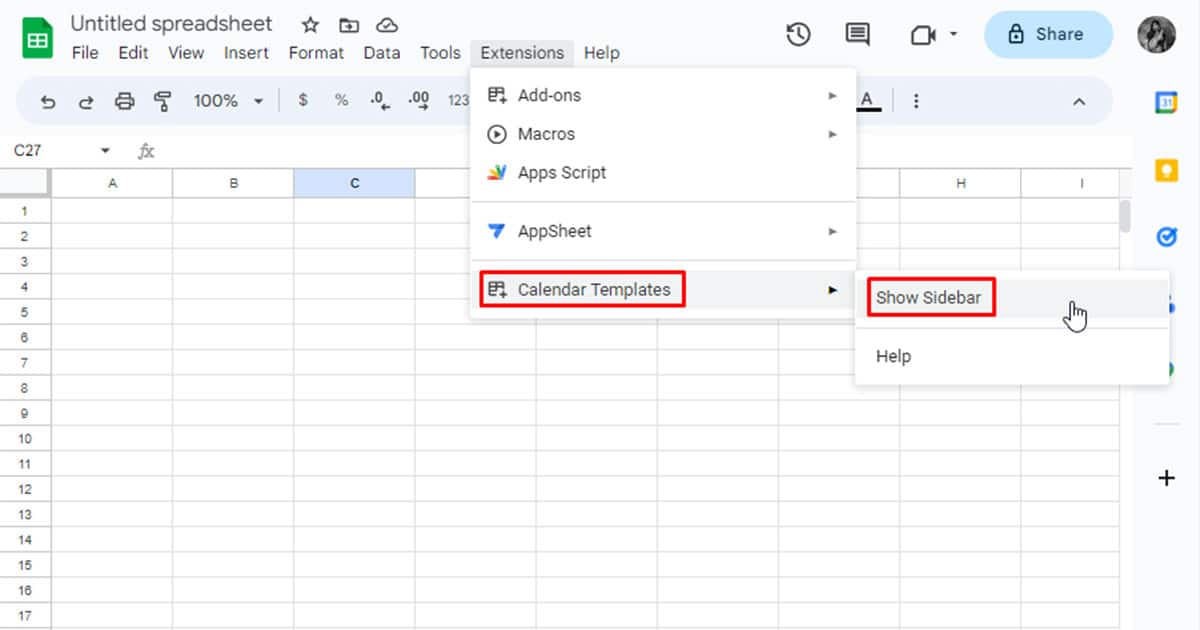
- Select Extensions/Add-ons from the menubar.
- Choose Calendar Templates > Show Sidebar.
- Under CREATE CALENDAR, choose the year.
- Select the Create Calendar button.

Manually Create a Calendar in Google Sheets
You can also manually insert a calendar in Google Sheets. Sheets uses smart AI to automatically fill a piece of information, like numbers, days in a week, and so on. You can use this feature to save time while creating your calendar.
Here’s a little information that might be helpful while creating your calendar in Sheets:
| Name of the Month | Number of Days |
| January | 31 |
| February | 28/29 |
| March | 31 |
| April | 30 |
| May | 31 |
| June | 30 |
| July | 31 |
| August | 31 |
| September | 30 |
| October | 31 |
| November | 30 |
| December | 31 |
Step 1: Fill in the Days of the Week
Let’s suppose that we’re creating a calendar for the month of January 2023.
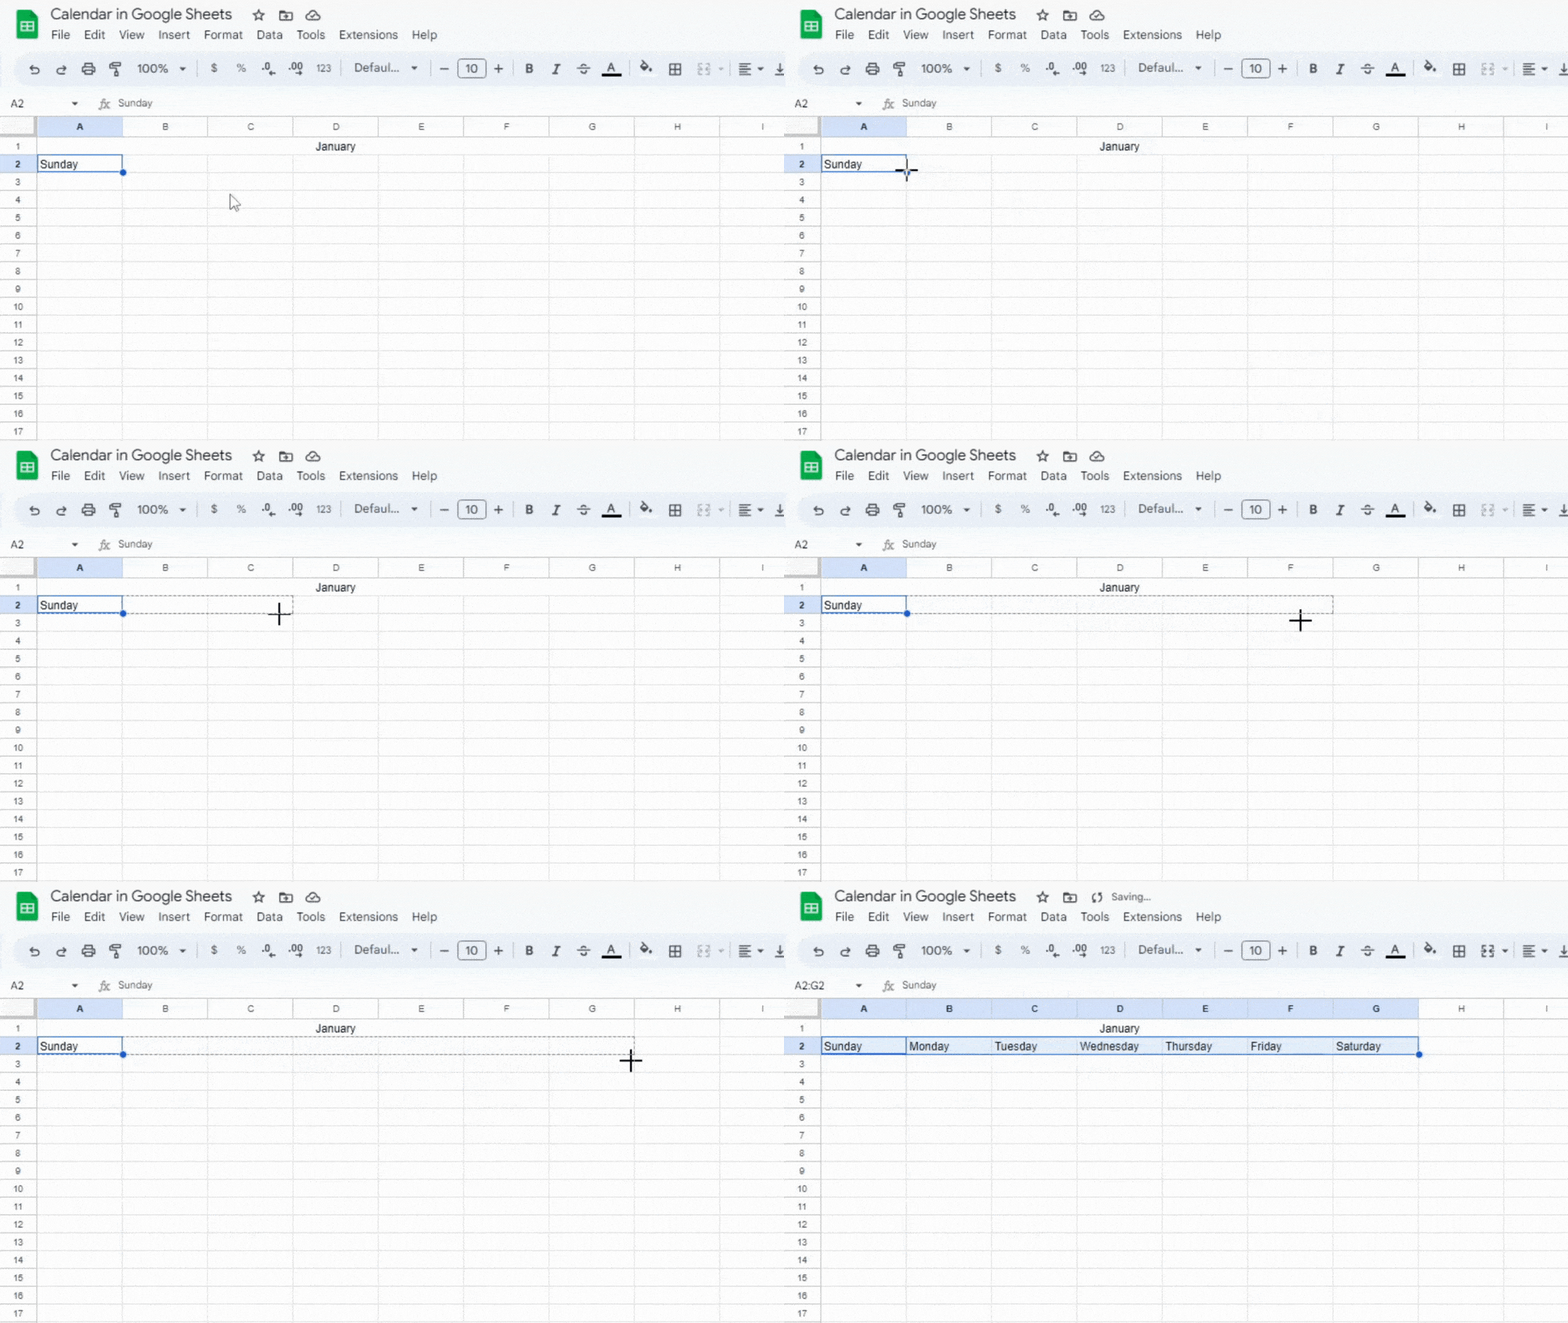
We will begin with the seven days of the week on top. In cell A2, we typed Sunday and then used autofill to fill in the rest of the days. Simply select the first cell and move your cursor to the bottom right. When the cursor changes to a +, drag it six cells to the right.
Step 2: Enter the Dates
After you enter the name of the days, it’s time to fill in the dates in the calendar.
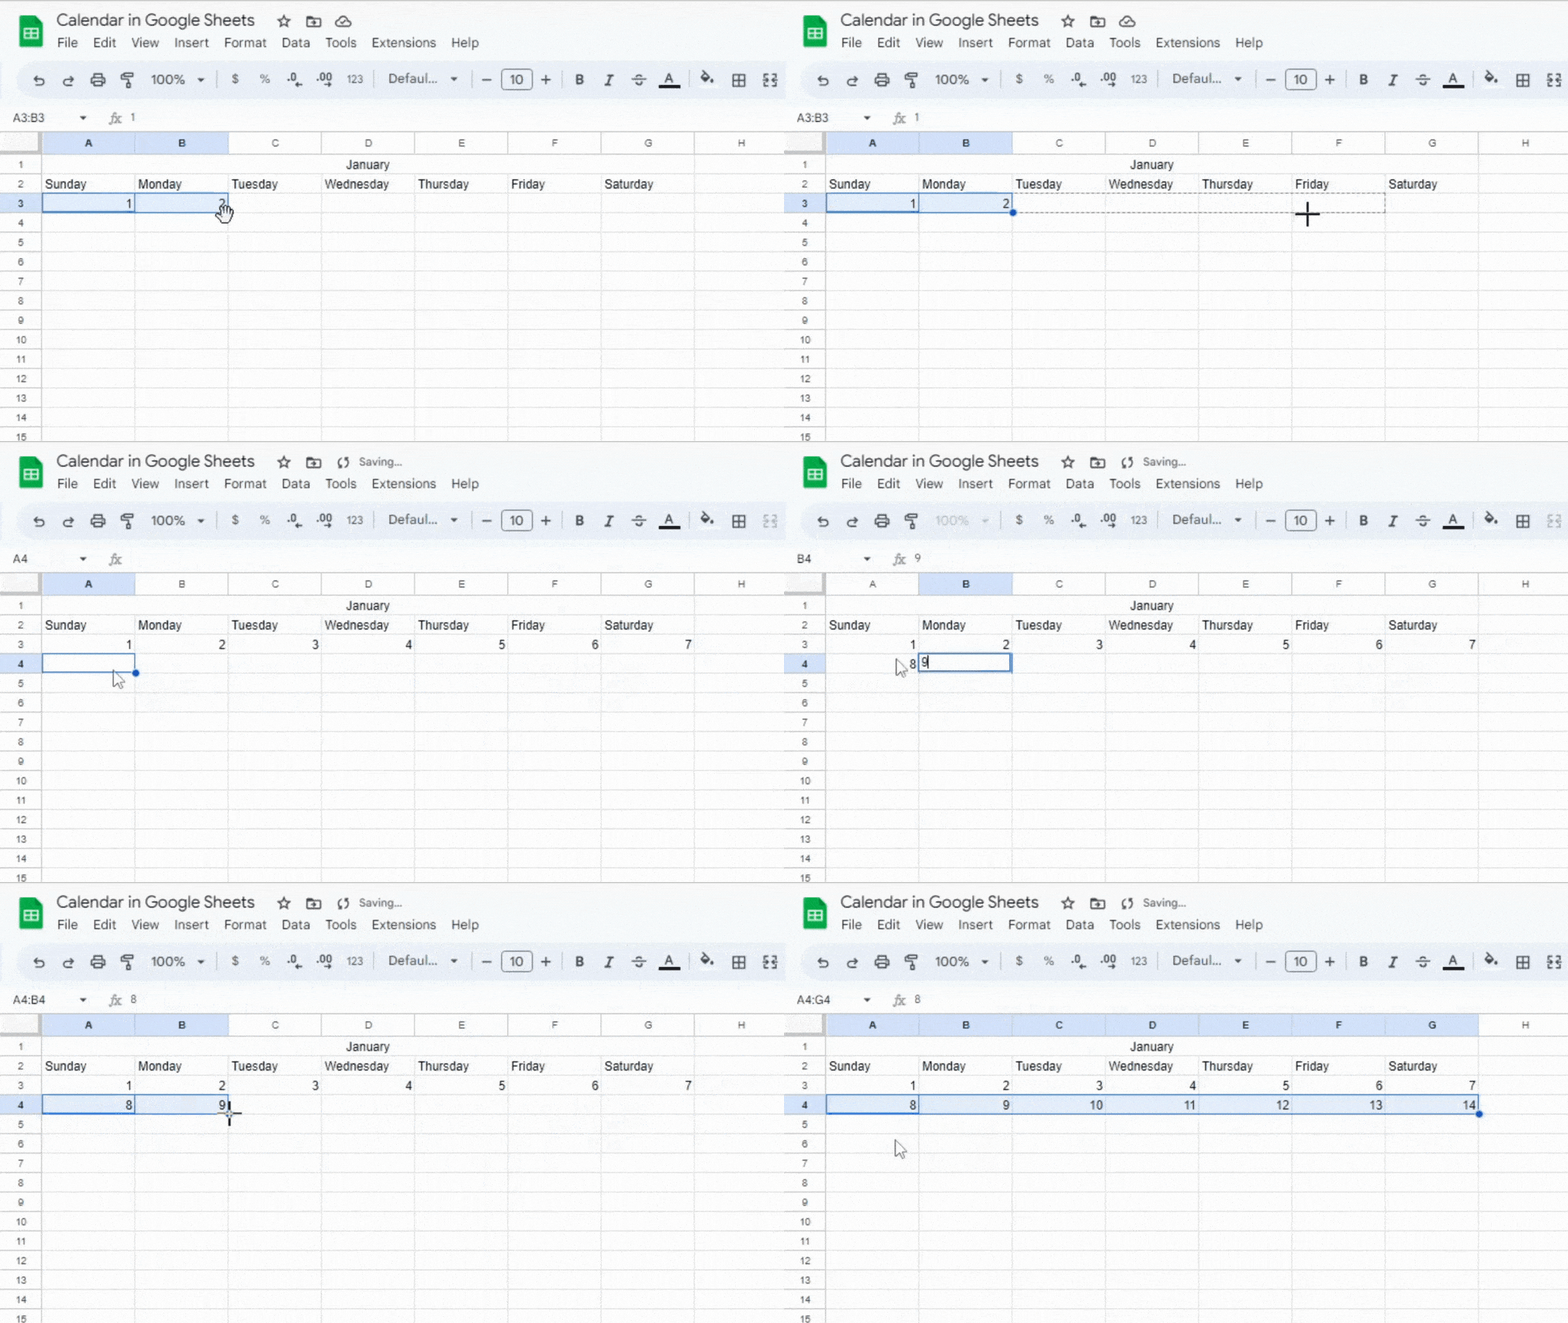
You can again use autofill to automatically enter the dates. First, enter 1 and 2 in cells A3 and B3. Then, select both cells and fill the rest of the cells till G3. Repeat this for the rest of the cells.
Step 3: Format Cells
It is always a good idea to format your cells to make your calendar look more like a calendar.
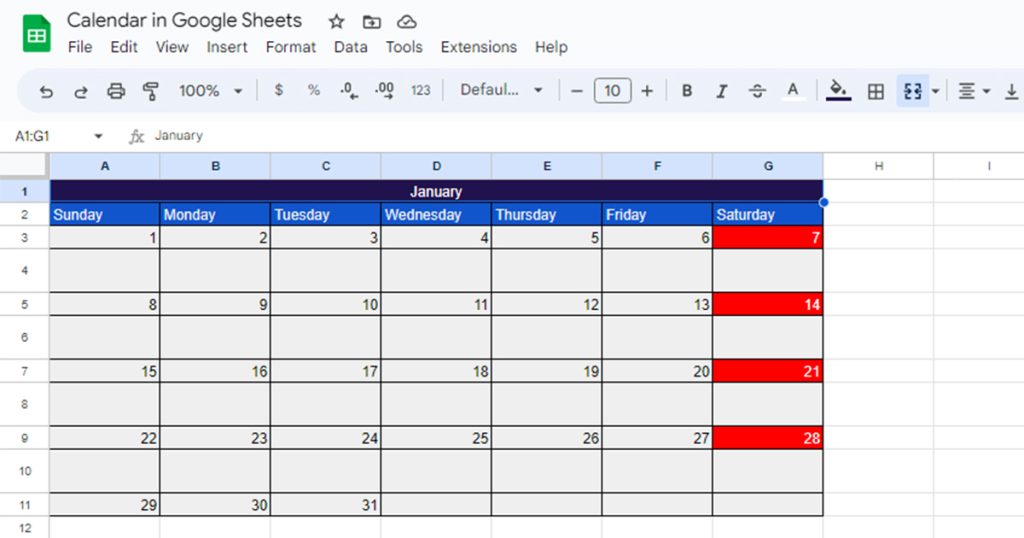
For starters, you can shade the headers to make them look a bit more distinct. Similarly, highlight the cells that represent holidays with the color red. I also added a new row between each row and increased their width.
Formatting cells isn’t a one size fits all. Therefore, I suggest you look around and try each formatting option to customize your calendar however you wish.