If you travel too often, especially out of the country, managing events like meeting in Outlook can get quite difficult. That’s because the time zone of your location may not match the attendee’s time zone.
For instance, morning in your location could be nighttime for an attendee at a completely different location. Similarly, if you have clients or co-workers attending from a different part of the globe, you wouldn’t want them to miss out on the scheduled meeting just because the meeting starts at an inconvenient time.
While you could look up the time zone manually and determine the correct time zone for all the attendees, it’s really an unnecessary burden.
Instead, you’re way better off using the built-in time zone option in Outlook which automatically makes sure that both the meeting organizer and the guest are on the same page (time zone) whenever the event takes place.
On Desktop (Microsoft 365)
- Launch the Outlook app.
- Click the File menu at the top.
- Click Options in the bottom left corner.

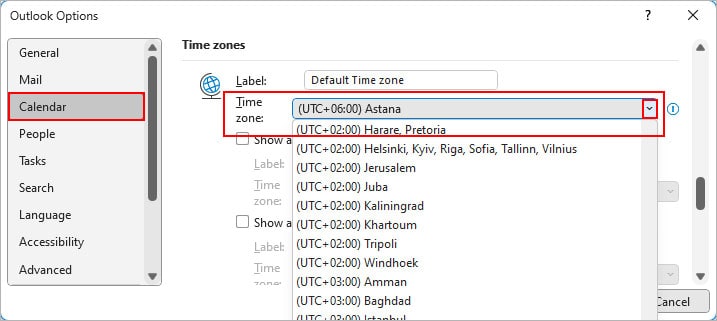
- Select the Calendar option from the sidebar.
- Now, in the right pane, scroll down to the Time zones section.
- Choose the preferred time zone next to the Time zone field.
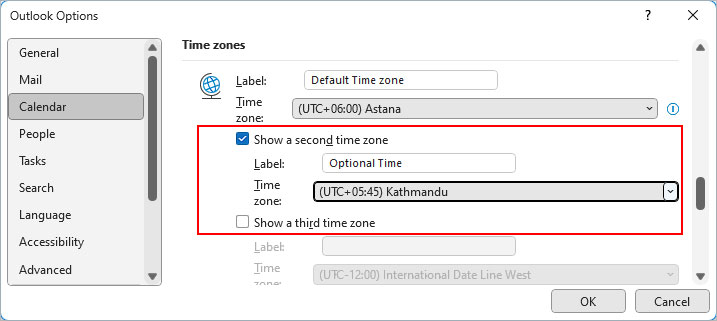
- To add and display multiple time zones on the calendar, enable the Show a second time zone and Show a third time zone checkboxes and choose the respective time zones.
On Outlook Web
- Sign in to your Outlook account.
- Click the gear icon in the top right corner of the window.
- Then, select View all Outlook settings.

- Next, select Calendar > View.
- Scroll to the Time zones section and choose a preferred time zone under the Display my calendar in time zone section.
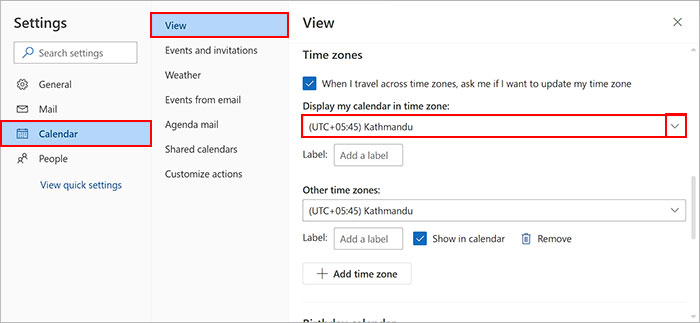
- Alternatively, enable the When I travel across time zones, ask me if I want to update my time zone so that whenever you travel across a different time zone, Outlook prompts you to use its time zone.
- To add multiple time zones, click Add time zone. Then, search for or type the name of the city.

- Click Save.
On Mac
- Launch the Outlook app.
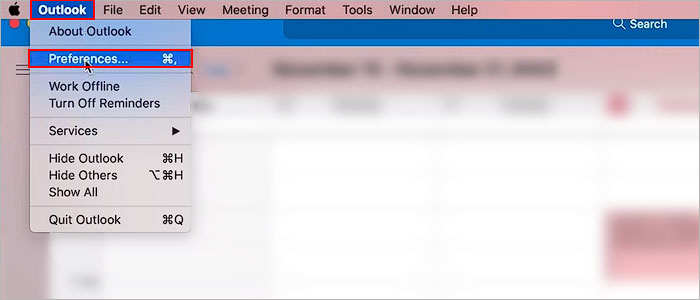
- Click Outlook in the top left corner and select Preferences. You can find it next to the Apple logo.
- Then, select Calendar.

- Now, expand the dropdown next to the Default time zone for new events field and choose your preferred time zone.

- To add another optional time zone, select the Show second time zone in Day and Week view and Show third time zone in Day and Week view checkboxes.
- Then, select the respective time zones for the second and third clocks.
How to Change the Time Zone in an Outlook Meeting?
Whenever you send a meeting invite to other people, Outlook uses the default time zone set on your Outlook calendar settings. However, you can specifically choose to use a different time zone while creating the meeting in the first place.
Here’s how to do it.
- Open the Outlook app.
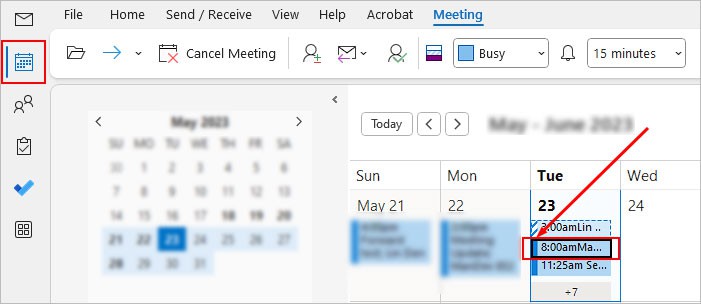
- Click the Calendar icon. Look for it in the sidebar or the bottom left corner.
- Select a meeting date on the calendar. Then, click New Meeting under the Home tab.

- Alternatively, you can select a future meeting and choose to change its time zone settings.
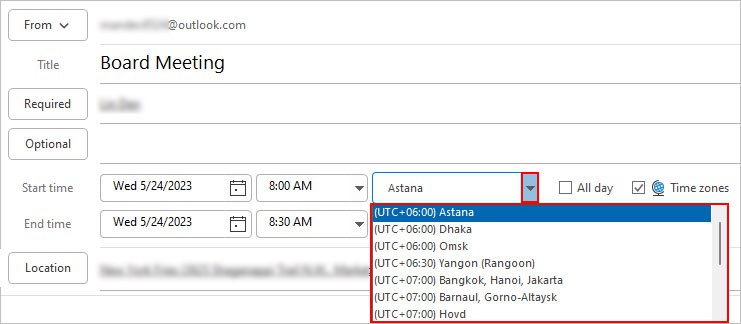
- Now, after entering other meeting details, select the Time zones checkbox.

- Then, click the dropdown next to the time or globe icon and choose the appropriate time zone.
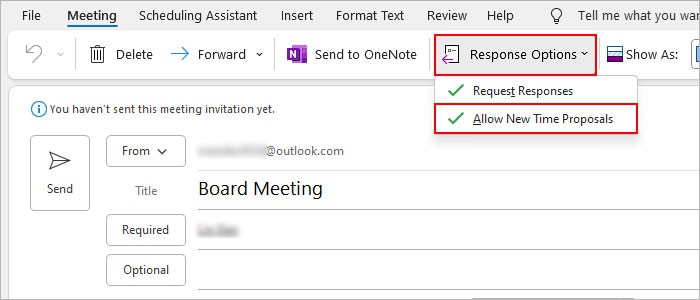
- Additionally, enable the Allow New Time Proposals option to let the attendees request you to change the meeting schedule.
- Click Send or Send Update when done.
Related Questions
Why Is My Time Zone Changing Automatically in Outlook?
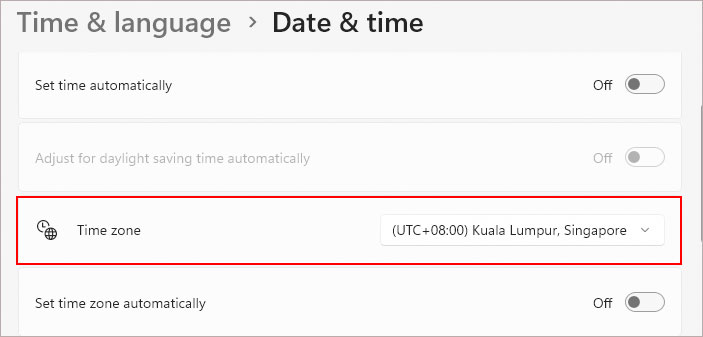
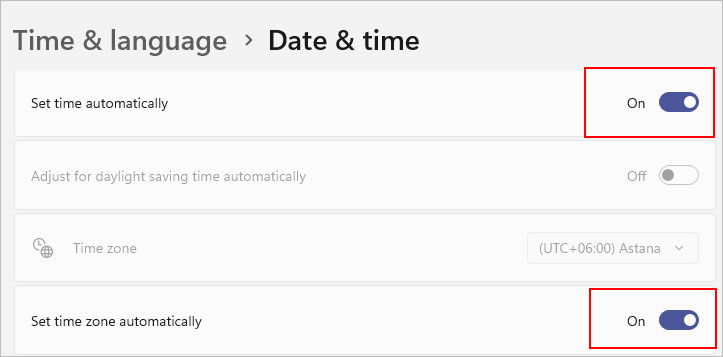
Any time zone you set in Outlook calendar preferences will automatically change the Windows system’s original time settings and vice-versa. So, to stop changing time zone automatically,
- Open the Settings app (Windows + I).
- Search for “
date and time” in the search bar.
- Then, toggle off the Set time automatically and Set time zone automatically buttons.
- Choose the preferred time zone you want to set for the Outlook app.
