Password protection is the best way to prevent other users from accessing your confidential workbooks in Excel. However, in order to protect these workbooks in the long term, you must make sure to change the password more often. Your Excel file can be at risk if too many people in your team know the password.
In Excel, there’s no default button to change the Password for the protected sheet or workbook. However, you could remove the current password and set a new one. To do so, Excel will prompt you to enter the current Password. If you know the pin code, unprotecting the workbook is a cakewalk.
But, it might not be the same case for all. Some of might you have forgotten the password. Or, maybe the ex-employee didn’t share the password with you. Could you unprotect the sheet without the password?
How to Change or Remove Password on Excel?
You can change or remove passwords from different levels of workbook protection. Here, we’ve compiled the steps for Excel Sheets, Workbooks, or Files.
From Excel Sheet
From Worksheet Tab
- Right-click on the password-protected worksheet and pick Unprotect Sheet.
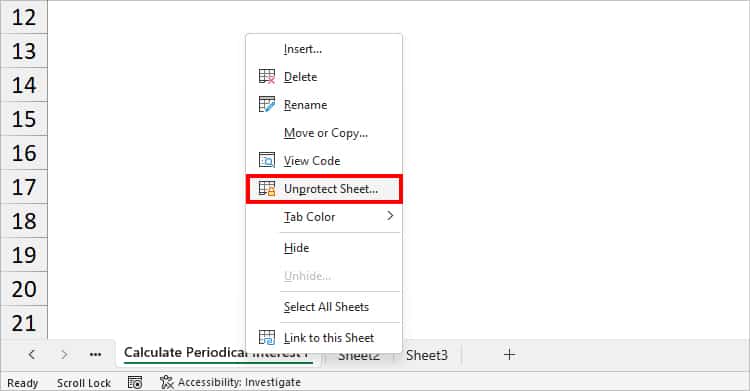
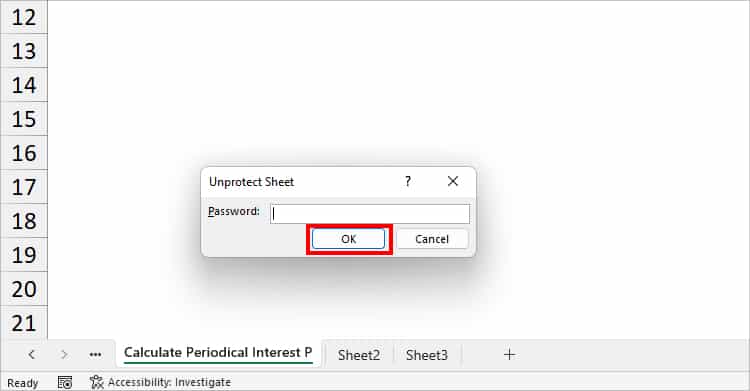
- On the Unprotect Sheet window, enter the Current password and hit OK.
From Review Tab
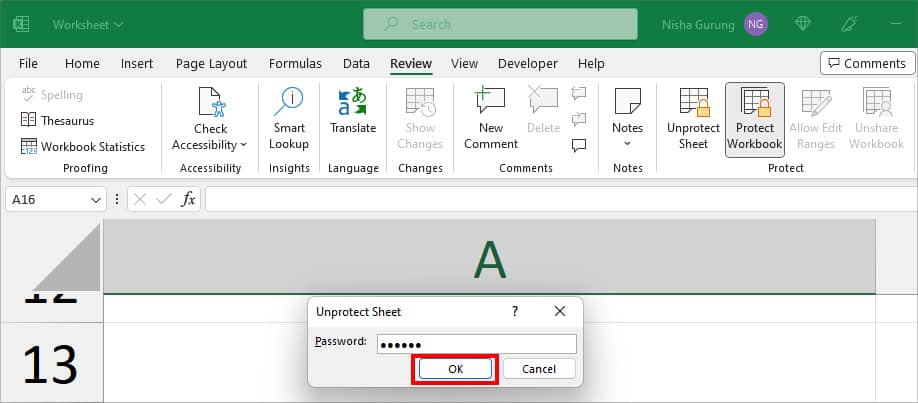
- On your sheet, go to Review Tab.
- From the Protect section, click on Unprotect Sheet.

- On Unprotect Sheet window, enter your Password and click OK.
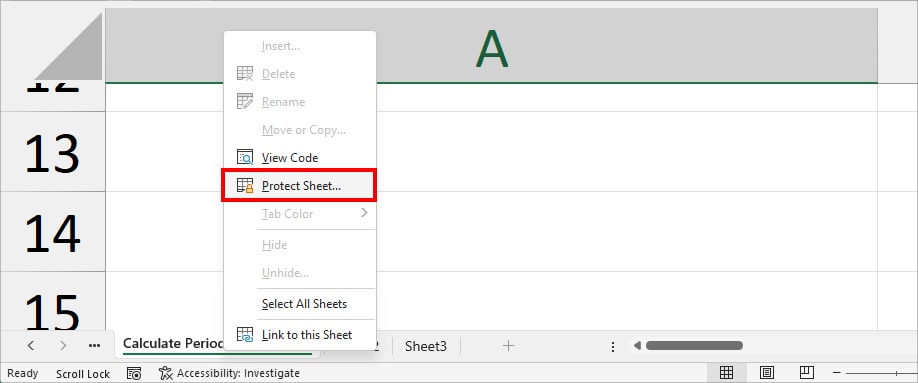
Now, your Sheet is unprotected. If you want to set a different password, you could Protect Sheet from the Worksheet tab or Review. Here, we have compiled the steps for Worksheet Tab.
- Right-click on the Sheet Tab and choose Protect Sheet.
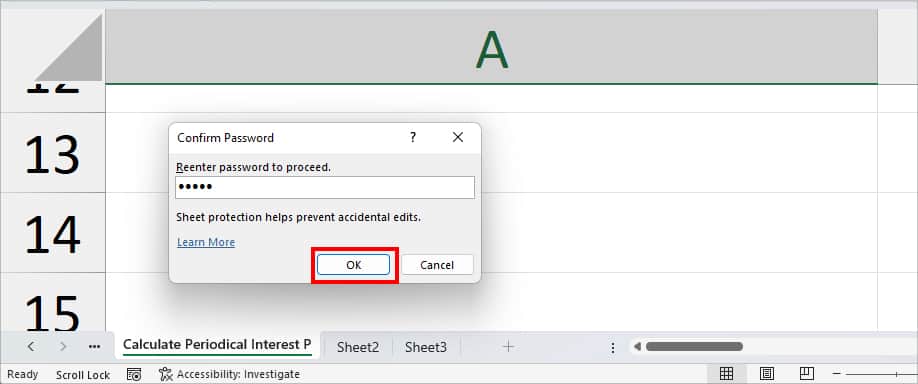
- Below the Password to unprotect the sheet, enter a Pin. Choose options for Allow users to and hit OK.

- On Confirm Password, re-enter the Password. Once done, hit OK to confirm.
From Excel Workbook
If you’ve protected your Excel Workbook, there are two ways to remove the password. You could unprotect the workbook from the Review Tab or the Excel Info Tab. Follow whichever method seems easier for you.
From Review Tab
- On your password-protected workbook, navigate to the Review Tab.
- From the Protect group, click on Protect Workbook.

- On the Unprotect Workbook, type in the Password and click OK.

From Info
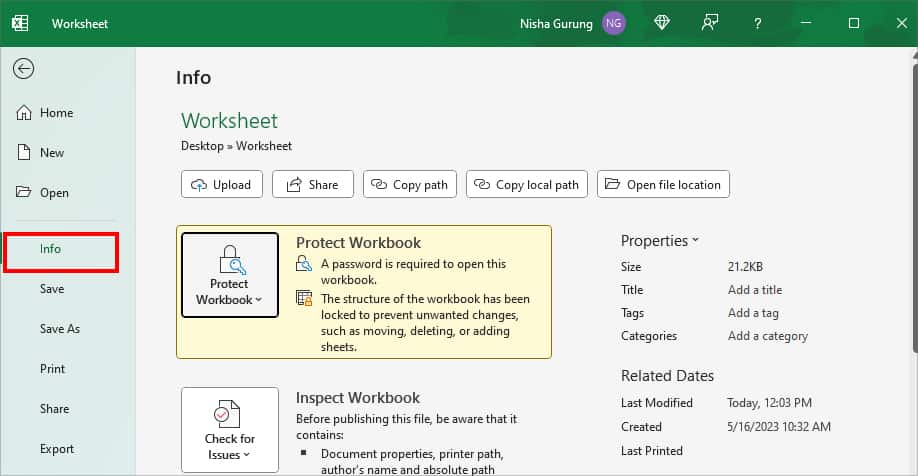
- On your workbook, go to File Tab.
- Click on Info Category in the left panel.

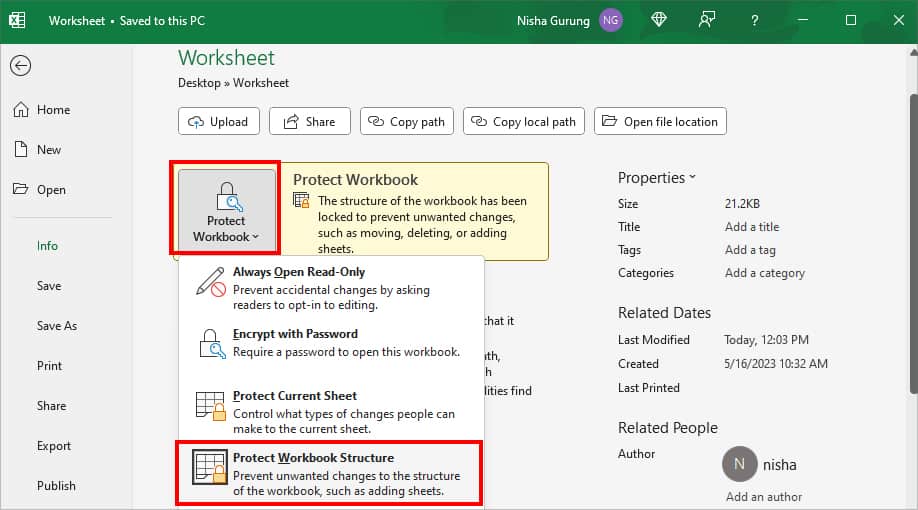
- If your workbook is protected, you can see a Yellow highlight in the Protect Workbook menu. Click on Protect Workbook > Protect Workbook Structure.
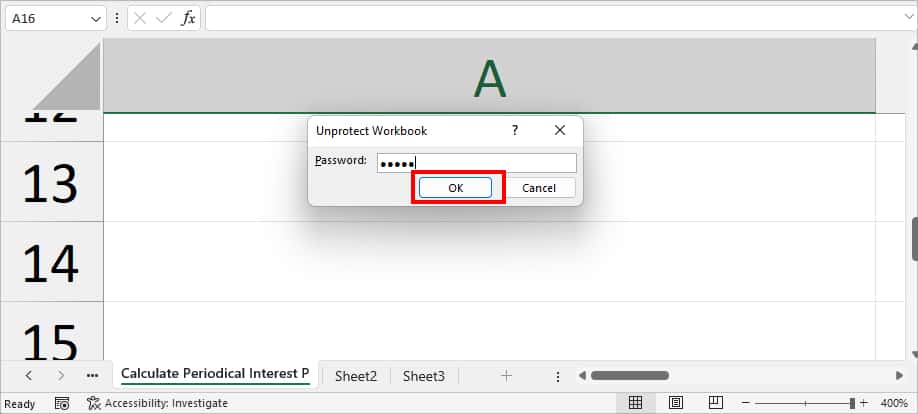
- Enter your Old Password and click OK.
Your Workbook will be unprotected. If you wish to keep a new password, head to Review Tab. Click on Protect Workbook. Enter and re-enter the password to set it.
From Excel File
Excel’s File level of protection encrypts the contents of an entire file. Here, the password is set from Excel’s Info option or General Options in the Save As window. Unlike the other types of password protection, here, you can actually change the password.
From Info Tab
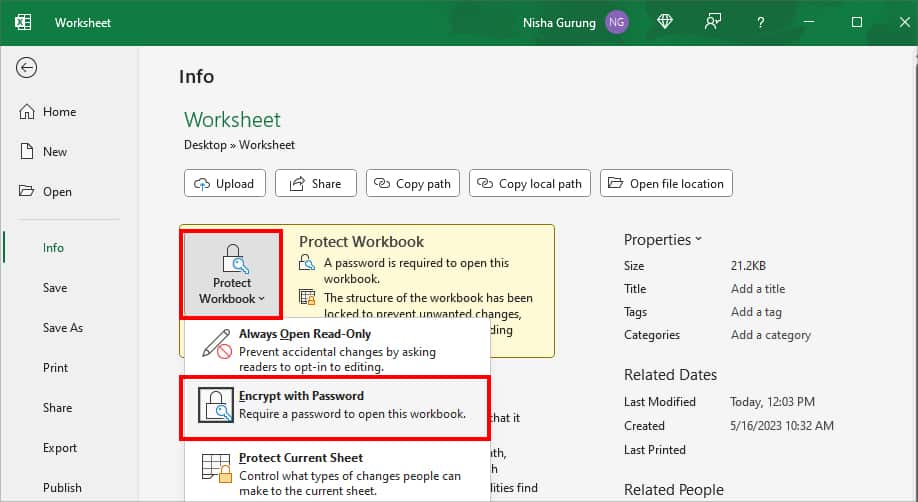
- On your Excel workbook, head to the File Tab.
- Click on the Info category in the left panel.
- Expand the Protect Workbook menu > Encrypt with Password.
- Do one of the following:
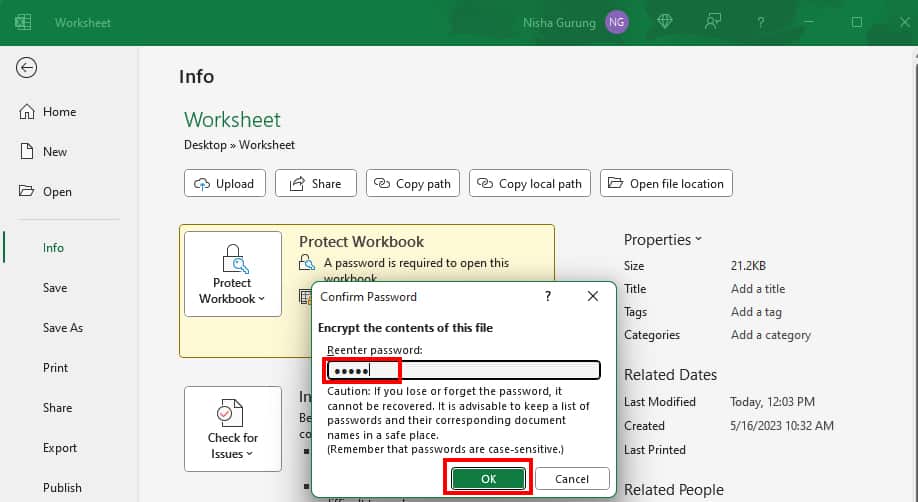
- To remove the password, erase the Old password from the field and hit OK.
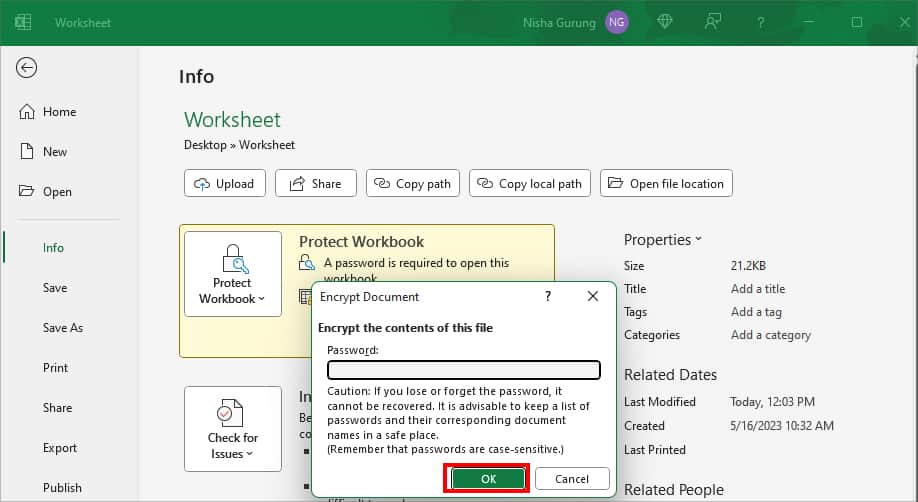
- To change the password, delete the Old password from the box and enter a New Password. Once done, hit OK. On Confirm Password window, re-enter your New Password and click OK.
From General Options
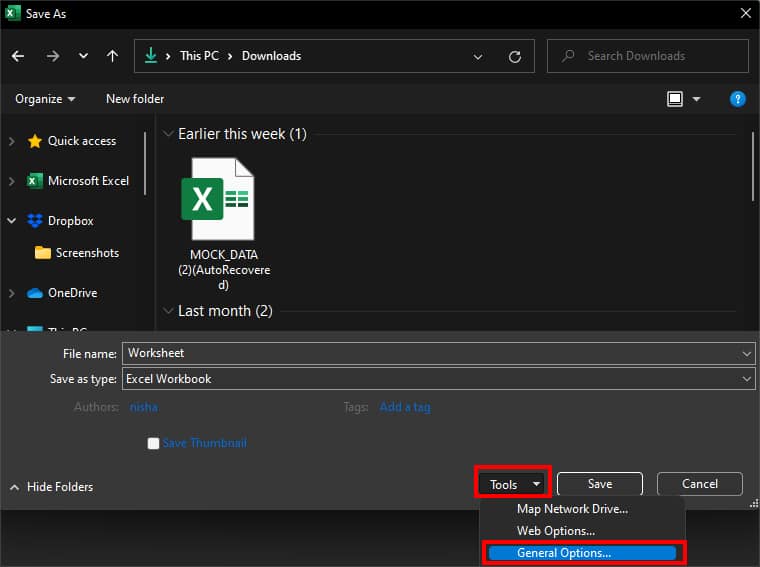
- Launch your Excel workbook and head to File.
- Click on Save As. Then, below Other locations, select Browse.
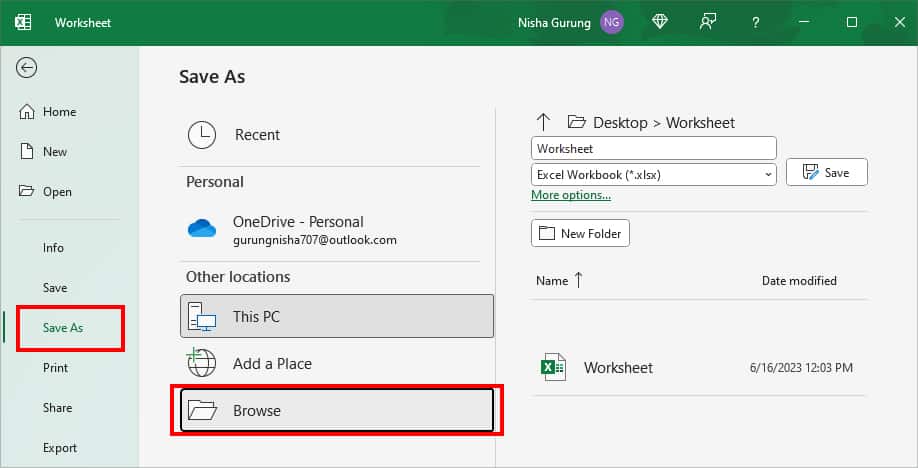
- On Save As window, click on Tools > General Options.
- Do one of the following on Password to open menu.
- To remove the password, delete the Old password and hit OK.
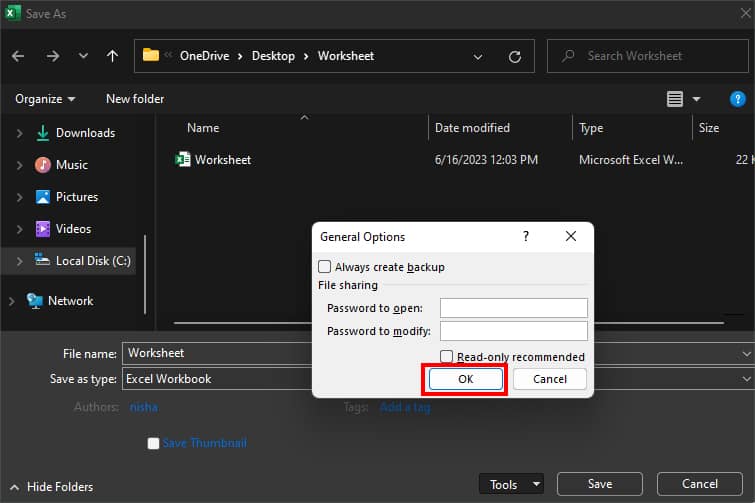
- To change the password, first, erase your Current Password. Enter a New password and hit OK. Re-type your New Password to confirm. Once done, hit OK.

- To remove the password, delete the Old password and hit OK.
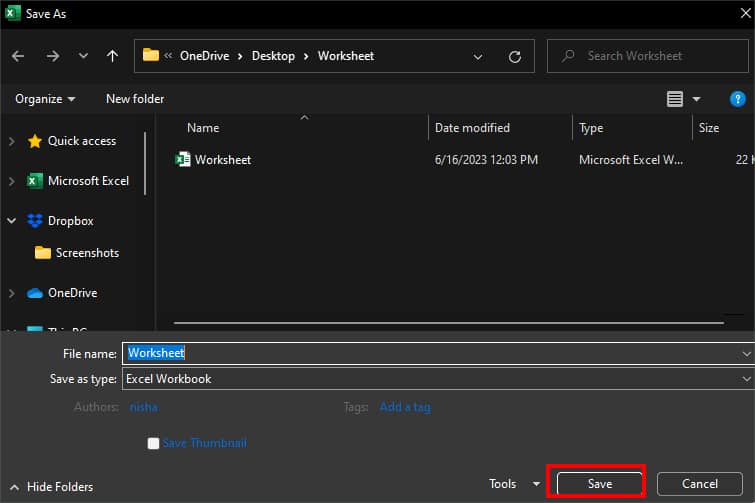
- Finally, on Save As window, click Save.
How to Remove Password Without Password in Excel?
If you do not know your old password, there’s a way to unprotect the Sheet. Here, we will first create a ZIP file of Excel. Then, erase the Sheet Protection in the XML sheet.
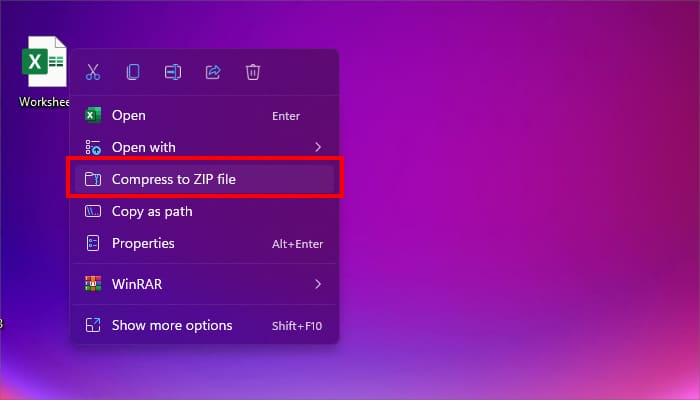
Step 1: Create a ZIP File
- Locate your Excel file on your PC.
- Right-click on it and enter Ctrl + C to copy it. Then, press down Ctrl + V to paste the file.
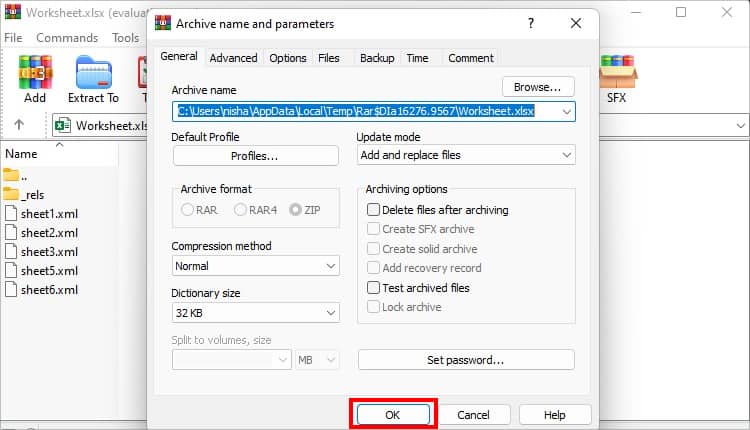
- Now, right-click on your Original file and pick Compress to ZIP file.
Step 2: Open ZIP File
- Open the Excel ZIP file.
- On WinRAR, select Excel file and hit View option. (For other tools, simply, click on the Excel file to open it.)
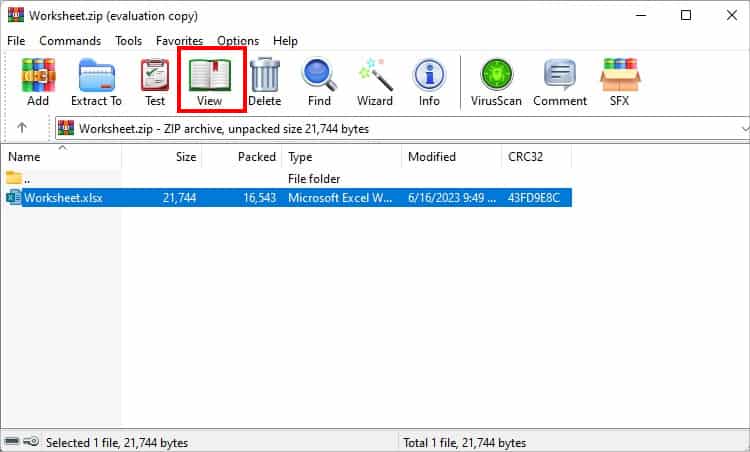
- Open xl folder.
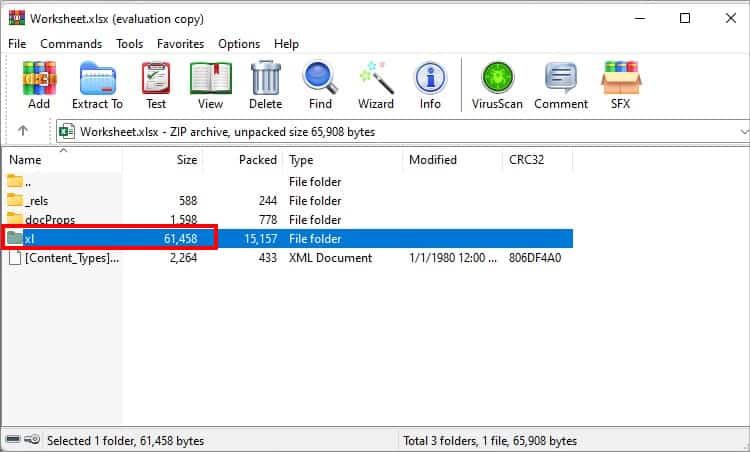
- Click on worksheets folder.
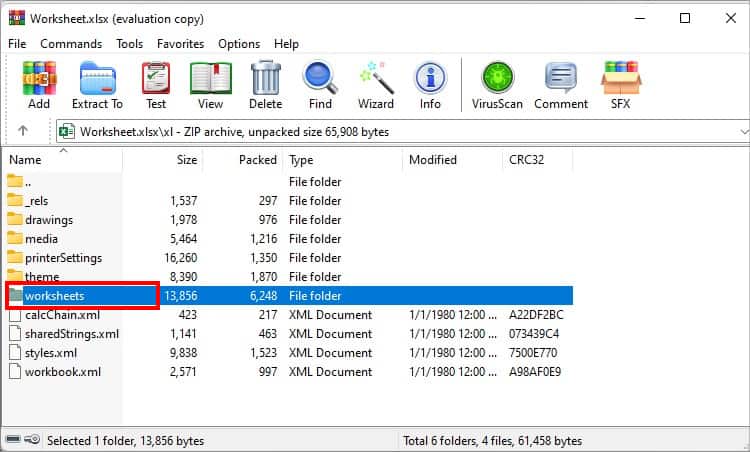
- You should see different sheets of files. From the lists, it’s hard to locate which sheet has password protection. So, to identify this, click on the Sheet XML file.
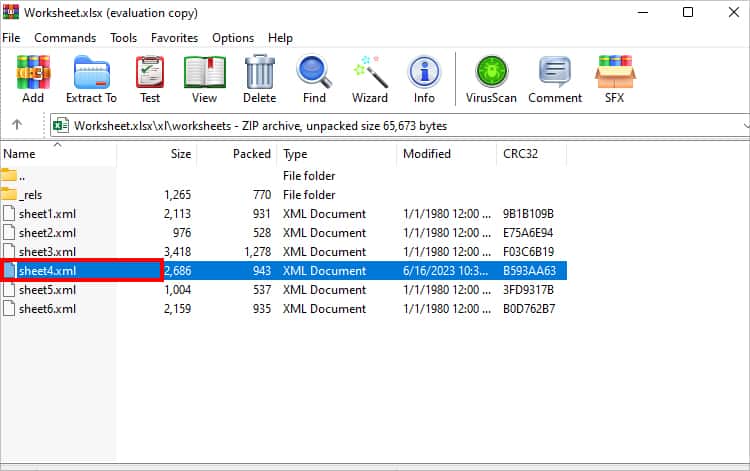
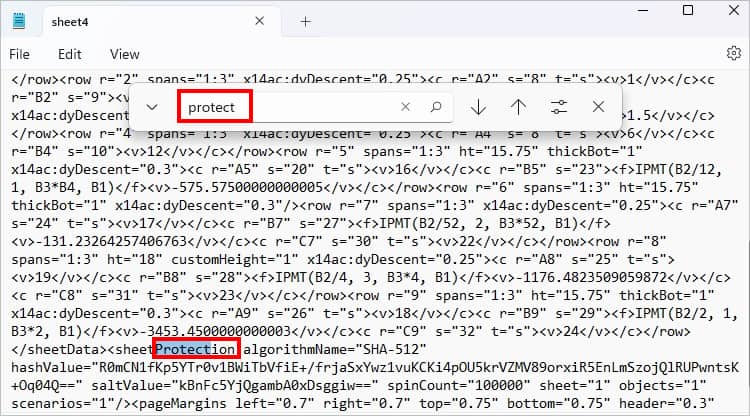
- Now, you’ll see an entire document tree of your XML file. Press down Ctrl + F to bring up the Find menu. Enter Protect in the search bar.

- If it shows the result, it means your sheet is protected. If the Find menu shows 0 results, your sheet does not have a password. In our case, Sheet 4 is password-protected.
- Drag the password-protected Sheet to your Desktop.
Step 3: Remove Password
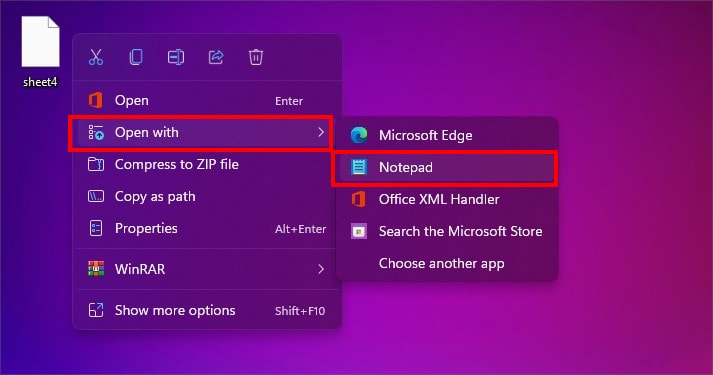
- Right-click on the Sheet file on your desktop and pick Open with > Notepad.
- Again, enter Ctrl + F to bring up the Find menu and enter Protect in the search bar.
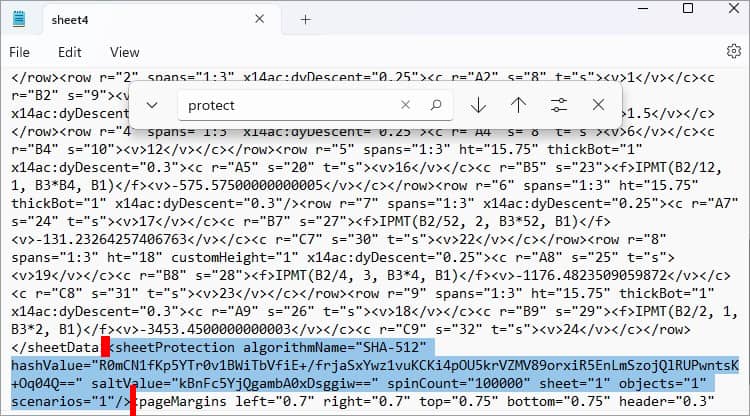
- Select the sentences starting from the <sheetProtection till the end of Angle Bracket. Press Backspace key to delete it.
- Close the Notepad window and hit Save.

Step 3: Launch the Excel File
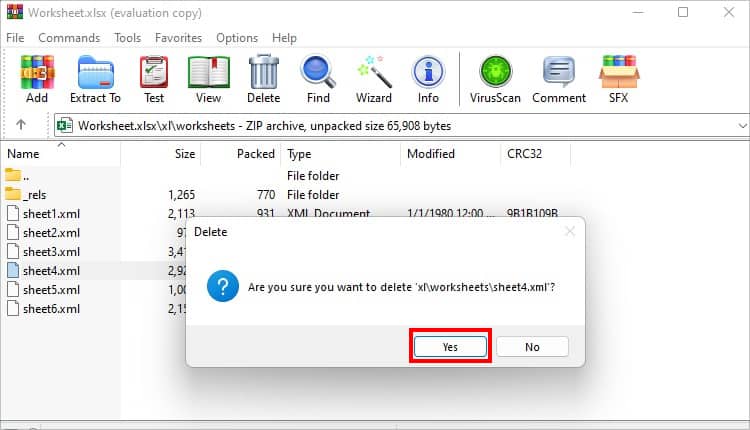
- Head back to the ZIP folder. Right-click on the Sheet and pick Delete Files.

- Pick Yes to delete the file in the prompt box.
- Now, drag the Sheet file you removed the password from the Desktop to the ZIP folder. Hit OK.
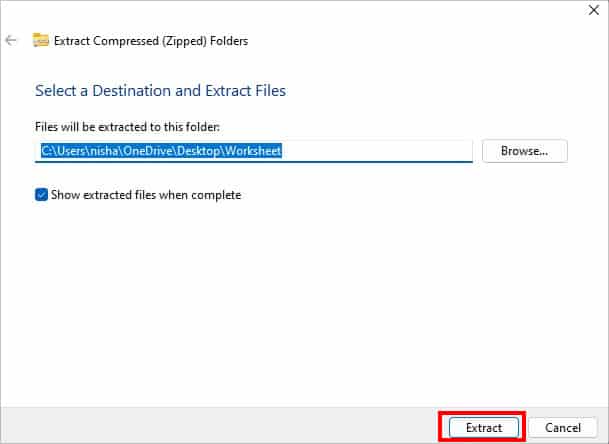
- Right-click on the Zipped Excel file and choose Extract All.

- On Extract Compressed (Zipped) Folders, set a destination and click Extract.
- Launch the Excel file. You will be able to edit the sheet now.