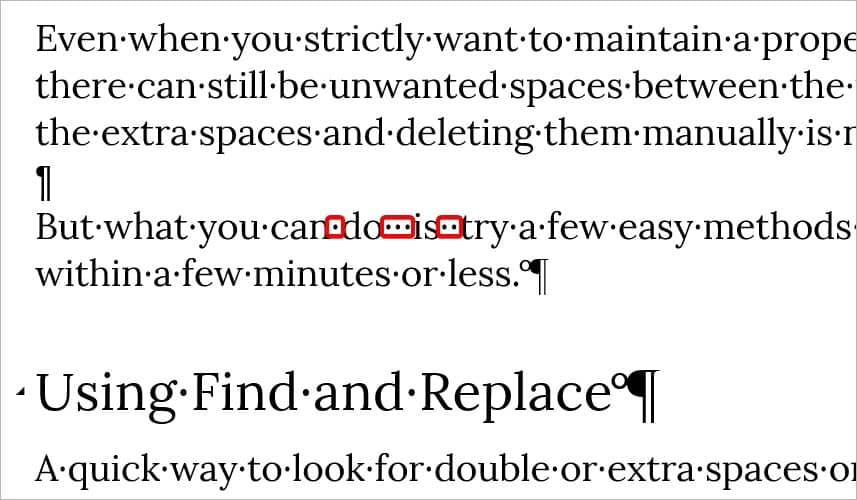
Even when you strictly want to maintain a proper formatting style on your document, there can still be unwanted spaces between the paragraphs. Adding to that, looking for all the extra spaces and deleting them manually is not the most optimal solution. But what you can do is try a few easy methods that can get rid of the additional spaces within a few minutes or less.
Using Find and Replace
A quick way to look for double or extra spaces on your paragraphs in MS Word is to use the convenient tool, Find and Replace. Using it, you can locate and then replace the characters with a single space or no space. Here’s how you can do it:
- Select the Home tab and click on the Replace icon on the right corner.
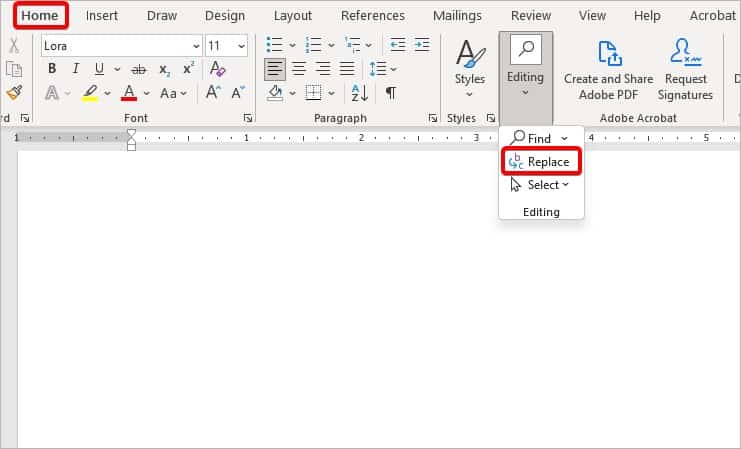
- A new window for Find and Replace will appear. Alternatively, you can also use the keyboard shortcut, CTRL key + H.
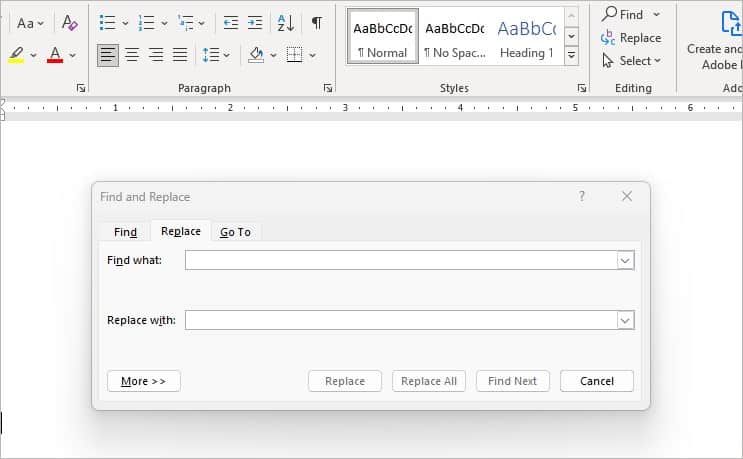
- In the first field for Find What, press the Spacebar two or more times. This will pinpoint all the spaces.
- In the second field for Replace With, don’t enter anything. Make sure it doesn’t even have a single space.
- Then, click on Replace All.
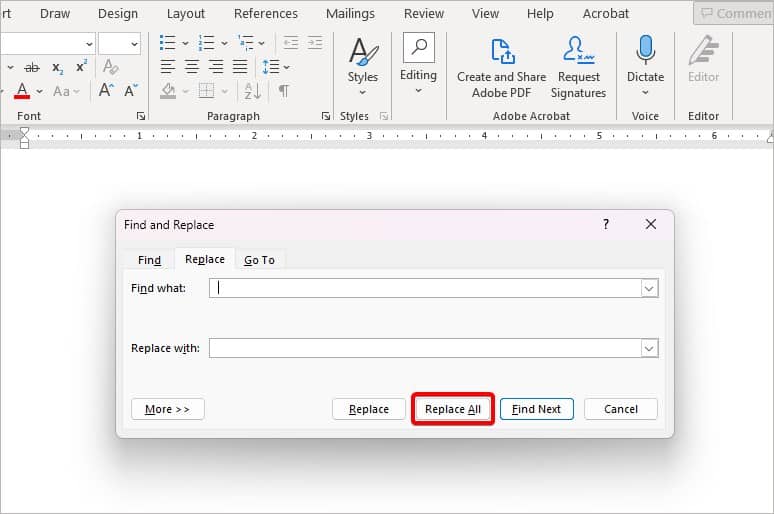
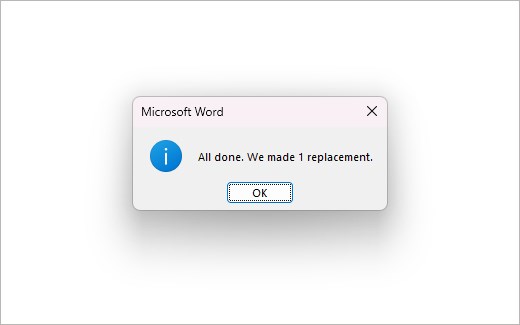
- Once it’s done, you’ll also get a pop-up message that states the exact number of successful replacements. Click on OK to exit.
Remove Paragraph Spacing
Regardless of which line spacing you have set on your document, Word can add its default paragraph spacing. So, you can make sure there’s no spacing available between your paragraphs. These are the steps you’ll need to follow:
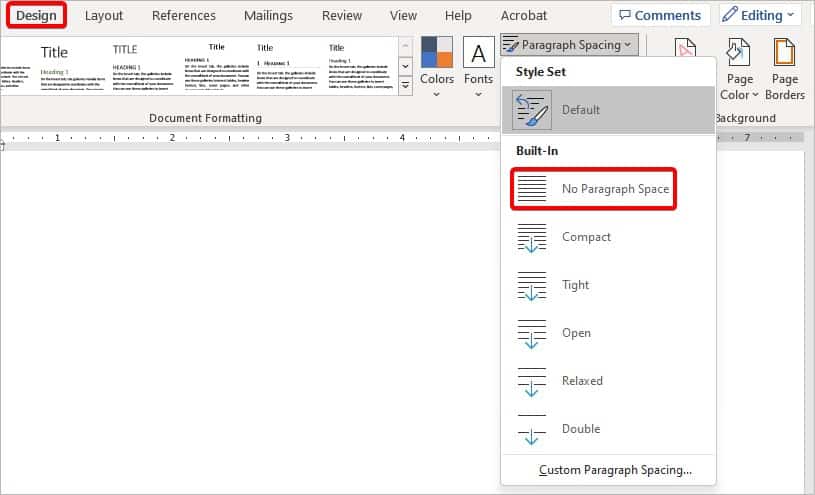
- Click on the Design tab and go to the Paragraph Spacing menu. From the list, select No Paragraph Space.
- If you only want to remove the spacing in one or a few selected ones, highlight the paragraph before applying the above settings.
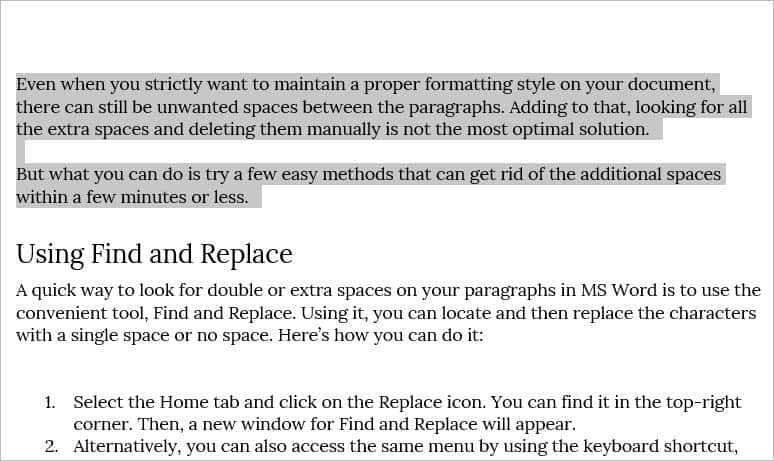
Now all your paragraphs will have a single spacing. This change will remain the same if your content has double-spaced paragraphs.
Set Custom Paragraph Spacing
If you still find that there are extra spaces between your paragraphs, you can manually set a custom paragraph spacing. You can adjust the pts to zero so that your paragraphs don’t have extra spaces and look clean. You can refer to the steps below:
- Click on the Design tab and go to Paragraph Spacing again.
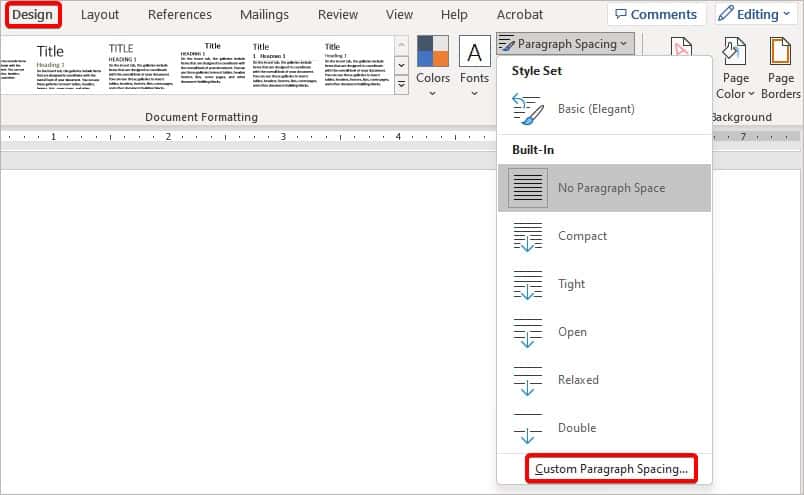
- At the bottom of the menu, click on Custom Paragraph Spacing.
- Make sure you’re on the Set Defaults tab.
- Then, navigate to the Paragraph Spacing section. Set both the Before and After fields to Zero pt.
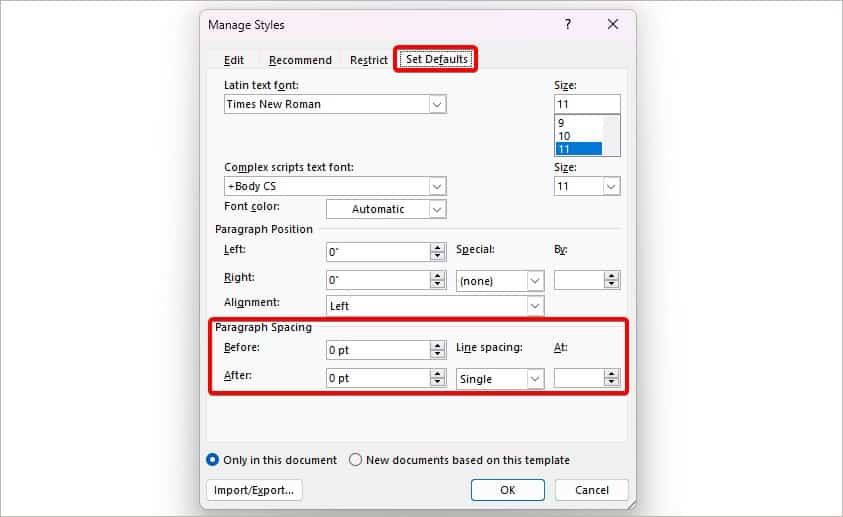
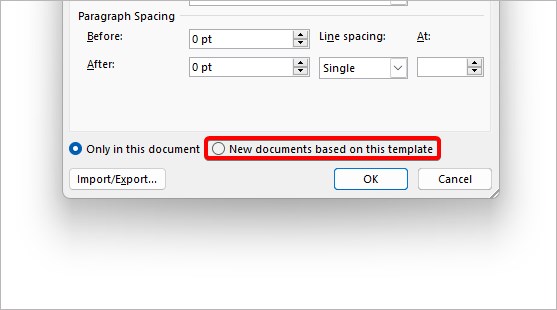
- To set this size as default , check the box New documents based on this template.
If you want to take additional steps to make sure your paragraph never has extra spaces, you can try this method:
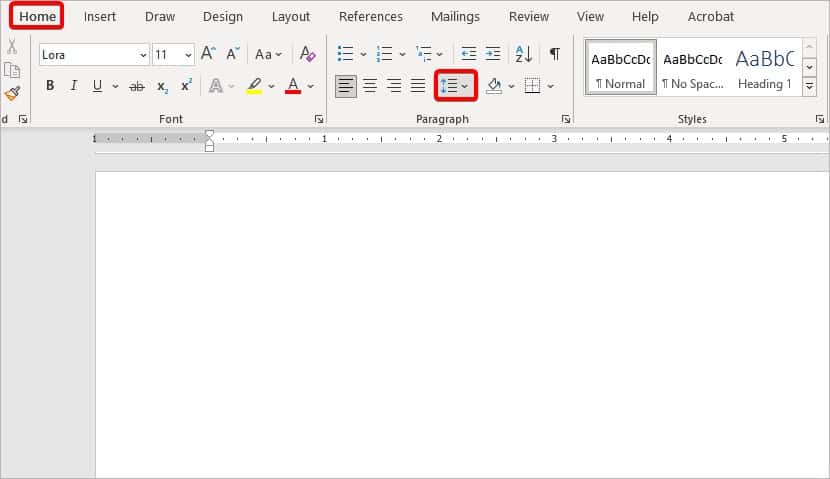
- Make sure you’re on the Home tab. Then, click on the Line and Paragraph Spacing menu. The icon has three horizontal lines with a double-edged arrow.
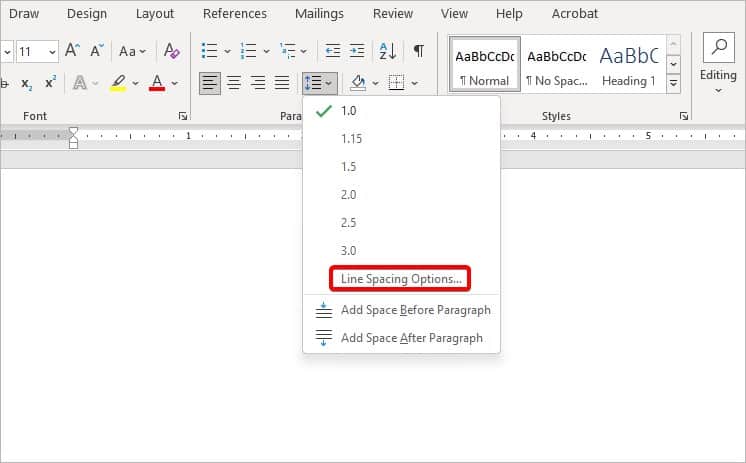
- Now, click on Line and Spacing options from the list.
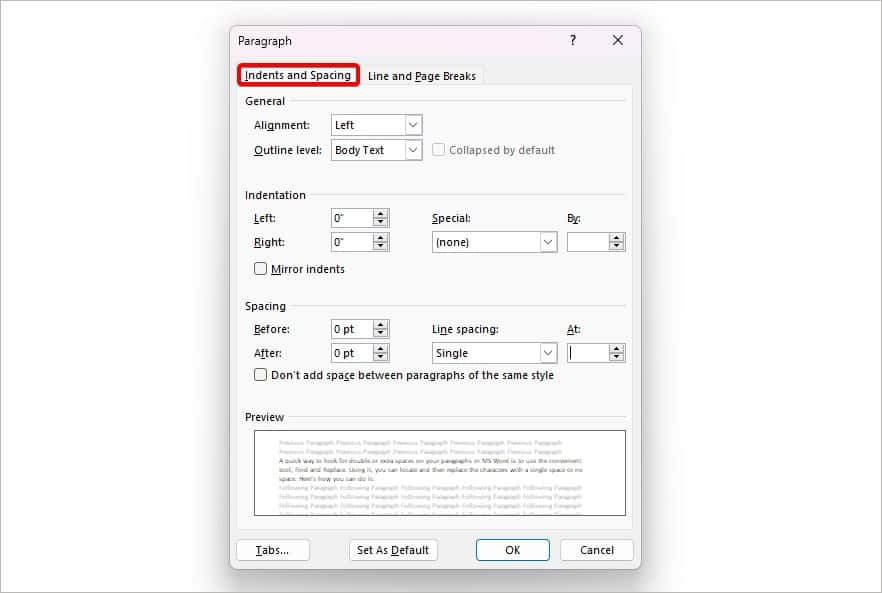
- On the Paragraph Settings window, click on the Indents and Spacing tab.
- Below the Spacing section, check-mark the box that says Don’t add space between paragraphs of the same style.
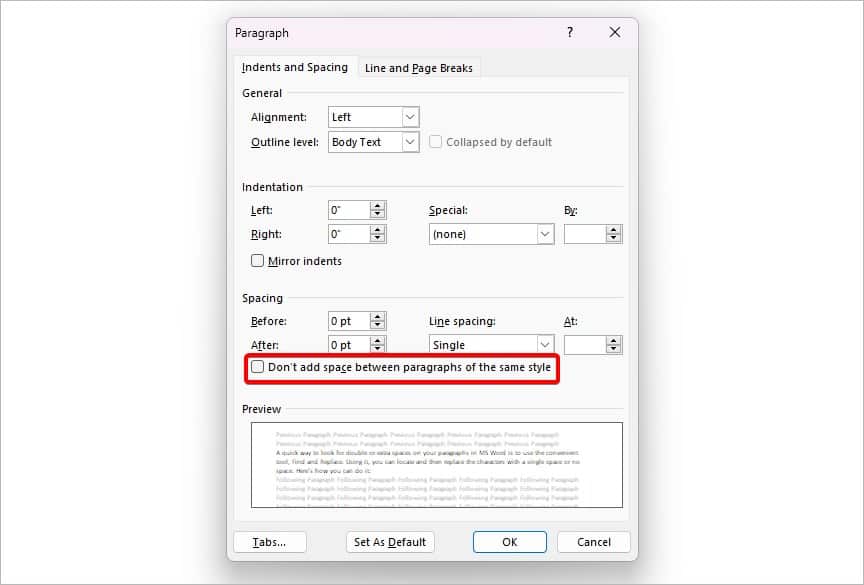
- Finally, click on OK and close the window.
Using Paragraph Marks
Lastly, you can use the paragraph marks to visually mark where the extra spaces are. Since this method includes every single character on your document, a space will be highlighted as a tiny dot, like a full stop. This is how you can do it:
- Go to the Home tab.
- Check the Paragraph group and click on the Paragraph Mark icon. Alternatively, you can also use the keyboard shortcut (CTRL key + Shift key + *).
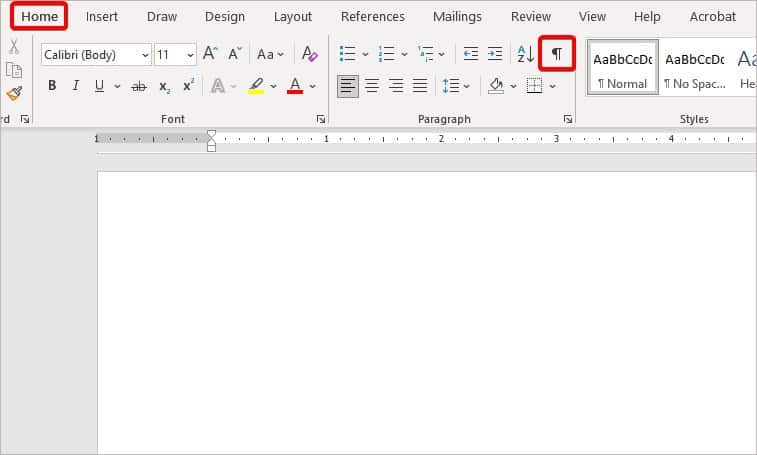
- Your document will now have distinct marks at the beginning and end of all paragraphs.
- Select and enter the Backspace key on the tiny dots to remove all the extra spaces.
