While showcasing your presentation at a trade show, you might need to present the slideshow indefinitely. So, manually presenting the slideshow continuously can be exhausting for you.
In these situations, you would probably prefer to have the presentation loop continuously. To achieve this, you can either enable the Loop continuously option on PowerPoint, run a VBA code, or use the hyperlinking method to loop the slideshow.
Set Up Loop via Slide Show Settings
Looping a slideshow in PowerPoint is a quick and straightforward process. By utilizing the Set Up Show menu, you can set up a loop for your presentation. This menu also offers advanced options for the slideshow, such as kiosk mode.
Here’s how to loop a slideshow on PowerPoint.
- Open PowerPoint and go to the Slide Show tab from the ribbon.
- Click on the Set Up Slide Show option.
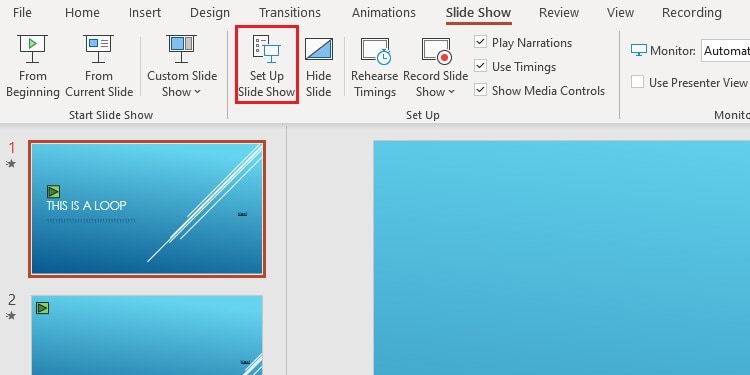
- Choose the following options on the Set Up Show Dialog box:
- Show Type: This option lets you choose your presentation type. If you select Presented by speaker or browsed at a kiosk mode, your presentation will be displayed in full screen. Else, your slideshow will be displayed in a window.
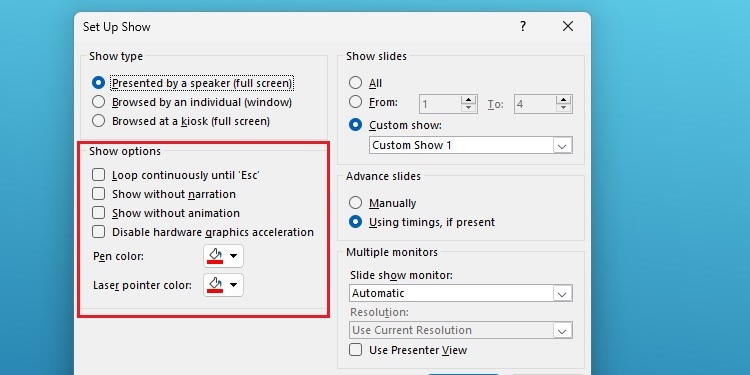
- Show Options: From this option, select the Loop Continuously until ‘Esc’ option. You can also adjust narration, animation, and graphics and choose the pen or laser point color for pointing.
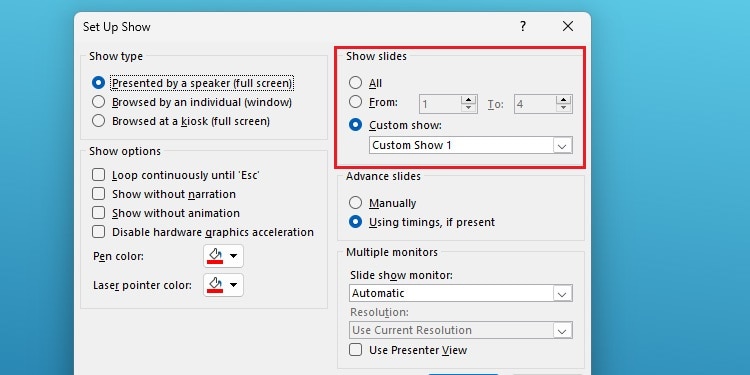
- Show Slides: Select which slides to show in the slideshow from this option.
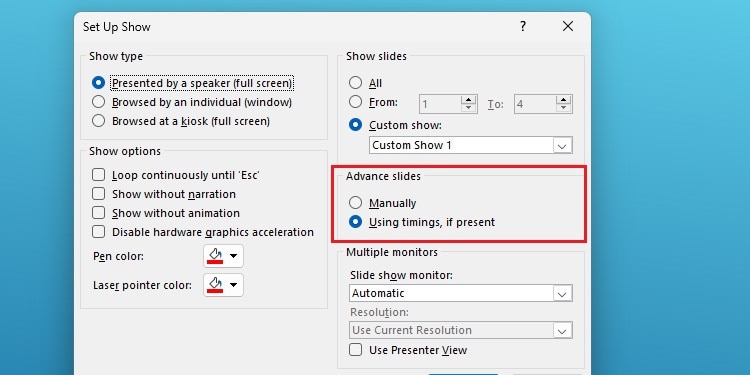
- Advance Slides: Choose whether to advance slides manually or using timings.
- Multiple Monitors: If you have multiple monitors, you can use this section to select a monitor for displaying the slideshow. Additionally, you can configure the resolution of your presentation in this section.
- Once you click OK, press Alt + F5 to start the slideshow.
After following the above steps, you can see that your presentation slideshow will loop until you press the Esc key.
Loop Slideshow via VBA code
The VBA code extends the features and functionality of PowerPoint. If you are familiar with the VBA language, looping a slideshow from this option will be much easier.
- Open PowerPoint.
- Go to the File tab and click on Options.
- Click on the Customize Ribbon option.
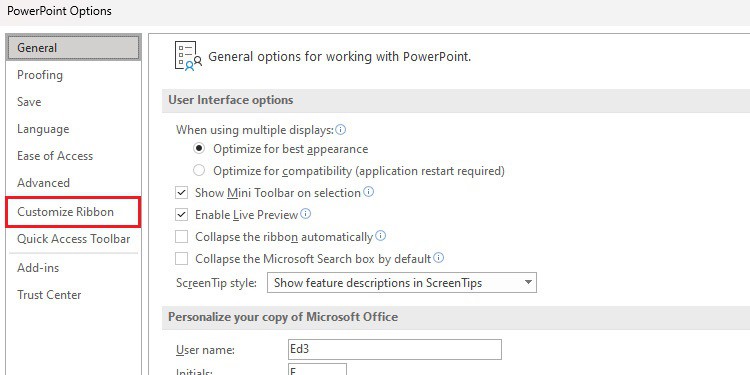
- Under Main Tabs, tick the Developer option and hit OK.
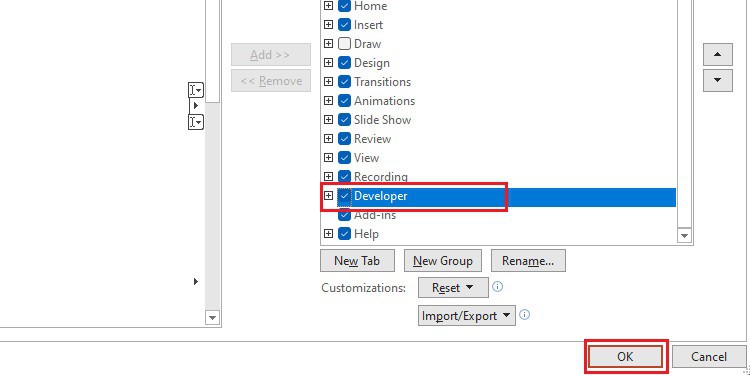
- On your presentation, click on the Developer tab and click on Visual Basic.
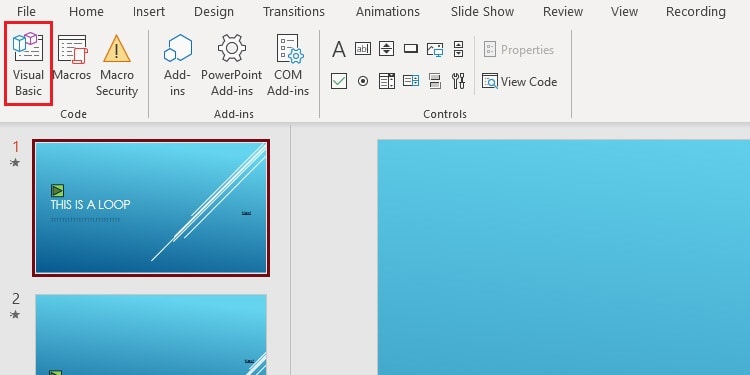
- Go to the Insert tab and click on the Module option.
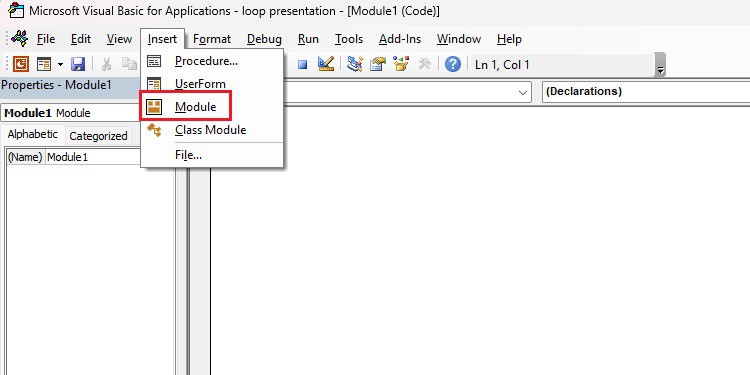
- Paste the following code in the blank spaces.
Sub looping()
With ActivePresentation.SlideShowSettings
    .AdvanceMode = ppSlideShowUseSlideTimings
    .LoopUntilStopped = msoTrue
    .Run
End With
End Sub- Click F5 to open Macros. If you have multiple modules, click Run to run the Module.
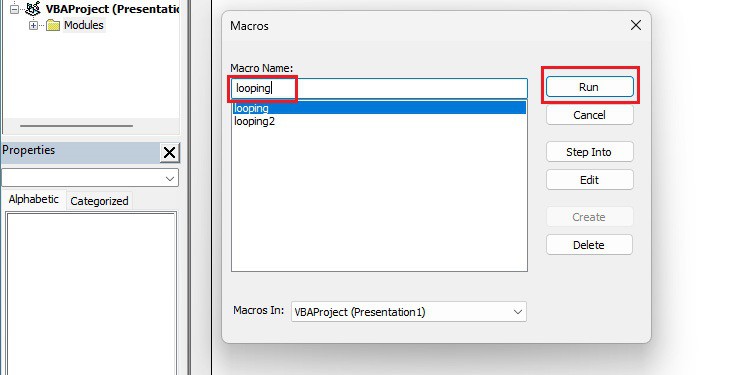
When you run the above VBA code, the slideshow of the active presentation will start and will loop until you press the Esc key. Along with that, slides will automatically advance using the stored timings.
Using Hyperlinks to Loop Slideshow
Hyperlinks in PowerPoint can redirect to specific slides with just a click. Using the hyperlink feature, you can simply insert links to any shapes, texts, and buttons.
Here, I will insert hyperlinks to the texts and redirect them to the following slides to create a loop in the slideshow.
- Open your presentation and go to the Insert tab.
- Select the Text box option.

- Insert the shapes or text into slides in an appropriate place.
- Select the Text and press Ctrl + K to hyperlink the text.
- Click the Place in This Document option, choose Next Slide, then hit OK.
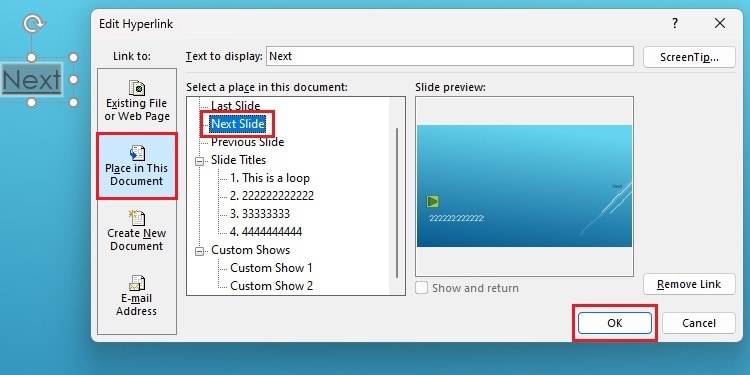
- Do this for all the slides in your presentation.
- For the last slide, hyperlink the text to the First Slide to create a loop.
Applying Transitions and Timings in Slideshow
You can apply transition effects when you advance from one slide to another during a presentation. These minor transition effects on your presentation can significantly impact your audience.
Slide Transitions
Transitions give your slides a sense of flow during the presentation. If done well, transitions make your presentation feel like a video!
You can apply transitions to your slides from the “Transition to the slide” section on the Transition ribbon. This section has many effect options like Subtle, Exciting and Dynamic Content.
Here’s how you can add or change transition effects on your presentation.
- Open PowerPoint and go to the Transitions tab.
- Click on the More button to view all Transition effects.
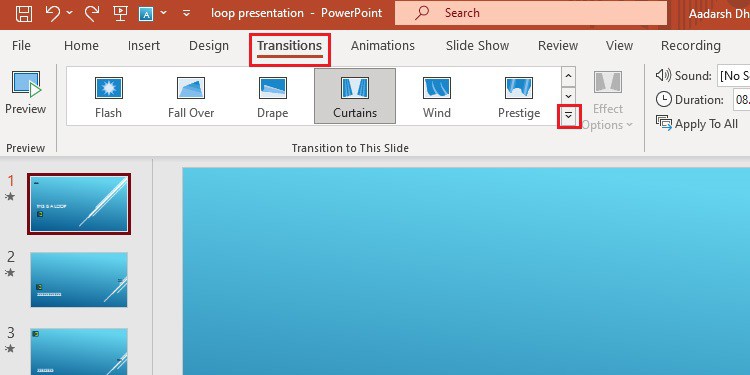
- Choose any transition effect from the Transition to this Slide section.
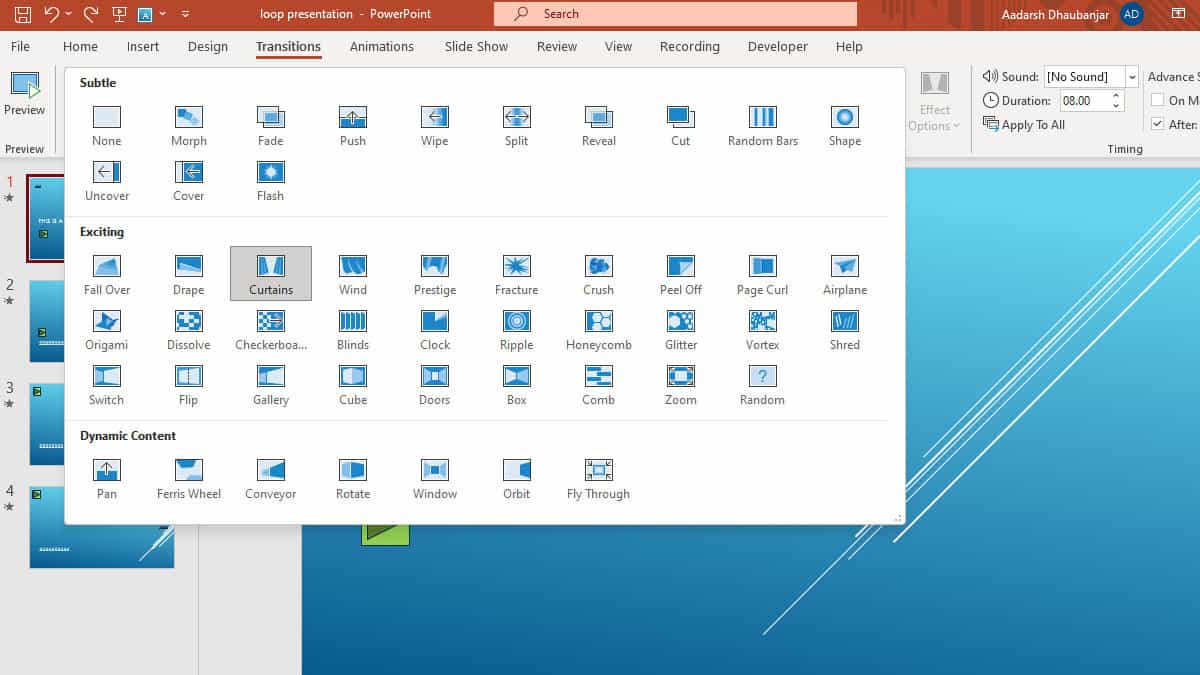
- On some transition effects, you can choose different Effect Options.
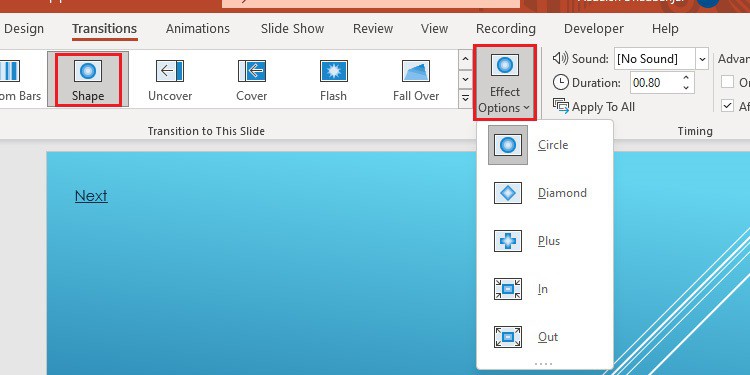
Moreover, you can choose the None option if you don’t want any transitions on your slides.
Set Timings
The Timing section allows you to add sound during transitions and set its duration. Additionally, you can also configure if you want to advance the slides with a mouse click or automatically.
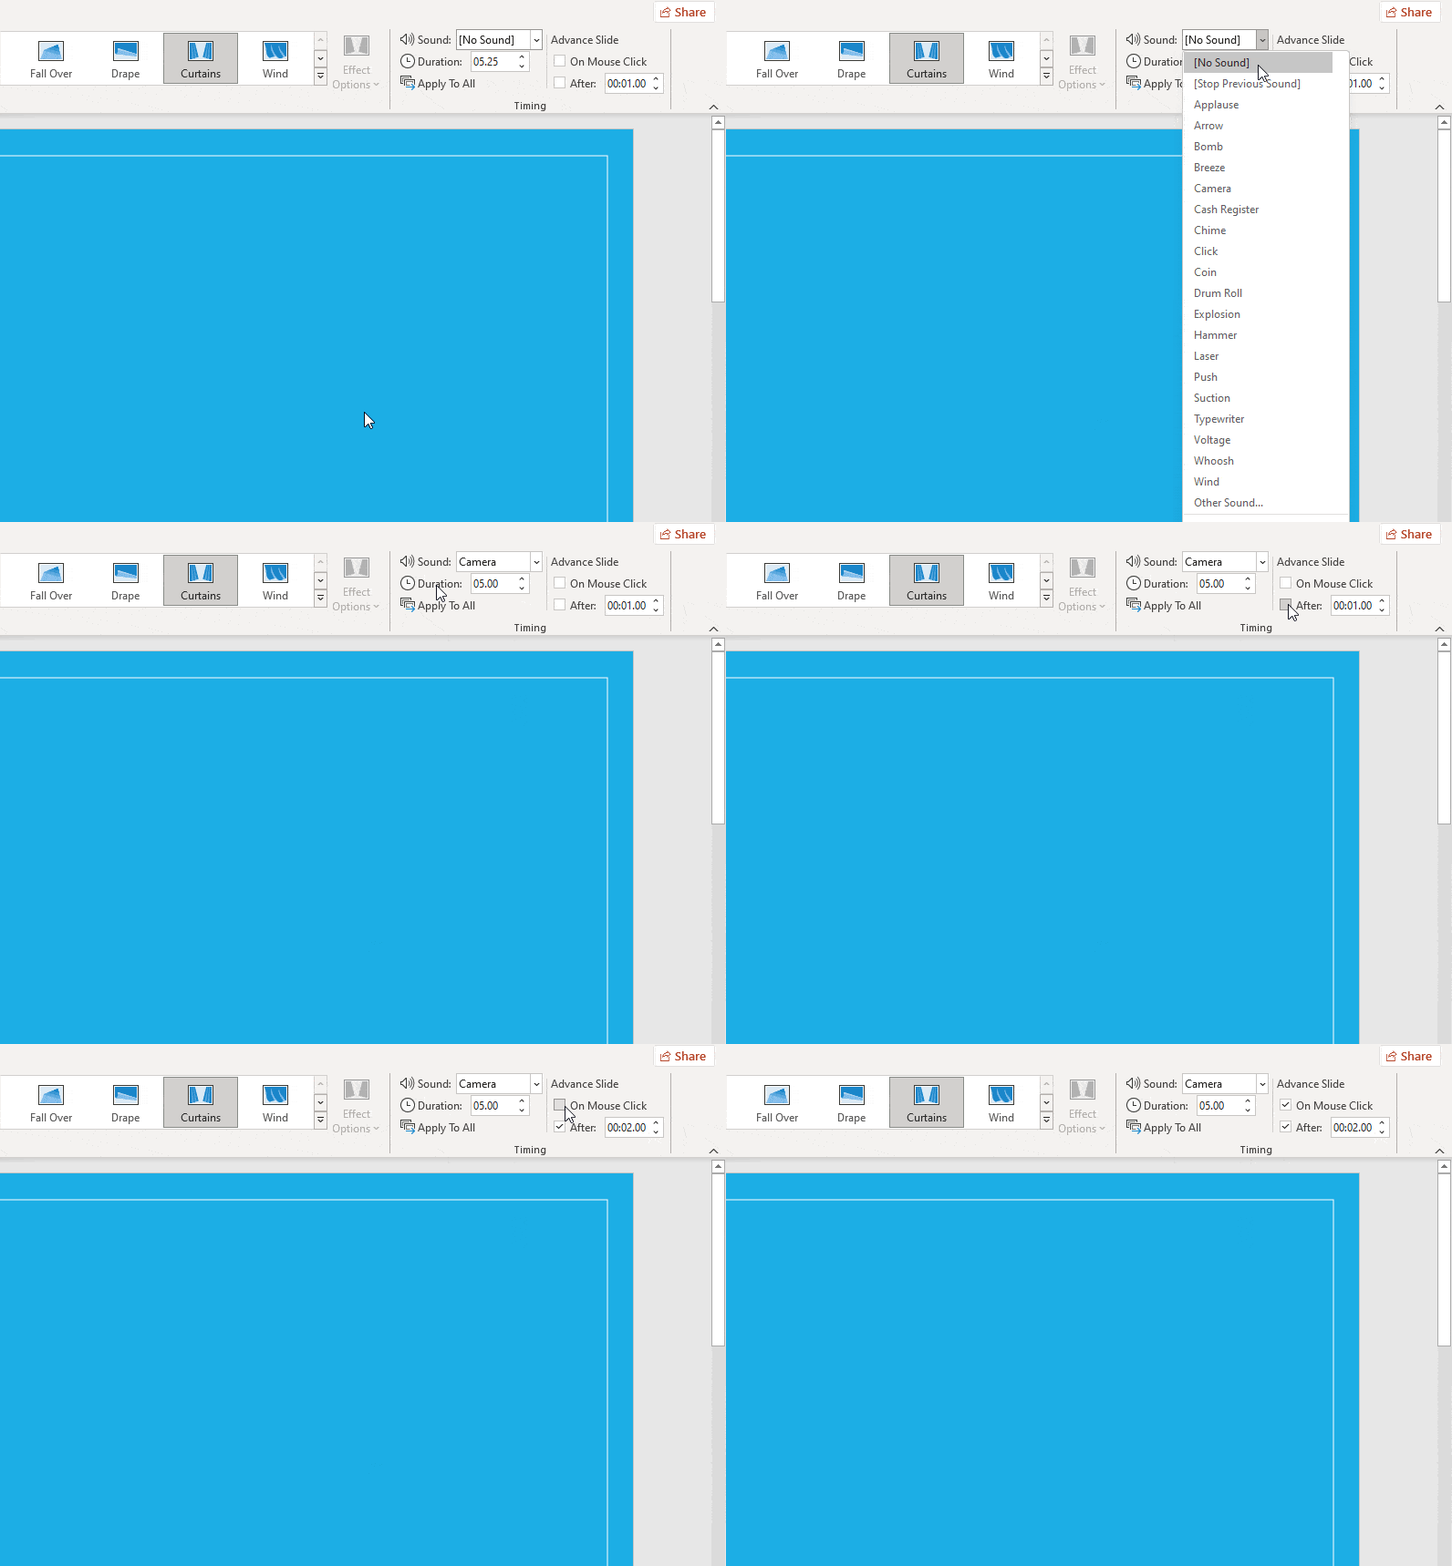
- To add sound during your transition, select the fly-out next to Sound in the Timing group. You can choose from the given sounds or import an audio from your device.
- Specify the length of the transition from the Duration option.
- Under the Advance Slide section, you will see the On Mouse Click and After options. If you wish to advance to the next slide by clicking on the screen, select the On Mouse Click option. Similarly, if you wish to transition to the next slide automatically, enter the duration next to the After section.