Skype is popular for video conferencing. It often comes preinstalled in Windows 10, 11, or Microsoft Office packages. However, many users prefer other video conferencing platforms over Skype as they are more polished and equipped with additional features.
If you don’t actively use Skype or use different software, you may want to save disk space by uninstalling or disabling Skype. If you’re looking to do so, we have you covered. In this article, we’ll go through all the possible ways you can delete or disable Skype from Windows.
How to Uninstall Skype on Windows?
You can use multiple methods to remove or disable Skype from your system. Windows offers more flexibility when it comes to deleting applications. You can uninstall it from the start menu, Windows settings, Control Panel, or even a command line.
Through Start Menu
Uninstalling Skype directly from the Start menu is the easiest method to delete it from your computer. Follow the steps below:
- Press the Windows button to open up the start menu.
- Type in Skype.
- Right-click on Skype and select Uninstall.
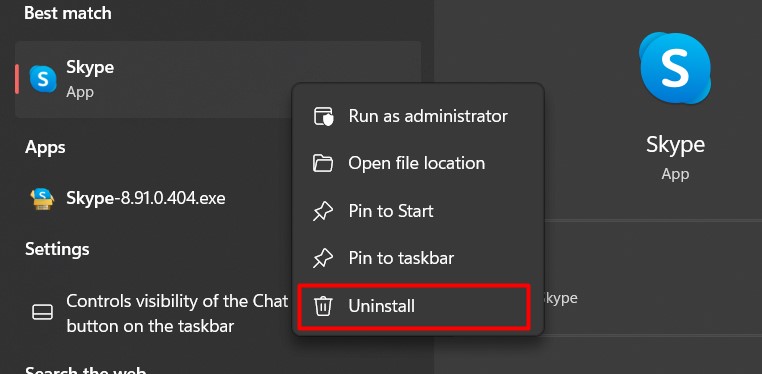
- Select Yes on the given prompt.
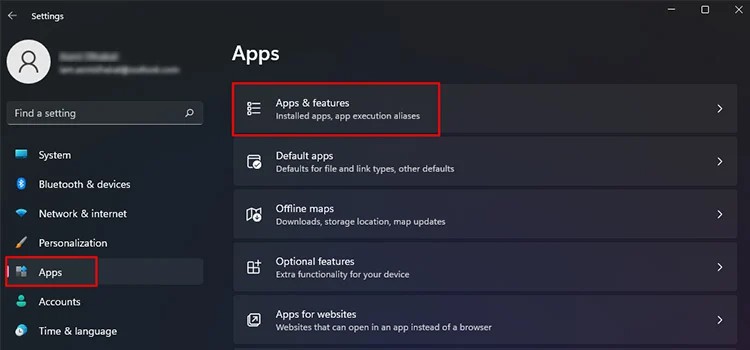
Through Apps and Features
If you cannot open the start menu or have trouble with the search function, you can remove Skype from the Apps & Features inside the Windows settings.
- Press the Windows + I keys to open Settings.
- Click on Apps > Apps and Features.
- Scroll down and click on Skype.
- Click on the Uninstall button.
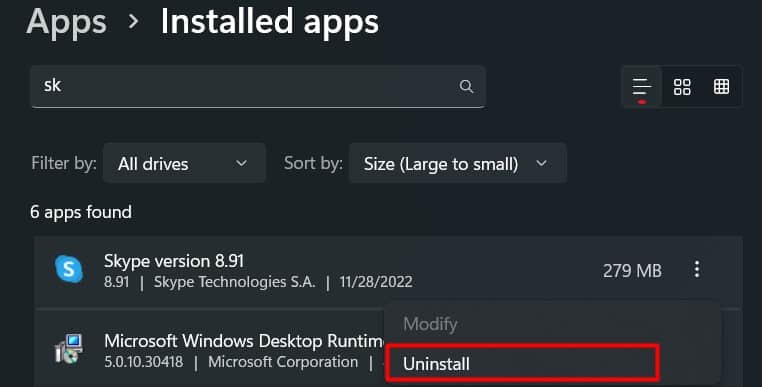
- Select Uninstall again.
Through Control Panel
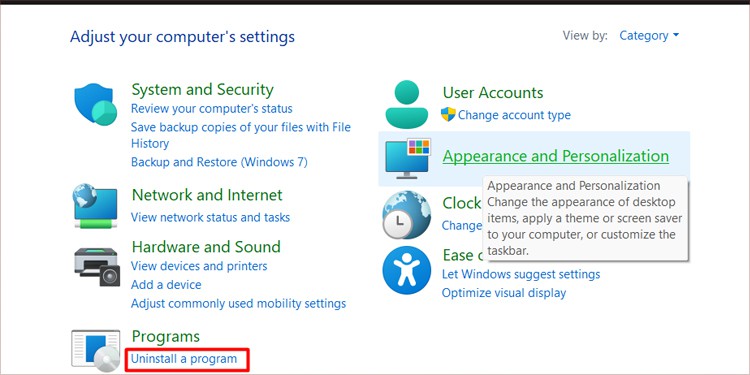
Another great way to uninstall Skype is through the Control panel. The Control panel offers a clear interface of all applications installed on your PC. Follow the steps to uninstall Skype via the Control Panel.
- Open the Start menu.
- Type
Control Paneland press Enter.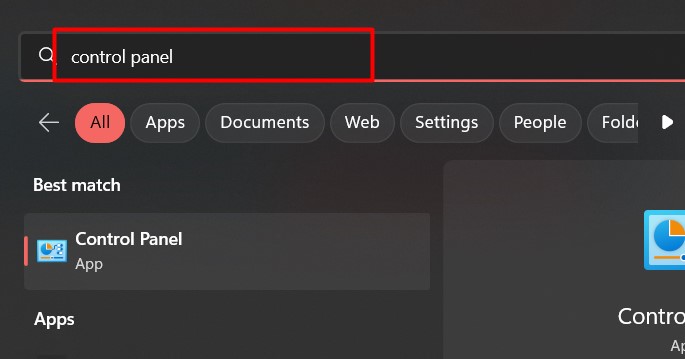
- Click on Uninstall a program. If the option is unavailable, sort the view by Category.
- Right-click on Skype.
- Continue with the uninstallation wizard.
Uninstalling Skype removes the application itself but saves its residual files on your computer. You can remove it from the Appdata folder. Follow the steps below:
- Press Windows + R to open up the Run command.
- Type in
%appdata%and press Enter.
- Delete the Skype folder.
How to Uninstall Skype for Business?
Deleting Skype for business can be tricky as it does not appear in the Windows Settings or the Control Panel. Skype for Business is an additional application included in the Microsoft Office package. There is a couple of different ways to remove the application. You can remove it directly from the Office package.
You can also use a simple command line in Windows Powershell to delete Skype for Business. Removing Skype from Powershell also removes the registry keys for Skype.
Through Microsoft Office
Here’s how you can remove Skype for business through Microsoft Office:
- Press Windows + R to open the Run command.
- Type
appwiz.cpland press Enter.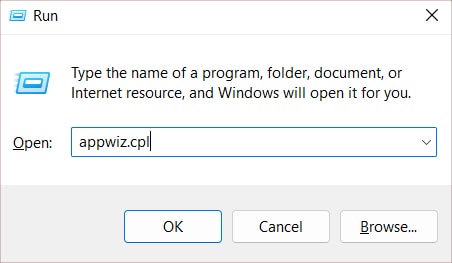
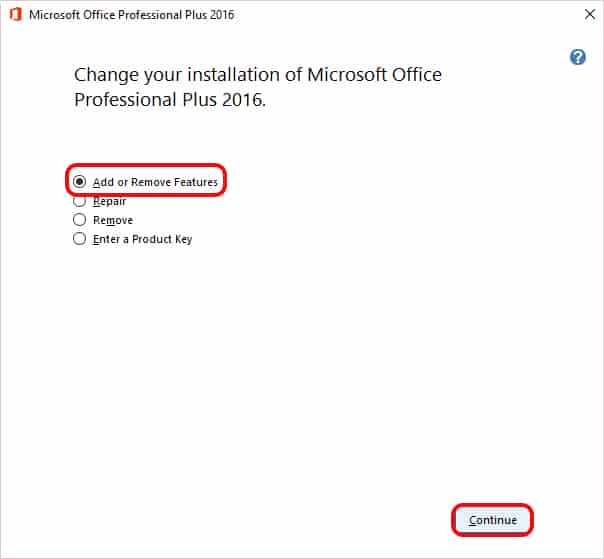
- Right-click on Microsoft Office and select Change.
- Click on Yes, in the next prompt.
- Select the Add or Remove Feature and click on Continue.
- Click the dropdown beside Skype for Business and select Not Available.
- Click on Continue.
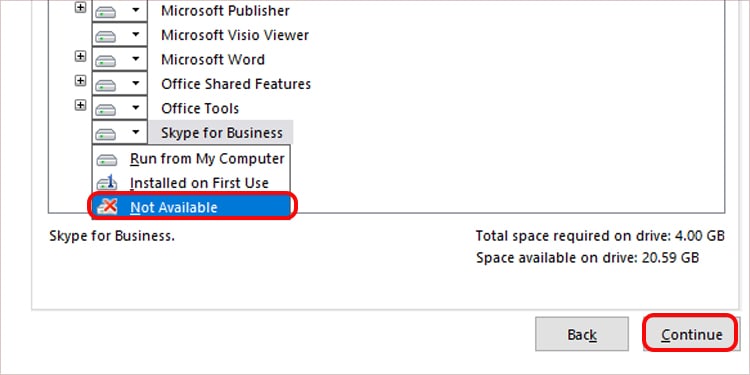
- Restart your PC upon completion.
Through Windows PowerShell
Here’re the steps you need to follow:
- Press Windows + X keys to open the additional windows menu.
- Press the A key to open Powershell with administrator privileges.
- Select Yes on the given prompt.
- Type in
get-package *skype* | uninstall-packageand press the Enter key.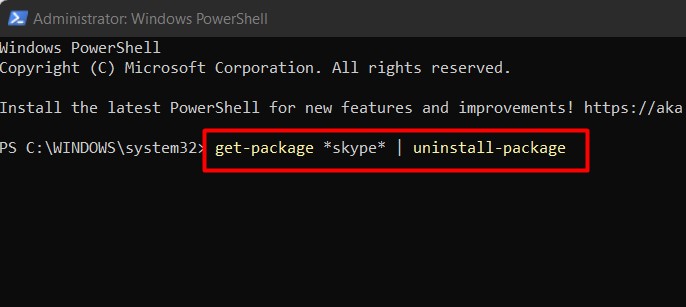
How to Disable Skype Auto Start?
By default, Skype startups as soon you boot Windows which can affect your computer’s boot time. So, it is best to disable skype from starting automatically. Additionally, you can also disable Skype altogether by blocking its connection. You can disable Skype autostart from the different methods below:
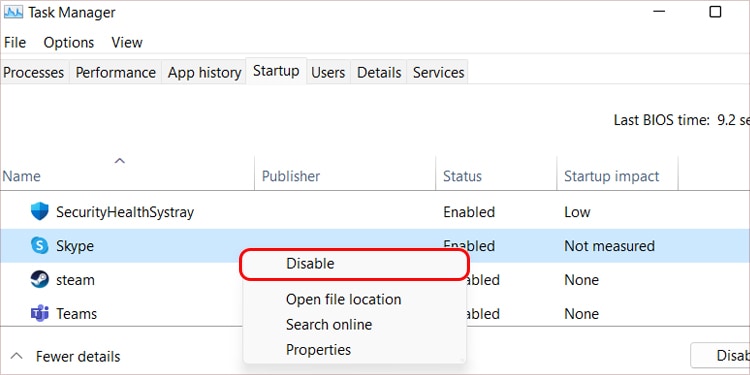
Through Task Manager
The Task manager offers a lot in managing processes, startup, services, etc. You can choose the program you want to disable when booting Windows.
- Press Ctrl + Shift + Esc keys to open Task Manager.
- Switch to the Startup tab.
- Right-click on Skype and select Disable.
Through Skype
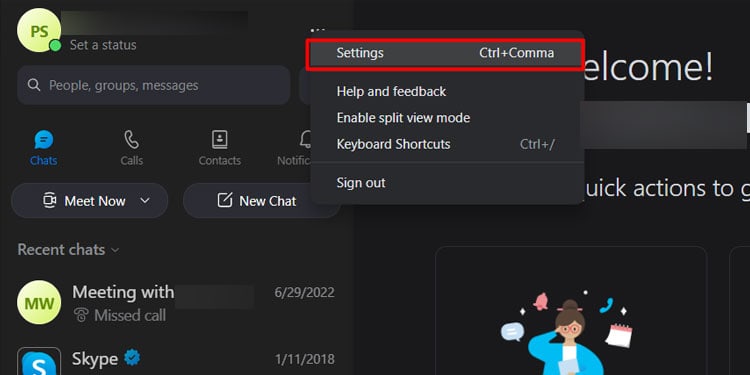
Aside from disabling Skype autostart from the task manager, you can also disable autostart from the application. Follow the given steps:
- Open Skype.
- Click the three dots icon beside your profile icon.
- Click on Settings.
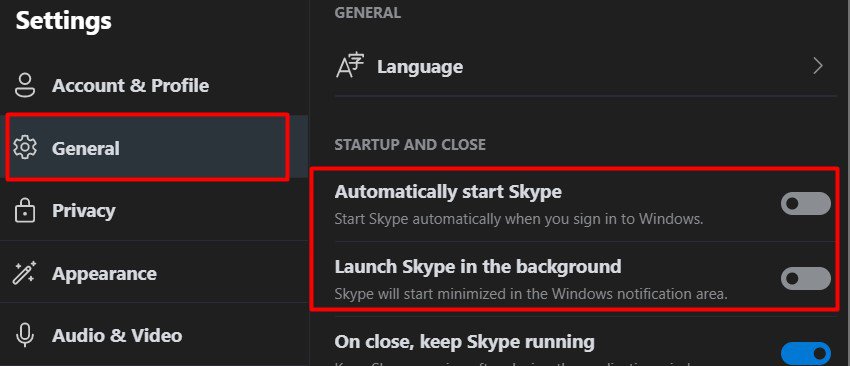
- Switch to the General tab.
- Toggle off the following options.
- Automatically start Skype.
- Launch Skype in the background.
The process to disable Skype for windows differs little from skype for business. Follow the step to disable auto-start for Skype for Business.
- Open the Start menu and type in Skype.
- Open Skype for Business.
- Click on the gear icon to open settings.
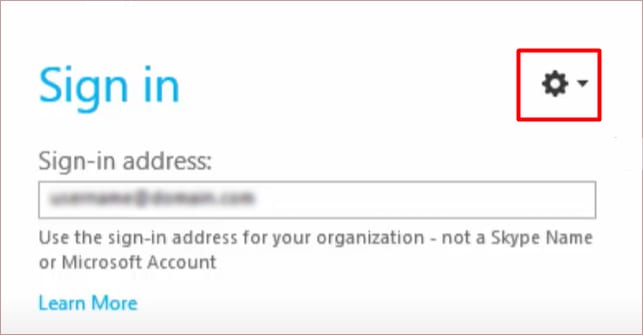
- Switch to the Personal tab.
- Uncheck the following tick boxes.
- Automatically start the app when I log on to Windows.
- Start the app in the foreground.
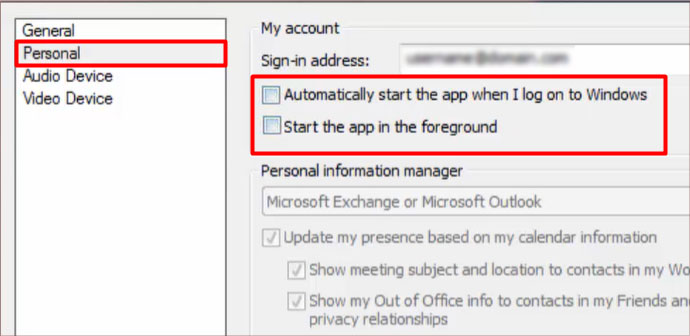
- Click on Ok.
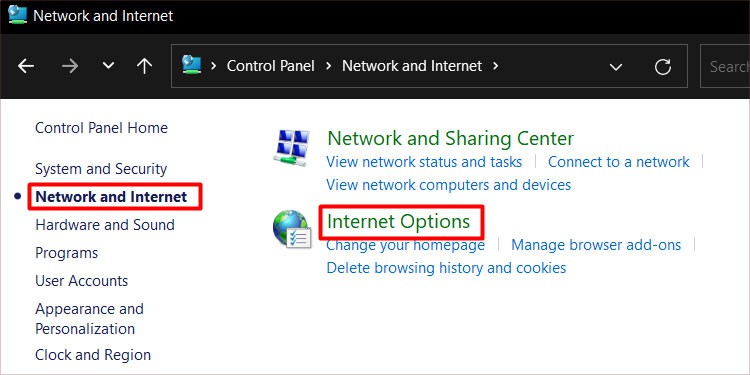
How to Disable Skype from Network?
We’ve mentioned how to disable the Skype application from running automatically. However, if you want to disable Skype from establishing connections with the internet, you can block it from the network settings. Follow the given steps to disable Skype.
- Open the Control panel from the Start menu.
- Click on Network & Internet.
- Select Internet Options.
- Switch to the Security tab.
- Click on Restricted Sites, then select the Sites button.
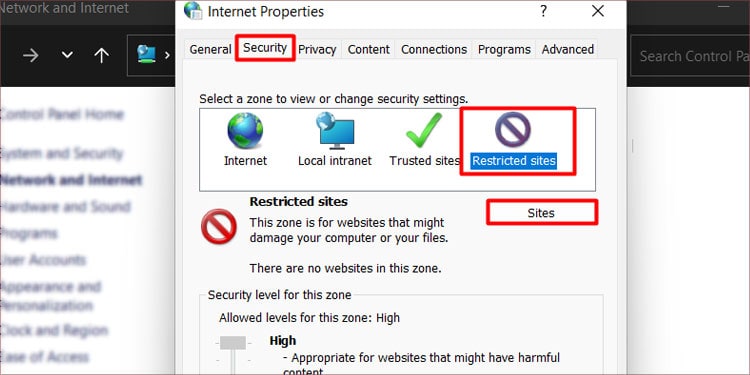
- Type in
https://apps.skype.com/and click Add.
- Click on Close and then Apply to save changes.
- Click on Ok to close the dialogue box.