Margins are important to make your document look professional and organized. Many institutions do not accept the half-inch margins set as default in Microsoft Word. They have different margin standards for the documents. Depending on the guidelines, you may need to adjust the document margins.
There are multiple ways to add margins to your Word document. You can either select a margin from the given list of presets or opt-in to use your custom margins.
How to Put Margin in Word?
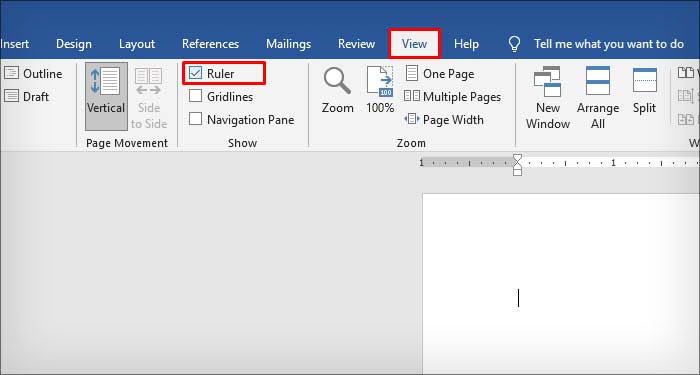
You can quickly add margins to your document by using the rulers. There are two different rulers in Word which are used to adjust the horizontal and vertical margins in the document. Tick the Ruler check box on the View tab to enable Ruler.
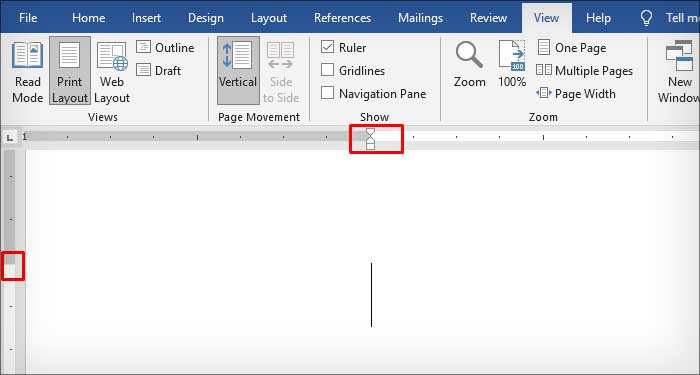
On the ruler, the gray area represents the margin section, whereas the white area is the document section. Hover on the midpoint of the white and gray area on the ruler. This will change your mouse cursor to a double-headed arrow. Click and drag the cursor to adjust the margins.
Besides, there are two other methods to add margin to your Word document.
Preset Margins
To avoid the hassle of changing margins manually, Microsoft Word has provided its user with six commonly used margin presets. Start by opening the document on which you wish to adjust the margins.
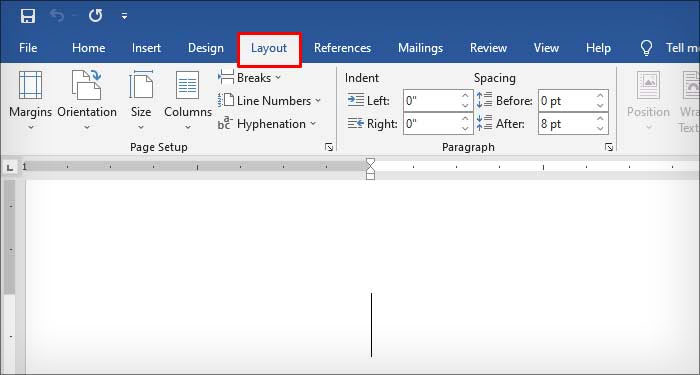
Step 1: Open the Layout
After you’ve opened the Word document, you need to switch to the Layout tab. Aside from margins, you can also adjust the document’s theme, orientation, and size from the Layout section.
Step 2: Click on Margins
Click on Margins at the top left corner, which will bring out a dropdown menu with six different margin options. There can be one more if you’ve previously used a custom margin. Select the margin you wish to apply to the document.
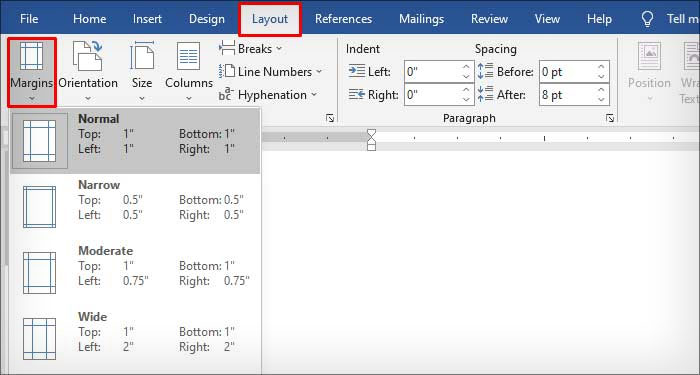
If you want to use the standard 1-inch margin on your document, select the Normal margins from the given list of options.
Custom Margins
In addition to the preset margins, you can also apply your preferred margin size to your document. The process of using custom margins is similar to presets.
Step 1: Switch to the Layout Tab
Similar to the step mentioned in the Preset margin section, you have to start by switching to the Layout tab from the Ribbon.
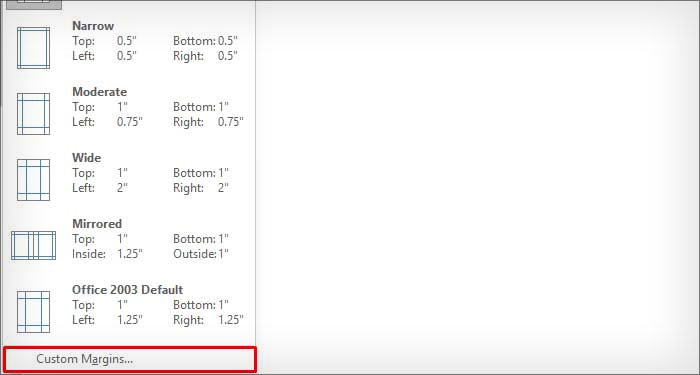
Step 2: Set Custom Margins
Click on Margins beside Theme. Select the Custom margins option at the bottom of the dropdown menu. This will open the Page Setup dialog box. Here, you can customize the margin, change the gutter space, set your margin configuration as default, etc.
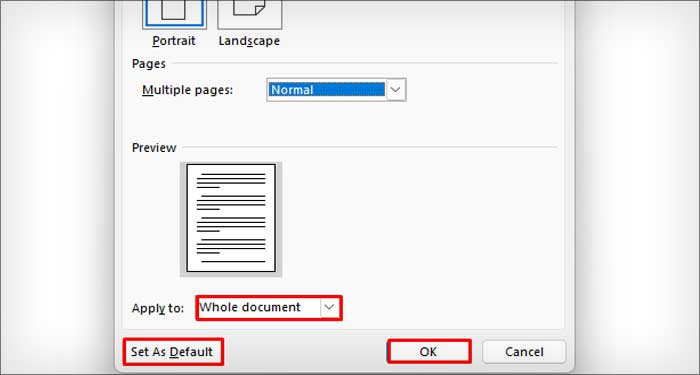
Under the margin section, enter the margin size on the Top, Bottom, Left, and Right text fields. You can choose the section of the document to apply margins from the Apply to the dropdown menu. Press the Ok button on the window to apply the margins on your document.
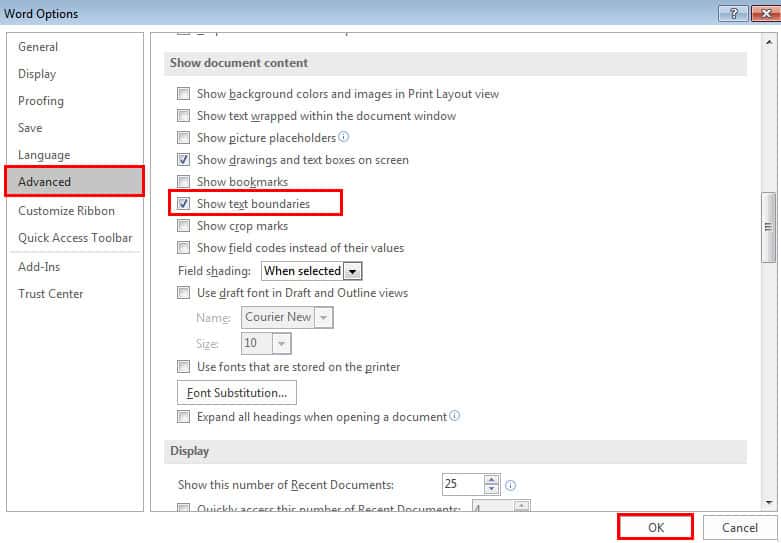
Can’t View the Margins?
You might not be able to view the margin lines on your document even after applying a custom margin. This is because the margins in Word documents are invisible by default.
You must change the text boundaries settings in Word to make the margin line visible on the screen.
- Open the Word file.
- Click on the File menu.
- Select Options.
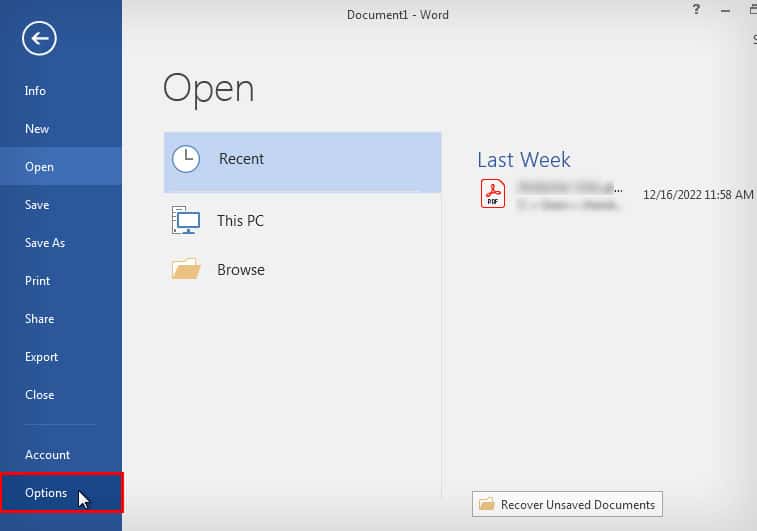
- Switch to the Advanced tab.
- Tick the Show text boundaries checkbox under the Show document content section.
- Click on Ok.