If you want your files to be easily accessible whenever you need them, organize your Google Drive.
You can create folders/subfolders and name them according to the type of files or items you want to store inside them. Along with proper naming, you can color code the folders to make them easily distinguishable based on their types.
Furthermore, you can filter out the data stored in your Drive by managing the apps connected to the drive.
If something is unnecessary, you can delete it to make space available for important files.
Create Folders in Google Drive
Creating a folder based on file types is the best way to organize items in Google Drive.
To do so, you can create a parent folder and insert a subfolder inside it.
For example,
If you want to organize employee details in Google Drive, create a main folder with employee names.
Then, create a subfolder, each titled with the type of data such as personal details, contacts, salary details, etc.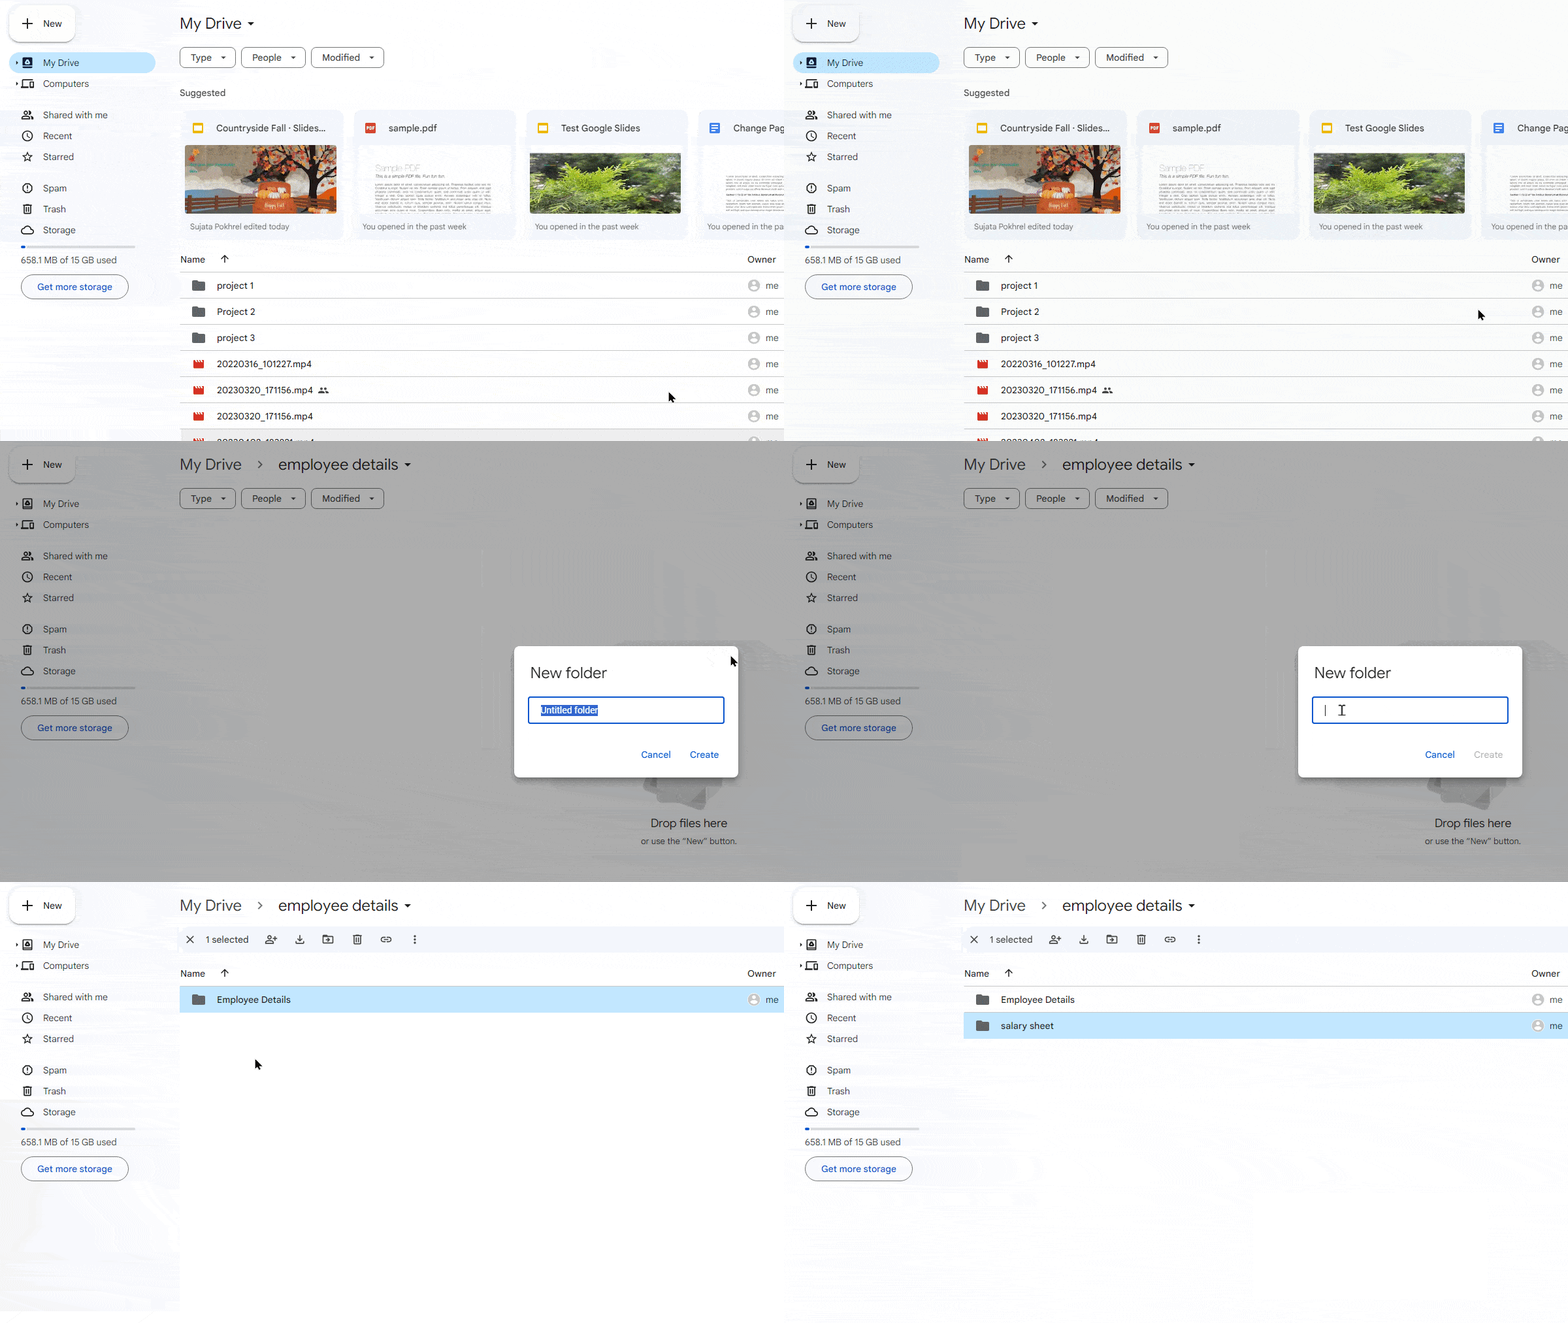
After creating a folder, move the scattered files, images, and other items to their folders. You can drag and drop the files, move them manually, or use keyboard shortcuts.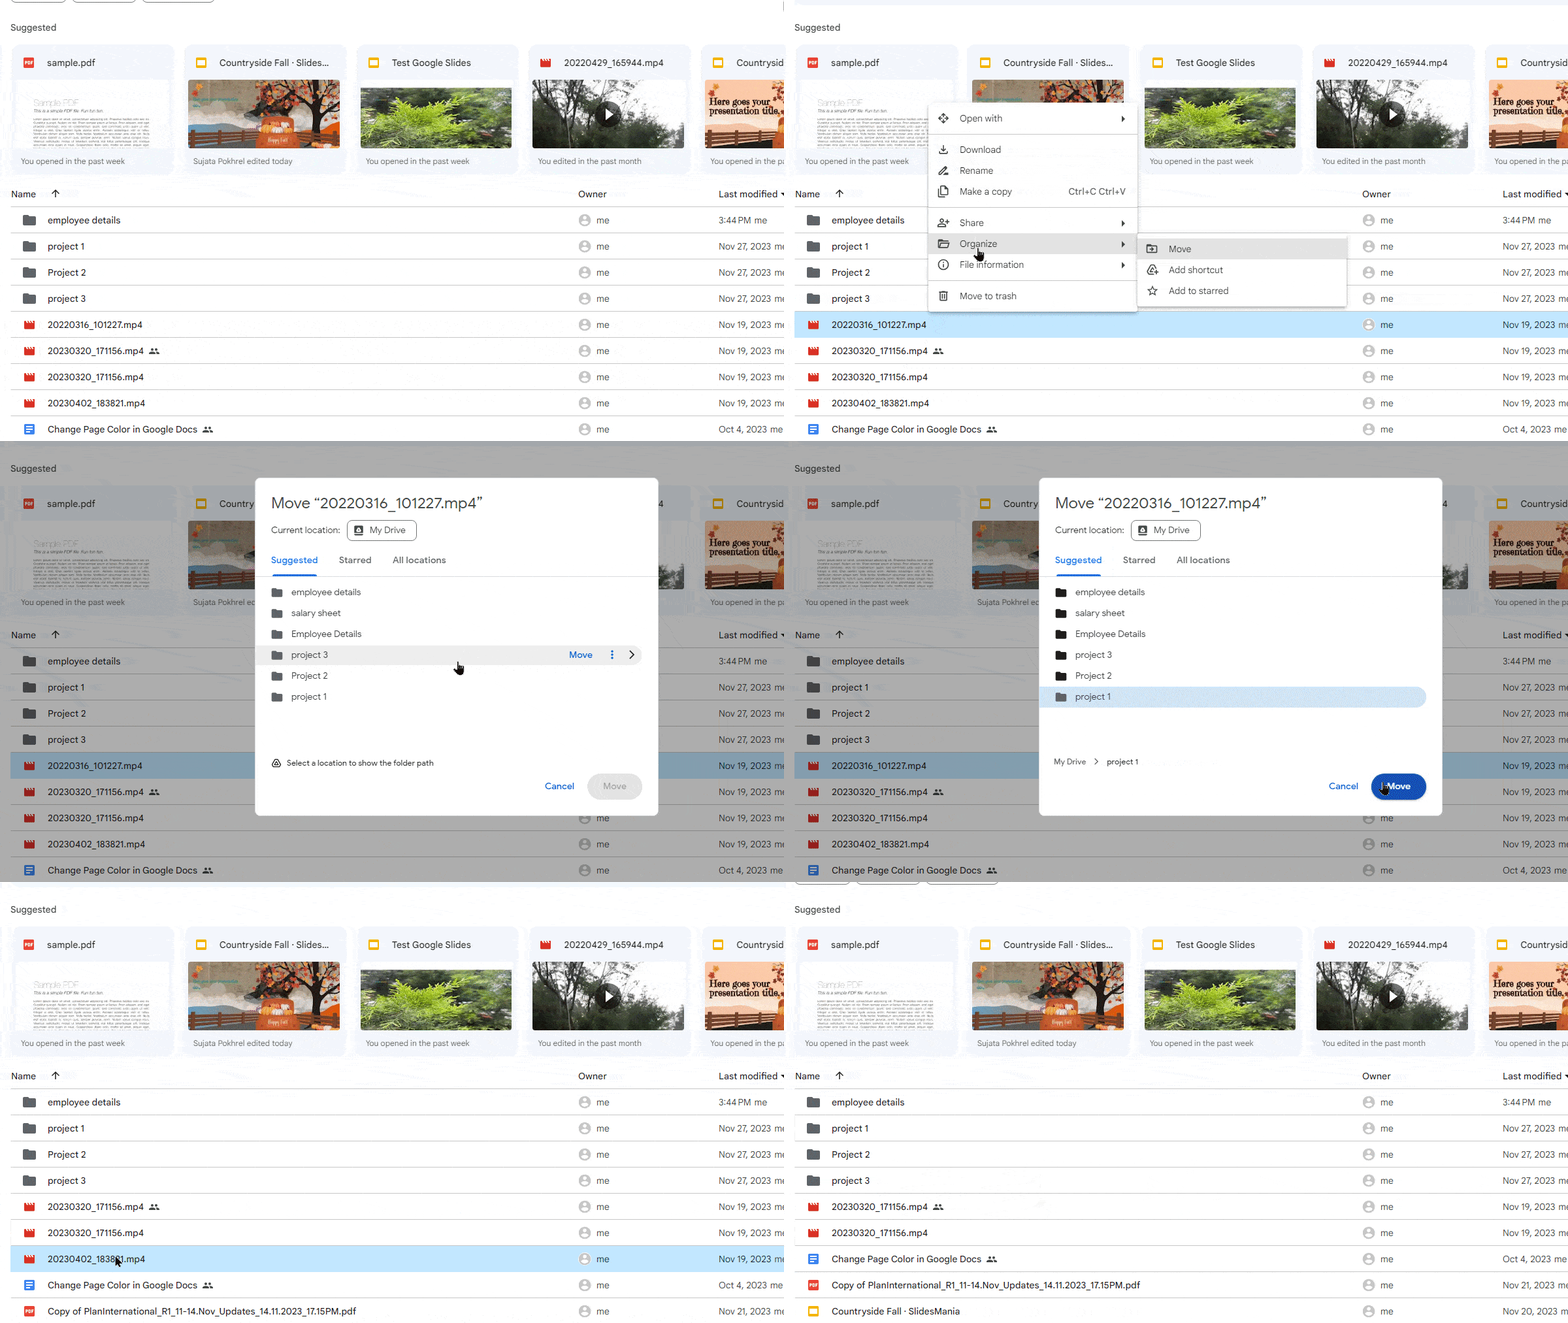
Naming the Folders
The naming convention is important for organizing files and folders in Google Drive. It makes items easily distinguishable and easy to find for the shared users as well.
For example,
If you want to keep a record of your client’s details, name the parent folder Client 1 or Client name. Then, use the Project name or number to name the subfolders inside.
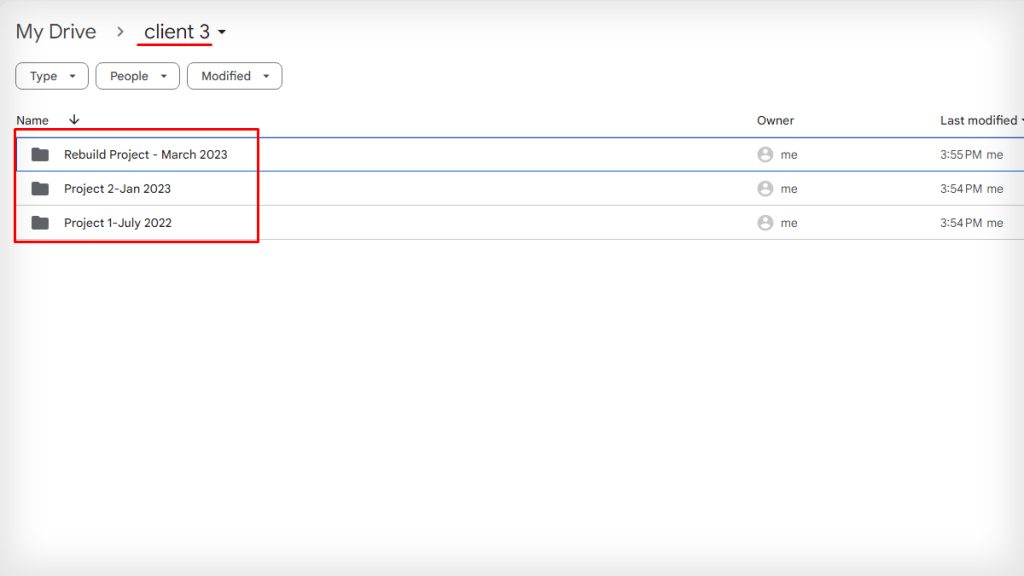
You can also rename the subfolders as completion status, project dates, and project type.
Here are a few naming conventions that I suggest:
- Make sure names are clear and easily understandable.
- You can use abbreviations to name a folder, but don’t use them for a filename.
- Always use consistent naming conventions for similar files.
- Use underscores for coding files.
- You can insert the date in the folder/filenames to make it easy to find.
Color Code the Folder
Users can also customize the colors of each and every folder to color coordinate for organizing well. You can use color to set preference priority or purpose-based color for different folders.
For example,
You can use Red for confidential items, Green for submitted documents, Yellow for work in progress, etc.
Go through these steps to learn how:
- Click to select a file.
- Tap on the folder to select.
- Right-click on it and expand Organize.
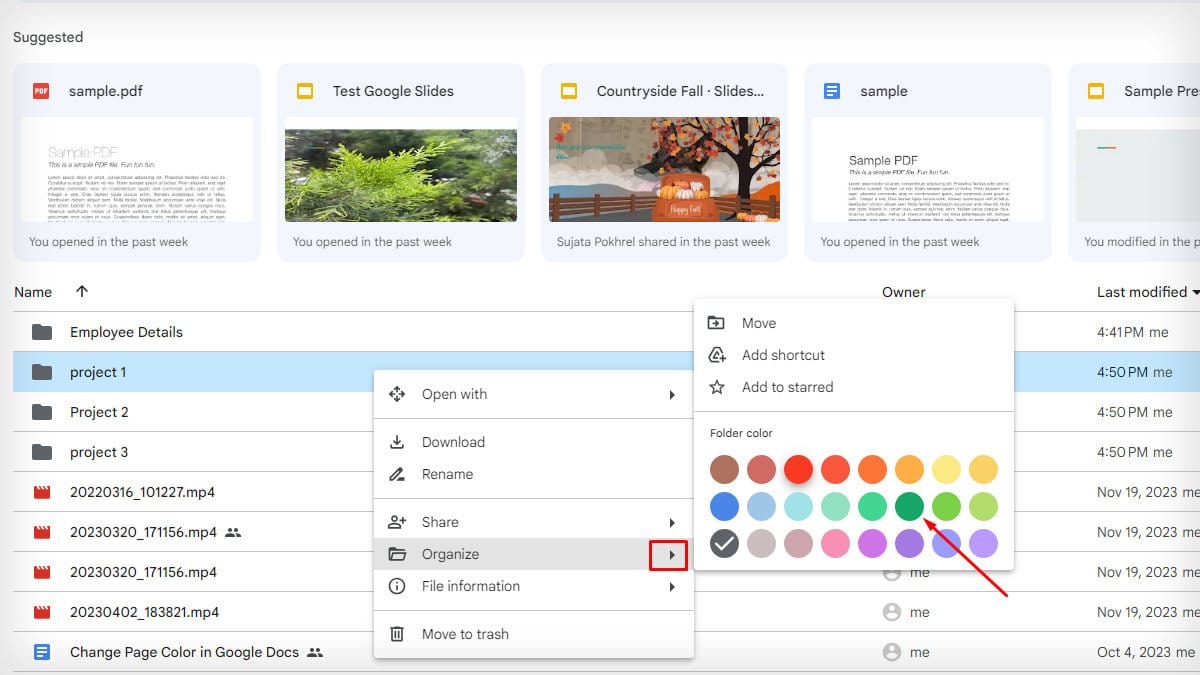
- A dialog box pops up with a color palette at the bottom.
- Click and choose a color for the folder.
- Repeat the steps for every folder. Choose different colors to make them distinct.
Delete Old Files or Folders
Sometimes, older files or folders that aren’t necessary are stacked and occupy unnecessary space. Get rid of them to make more space and organize your drive efficiently.
- Search for the old non-essential items.
- Right-click on it.
- Select Move to trash.
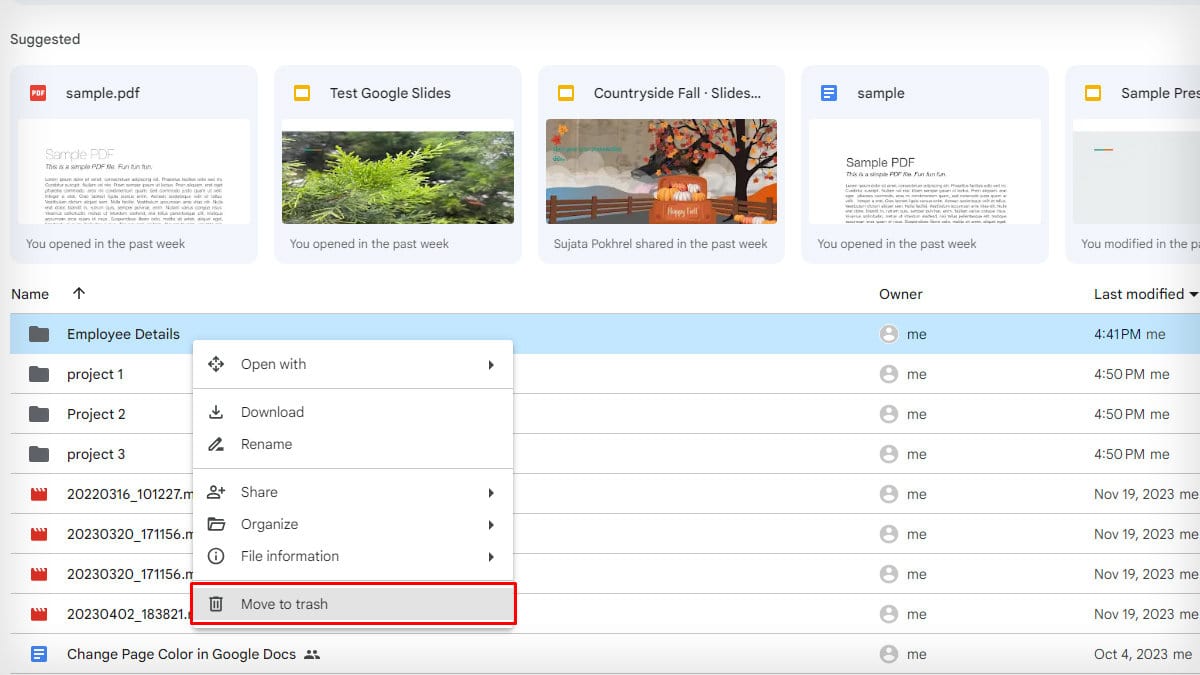
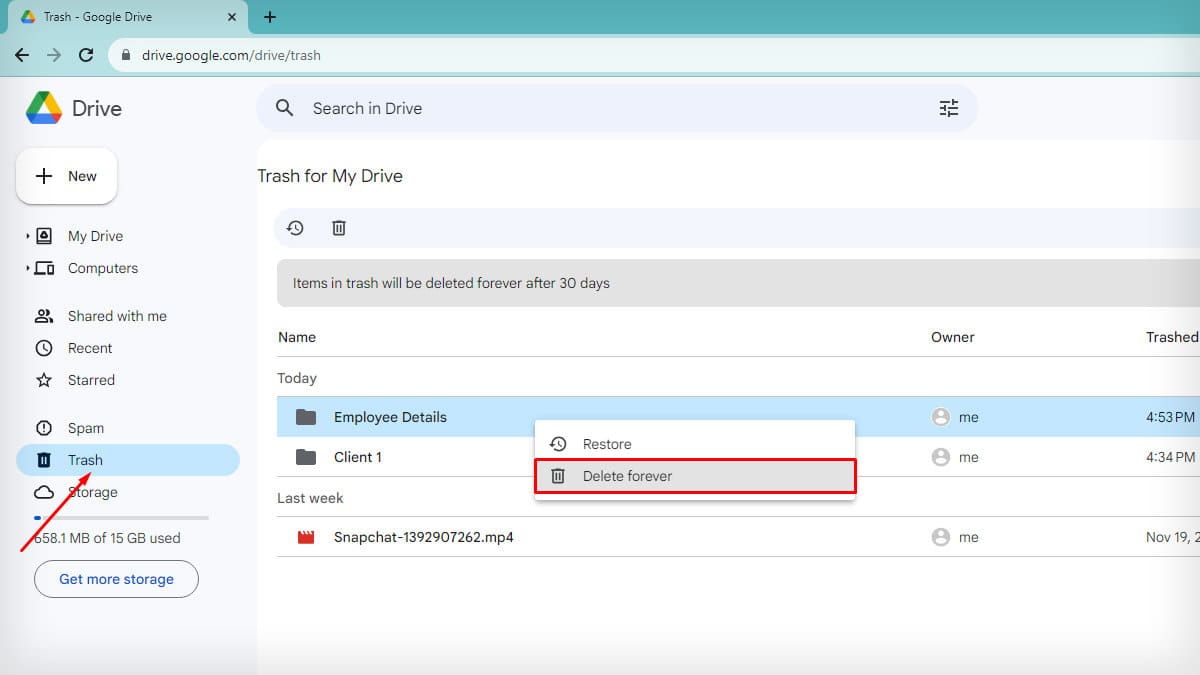
- The file will stay in the trash for 30 days before it gets permanently deleted. You can restore it later if you happen to restore the accidentally deleted one.
- But if you want to remove it immediately, click the Trash folder on the left pane. Select Delete forever.
Manage Apps Connected to Drive
If you have connected Google Apps to your Drive, every new file added to it gets stored in Drive, too.
Besides, the third-party apps could also use your Drive as a backup storage location if you‘ve signed in using your email address.
You can revoke the default access of that app to save space and prevent disorganization.
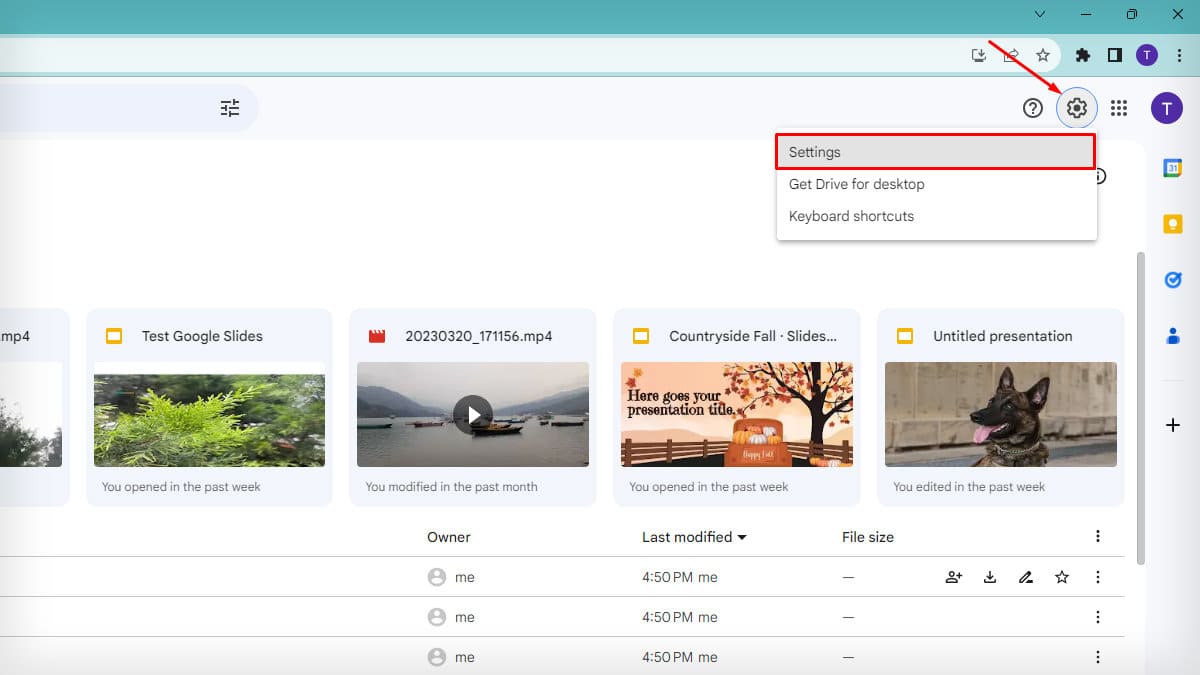
- Go to your Google Drive.
- Click on the Cogwheel icon.
- Select Settings.
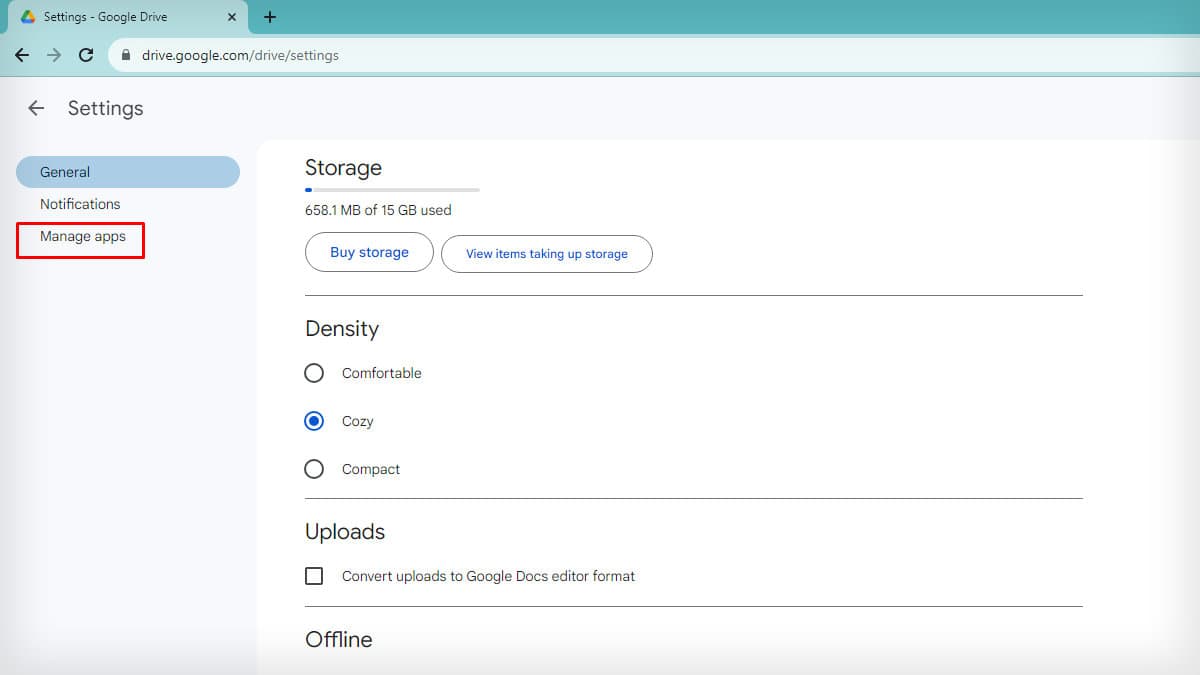
- Choose the Manage app on the Settings page.
- Untick the Use by default box before the Google apps that you want to restrict.
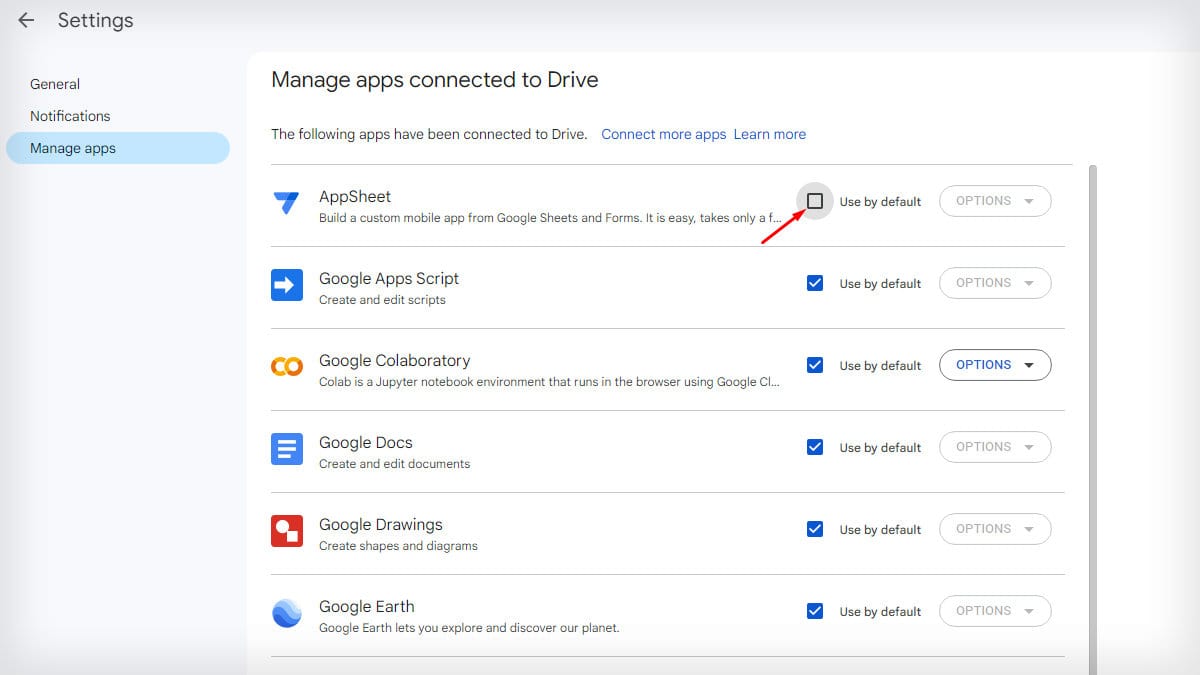
- To completely disconnect the Google or third-party apps, expand the Options tab.
- Select Disconnect from Drive.
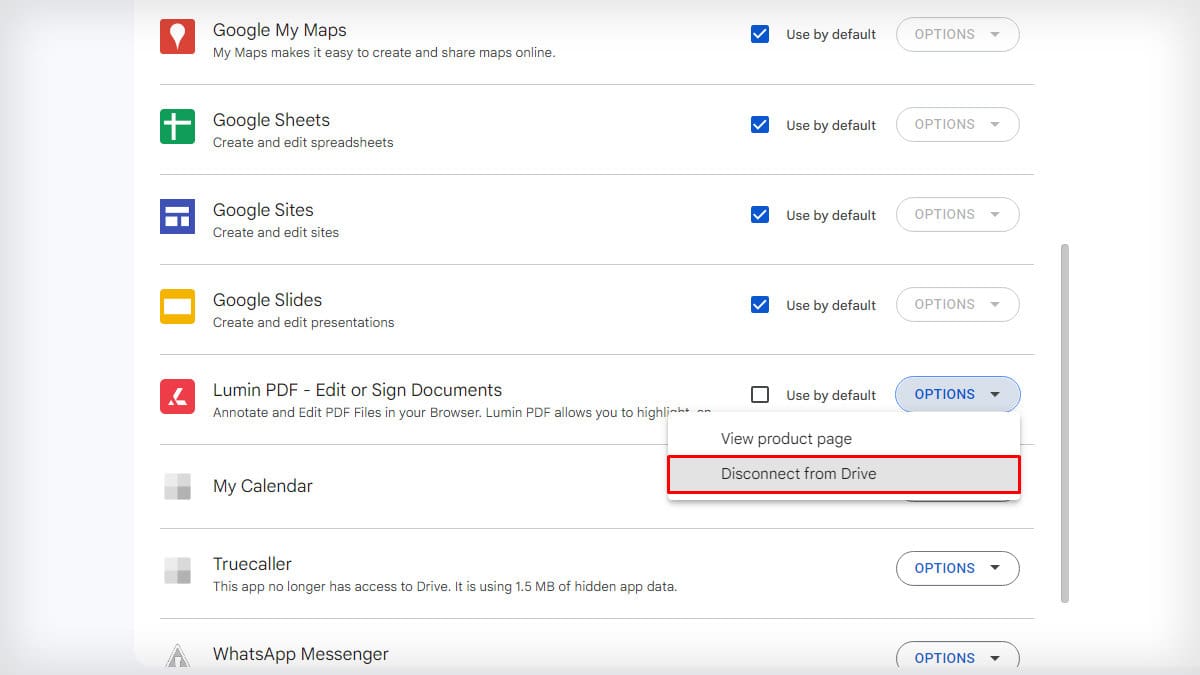
- Tap Disconnect again for confirmation.
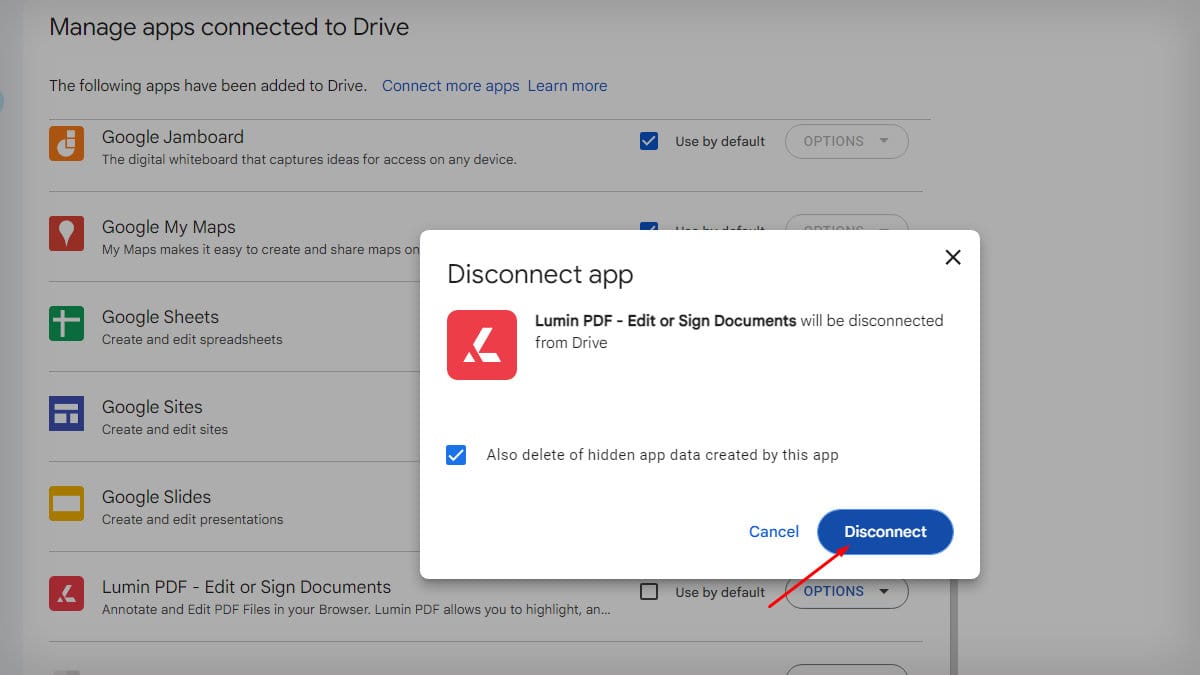
Starred Feature
If you want to quickly access the important files and folders in Google Drive, make a habit of starring them.
You will just have to click on the Star icon at the end of the files/folders you want to mark. These files will automatically get stored in the starred folder.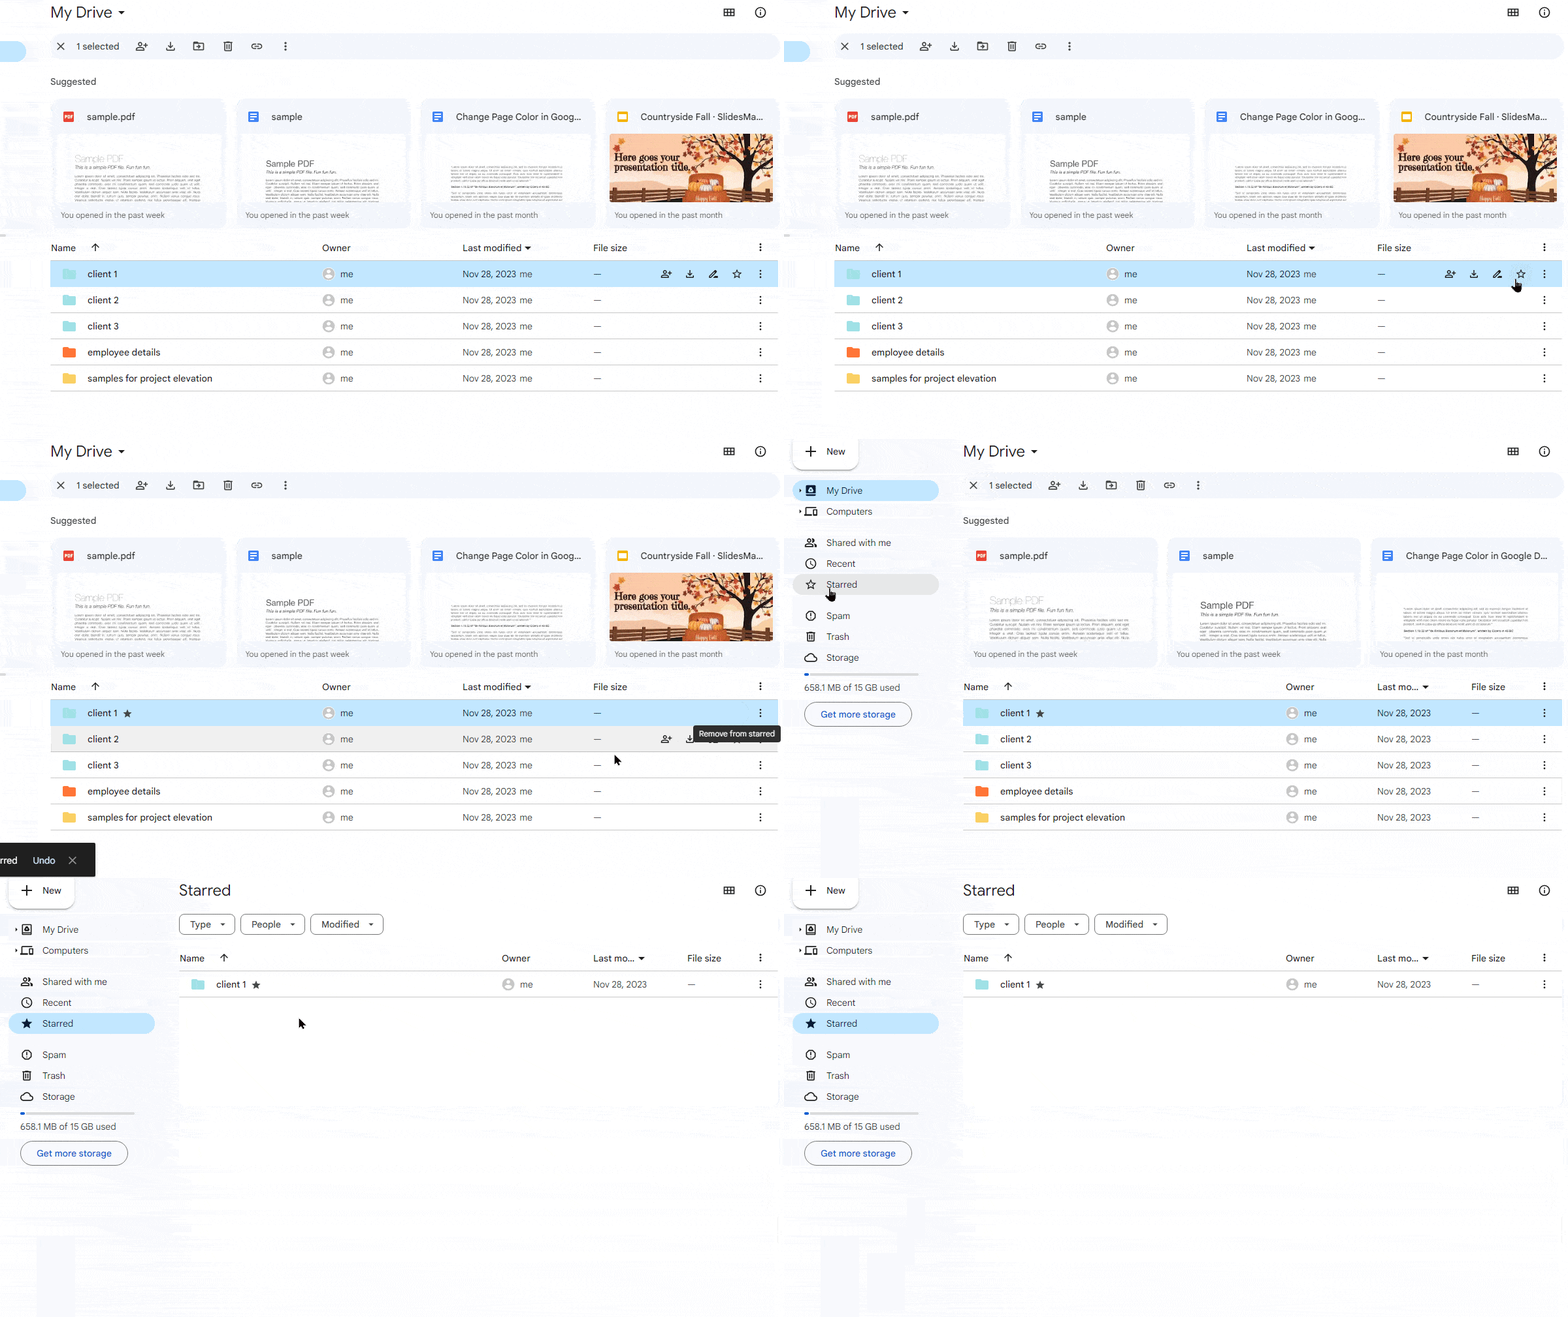
Once starred, you do not have to scroll through the General section. Click on the Starred folder on the left pane of your Google Drive’s homepage.
All files with starred marks will be displayed, you can easily find yours.