Grid is most useful tool to align content, like graphs, images, shapes, drawings, and more. It helps you improve the structure of your content and the overall professionalism of the document.
On MS Word, you can easily create or hide gridlines on your document. In addition to that, you also get to to resize or redesign the appearance of your grid. Besides the default gridlines that can’t be printed, there are some ways you can make printable gridlines as well.
Create a Grid on Word
There are two ways you can insert the standard grid layout on your Word document. One method is from the Layout tab and the other is the View tab.
- Select the Layout tab on your document.

- Go to the Align menu in the far-right corner of the ribbon. Click on View Gridlines.
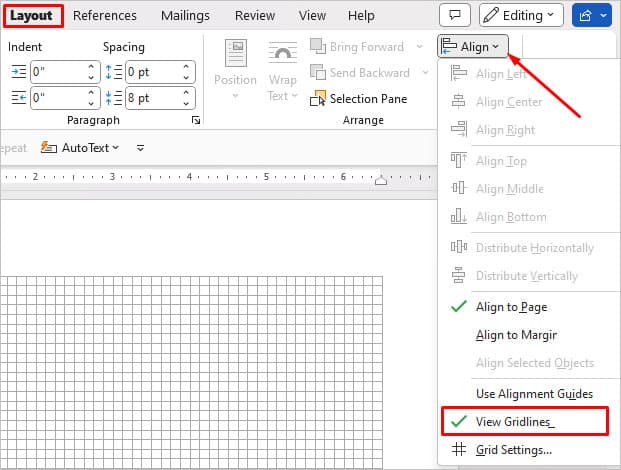
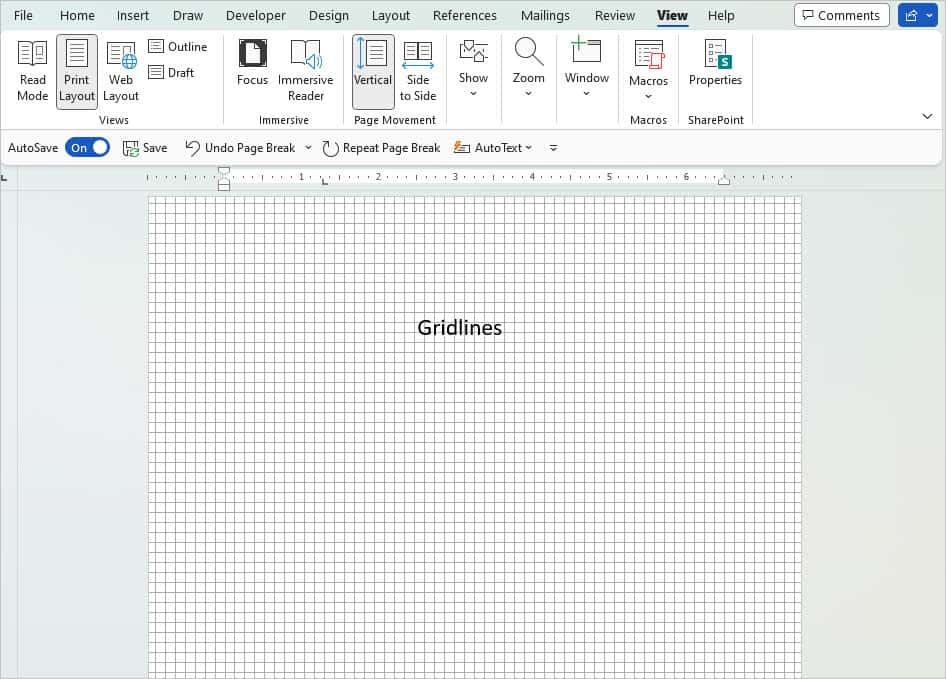
- You will now have gridlines throughout your document inside the margins.
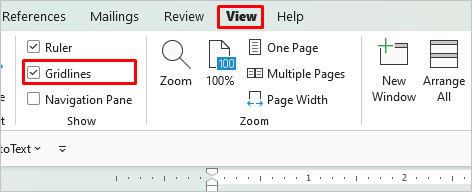
- Or, go to the View tab. Then, select Gridlines.
Create a Printable Grid
When you print a Word document, the standard grid doesn’t get printed on paper. But, there’s a way you can create a grid that’s printable by using Tables to behave like gridlines.
Do note that if you want an entire page with the gridlines, the maximum number of columns and rows MS Word allows you is 63.
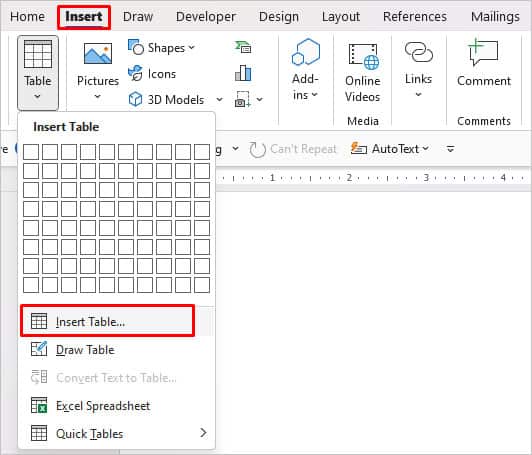
- Select the Insert tab and click on Table.
- Choose a size. If you want a bigger table , click on Insert Table.
- In the box, check the Table Size section and enter numbers for columns and rows.
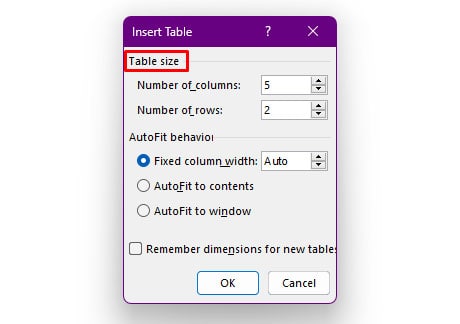
- Then, enter OK.
How to Customize Your Gridlines?
There are several ways you can customize the gridlines on your Word document. You can change its size and style. But, note that once you change the grid settings, they will reset back to their original size. So, it’s best to plan your content accordingly.
Change Grid Size
A way to change grid size is to change the spacing. You can either adjust the horizontal or vertical spacings or, manually type the spacing measurements. Follow these steps to change the grid’s spacing:
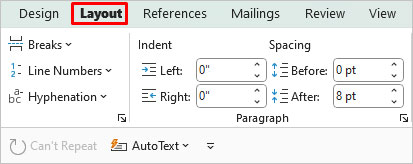
- Navigate to the Layout tab.
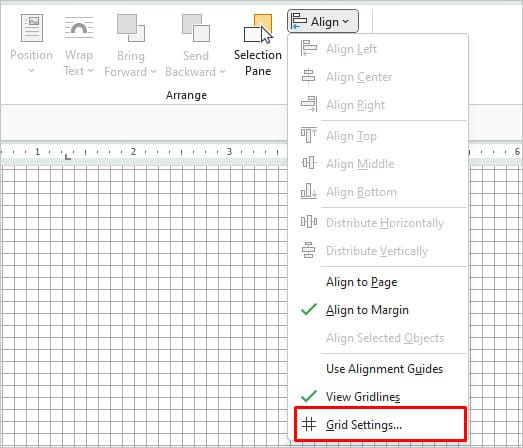
- Go to Align and then select Grid Settings. A new window will pop up.
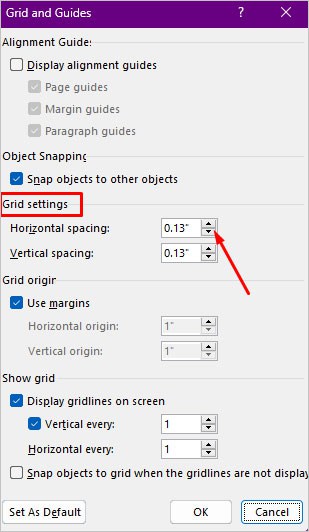
- Check the Grid Settings section and adjust the spacing.
- Then, click on OK.
Add a Full Page Grid
When you add the standard gridlines, it’ll automatically resize itself as per your margin size on the page. But, if you want the grid to cover your entire page, here’s what you can do:
- Go to Grid Settings again by selecting Layout tab > Align.
- In the dialog box, untick the box that says Use Margins.
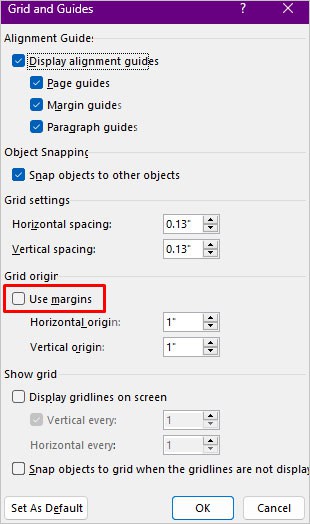
- Then, click on OK.
- Now, add the grid on your page again and it’ll cover the whole document.
Change Grid Style
If you want a bullet journal-like page or want a change in aesthetics, it’s easy to change the design of your gridlines. You can choose from an array of unique various designs. There are also direct options, like Small grid or Large grid.
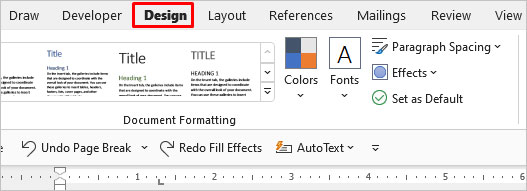
- Go to the Design tab from the ribbon.
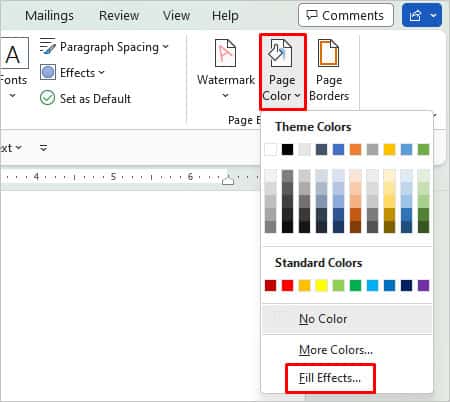
- Then, click on the Page Color option and go to Fill Effects.
- A new window will pop up. Click on the Pattern tab.
- To change the color, click on Foreground option.

- Then, click on OK.
Creating grids in this way also automatically makes the gridlines cover the entire document regardless of the margin sizes.
Customize Table Grid
If you want to make changes to the table grid, like its size and color, follow these steps:
- Click on the table to open the Table Design tab.

- Then, select any table style from the options given in the ribbon.
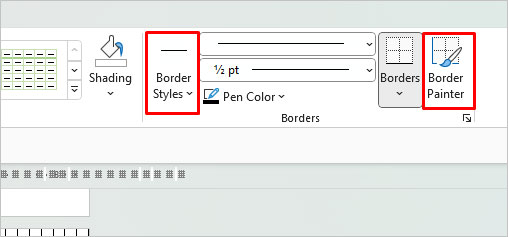
- Go to the Border Painter and Border Styles menu if you want to make further changes.
How to Align Images, Charts, Objects to a Grid?
MS Word has an option called Object Snapping that makes content like images, charts, and objects automatically adjust to the gridlines.
Here are simple steps to do so:
- First, select the desired object on your document.
- Go to the Layout tab > Align > Grid Settings.
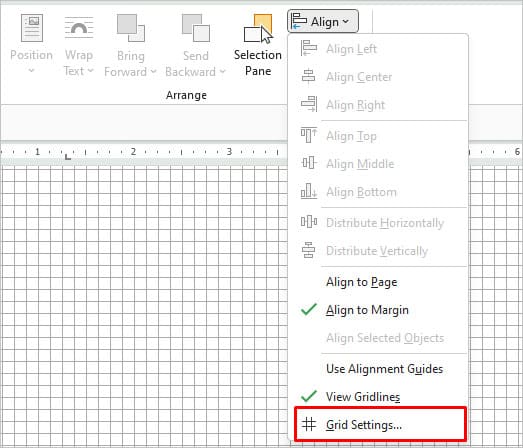
- Select Object Snapping section and tick the box that says Snap objects to other objects.
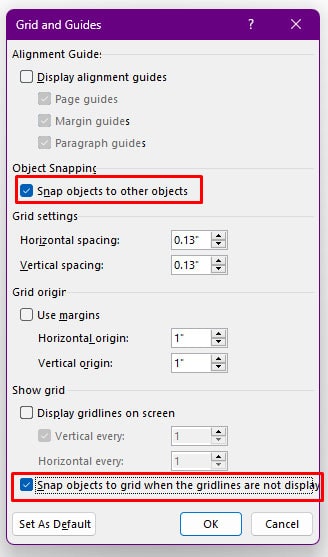
- At the bottom of the window, tick the option for Snap objects to grid when the gridlines are not displayed.
How to Hide or Remove Gridlines?
Unlike other elements, you can’t remove gridlines using the undo shortcut CTRL + Z. Instead, a simple way to hide them is to go to the same menu to view gridlines and uncheck the box. This will get rid of all the gridlines.