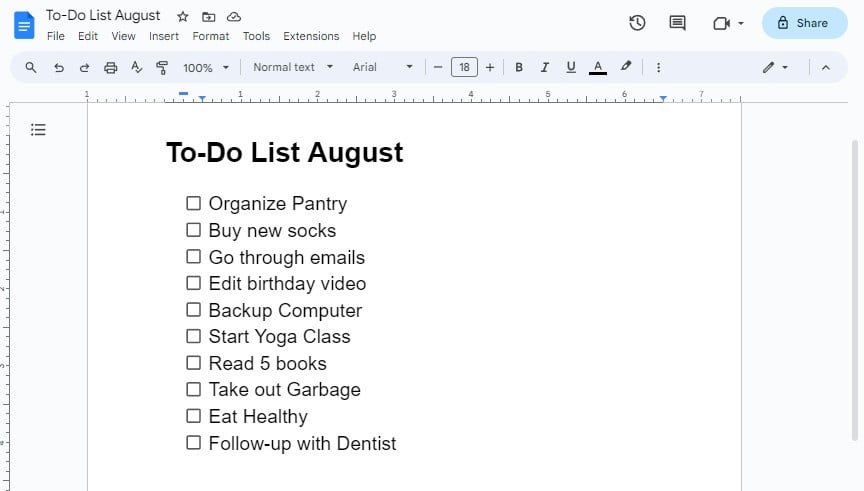
We all know that using checklists makes tracking our daily tasks easier. It is an efficient way to plan, keep records, and stay up to date with our day-to-day activities.
Similarly, in Google Docs, you can create checklists in various forms. You can turn your old existing list into a checklist, add a checkbox in a table, insert a multi-level checklist, and much more!
From to-do lists and short/long-term goals to work plans and projects, you can trace them all by simply checking them off the list.
Start a New Checklist
Let’s start with making a fresh list of things you want in a checklist. All you need is a Google account to log into your Google Drive and create a new Google Docs.
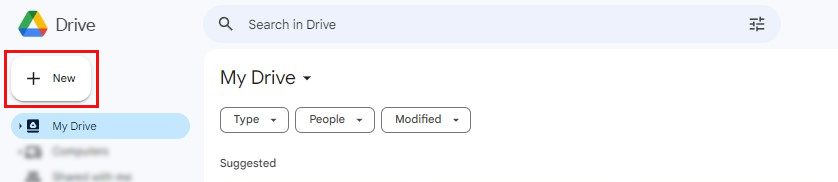
- Open Google Drive on any browser.
- Click on the +New icon to create a new Google Docs.
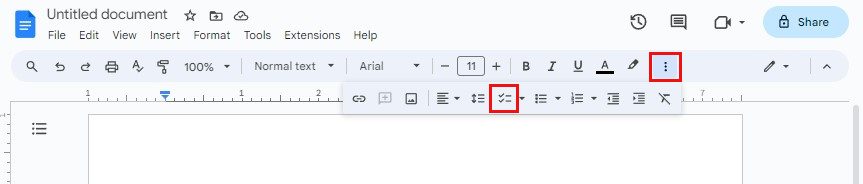
- Select the More icon on the toolbar and click the Checklist icon, or type @checklist and press Enter key to start a new list.
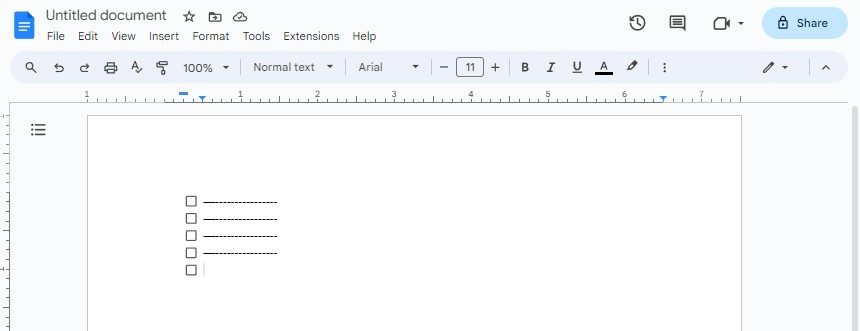
- Now, you can start making your list with checkboxes appearing after every Enter key.
Add Checkbox to Your Existing List
Moving on, you can also turn a normal list of things into a checklist in less than a minute!
- Open the document with the contents you wish to turn into a checklist.
- Highlight the existing list by click-dragging the cursor from top to bottom or by simply using CTRL + A to select all.
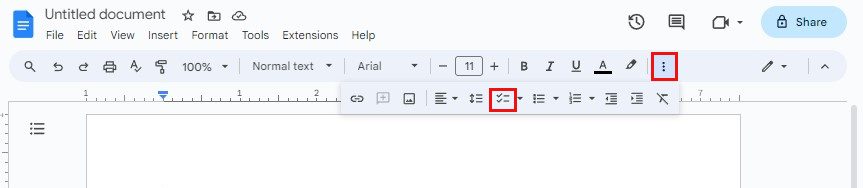
- On the toolbar, you can find the Checklist icon. Click on it or press CTRL + SHIFT + 9, and you will have a checklist ready to use.
Add Checklist With Strikes
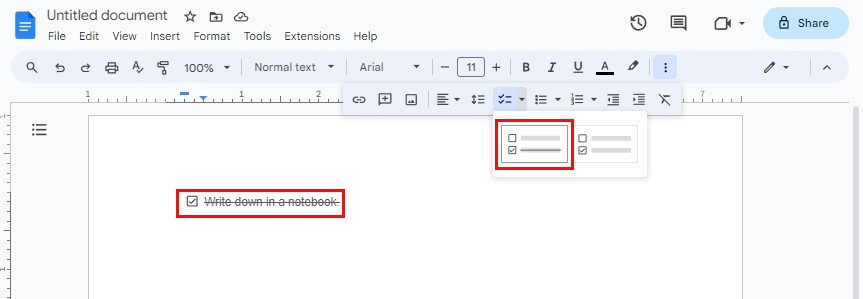
When you tick off a task from the checklist, the mark denotes its success. However, it is up to you if you want to keep the completed tasks readable or unclear with the help of strikes.
There are two options available on Google Docs to showcase the completed version of your checklist—one is where you will see no difference after ticking the box, and another is when the text supporting the checkbox is scribbled with a straight line the moment you tick the box.
To add a checklist with strikes, click on the upside-down triangle button to open the checklist menu. You will have two options to choose from. Click on the first option.
Add Multi Level Checklist
If a basic checklist is not what you want, try making a multi-level checklist. It can come in handy if you want to organize sub-tasks under vast titled tasks. Here are the steps.
- Open your Google Docs.
- Click on the checklist icon on the toolbar.
- Type the first item in your list and press Enter to start another line. You will find a checkbox at the beginning of the second line.
- Then, press the Enter key and tab key or CTRL + ] to add an additional level.

Add Checkbox in Table
If you want to make an even more arranged or professional-looking checklist, then you must try making a checklist on a Table. You can insert a table with as many rows and columns as you want and add the little checkboxes inside of them.
- Open your Google Docs.
- Click on the Insert tab at the ribbon and tap on Table. Then, select a required table template.
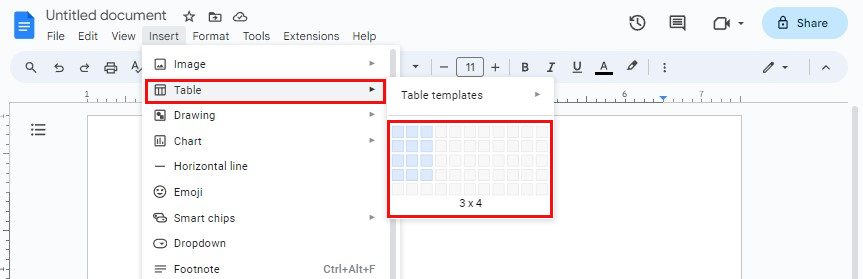
- Make your list using names and numbers inside the table.
- Now, click on the desired row to add the checkbox.
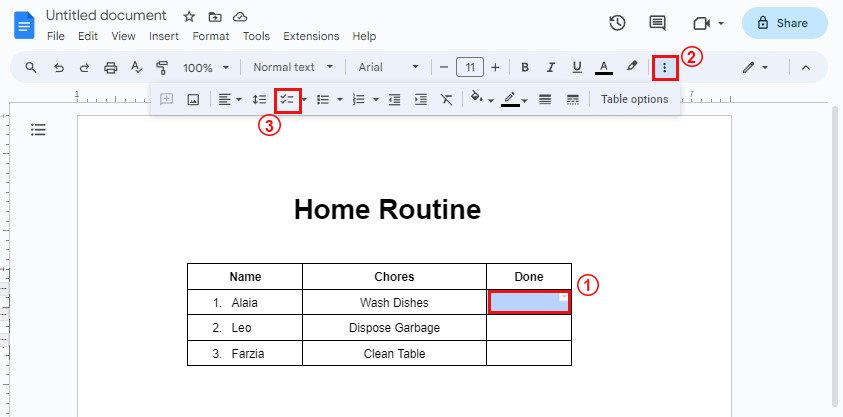
- Then select the checklist icon from the toolbox or press CTRL + SHIFT + 9.

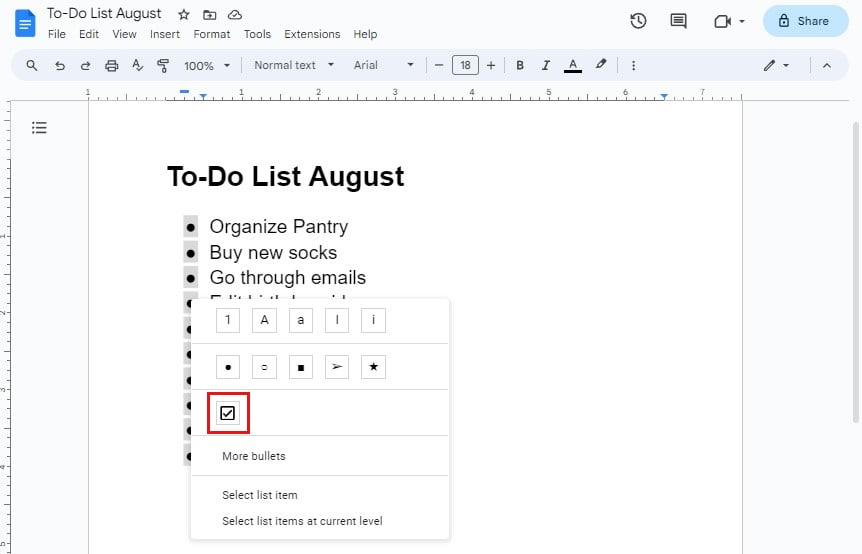
How to Convert Bulleted List to Checklist?
Sometimes, you might start your list with bullets available on the toolbar right next to the checklist icon. In case you want to convert it to a checklist, you can do it without restarting it.
Open your Google Doc and click the bullets (lined up at the left side of the texts) to select all.
Now, right-click and select the checkbox option to make it a checklist.
Can We Insert a Special Character in a Checklist?
You also have the option of adding a special character that resembles a checklist on your Google Docs. This is the perfect way to create a checklist if you don’t want the checkboxes placed serially but in specific locations only.
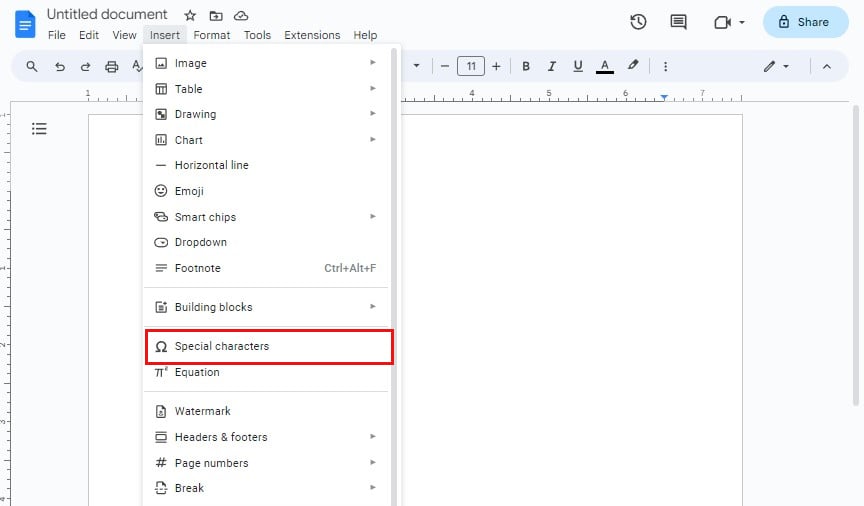
- Open your Google Docs.
- Click on Insert at the ribbon and select Special characters.
- Then, a box will appear on your screen.
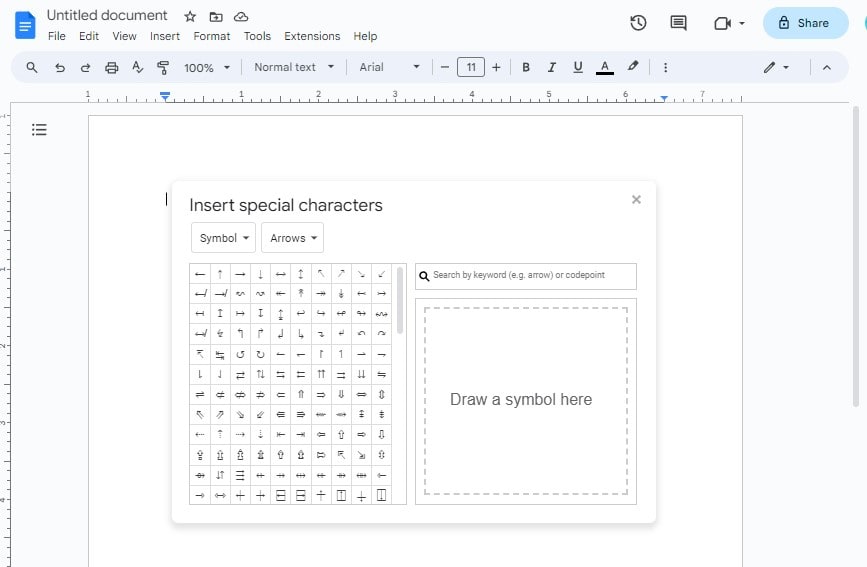
- Type ‘check’ on the search keyword bar or choose to draw a symbol on the blank pad.
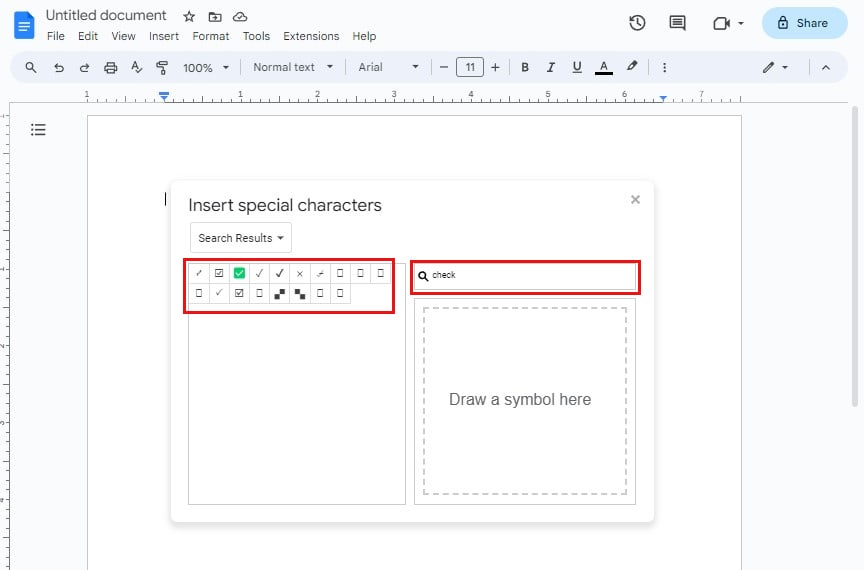
- Click on the preferred symbol to add to your docs.