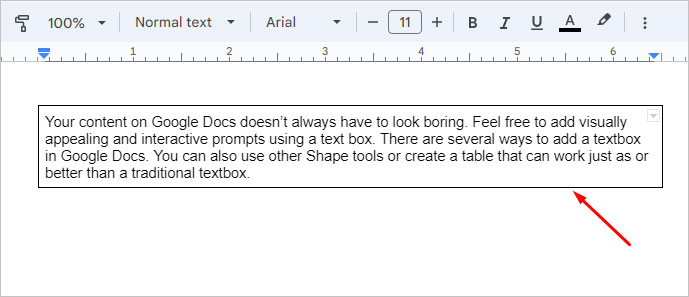
Your content on Google Docs doesn’t always have to look boring. Feel free to add visually appealing and interactive prompts using a text box. There are several ways to add a textbox in Google Docs. You can also use other Shape tools or create a table that can work just as or better than a traditional textbox.
Use the Drawing Tool
On Docs, you can find the text box in the Drawing tool. You can create a box of your preferred size using these steps:
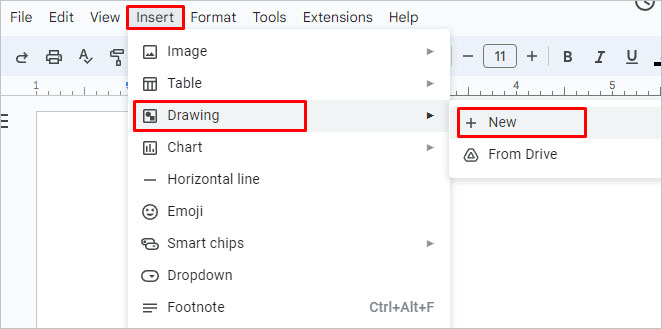
- From the toolbar, click on Insert and then click on the Drawing option. Select New to open the drawing prompt.
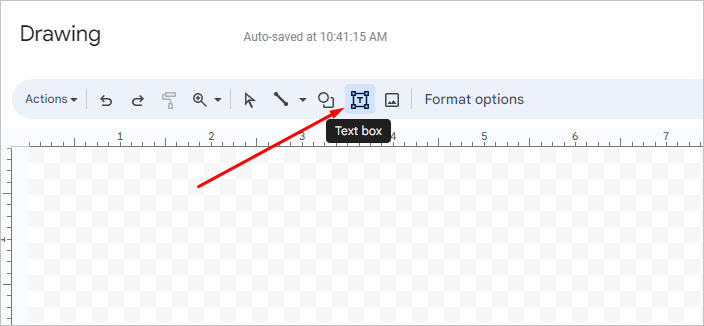
- Here, click on the Text box icon from the toolbar.
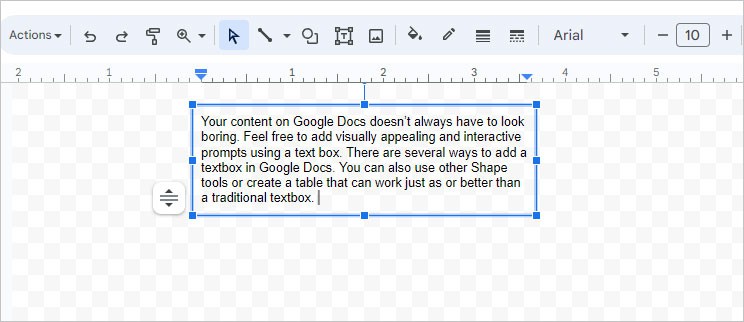
- In the prompt, a + icon will appear. Click and drag the cursor to create a box of your desired size.

- Click inside the box and type or paste any text.
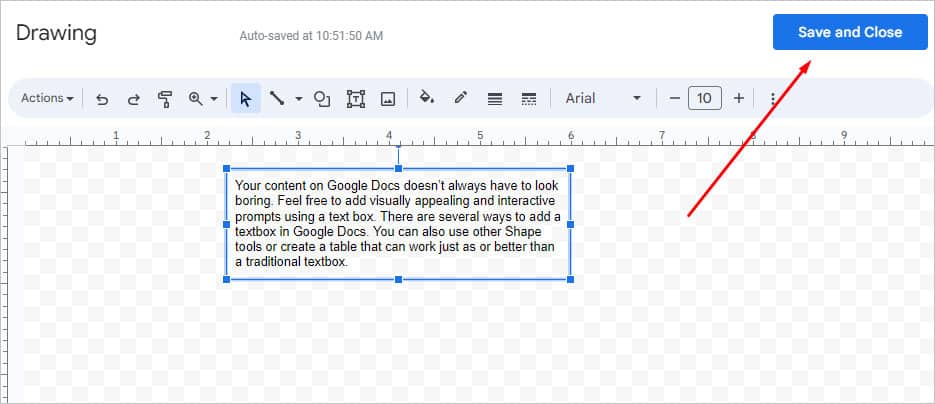
- Once you’re done, click on Save and Close in the top-right corner.
Tip: You can achieve the same result with the Shape Tool within the Drawing prompt. You can find it on the left of the text box tool.
Use the Table Template
If you want more flexibility with your textbox, a good idea is to use a table instead. But to make it act like a textbox, you may only use one cell. Then, enlarge or customize it to any size or color of your choice.
- Place your cursor where you want to add the table.
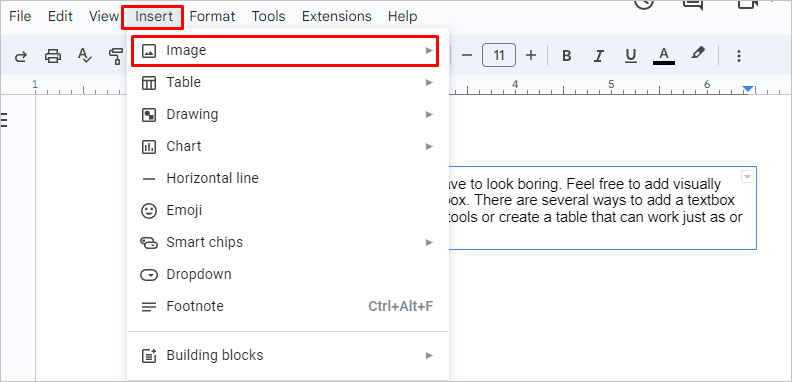
- Go to the menu at the top and click on Insert.
- Then, select Table and only click on the first box that says 1 x 1.
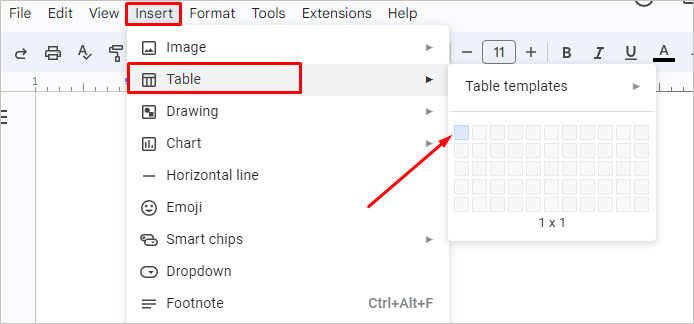
- A rectangle box will appear. From there, you can customize it. You can change the size by selecting its borders and then dragging them to your preference.
If you want to add more elements or media to your table, always make sure your cursor is inside the box.
Editing a Text Box in Google Docs
From color, size, and alignment to images and other elements, there are various ways you can edit a text box.
But in comparison, a text box is mostly limited to text only and you don’t get much versatility. Whereas, a single-cell table offers much more if you want to fully customize your text box. Basically, you can add any type of content inside a text box made with a single-cell table.
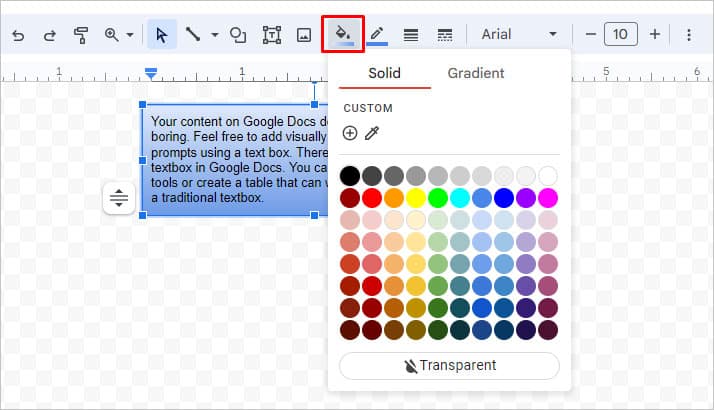
Change Color
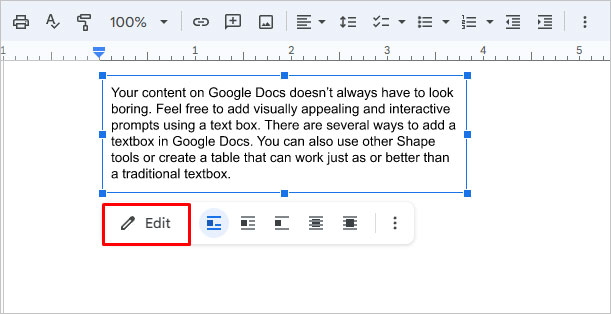
- Select your text box and then click on Edit.
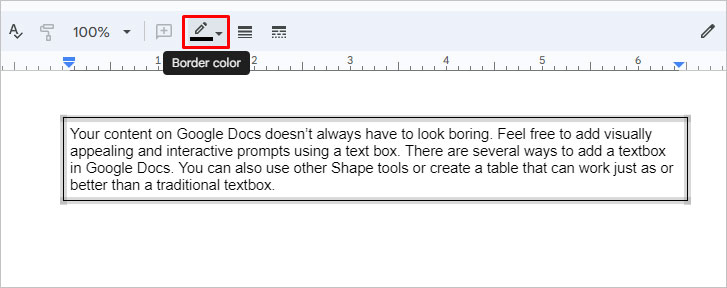
- In the drawing prompt, select your text box. Then, click on the pencil icon to change the border color.
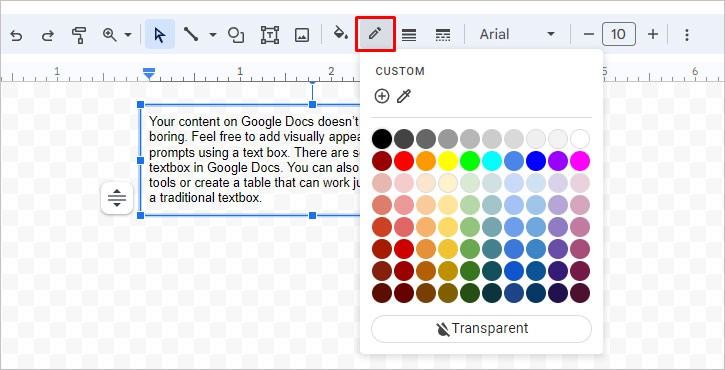
- On the left, click on the bucket icon to fill the text box with color.
If you used a single-cell table, follow these steps:
- Press and hold the CTRL key and select all four borders. This will display the Border Color icon in the toolbar. It looks like a pencil on top of a strip of color. Click on it and choose any color.
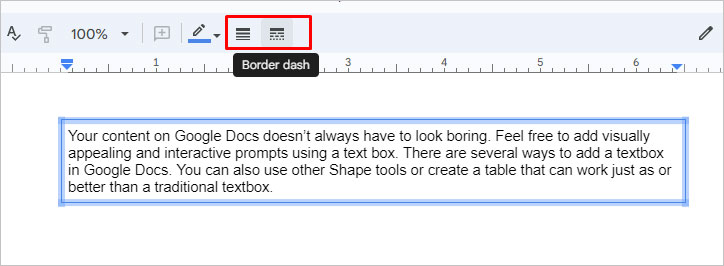
- Similar to the text box, change the box style by clicking on the Border weight and Border dash icons.
Size and Rotation
- Click and drag the text box or the single-cell table borders to change the width.
- To change the length of the text box, click inside the box and then press Enter.
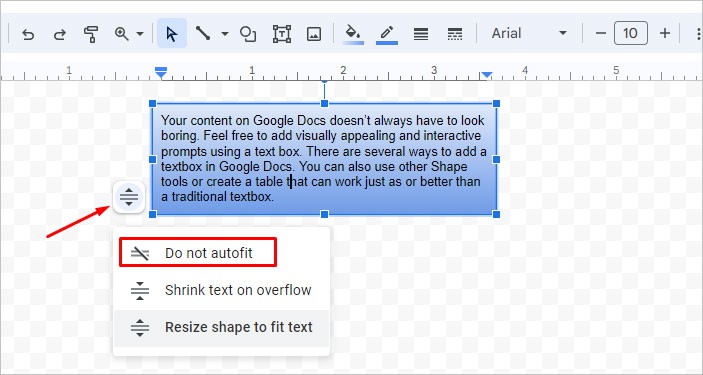
- If you want to resize it freely, click on the Resize button on the left. Then, select Do Not Autofit.
- To change the thickness of the text box’s border, click on the Border weight icon. Then, choose any size.
- To change the border pattern, click on the Border Dash icon. Select any style.
- Click on Save and Close.
Add an Image/Content
The text box doesn’t allow you to add images freely inside it. But there’s a workaround for it. We can use an image as an overlay. Although it’s technically not a part of the text box, you can still fit it inside the box.
- Double-click on the text box to open it in the Drawing tool.
- Click inside the box and then select the Image icon. Choose or upload any image.
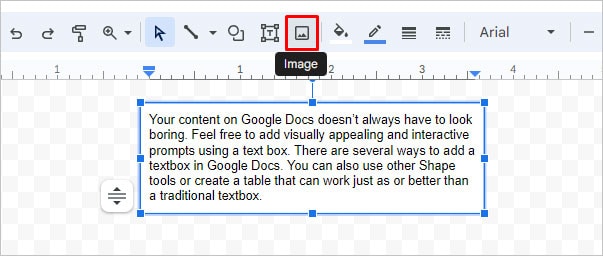
- The image will open outside the text box. Drag the image to fit inside the textbox. Click and drag the borders of the text box to resize the image.
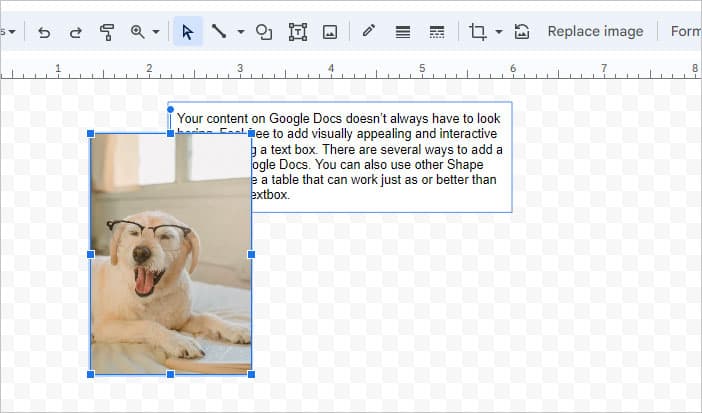
- Now, the image will completely cover the text. So, you’ll need to manually align your text to make it fit.
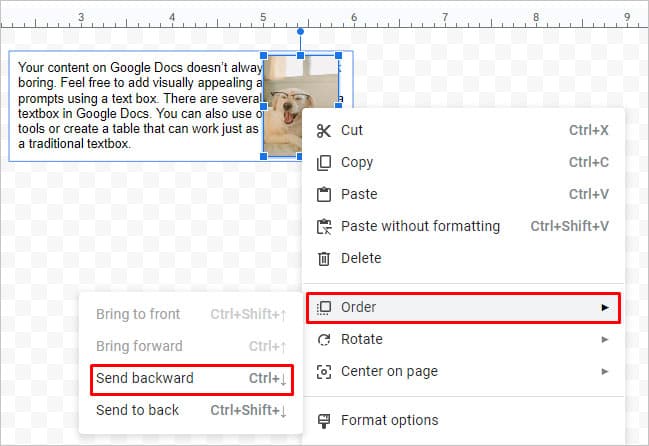
- Or, if it’s a background image and you want to show the text in the front, right-click on the image. Then, click on Order. Click on Send Backward.
If it’s a single-cell table, refer to these steps:
- Click inside the table and click on the Insert menu. Then, go to Image and select any image.
- Click and drag the corners to resize the image.
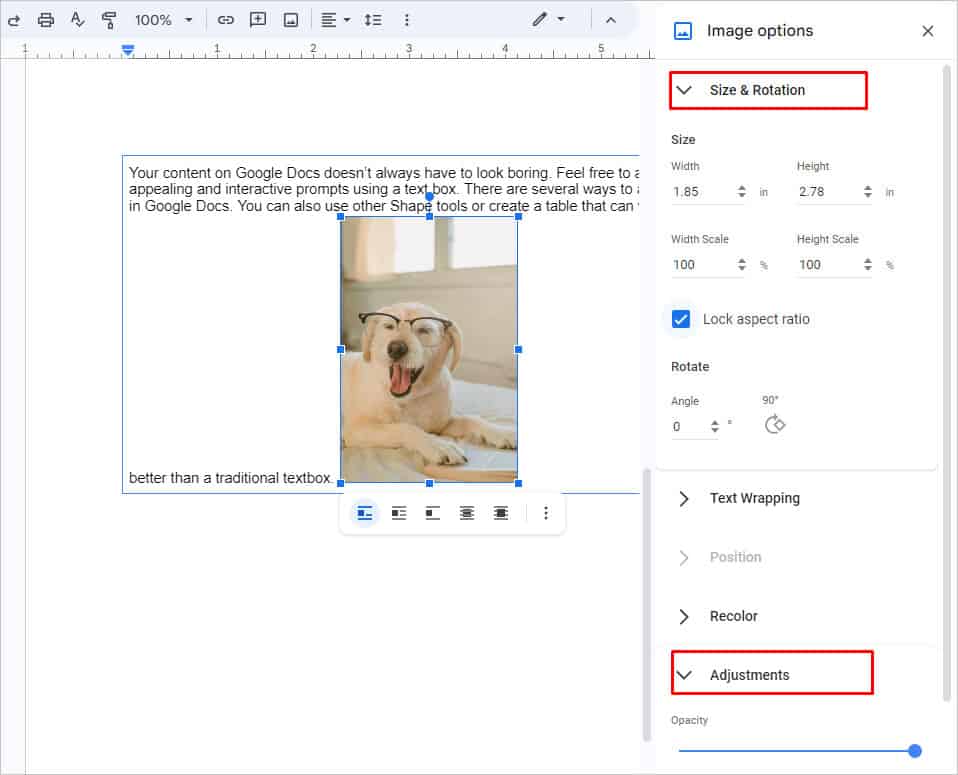
- To edit the image, right-click on it and go to Image Options.
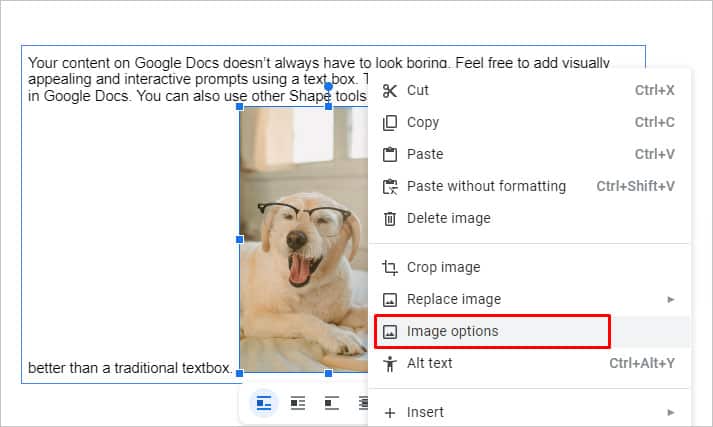
- Hare, change the image size and position. You can also go to Adjustments and change the brightness, contrast, and opacity of the image.
Why is My Text Box Not Moving?
If your text box is difficult to move around in your document, it can be because of its formatting style. To check this, here’s what you can do:
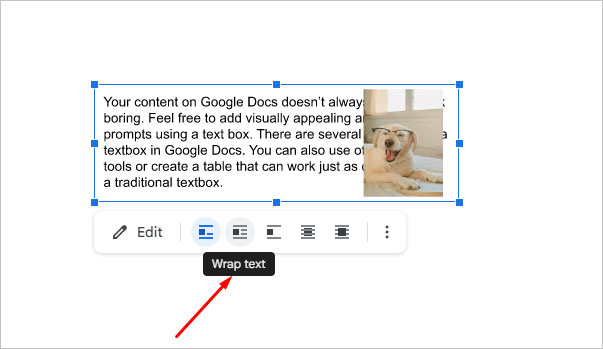
- Click the text box and navigate to the formatting icons below. Select from In Line, Wrap text, Break text, Behind text, and In front of text.
- You can select any margin to fit your text box among the texts.
- Click on the third option and select Move with text or Position options to set a custom positioning.