Did you know that you could edit images in Google Docs? The word processor is not only an excellent platform for creating text-based documents, but it also offers a range of tools that can be used to edit pictures within your document.
Although it is limited in its ability to perform advanced editing, you can perform some basic level modifications like resizing an image, adjusting and aligning it with the content, adding text and shapes to it, and many more.
In this article, I will introduce you to all the available tools used for editing images in Google Docs.
Importing Images
Users will find it as easy to import an image to the document as using the editing tools. You can add images in many ways and adjust and edit them as you want.
You can directly upload an image from your PC by simply choosing Upload from computer option under the Insert tab.
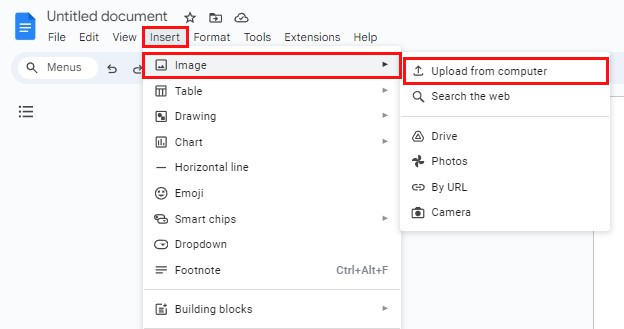
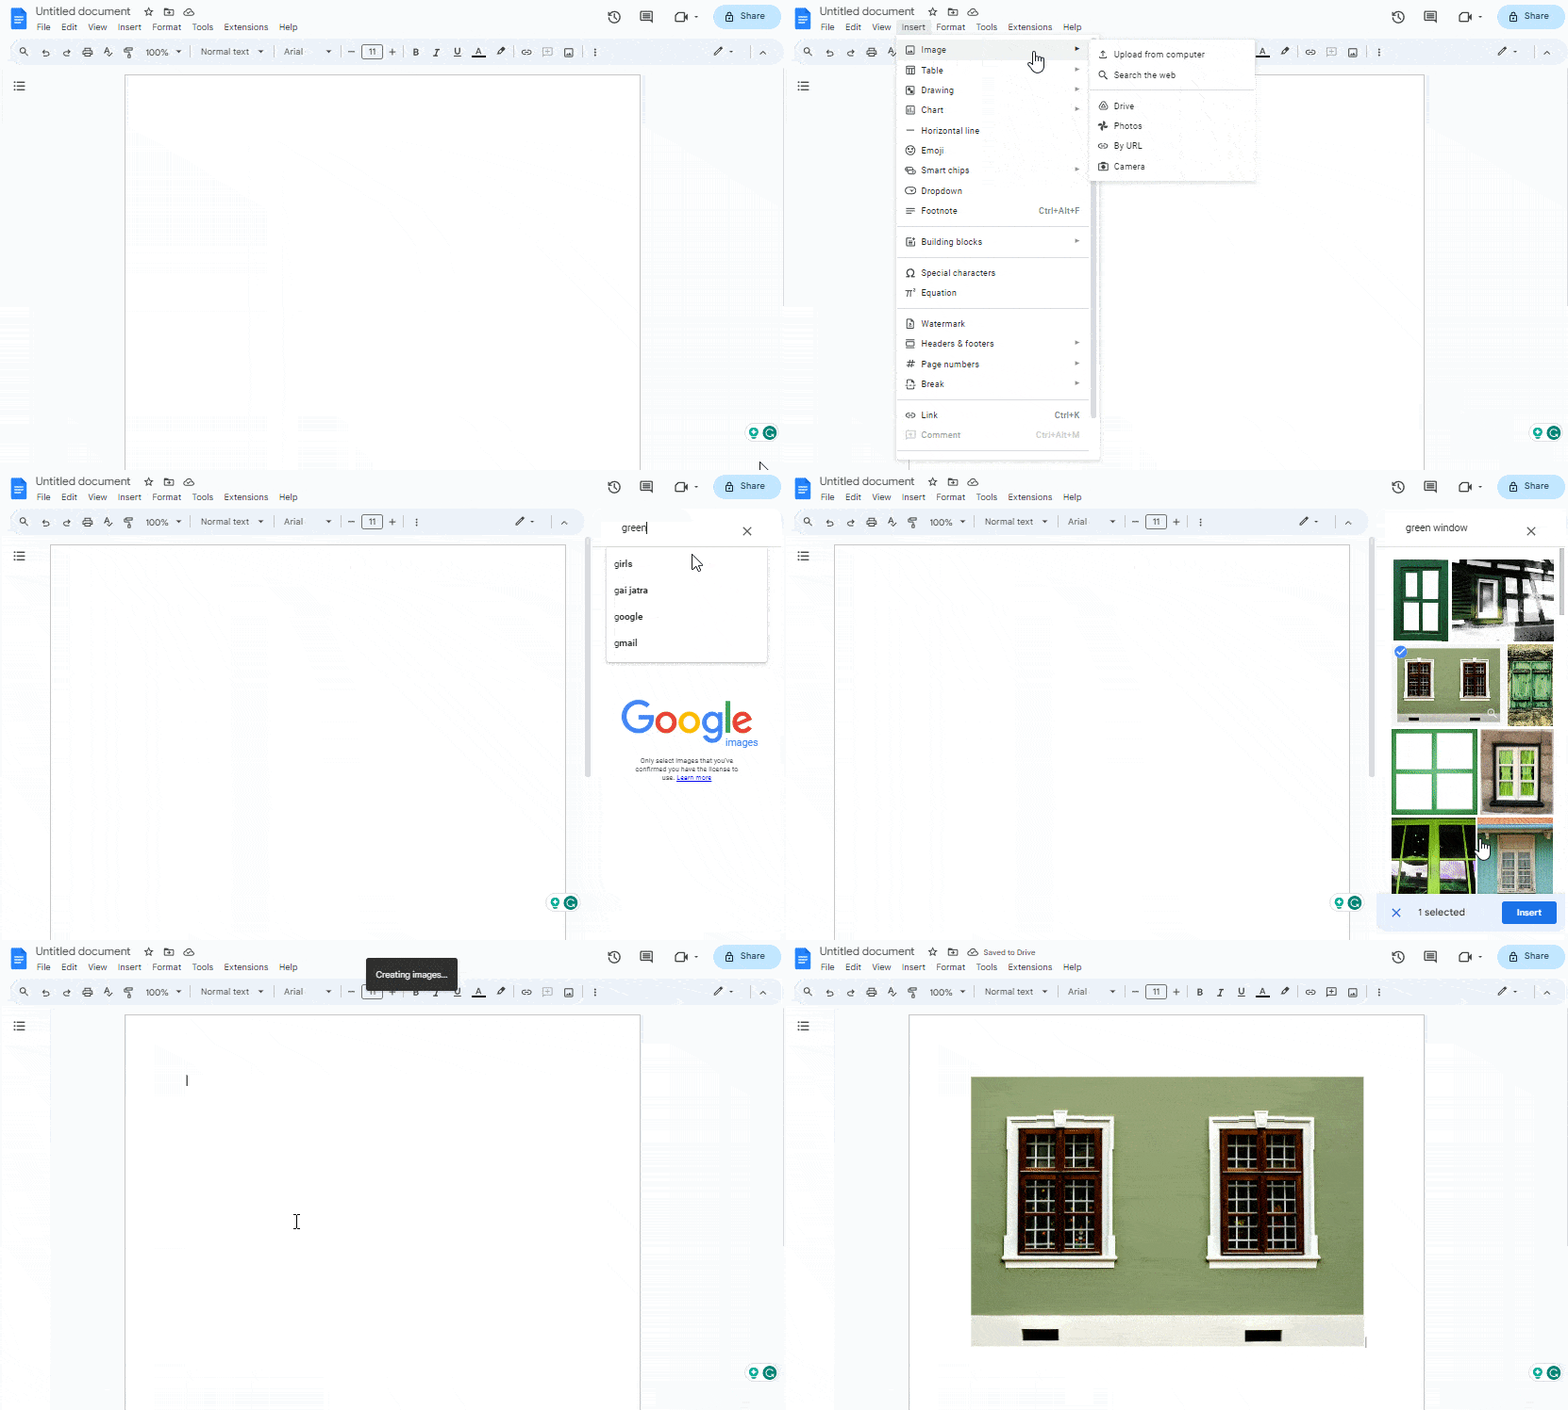
Another method to import images to your Google Document is by choosing Search the Web option under the Insert > Image tab.
You can pick images from the Google Image search engine that will appear on the right sidebar.
You can also add a picture in Google Docs by simply using CTRL + C to copy the image and CTRL + V on the document to paste it.
Resizing Images
You can easily resize your image by simply dragging it inwards or outwards from all the blue dots around it. However, if you want to keep the images in their proper shape, we advise you to stretch out or in from either of the four corner blue dots.
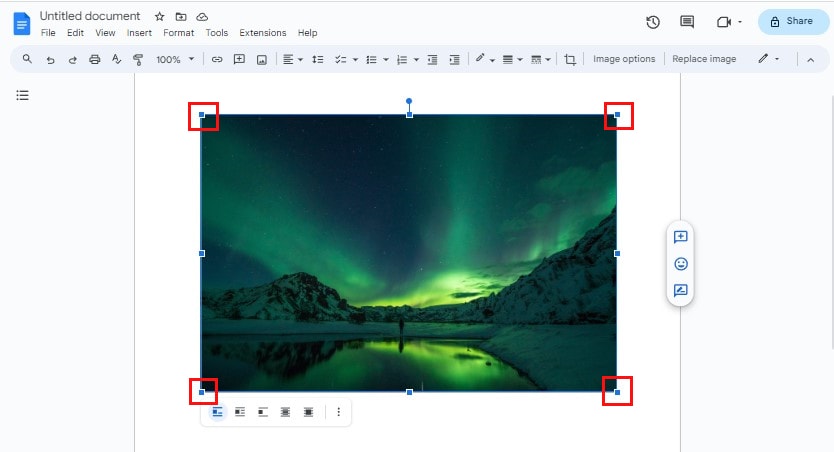
Avoid dragging the blue dots placed in the middle of the image which affects the aspect ratio of an image.
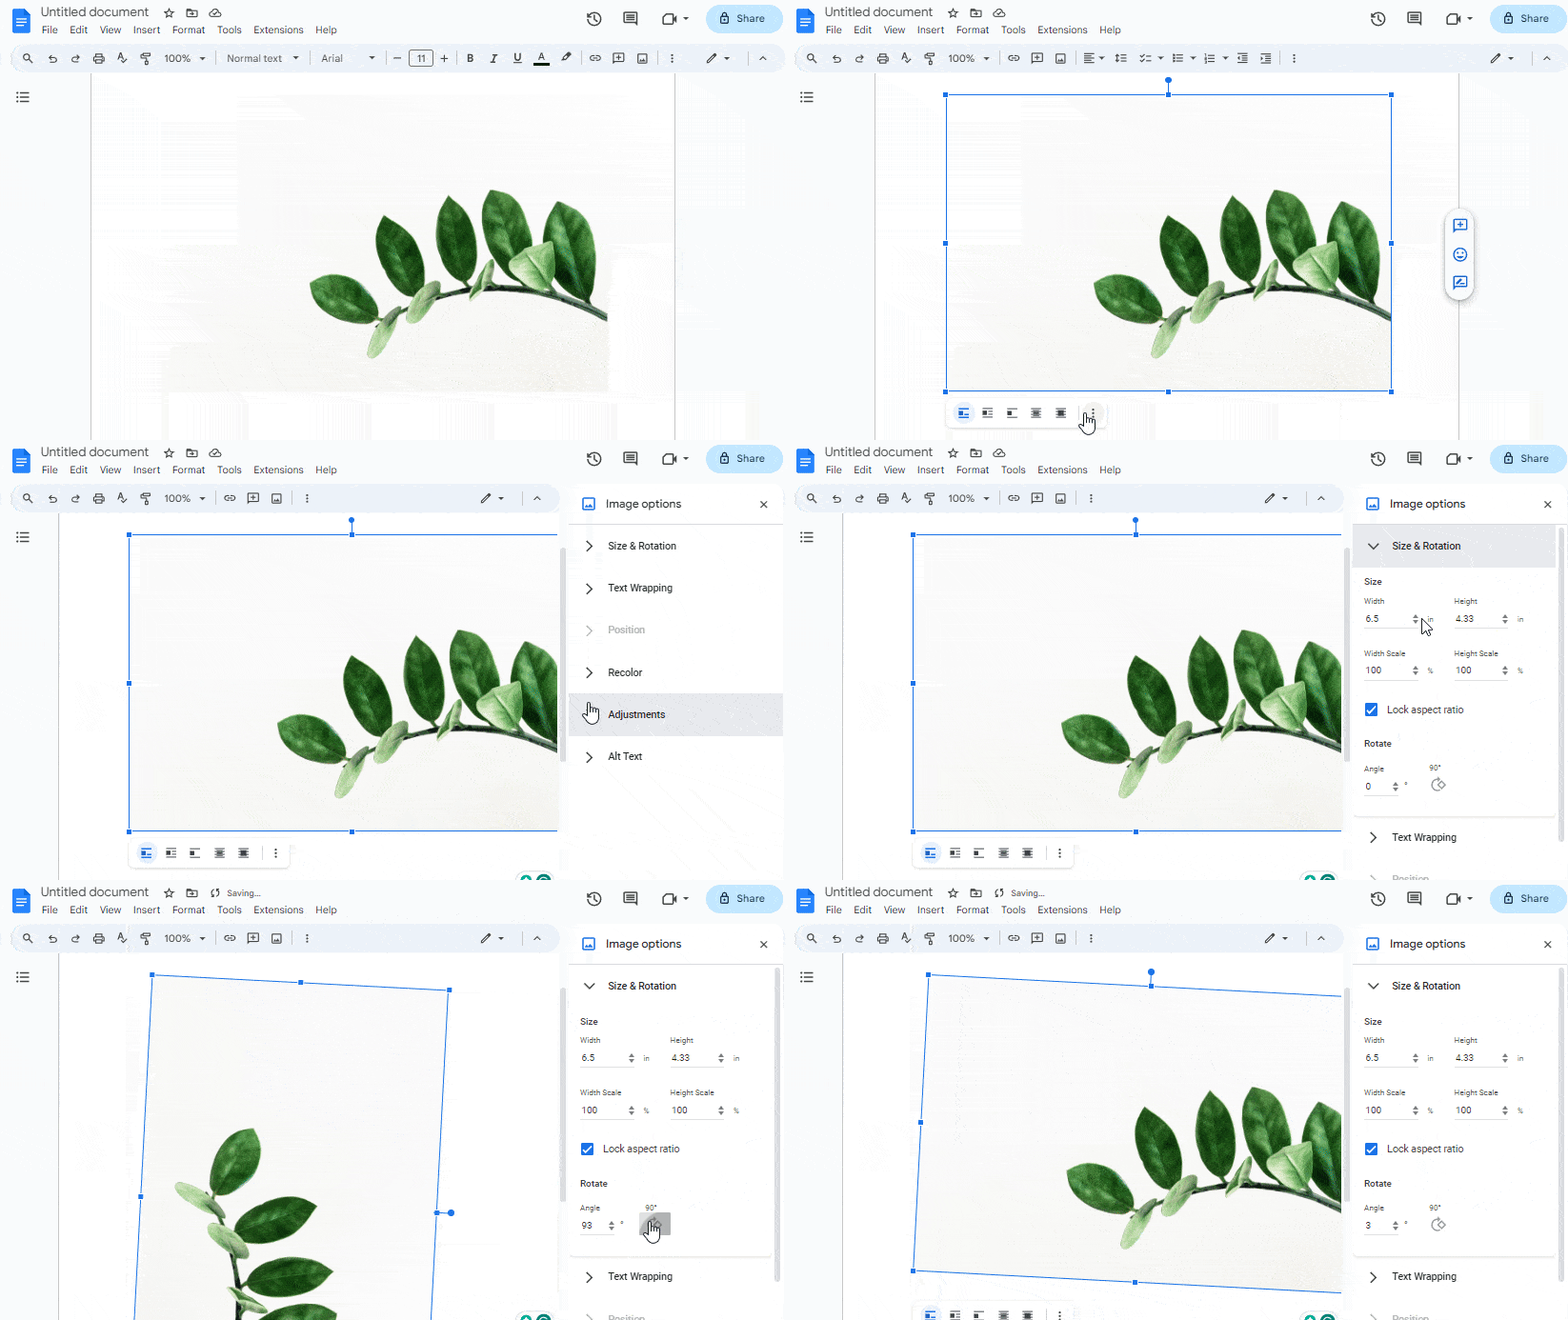
Moreover, to resize the image to a specific size, click on the image options (three vertical dots) to open a sidebar.
On the pop-up that appears, click on Size and Rotation and change the width and height alongside the image’s width and height scale by typing the numbers on the boxes.
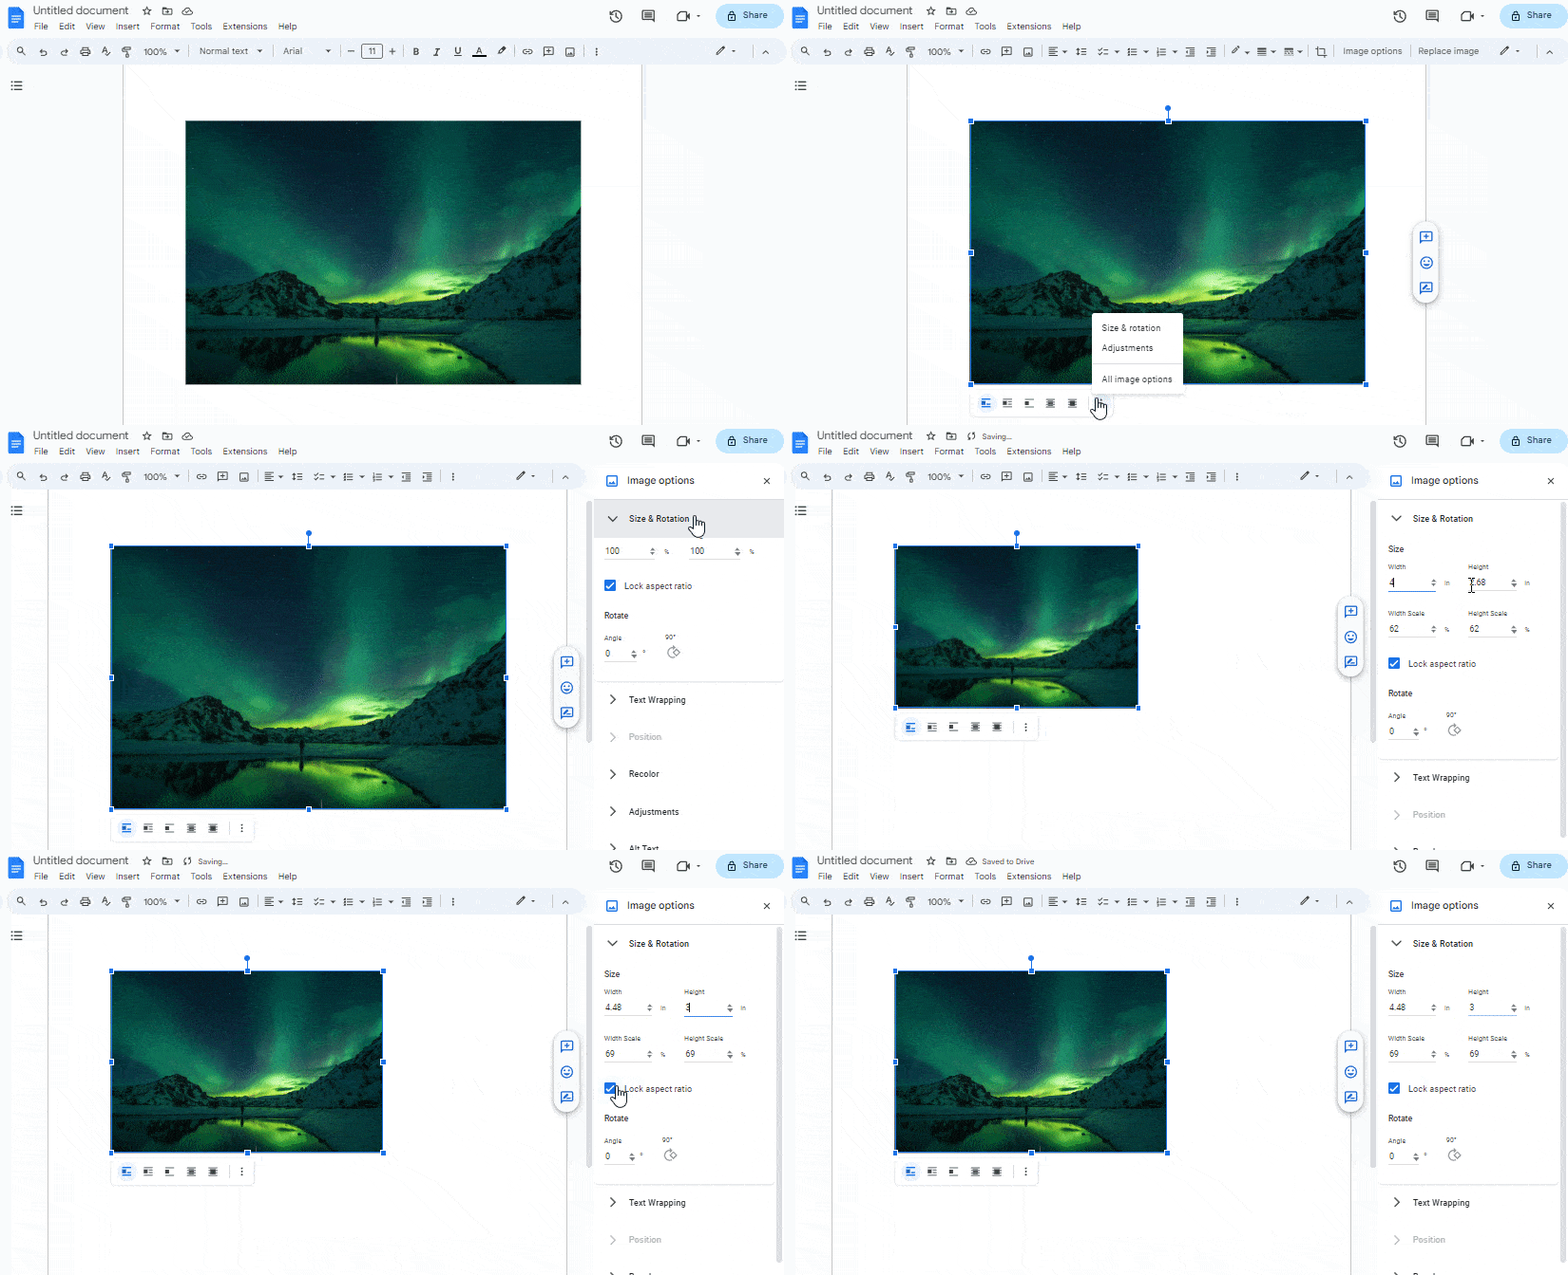
Also, tick the square next to the Lock aspect ratio to protect your image from any damage.
Cropping Image
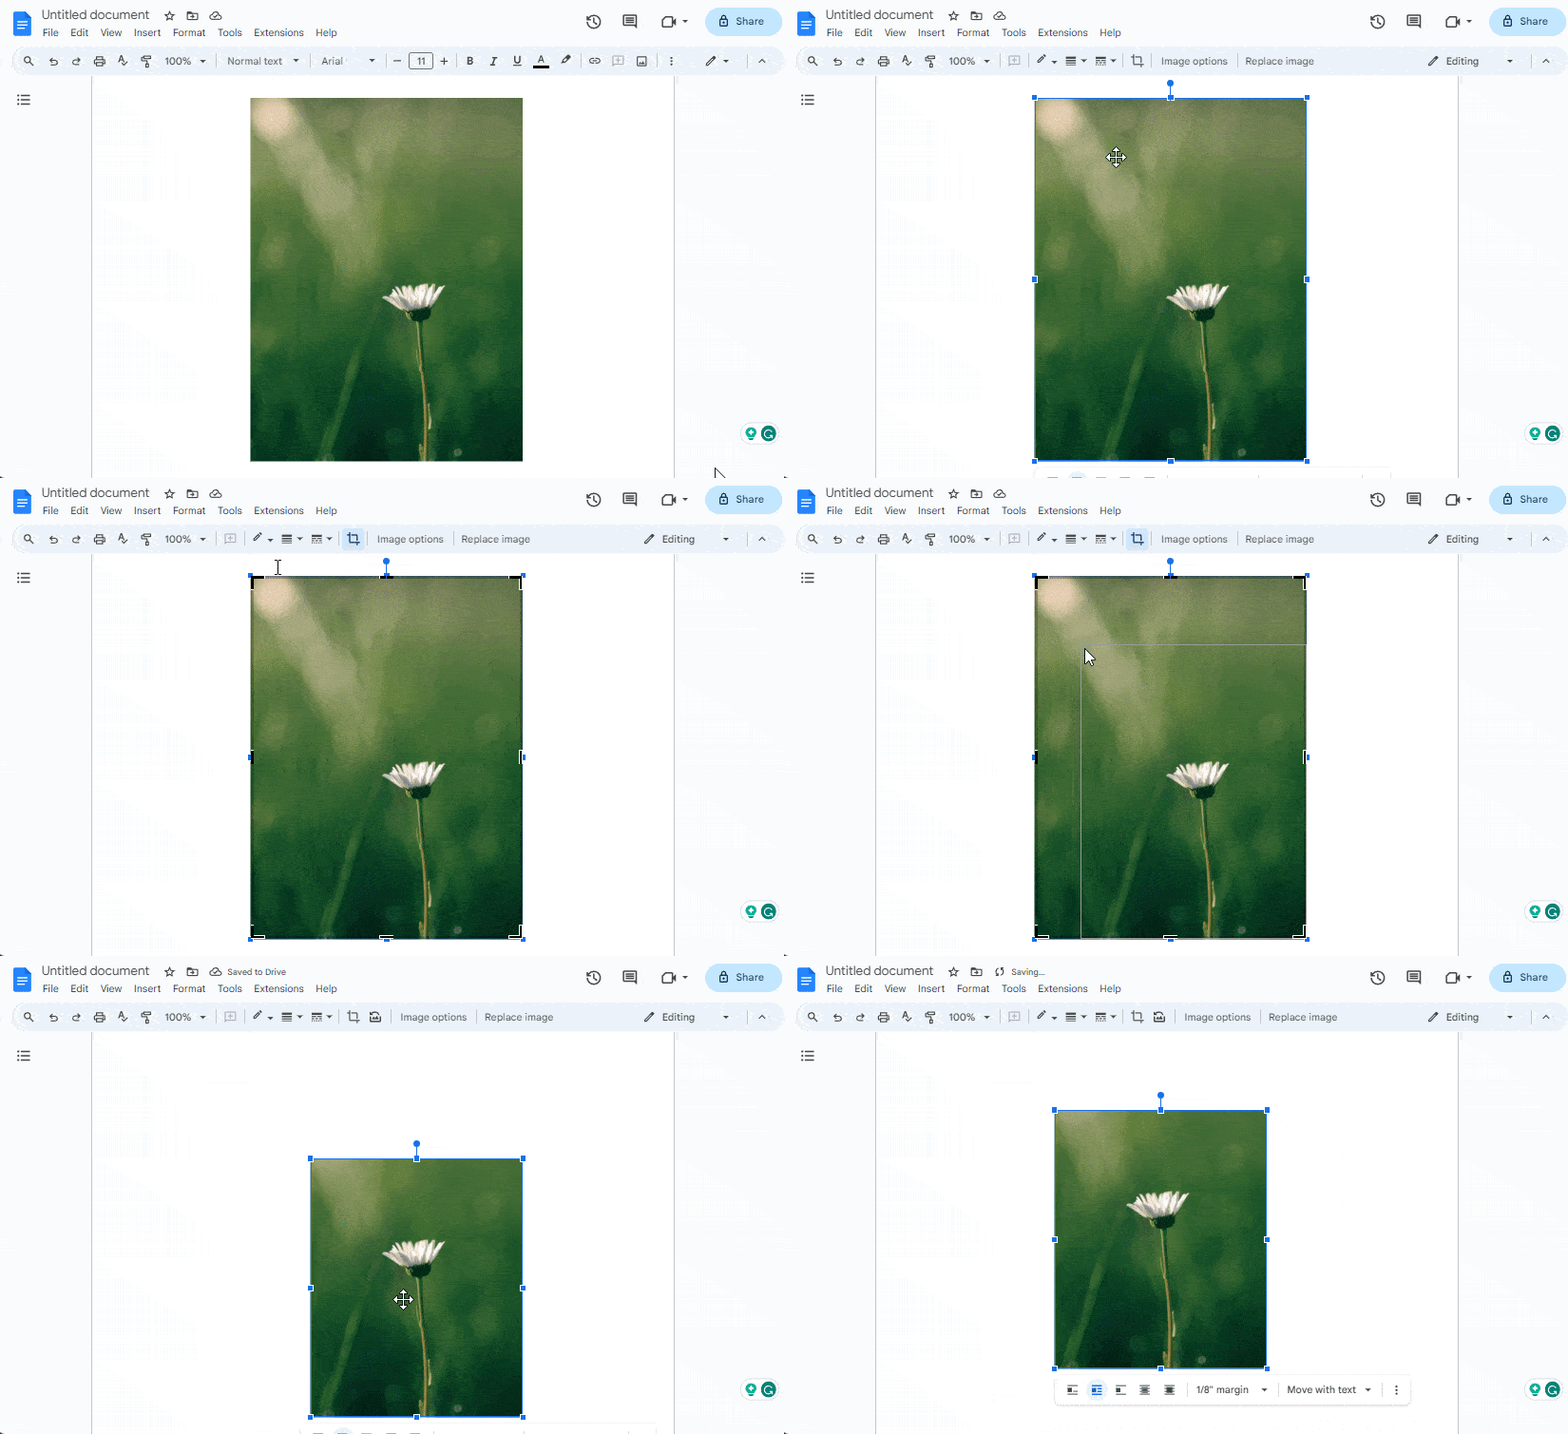
You can crop the image by clicking on the crop icon that appears on the toolbar. Drag the corner of the image in and out to cut the excess part. Then, press the Enter key if you want to finalize the size of the picture.
Rotating Images
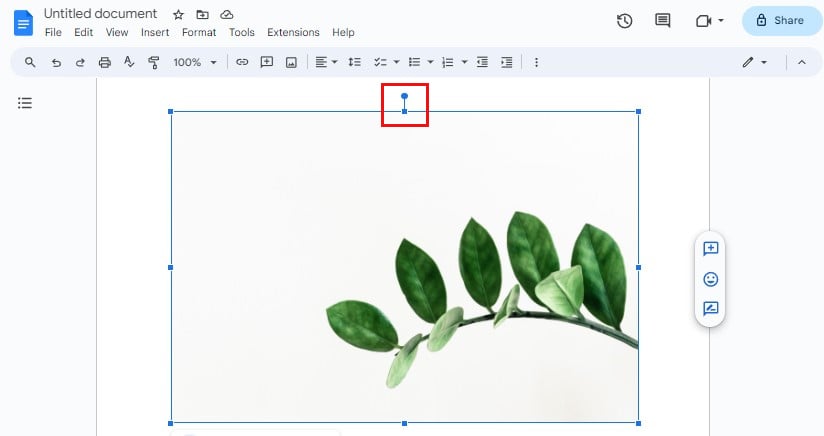
In order to rotate the image, click on it and place your cursor on the Middle (Top) hand, then click-drag it in a circular motion to rotate the picture.
Another way is by right-clicking on the picture to open All Image Options, where a sidebar will appear on the right side of the screen. Click on Size and Rotation and modify the angle of the image accordingly.
Adding Borders
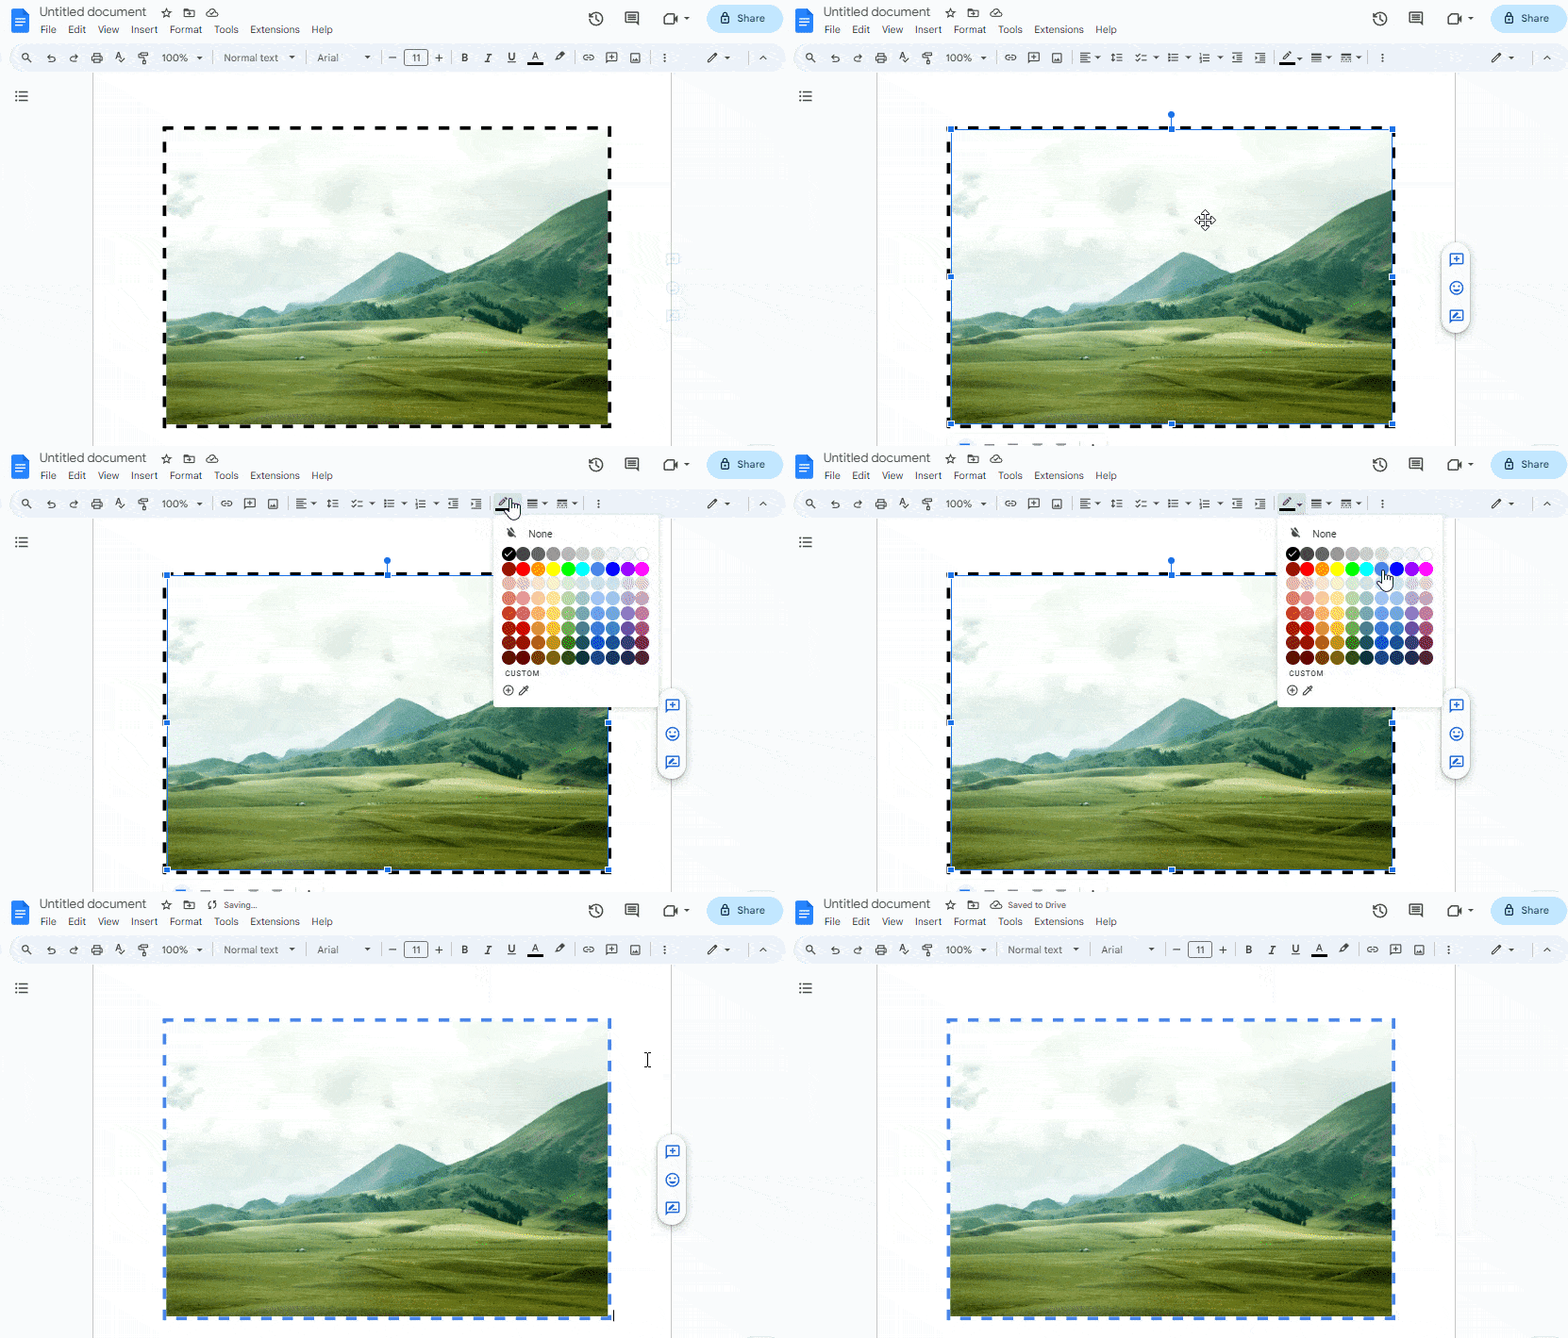
Google Docs also allows you to add a border on the image. First, select the image, and you will find three border options on the toolbar to customize a border for your image. Select border dash to choose from three designs.
To change the thickness of a border, you can click on the border weight (left next to the border dash).
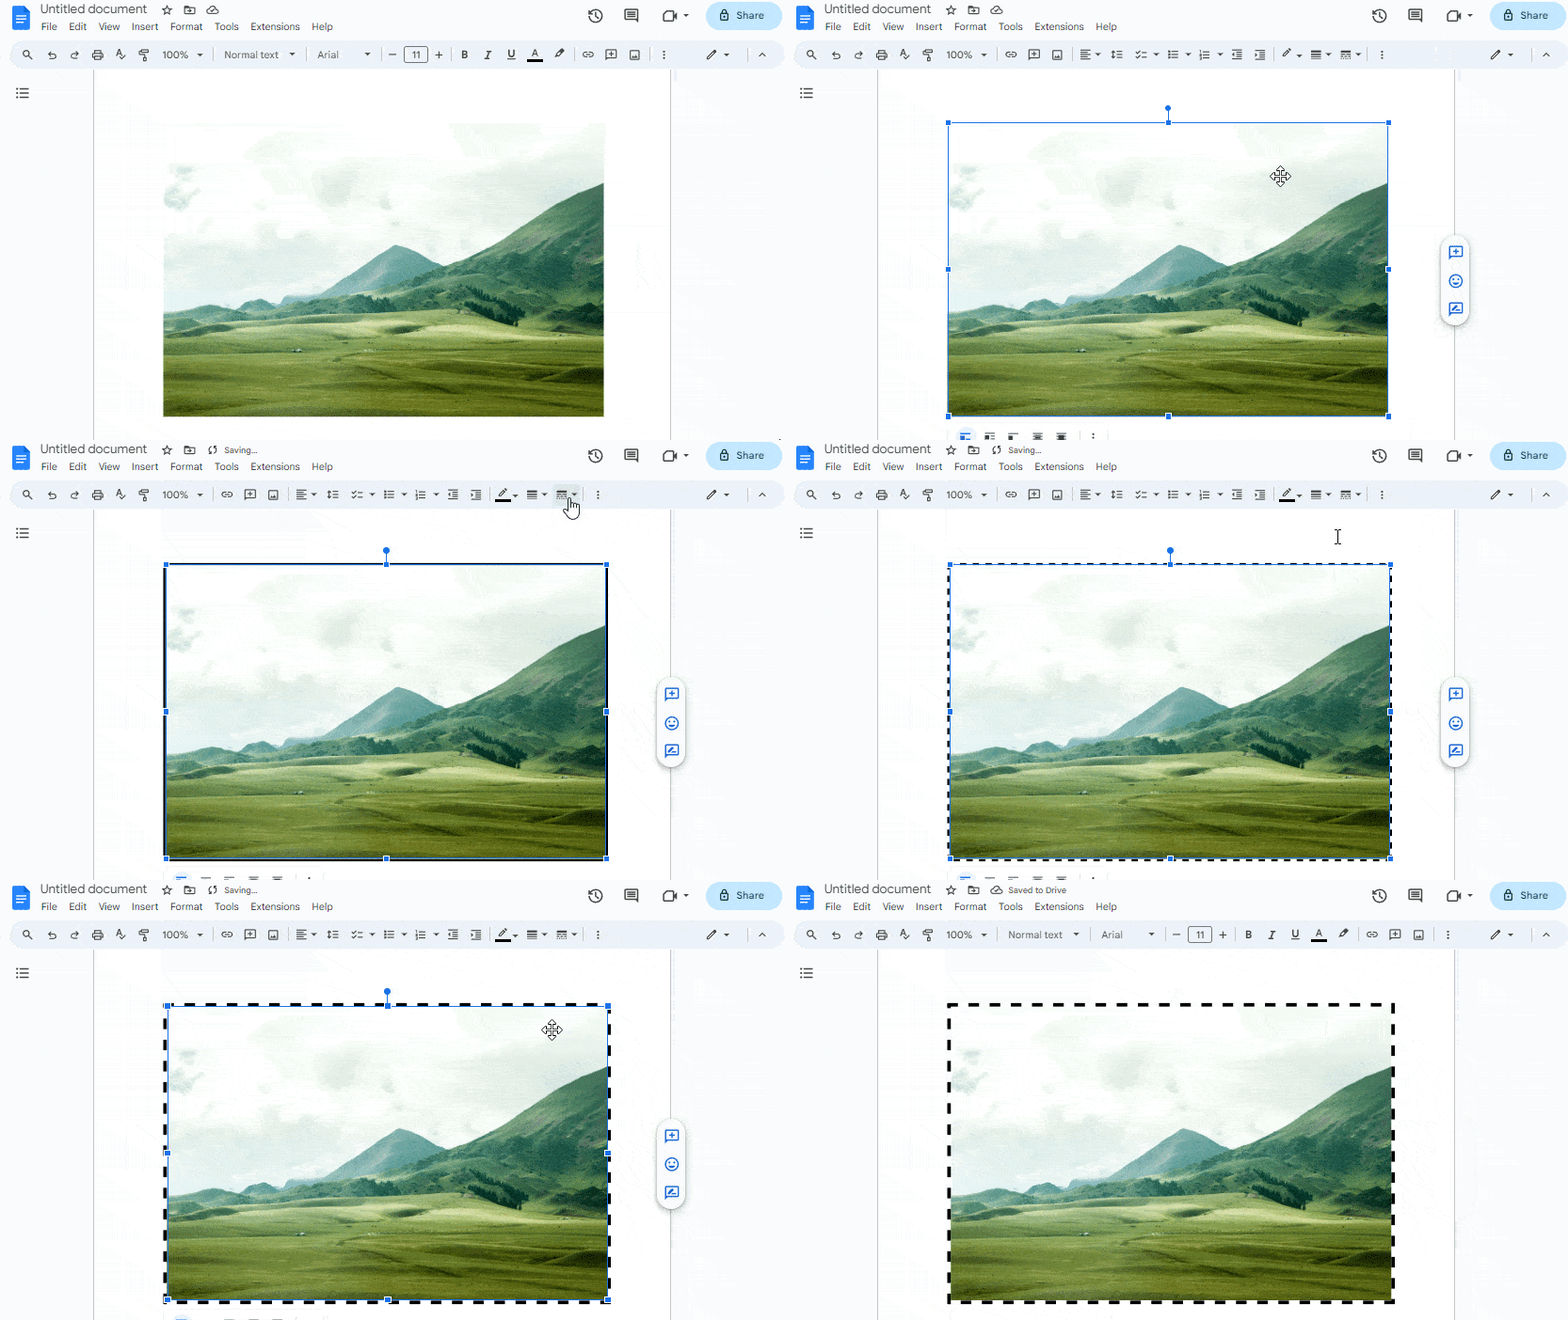
If you want to change the color of your border from the default color of black, go ahead and click on your picture first and select the border color icon on the toolbar.
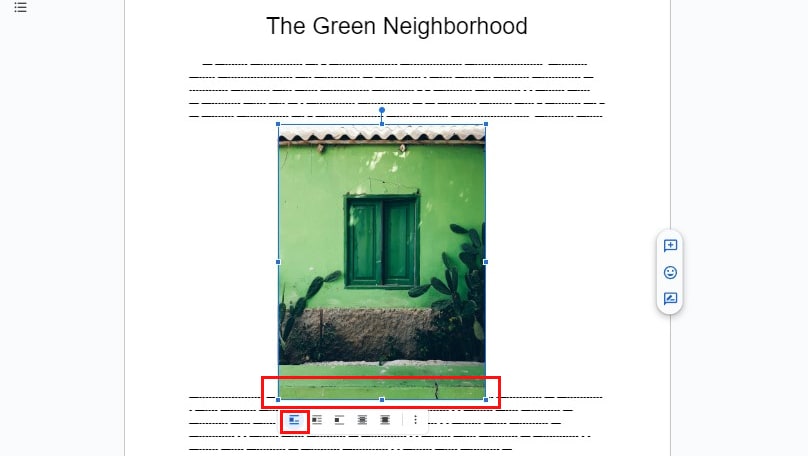
Adjusting Image With text
To place an image along the line like any other text, click on the picture and select the first icon on the pop-up bar called In Line.
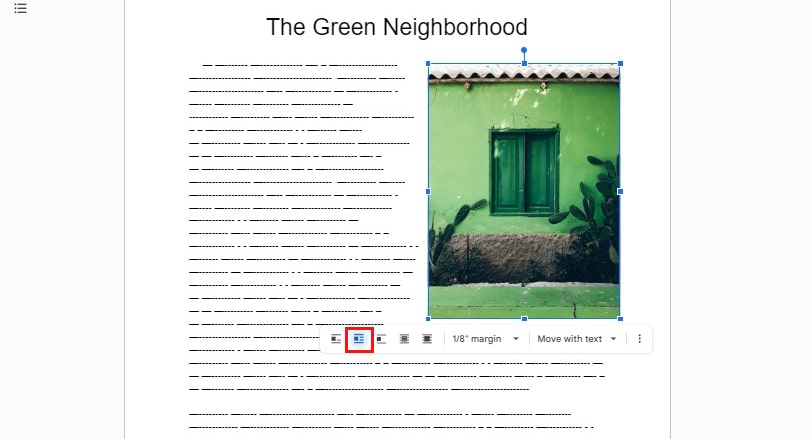
If you want to insert an image among the texts, clicking on the Wrap text icon on the pop-up options bar will align the image with the texts.
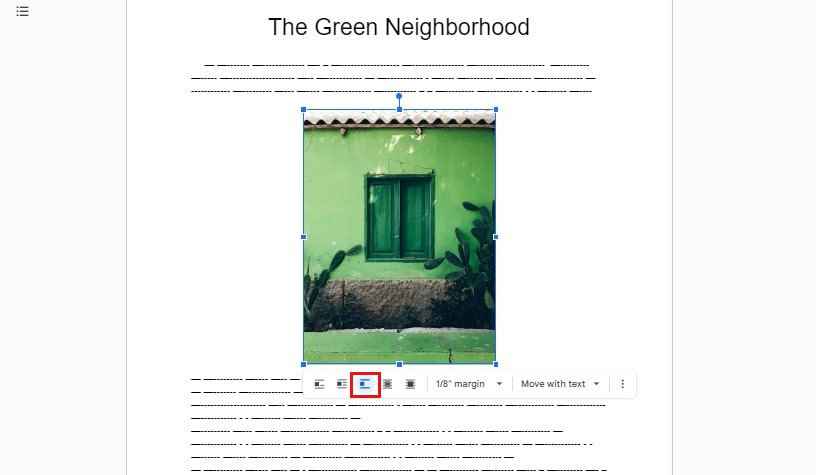
Using Break text allows users to move the picture anywhere without breaking any text. The icon is on the options bar, the third one in the row.
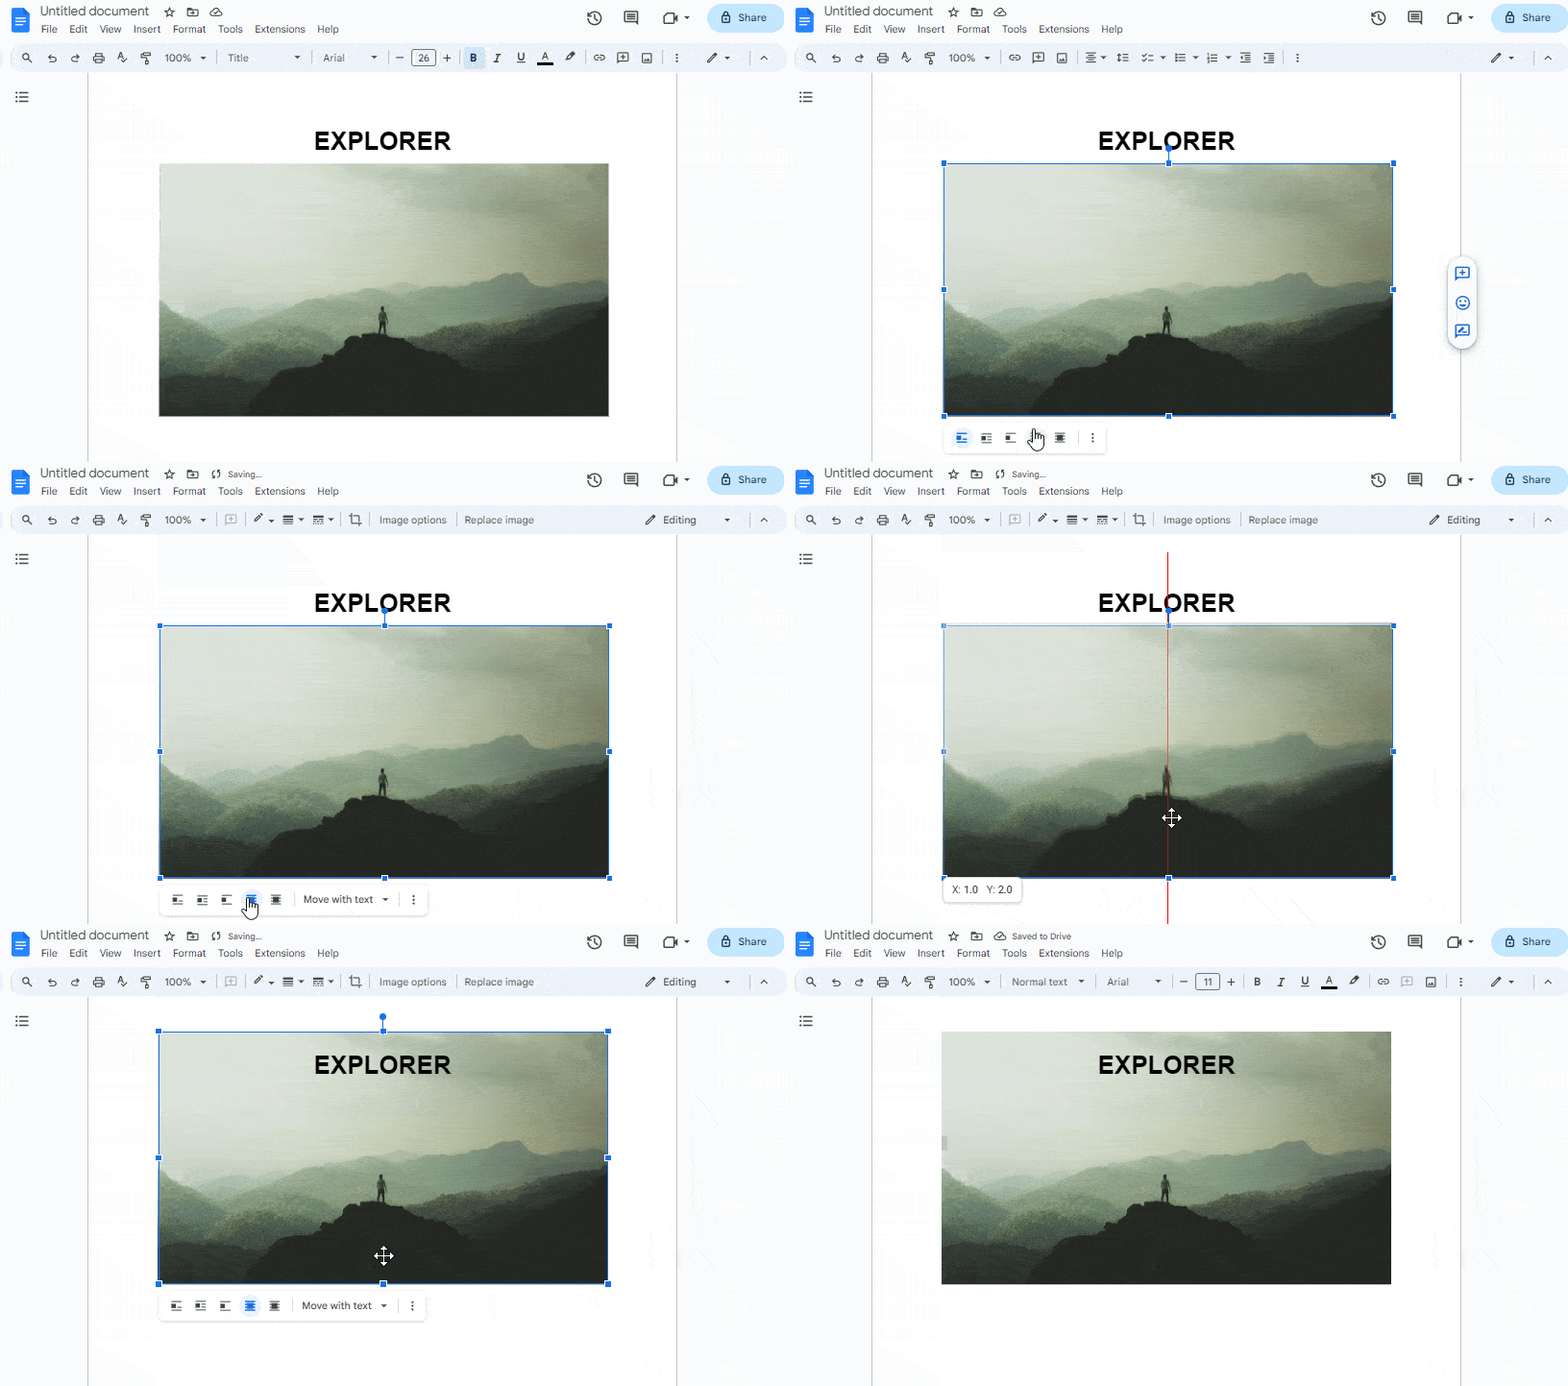
You can place images behind the texts and write over pictures by using Behind text.
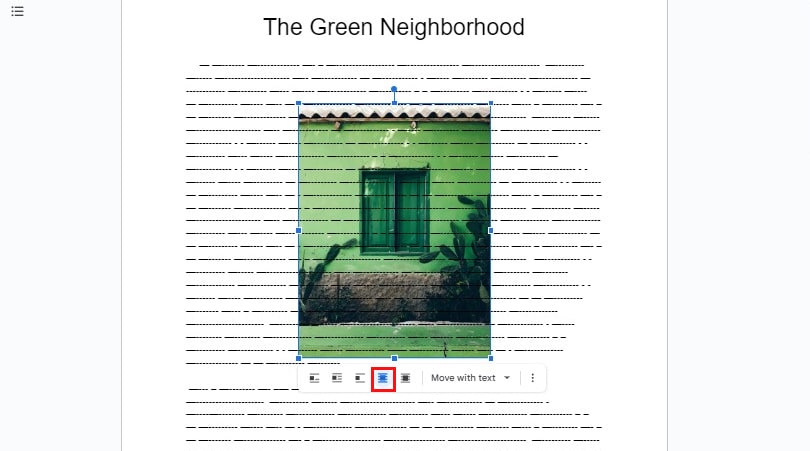
Using In front of text will let your image come forward and text behind it.
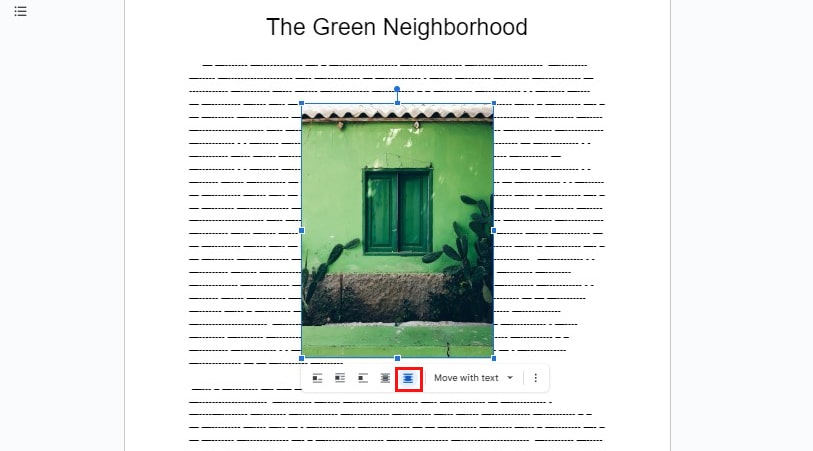
Recoloring images
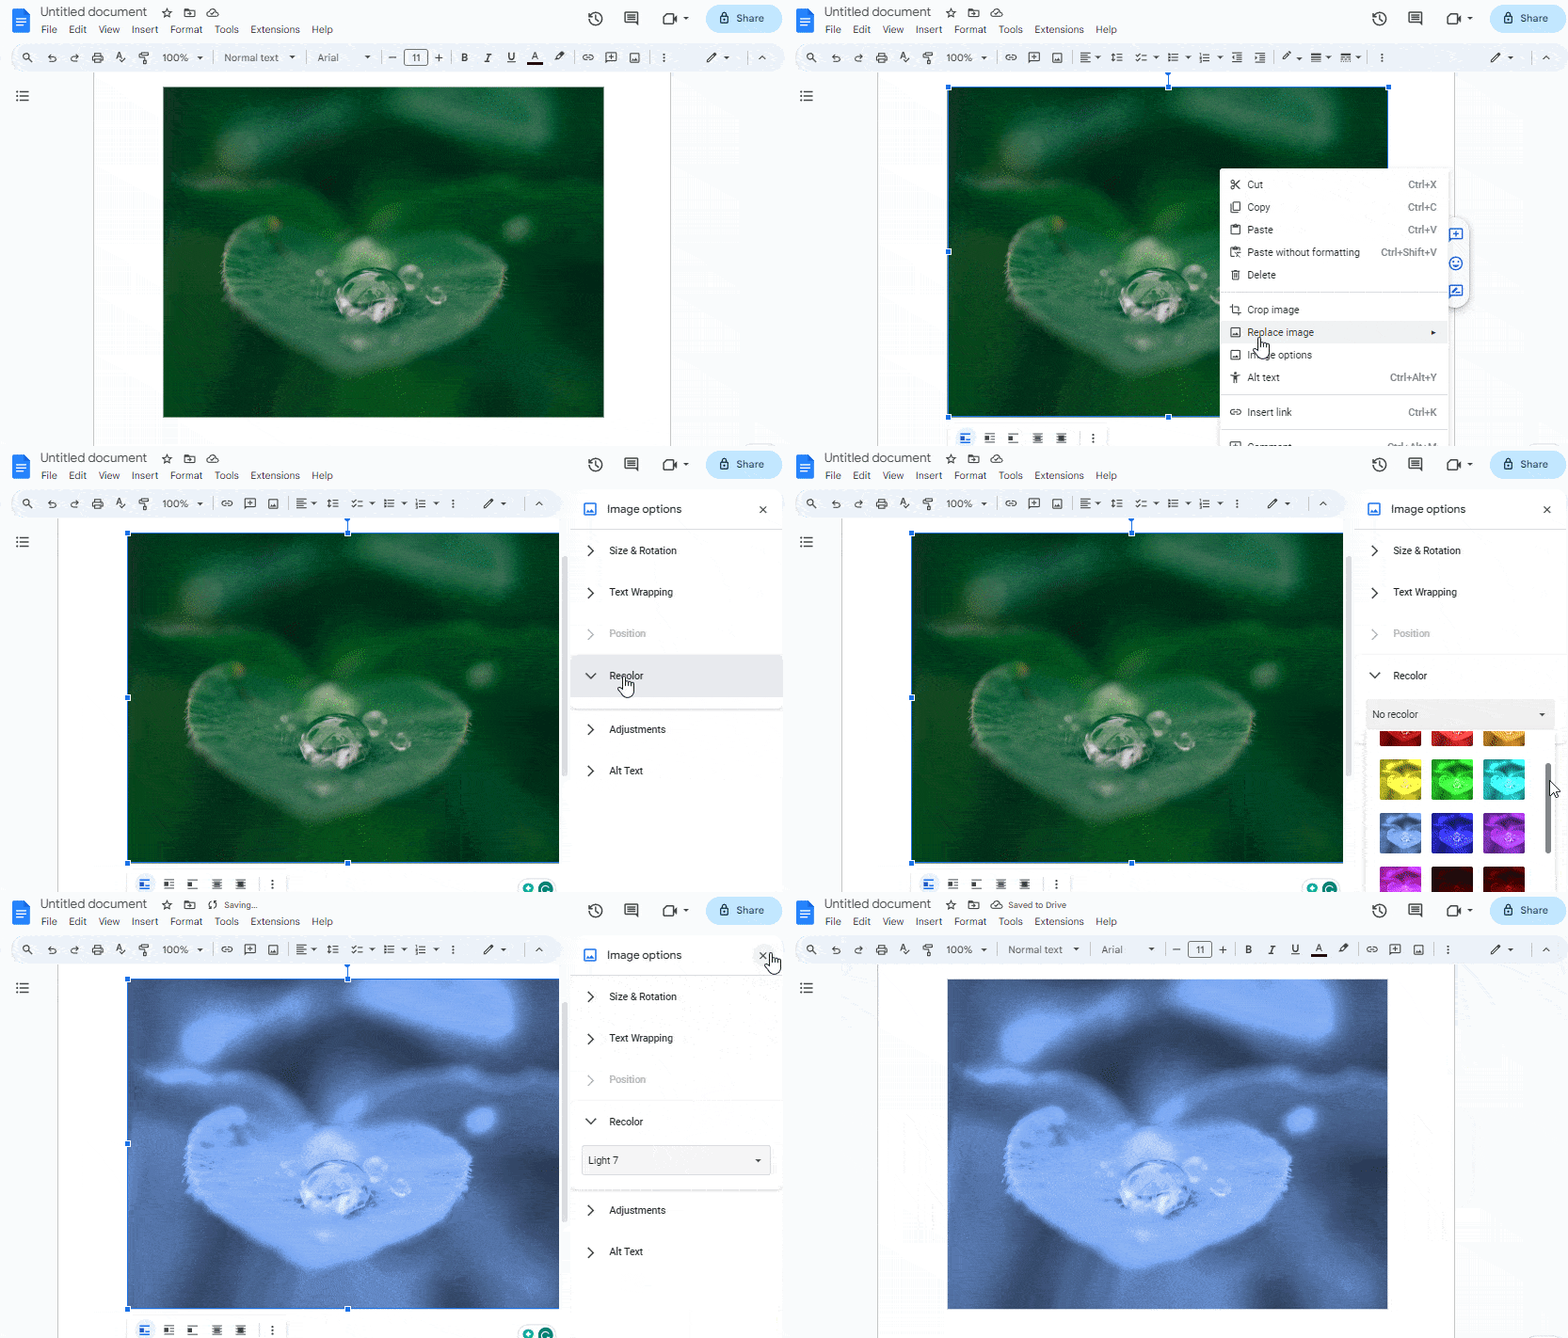
You can completely change the color of your image by simply right-clicking on the picture to open the image options and selecting the Recolor option.
Adjusting Image Brightness and Opacity
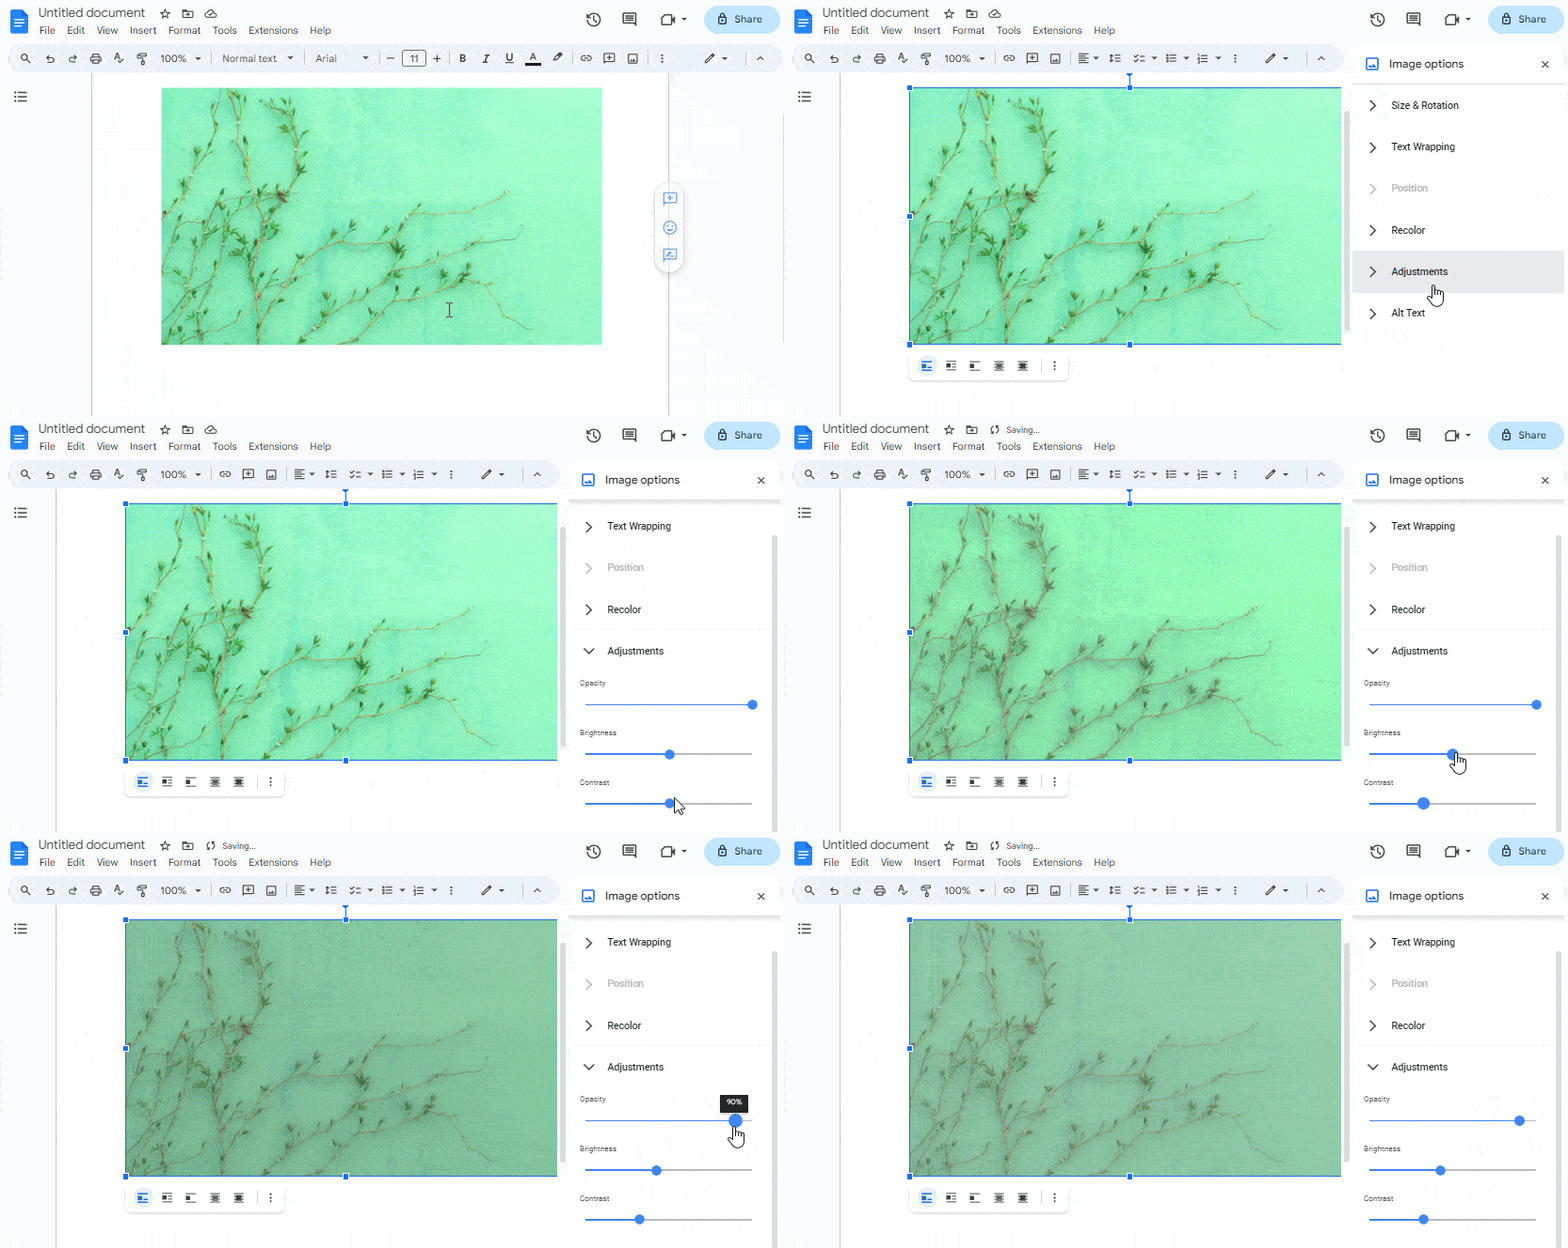
Google Docs also allows you to adjust the Opacity, Brightness, and Contrast of an image.
Click on the image and open All image options. You’ll find the Adjustments option on the right-hand sidebar.
You can increase or decrease the intensity of the editing tools by dragging the blue dot towards the left and right.
Adding Text and Shapes to Images
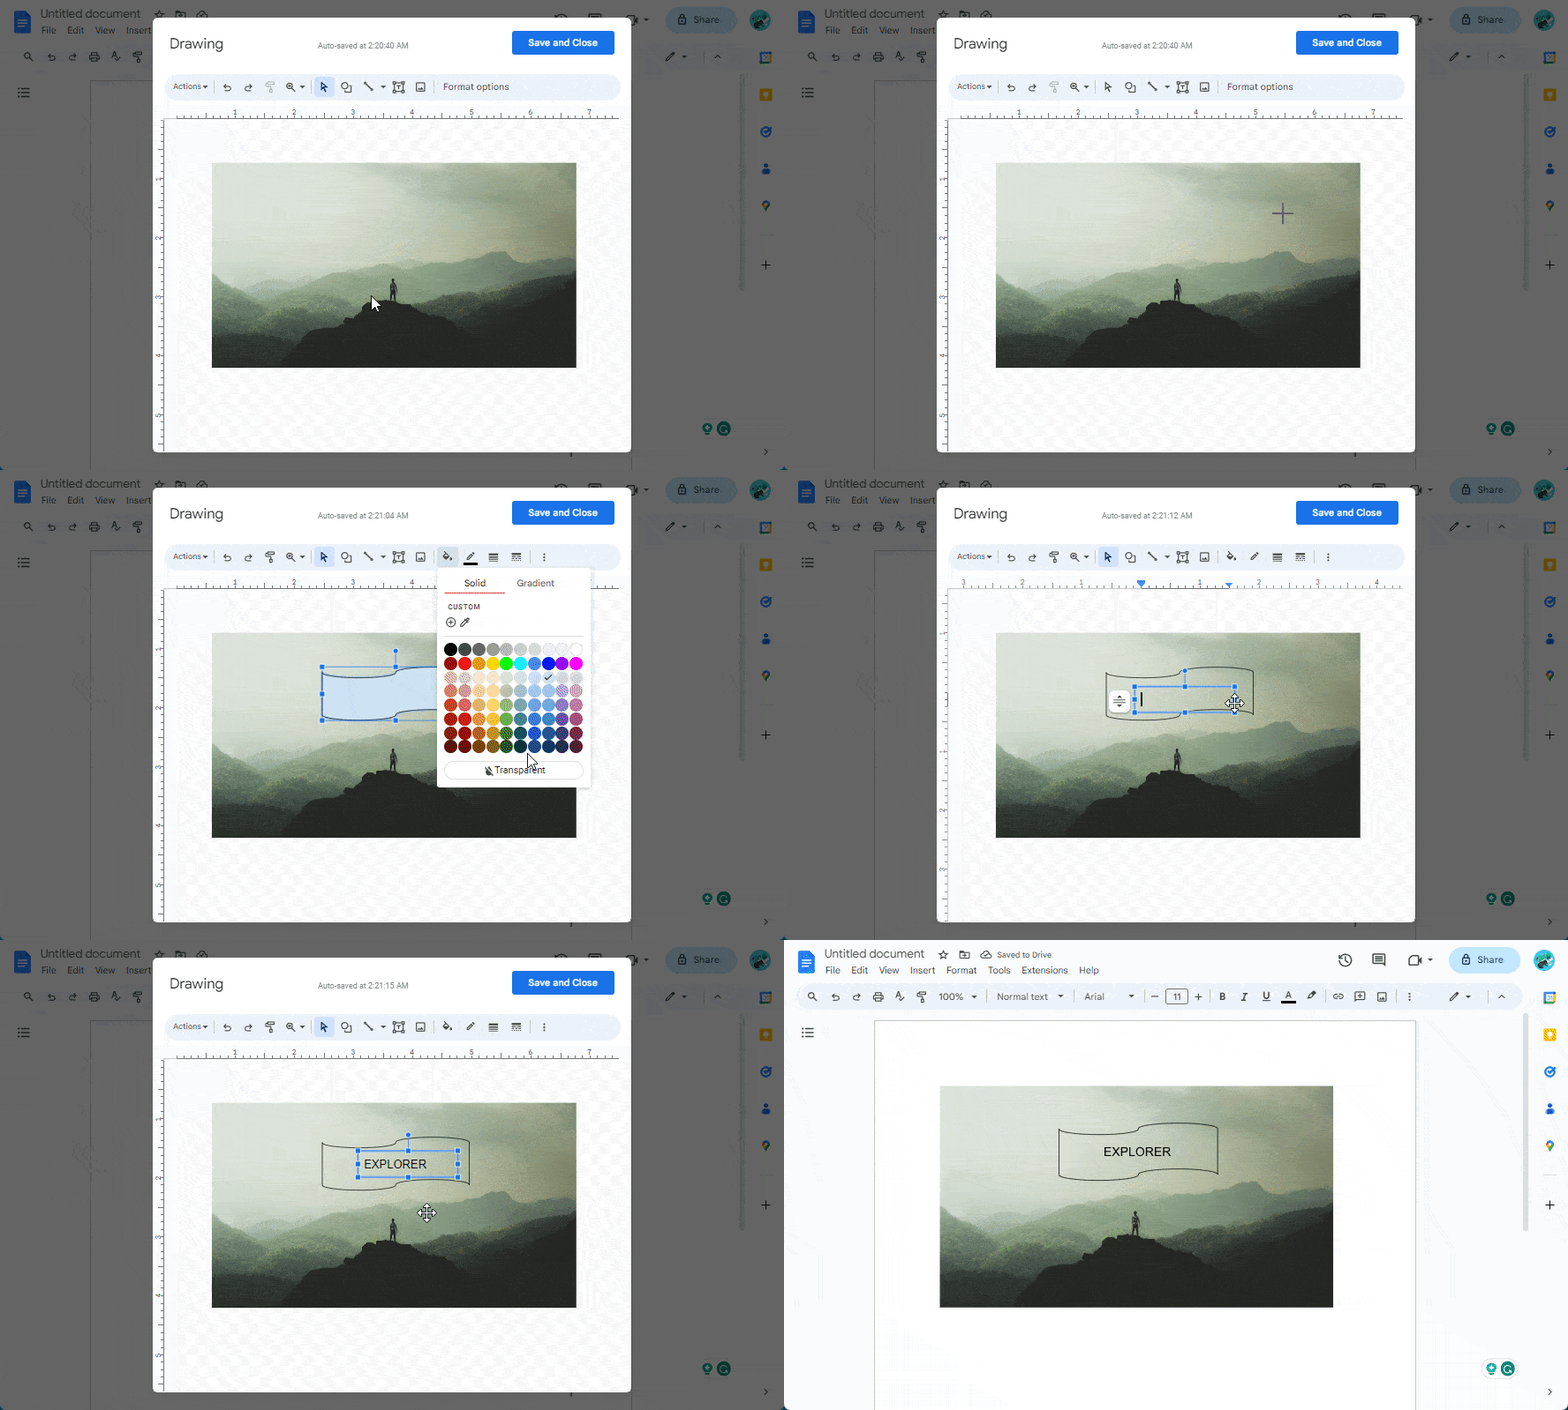
An easy way to add and create shapes to your Google Docs is by making use of the Drawing tool.
Click on the Insert tab from the menu bar and select Drawing. Upload a picture by clicking on the image icon from the computer or search from the web, then add shapes, text boxes, and lines to the image.
Finally, choose save and close to add the picture to your document.
Or, you can select the Behind text icon from the text wrapping options where the text will appear above the image.
Undo and Redo Image Edits
While editing, one thing you will make is a lot of mistakes. And that is when undo and redo functions come in handy.
You can find turned-over arrows pointing in different directions on the toolbar right next to the menu search bar.

Or use Shortcut keys, CTRL + Z to undo and CTRL + Y to redo.