Whether you want to craft a perfect document in a certain format or write in a completely foreign language, anything is possible in MS Word. The best part is that you don’t even need to be a native of that language nor do you need help from third-party sources.
On MS Word, you can change the existing text from English to another language, write in different language, or even change the display language of the app itself.
Additionally, Word will also help you proofread text in any language.
Change Language By Translate Menu
If you want to change the language of your existing content on a Word document, a straightforward method is to use the Translate button. With this, you can translate your entire document to another language, regardless of the word count or the pages. What’s more, you won’t need to install any language packages.
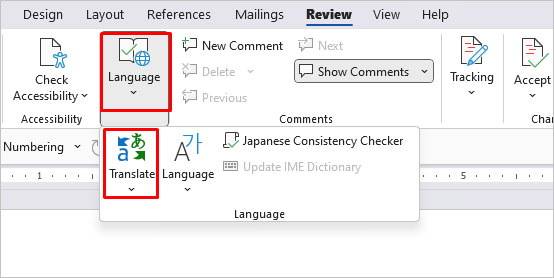
- Click on the Review tab.
- Check the Language group and select Translate.
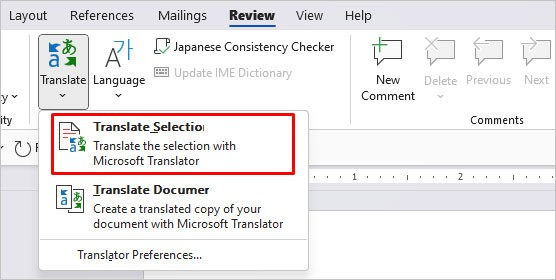
- If you only want to translate a highlighted part of your text, select Translate Selection. If not, click on Translate Document.
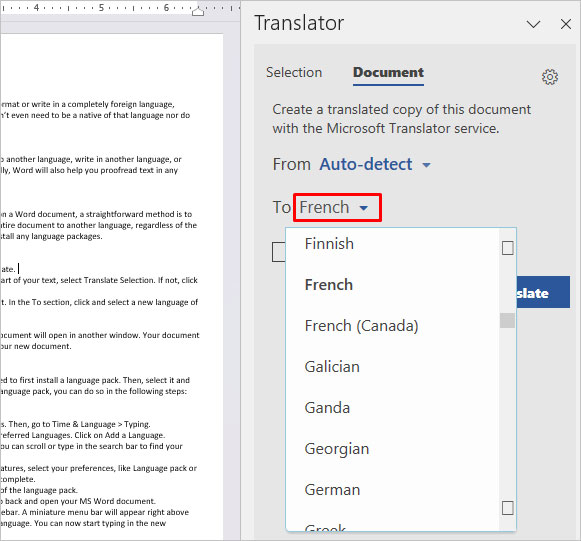
- A new Translator pane will open on the right. In the To section, click and select a new language of your choice.
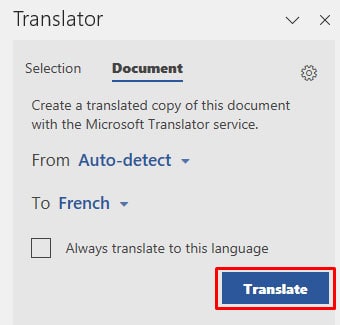
- Click on Translate.
- After a while, a new copy of your existing document will open in another window. Your document is now in another language. Press CTRL + S to save your new document.
Change Typing Language
If you want to write in a new language in MS Word, you’ll need to first install a language pack. Then, select it and type in the respective language. If you’ve not yet installed a language pack, you can do so in the following steps:
- Press the Windows key + I and open Settings. Then, go to Time & Language > Typing.
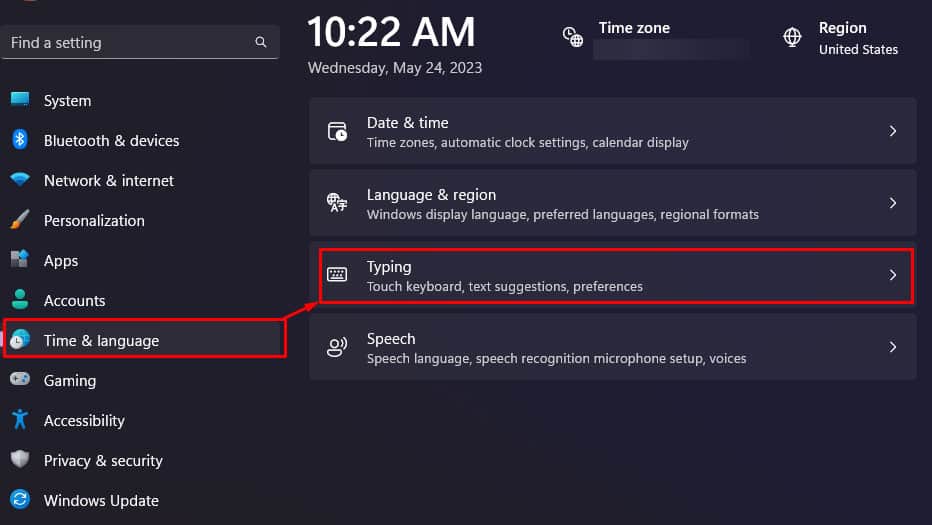
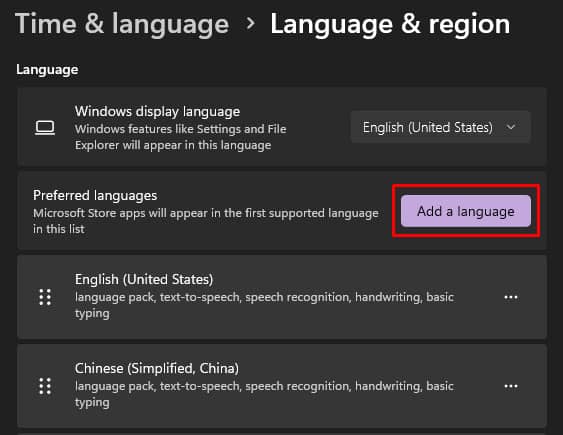
- Go to Language & Region and navigate to Preferred Languages. Click on Add a Language.
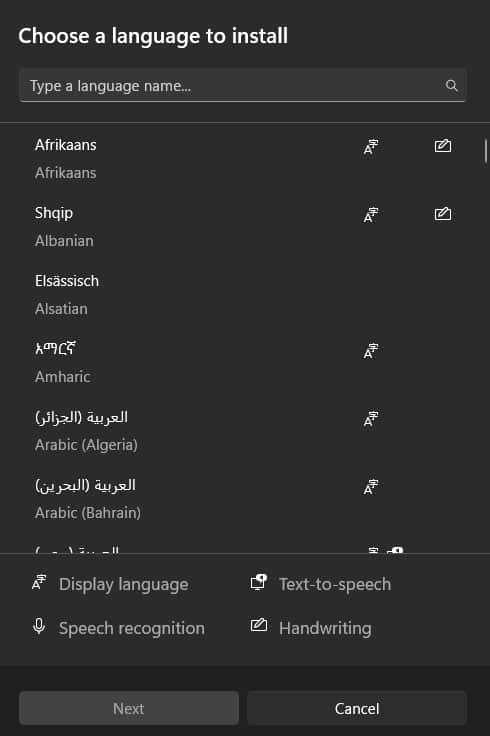
- Under Choose a language to install menu, you can scroll or type in the search bar to find your preferred language.
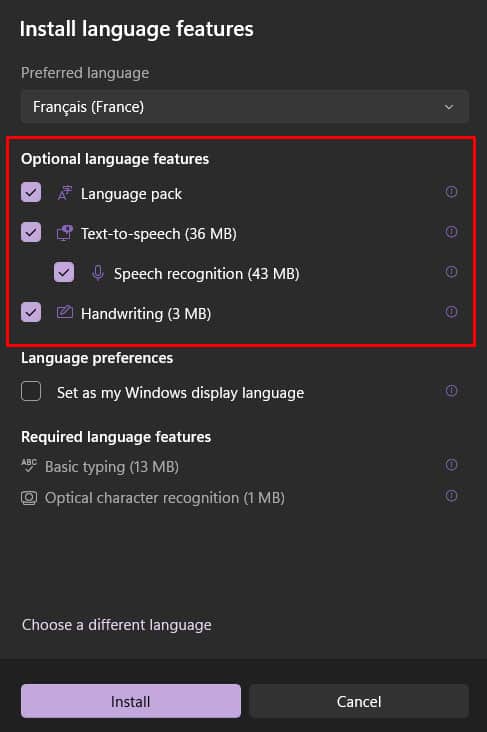
- Then, select Next. Under Install language features, select your preferences, like Language pack or Text-to-Speech, and click on Install. Let the process complete.
- Now, you’ll also view several progress bars of the language pack.
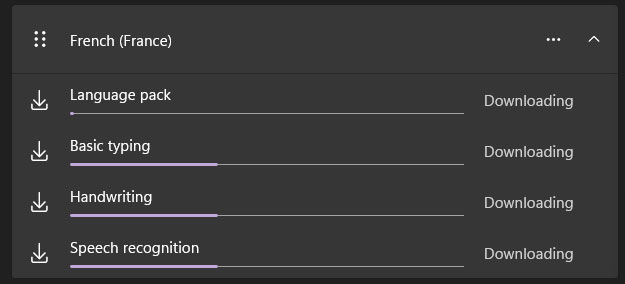
- Now when the language pack is installed, go back and open your MS Word document.
- Press the keyboard shortcut Win key + Spacebar. A miniature menu bar will appear right above your taskbar. Then, press the Spacebar again to toggle and select your preferred language. You can now start typing in the new language you just installed.
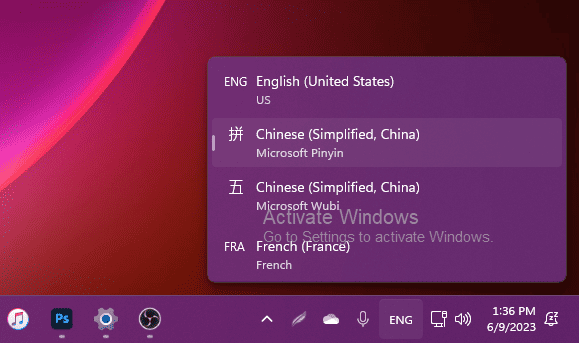
If the keyboard shortcut to change languages is not working, follow these steps to change the default input method.
- Open Windows Settings and click on Time & Language > Typing.
- Navigate to Advanced Keyboard Settings.
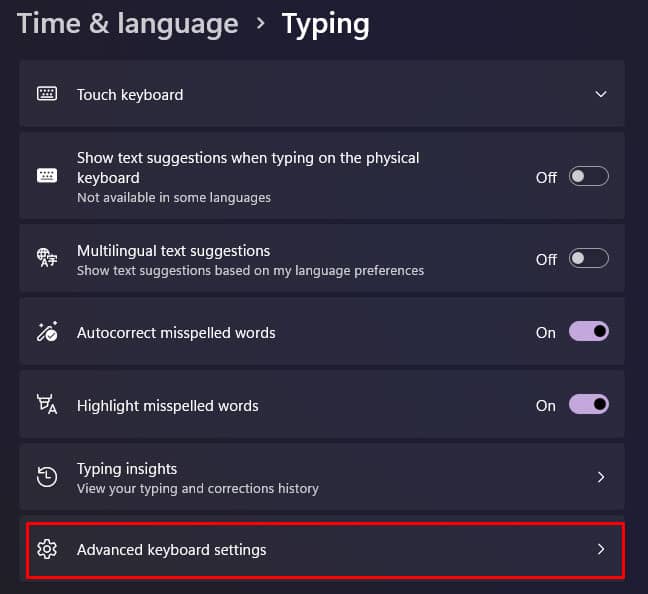
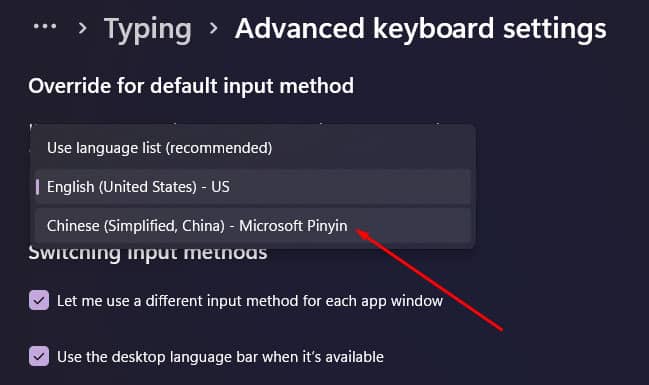
- Here, you’ll see the Override for the default input method. Click on the language option and select the language you just installed.
Change MS Word UI/Display Language
If you are a native of another language, you might enjoy changing MS Word’s UI (User Interface) or Display language. This means the language for the menus, controls, and buttons of the entire app will change. You can follow these steps:
- Click on the File tab and navigate to Options.
- In this window, go to Language. The Office Display Language section is at the top. If available, select your preferred language as the display language and click on Set as Preferred.
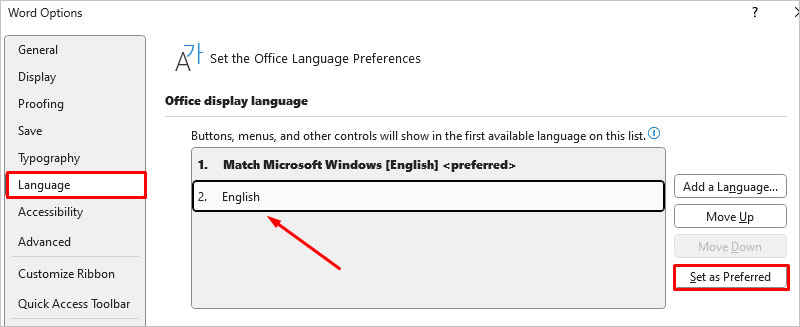
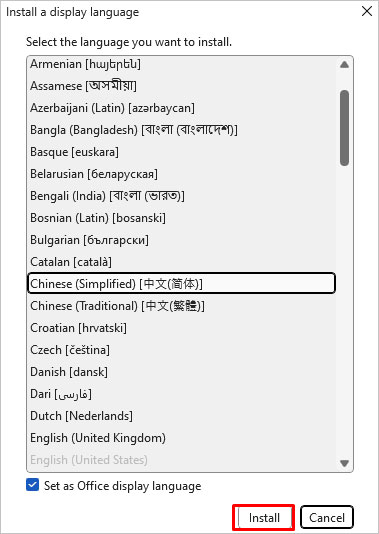
- If your language is not available, click on Add a Language on the side. Browse a new language from the new dialog box and click on Install. Again, click on OK.
- Restart MS Word. The next time you launch MS Word, the UI language will be set according to your preference.
Add Proofing Language on MS Word
Whether you change the typing language or use the Translate option, the process should be followed by a step to change the proofing language to your current language. Changing the proofing language helps you proofread by checking the spelling, grammar, and AutoCorrect.
When adding a new language, you get the proofing language as well by default. However, sometimes you won’t find it automatically, and thus won’t work. Also, the automatic translation may not always enter the language in its accurate format.
First, you’ll need to download and install the specific proofing language. Here’s what you’ll need to do.
- Click on File and go to Options.
- From the new window, go to Language. Then, check the Office authoring languages and proofing section.
- Find the language you want. Click on the Proofing available option next to it to download. Click on OK to proceed.
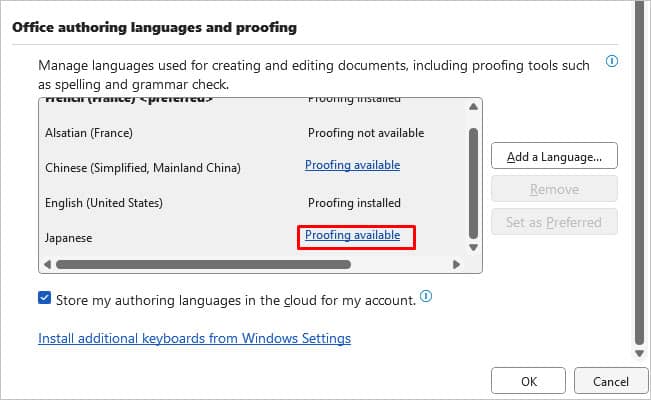
- Once the proofing language is installed, you’ll see the “Proofing installed.” status. To use it, click on Set as Preferred. Click on OK. MS Word might ask you to restart the app.
- Now, go back to your document. You can check which language is in Proofing from the bottom bar. Click on it if you want to quickly change it back to another language.

Another shortcut to switching proofing language is to press Alt + Shift keys. Then, toggle and change the language.