Adding a signature to a document reflects your professionalism and serves as a mark of validation for your content. Thanks to technology, we can now create or import signatures online onto documents.
Digital signature has saved so much of my time compared to the rigorous process of printing and physically signing the document.
If you’re using Word, there are several ways to add a signature. You can add the format for your signature line and integrate a verified digital signature. Or you can also quickly import an image of your handwritten signature or draw a signature directly in Word.
The signature feature of Word is available on both PC and mobile devices.
Electronic Vs Digital Signature
Although many people use electronic and digital signatures interchangeably, they aren’t the same.
An electronic signature is a digital copy of your signature. It can be an image of your handwritten signature or a digitally created signature.
However, digital signatures are created on third-party certificate authority.
All digital signatures are electronic, but not all electronic signatures can be called digital.
Insert Digital Signature
If you often need to send valuable information online while maintaining its authenticity, inserting Digital Signature is the best option.
In a digitally signed document, you can also keep track of people who accessed it. If an intermediator makes a change in the document, Word will invalidate the signature and notify the receiver.
In addition, a digital signature unambiguously links the document and its sender. The person who sent it cannot deny its authorship, i.e., non-repudiation of the document is maintained.
Step 1: Add Signature Line
- Open your Word file.
- Click on the Insert tab. Select the Signature line in the Text section.

- On the Signature Setup dialog, type the following:
- Signer’s name: Type the name of the person whose signature you want to insert.
- Signers Title: Type the title of the Signer. For example, manager, employee, etc.
- Signer’s Email address: Type the signer’s email address.
- Tick on the boxes to allow the signer to add comments and to show the signing date in the signature line.
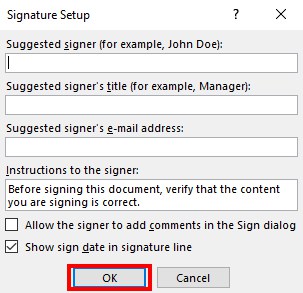
- Click OK.
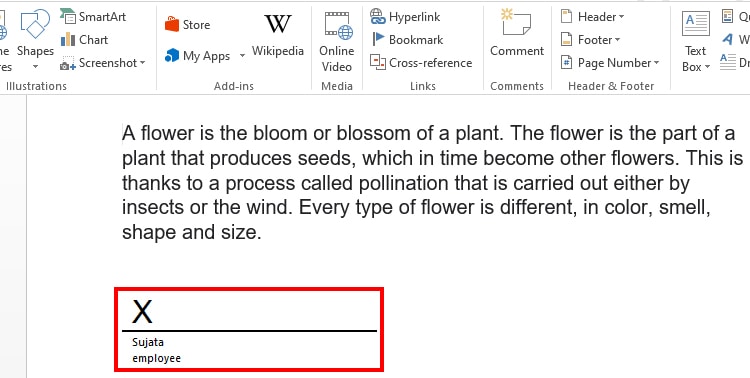
- A signature line appears on your doc.
Step 2: Insert the Signature
- Double-click on the signature line.
- On a new dialog, type your name in the box.
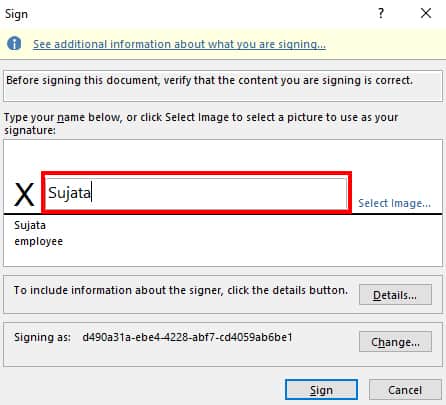
- To insert an image, tap on Select Image. Click on Browse on From a file section.
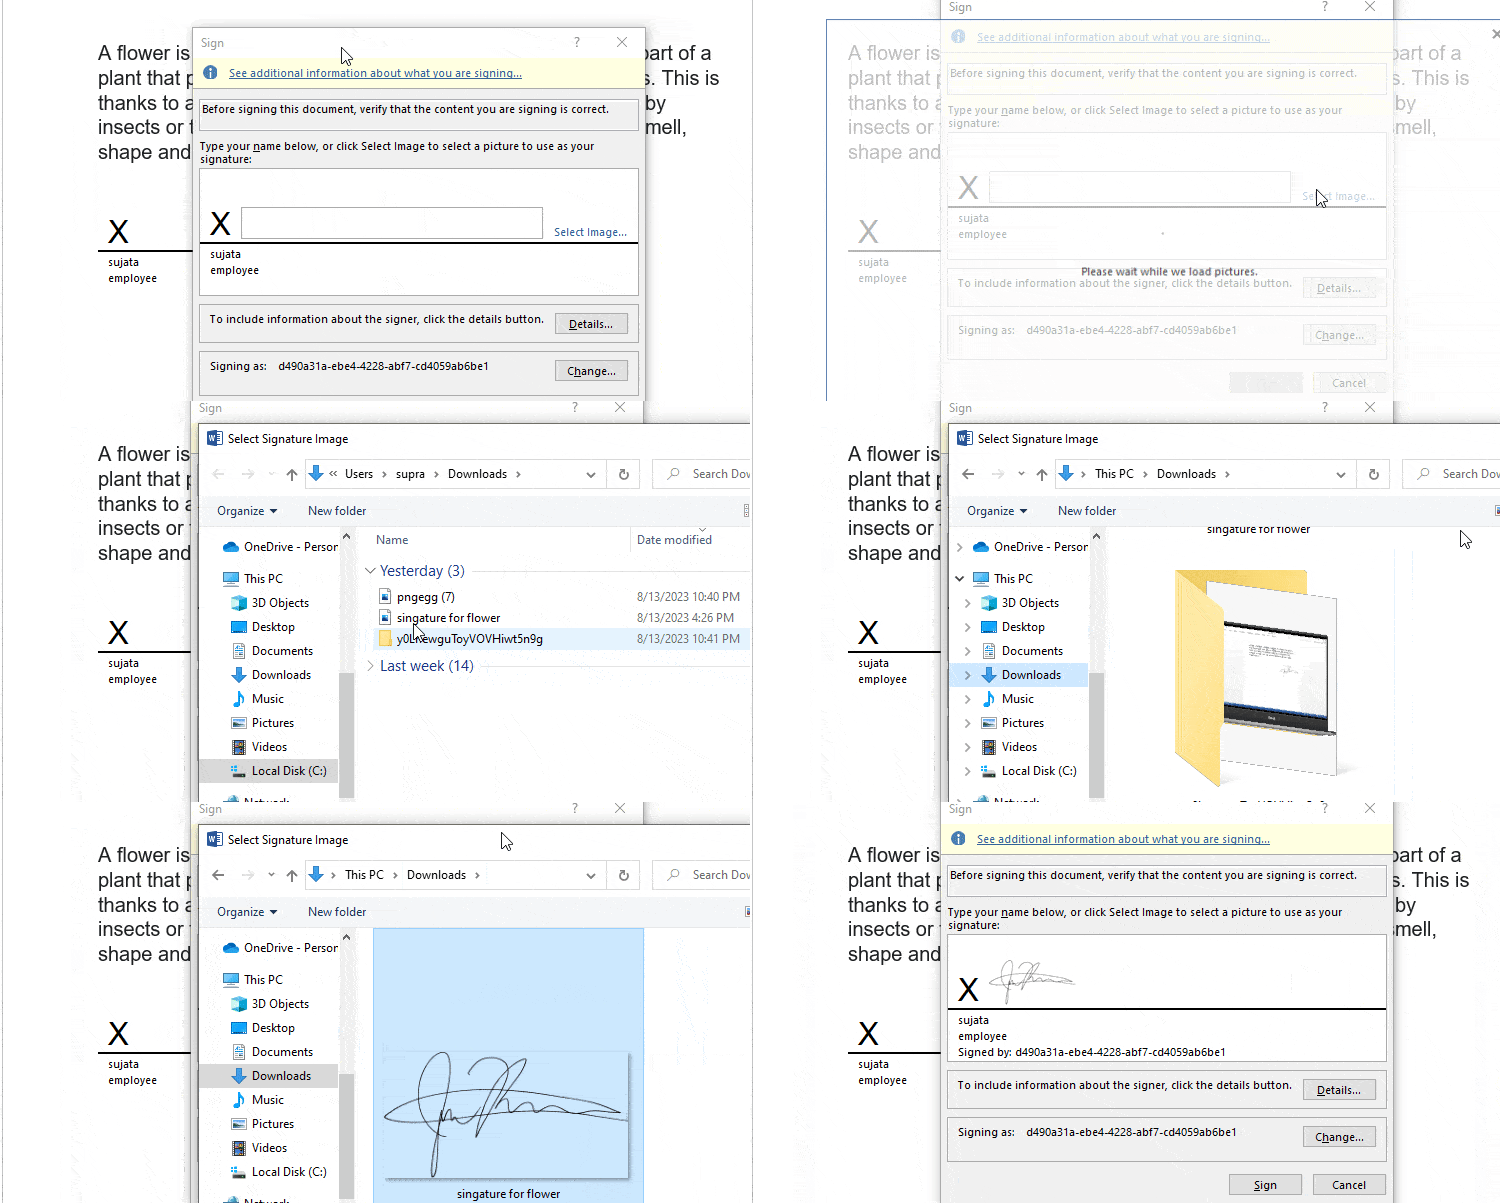
- Select an image and tap on Open.
- Click on Details to insert additional information. Fill information like:
- Signer Title/Role: Define the title or role of the person who is signing the document.
- Production place: Mention the detailed address of the sender. It includes information like Address, alternate Address, City, State, Postal Code, and Country.
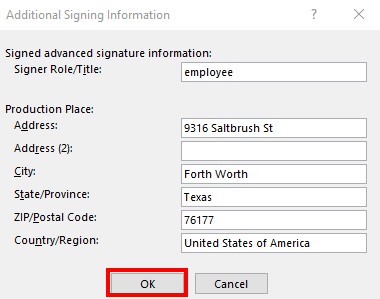
- Select OK.
- Tap on Change to alter Signing as. Make a choice and press OK.
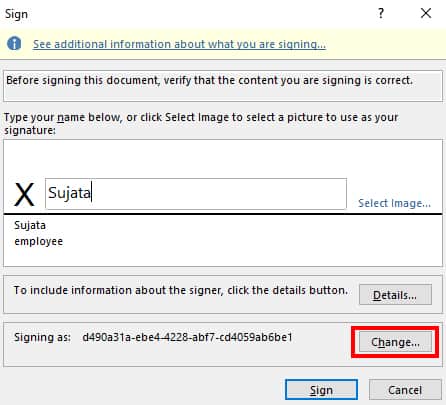
- Select Sign.

In Word 365, you might be unable to edit the Signature line directly. You might get an error message saying, “To Sign a Microsoft Office document, you need a digital ID, would you like to get one from a Microsoft Partner now?”
Thus, you must attain a digital certificate first to sign an Office document digitally. Buy a digital certificate from a recognized third-party certificate authority like Microsoft, or create your own digital certificate.
Insert Invisible Digital Signatures
An invisible signature will not be visible within the content of the document and is encoded inside the visible signature line. It can be a good option for preserving the authentic nature of the content in any document.
- Open your Word document.
- Go to the File tab on the top left.
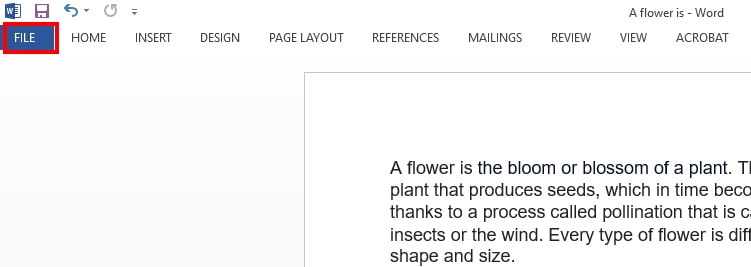
- Click on Info. Select Protect Document.

- Tap on Add a Digital Signature option.
- In a Sign dialog box, add the following:
- Commitment Type: Drag the drop-down menu and choose the commitment type
- Purpose for signing this document: Type the intention for signing the document
- Select Details to input additional signing information, such as Signer role/Tile and Production place address. Press OK.
- Select Change to change the Signing as information.
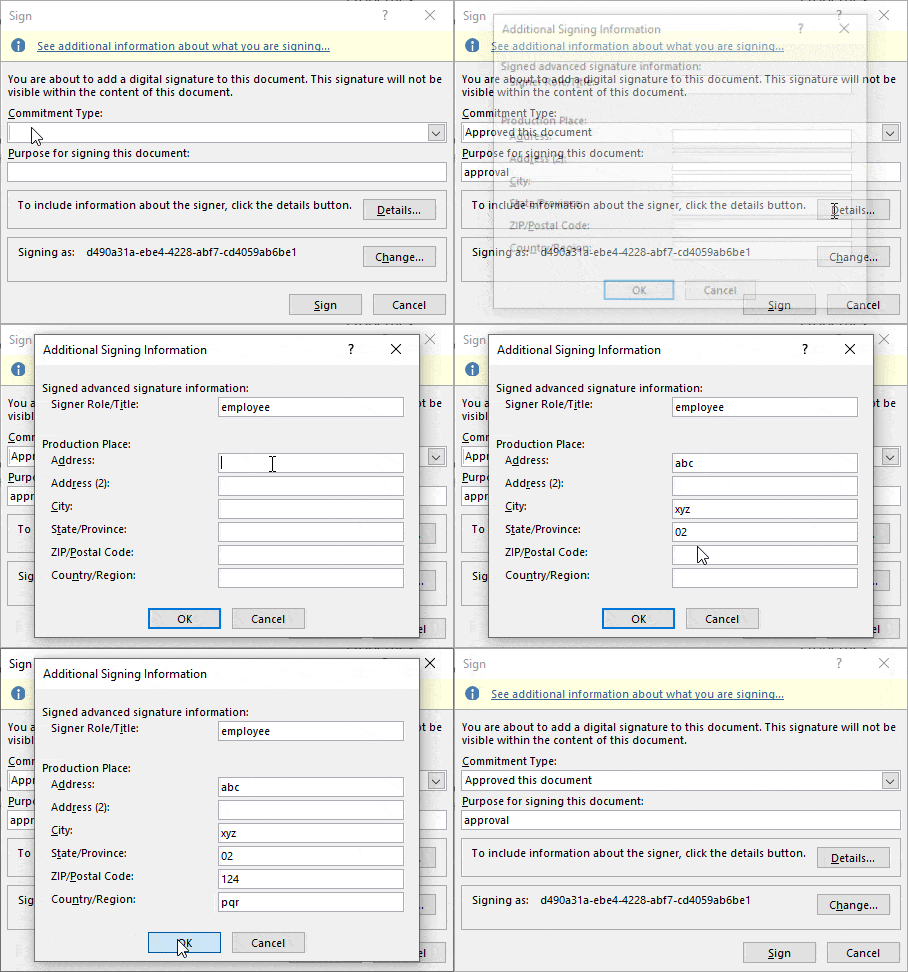
- Click Sign.
- On the Signature Confirmation dialog, press OK.
Insert Handwritten Signature
A handwritten signature ensures authenticity in a world where crimes like digital forgery could exist. Some people still prefer to use handwritten signatures over digital ones to add that personal touch to the documents. Here’re the steps you need to follow.
Step 1: Prepare a Signature
- Make a sample signature on blank paper.
- Click a picture of that signature and save it in JPEG, PNG, or any other format.

Step 2: Insert Signature
- Open the Word document. Place your cursor where you want to insert an image.
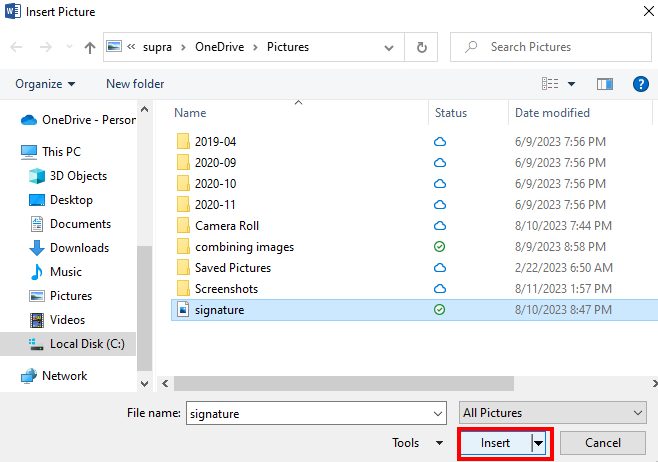
- Go to the INSERT tab. On the Illustrations section, click on Pictures.

- Choose This Device.
- Select the picture and tap on Insert.
Step 3: Edit the Signature
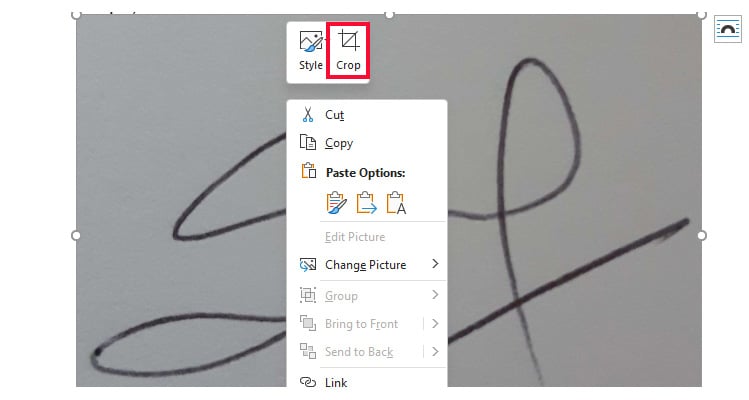
- Right-click on the image and select Crop image to resize.
- Select the Picture Format Tab if you want to make further edits.
- Go to Adjust section. Select Corrections to apply Sharpens style to improve image clarity.

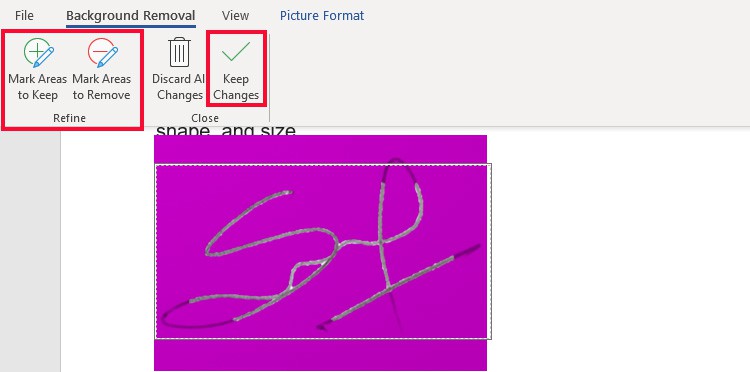
- To remove the background, select Remove Background.

- On refine section, tap on Mark Areas to Keep and Mark Areas to Remove to make necessary changes. Click on Keep Changes to apply.
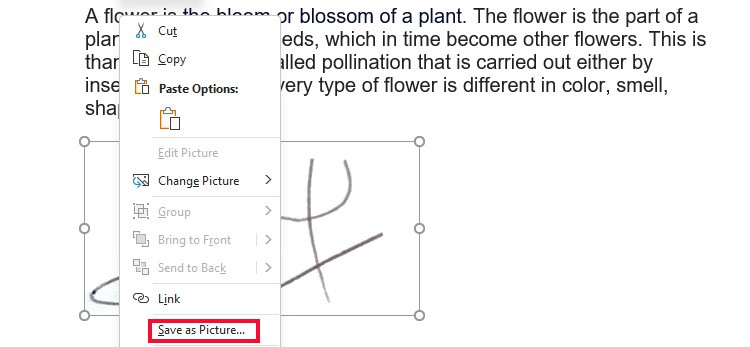
- Right-click on the image and select Save as Picture.
Manually Draw Signature on Word
A very easy and quick way to manually sign your documents in Word is by using the Drawing tool. This option will come in handy when you need to verify an unofficial document.
- Go to your Word document.
- Select the Draw tab on the top menu. From Drawing Tools, select a Pen.

- Tap on the pen to choose the thickness and color.
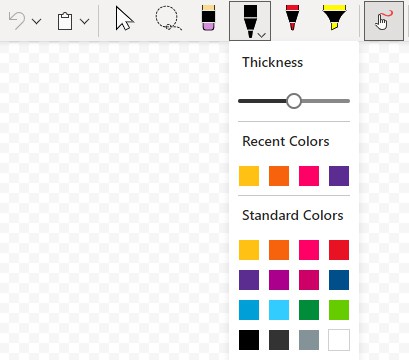
- Draw your signature on the canvas. Select Save and Close.

Add Signature Using Add-ins
You can also use Add-ins to add signatures to verify documents. However, you might need to subscribe to their premium packages to use these add-ins. Some of the popular add-ins are Adobe Acrobat Sign, DocuSign for Word, Impression Signatures, Signing Hub for Word, etc.
Here’re the steps to add a signature on Adobe Acrobat Sign. Similarly, you can add a signature with other add-ins too.
- Open your Word document.
- On Word online, click on the Home tab. Select Add-ins on the top right. But on the 365 Word app, go to Insert and select My Add-ins in the Illustration section.

- Search for Signature Add-ins and select Add. Now, the Add-ins show up in your Home tab.
- Select the Adobe Acrobat Sign.
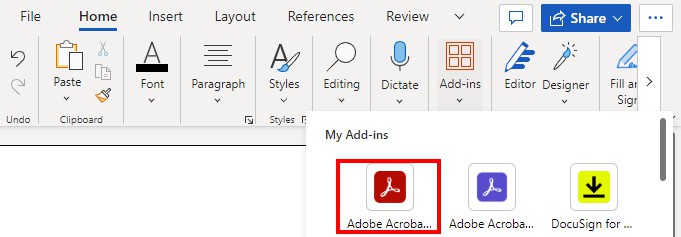
- Sign in using your Microsoft account email. A section opens up in the menu tab (Home/Insert).
- Tap on the Fill and Sign option.
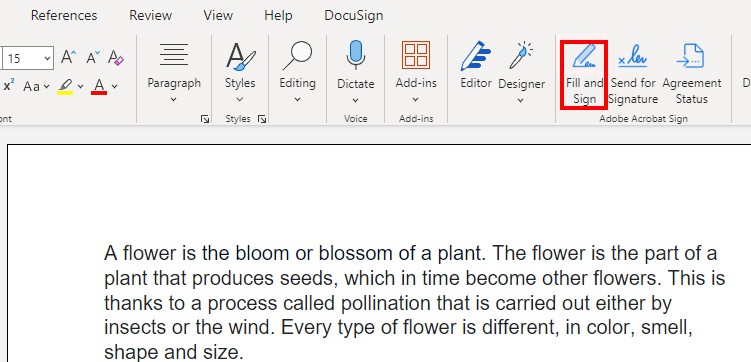
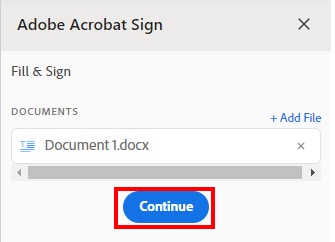
- On a new dialog, select Continue beneath the document name.
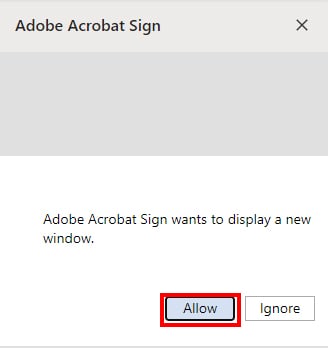
- After the document uploads, select Allow on the confirmation message.
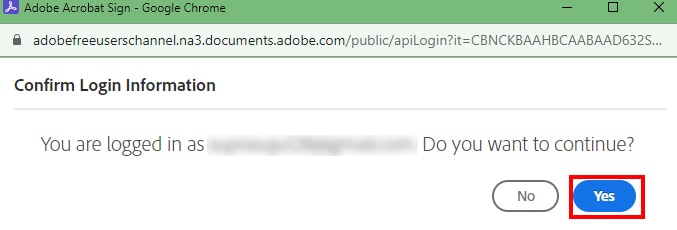
- Select Yes to confirm login information.
- On a new window, select the Sign option on the top menu.
- Tap on Add Signature. A new dialog opens up; select the following:
- Type: Type a signature
- Draw: Draw a signature
- Image: Insert an image as a signature.
- Mobile: Create a signature on a mobile device and paste it on your document. Click on this option, input your mobile number, and press Send. A link will be sent through text, and you can create a signature.
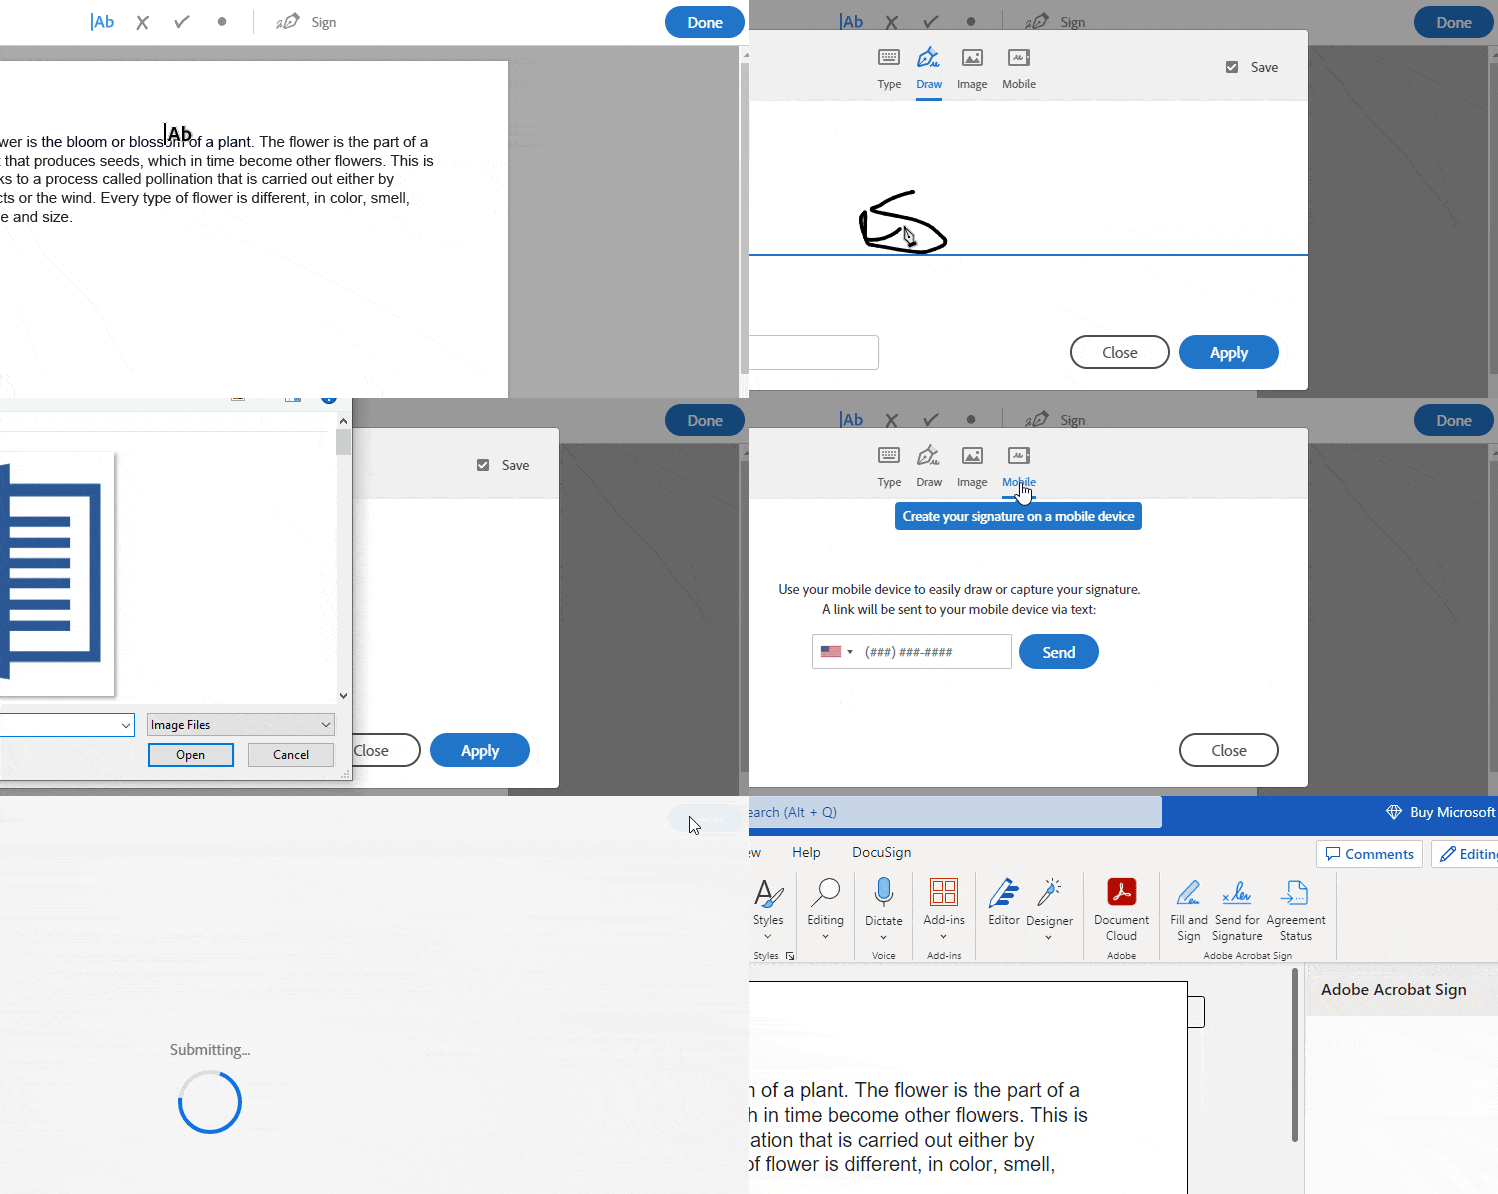
- Select Apply.
- Drag the signature to the desired spot. Select Done.
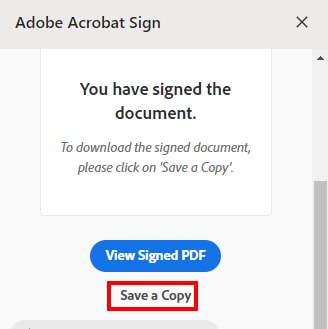
- After receiving a successfully signed message, close the window.
- Scroll down on the Adobe Acrobat Sign dialog. Select Save a Copy to download the signed document.
Add Signature in Word on Mobile
There is no feature to insert a signature in the Mobile Word app using the Signature line. However, you can draw the signature or insert an image saved as an image.
Inserting Handwritten Signature
- Open a Word document in your mobile app.
- Select the Edit option at the bottom of the page. Move your cursor to the signing spot.

- Click on the drop-down menu on the bottom right.

- Tap on the icon beside the Home tab.
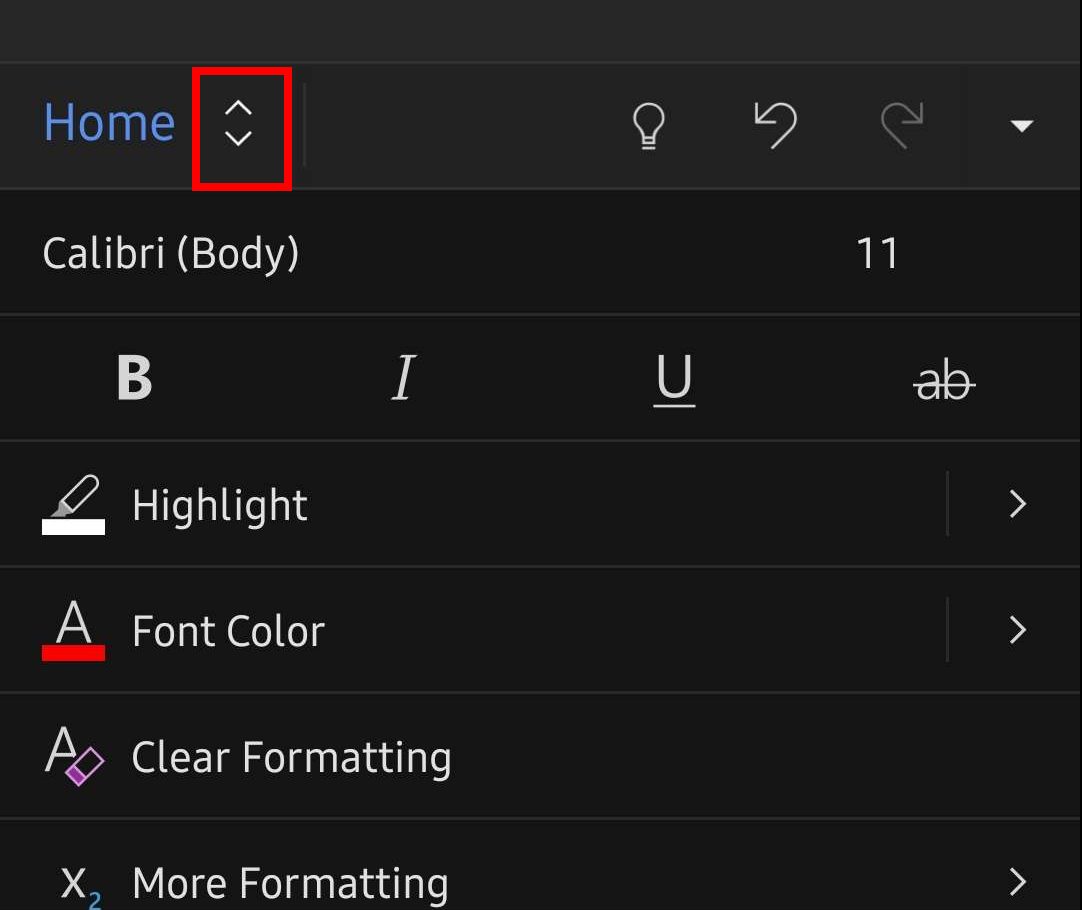
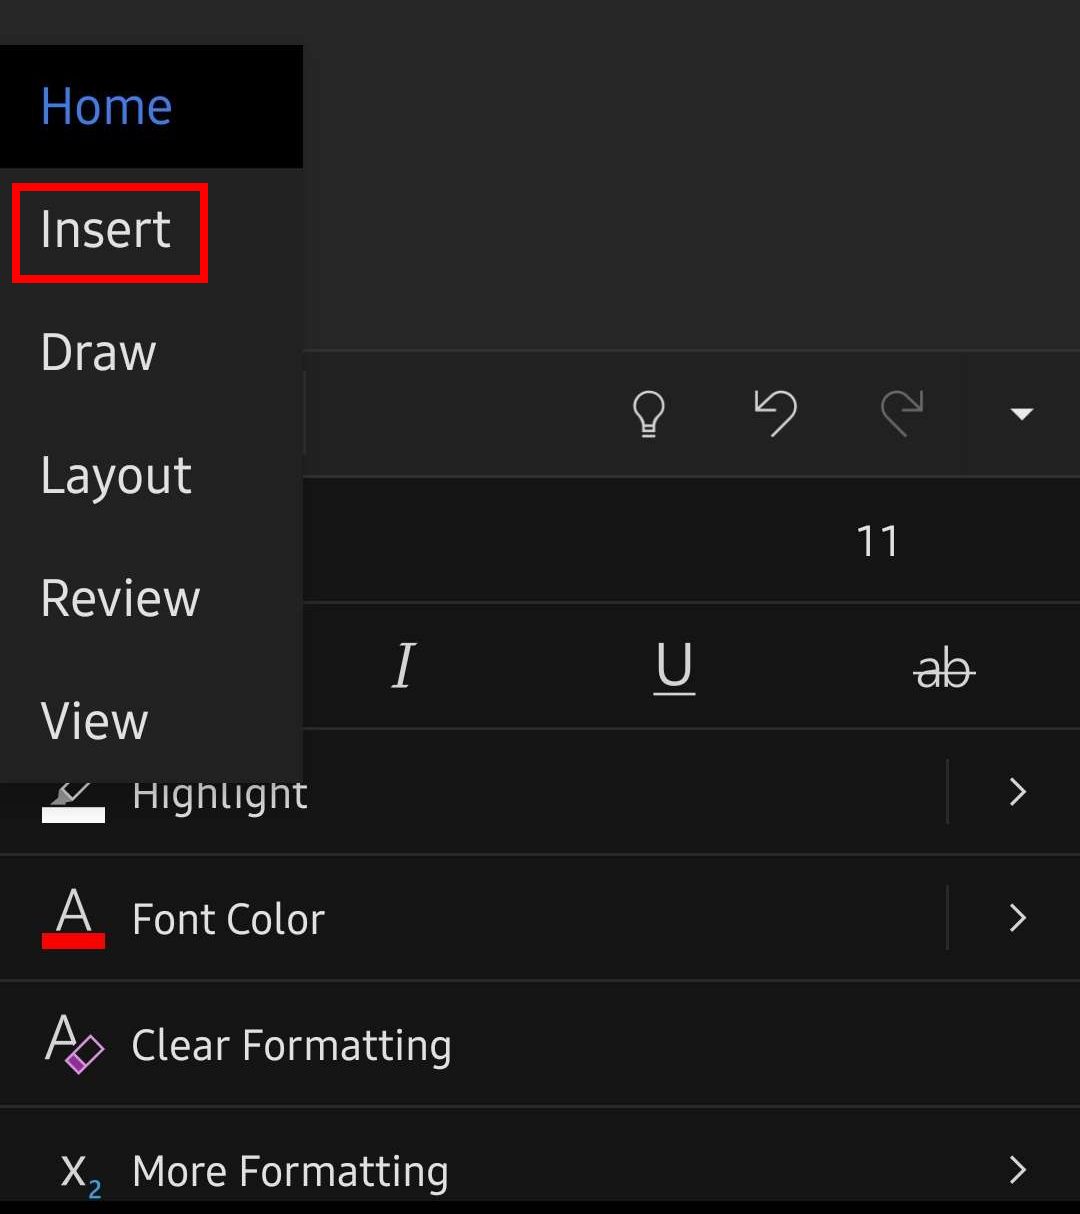
- Select Insert tab.
- Go to Pictures.
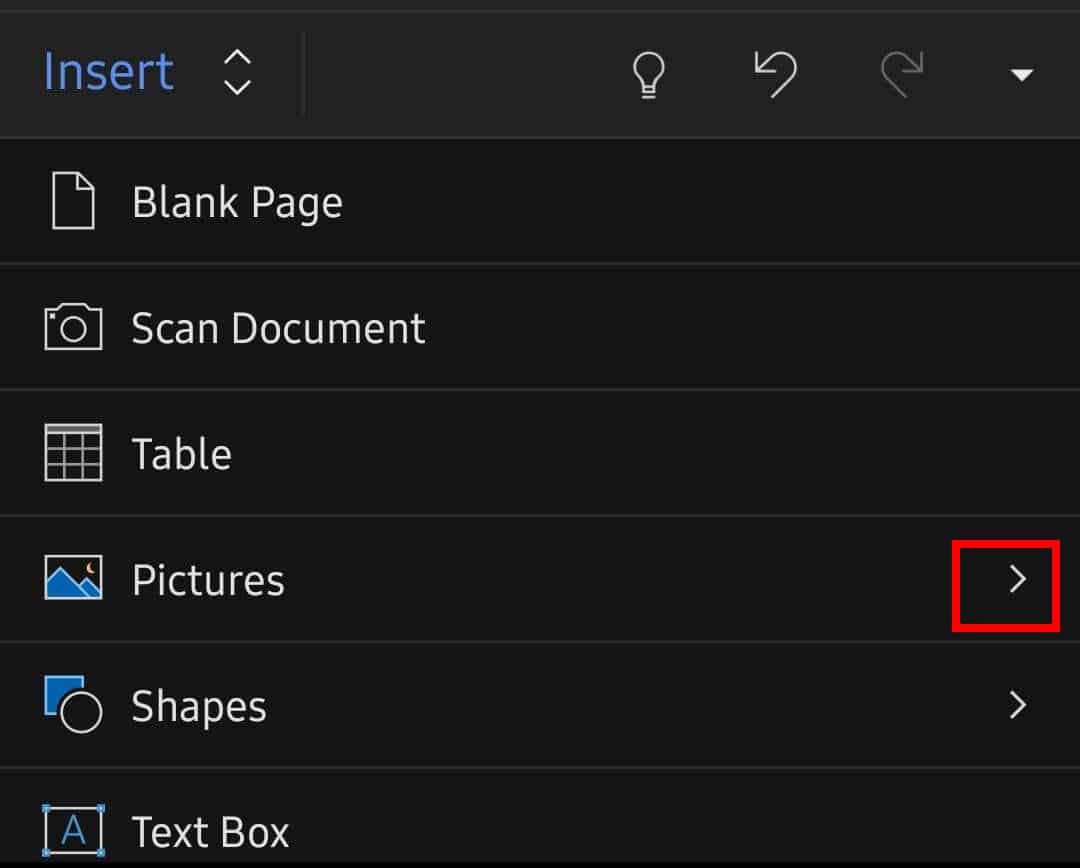
- To insert a signature image on your device, choose Photos.
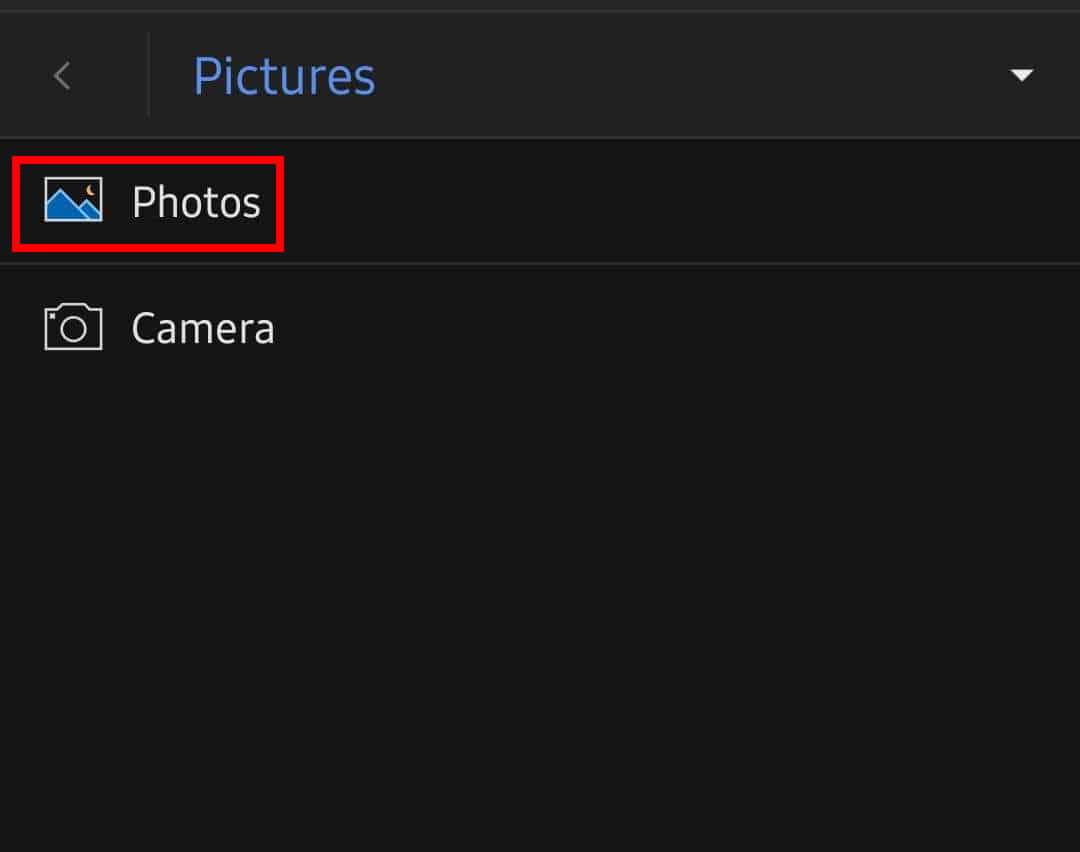
Select the photo, Crop or rotate if required and select Done.
- Or else, tap on Camera. Click the picture you want to insert as a signature.
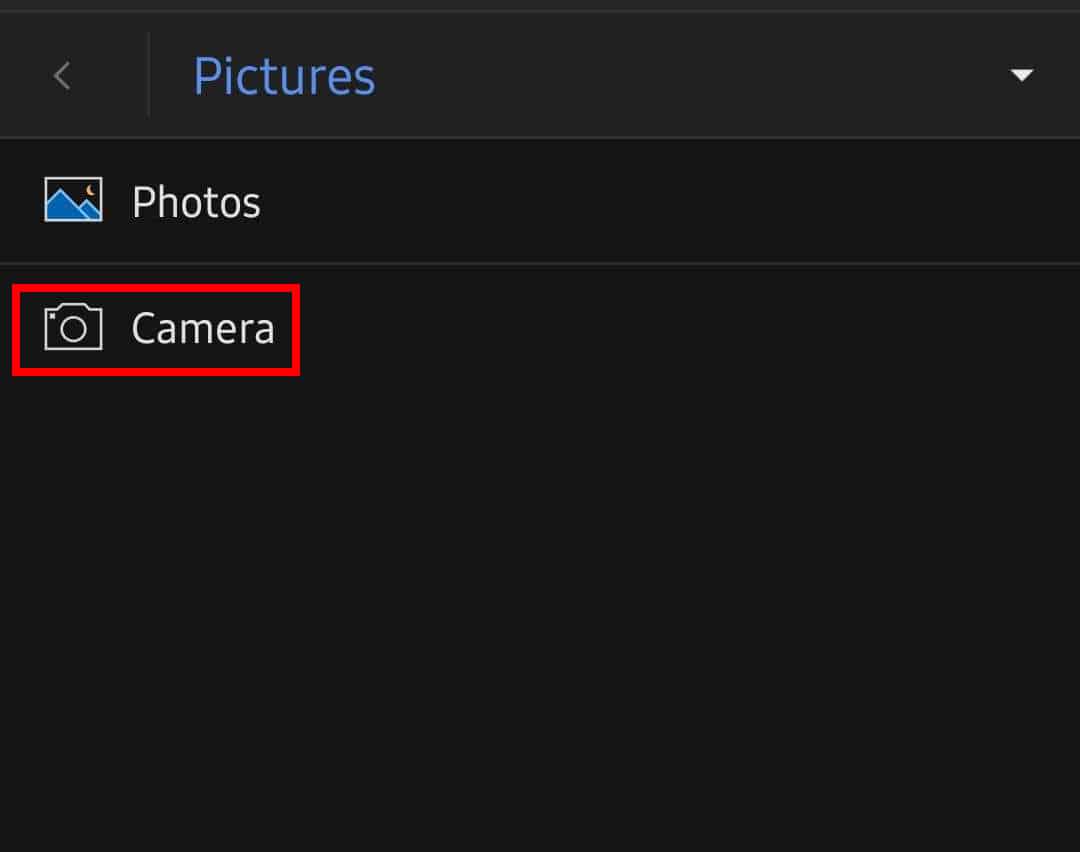
- Crop or Rotate if required and select Done.

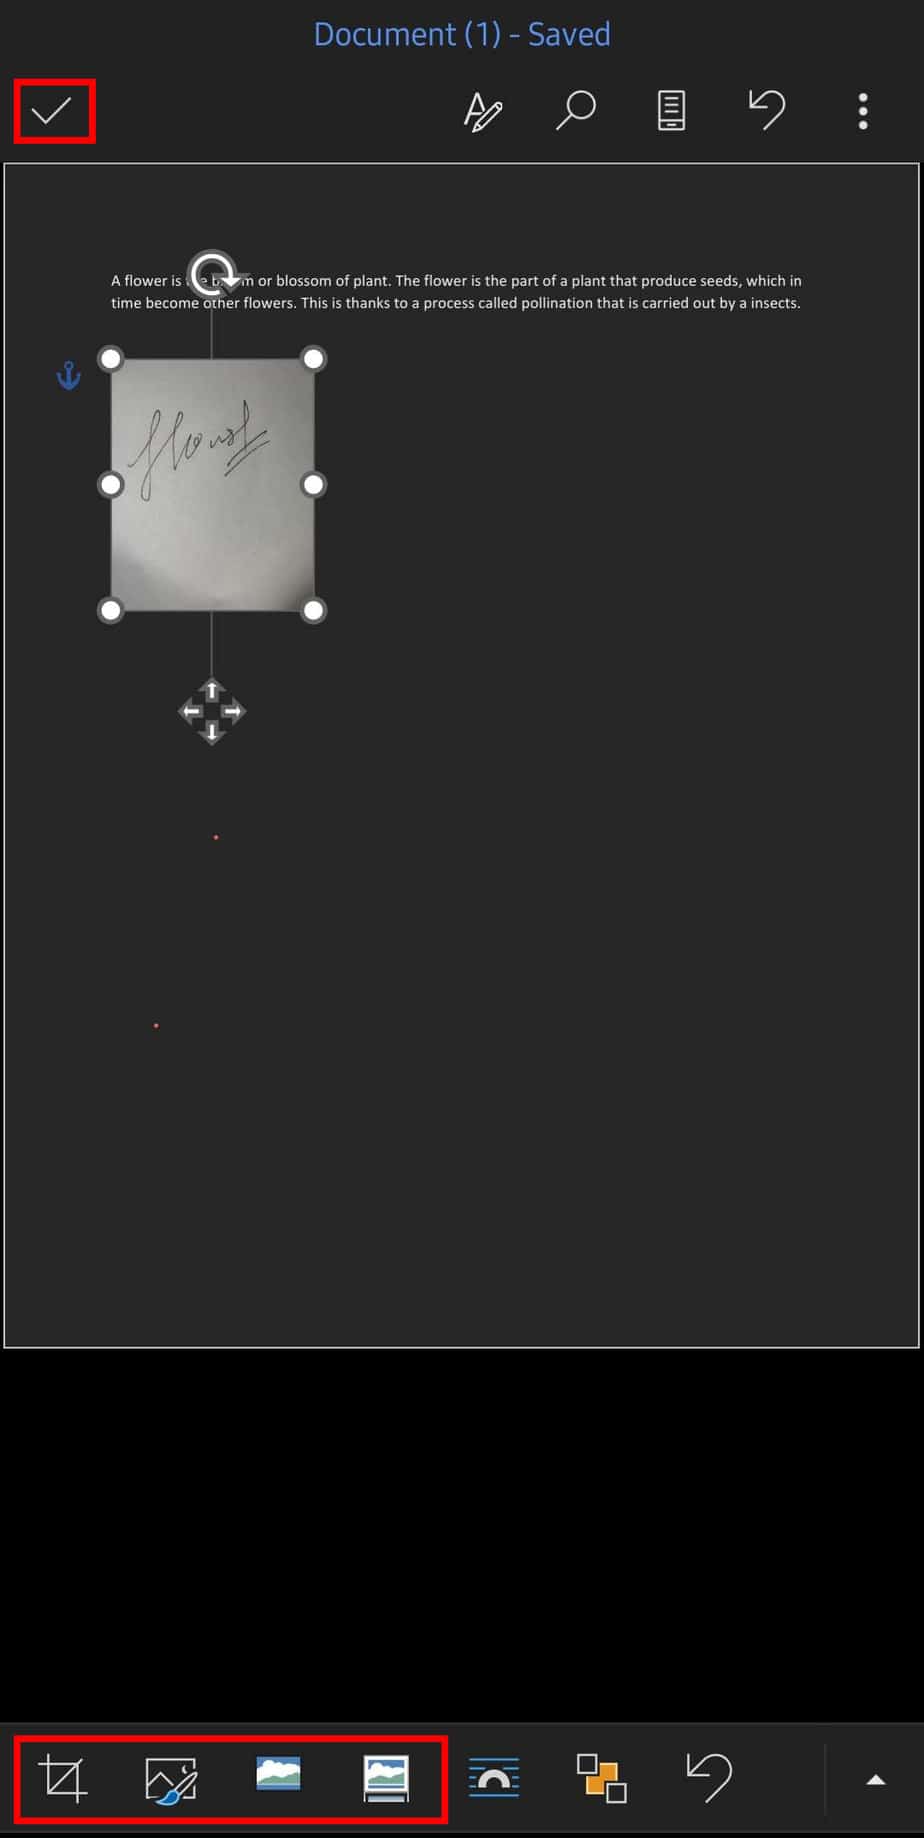
- After inserting the image, go to the Picture tab on the bottom to change Style, Crop, or Resize it. Tap on the Tick sign after you are done.
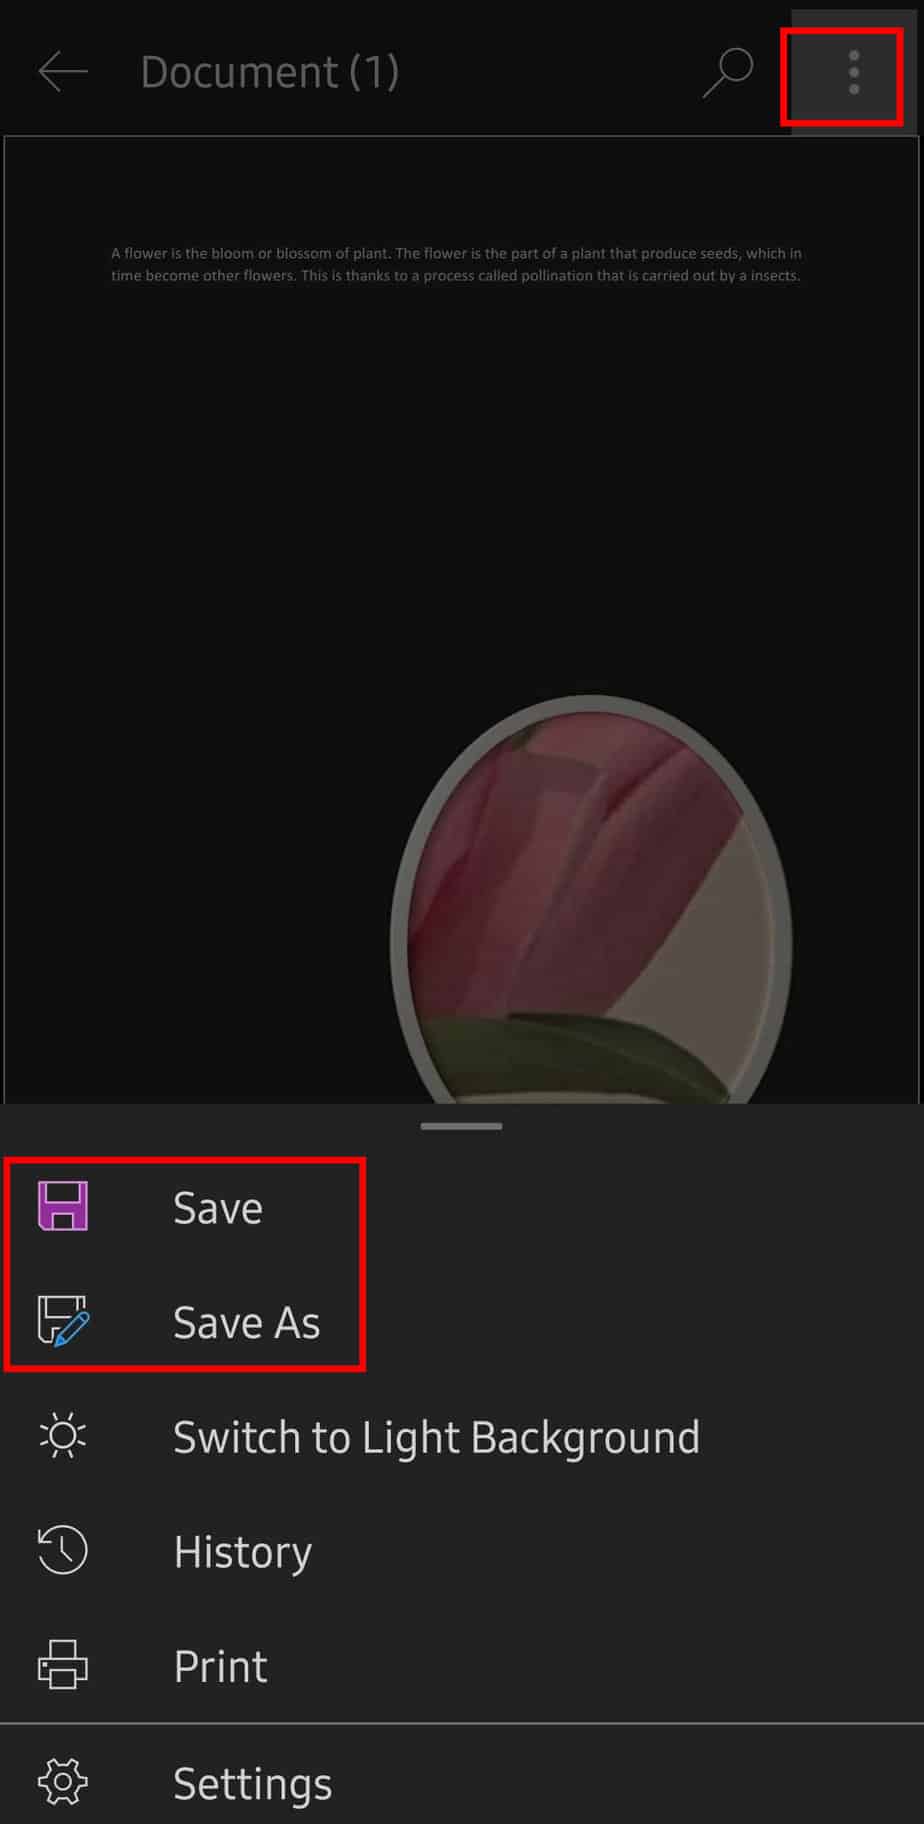
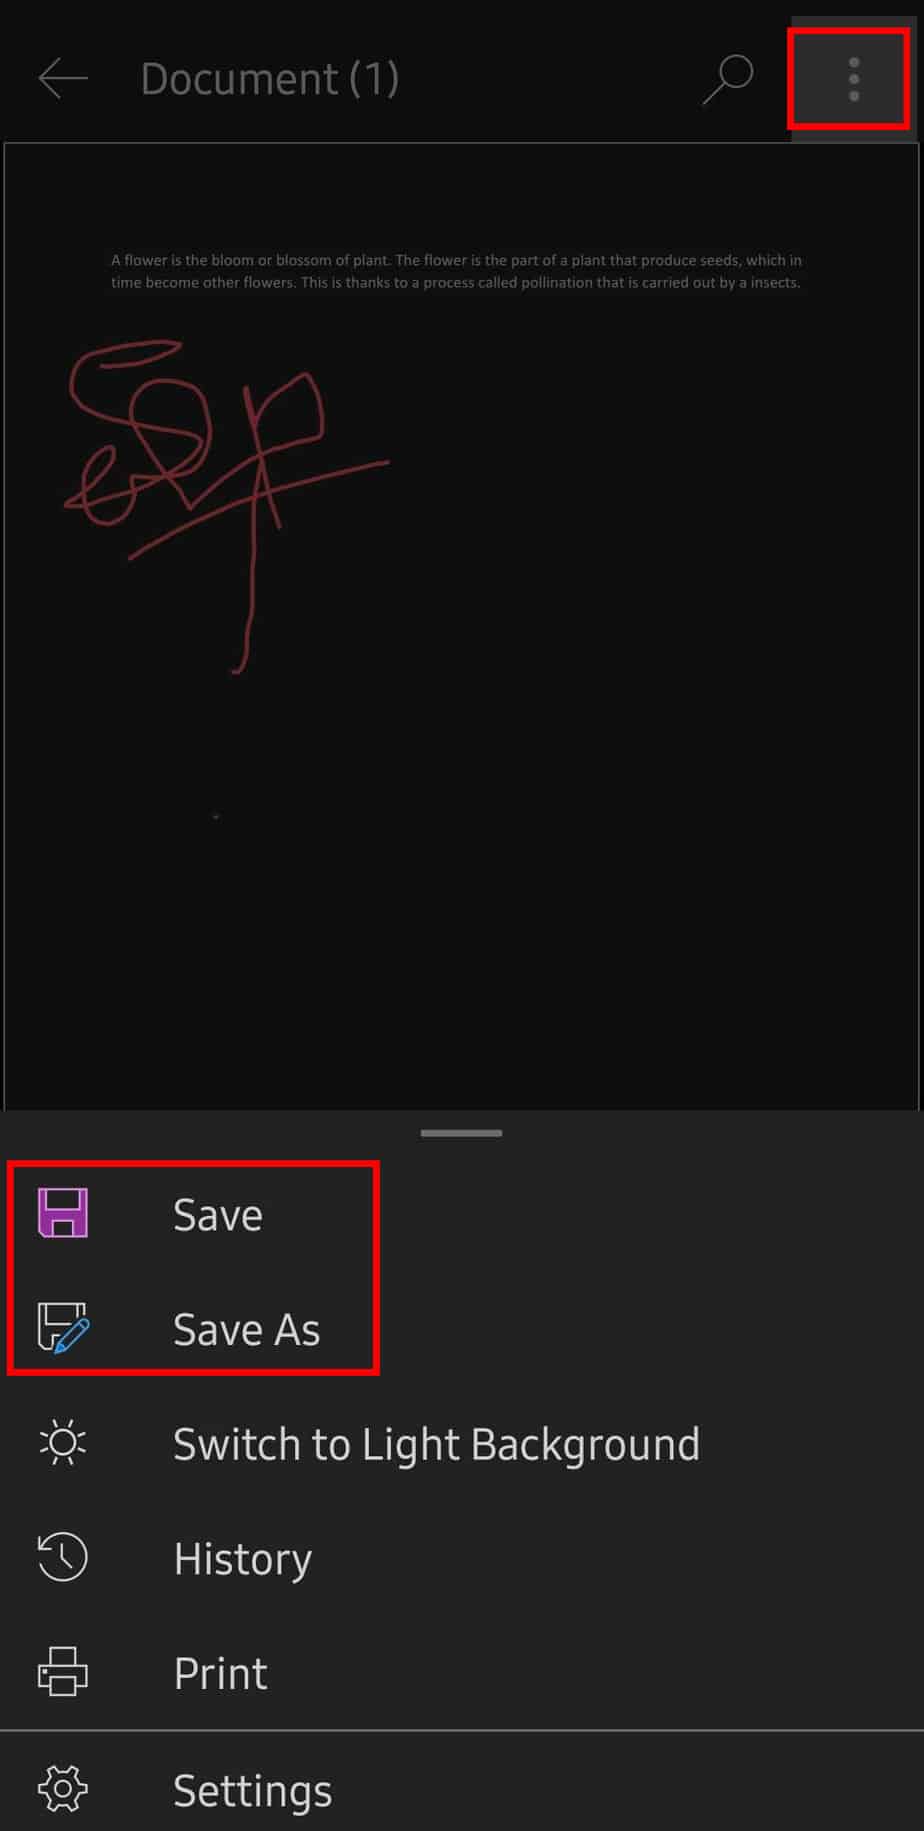
- Tap on the More icon on the top right. Select Save/Save as option.
Drawing Signature
- Open your Word doc and select the Edit option in the middle bottom.

- Go to the signing spot in the document. Tap the drop-down menu on the bottom right.

- Click on the icon beside the Home tab.

- Select the Draw option.
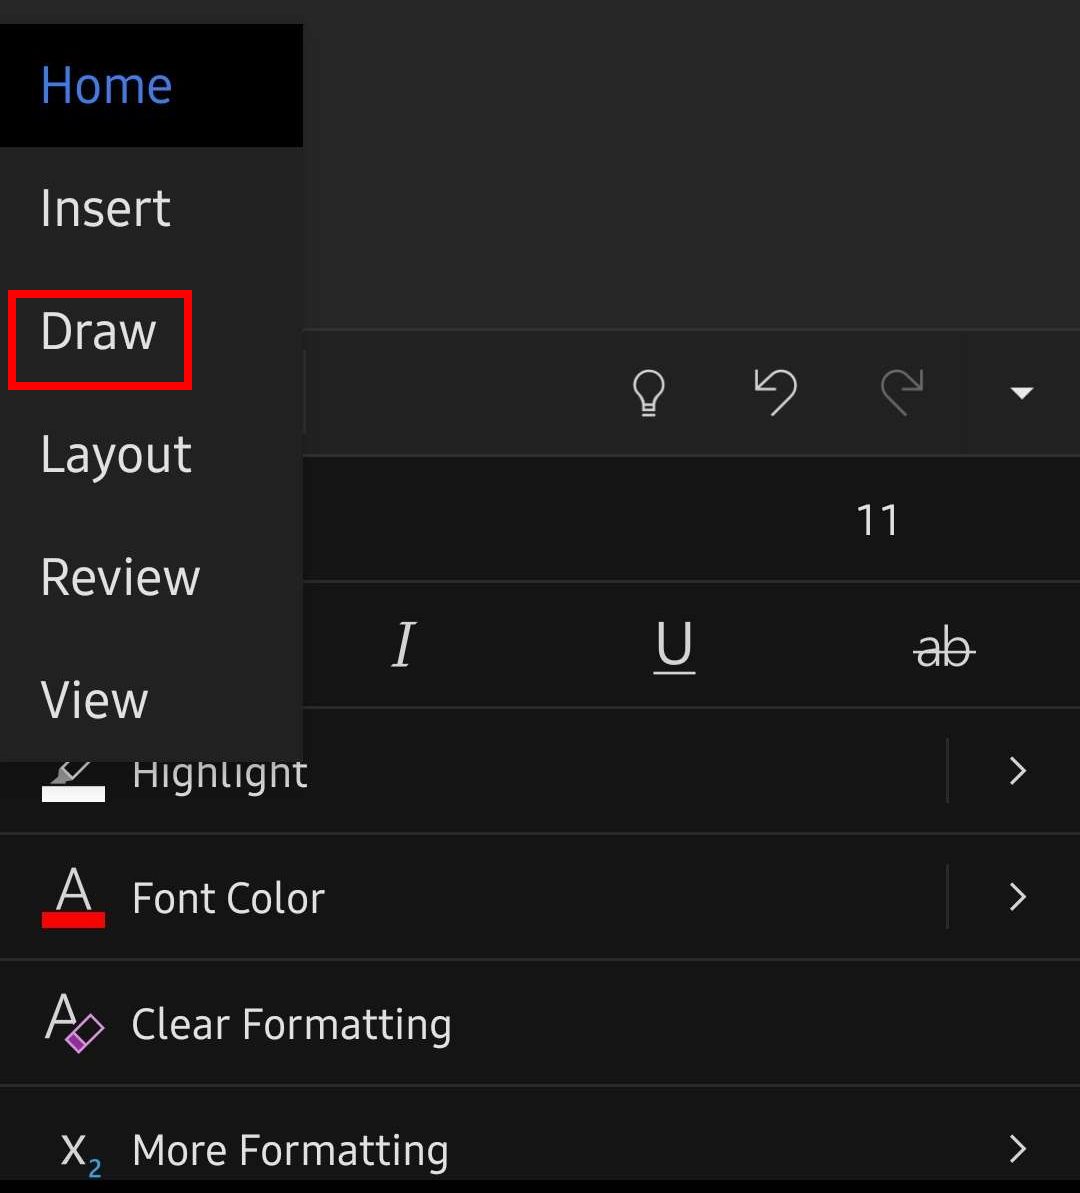
- Click on Draw with Mouse or Touch.
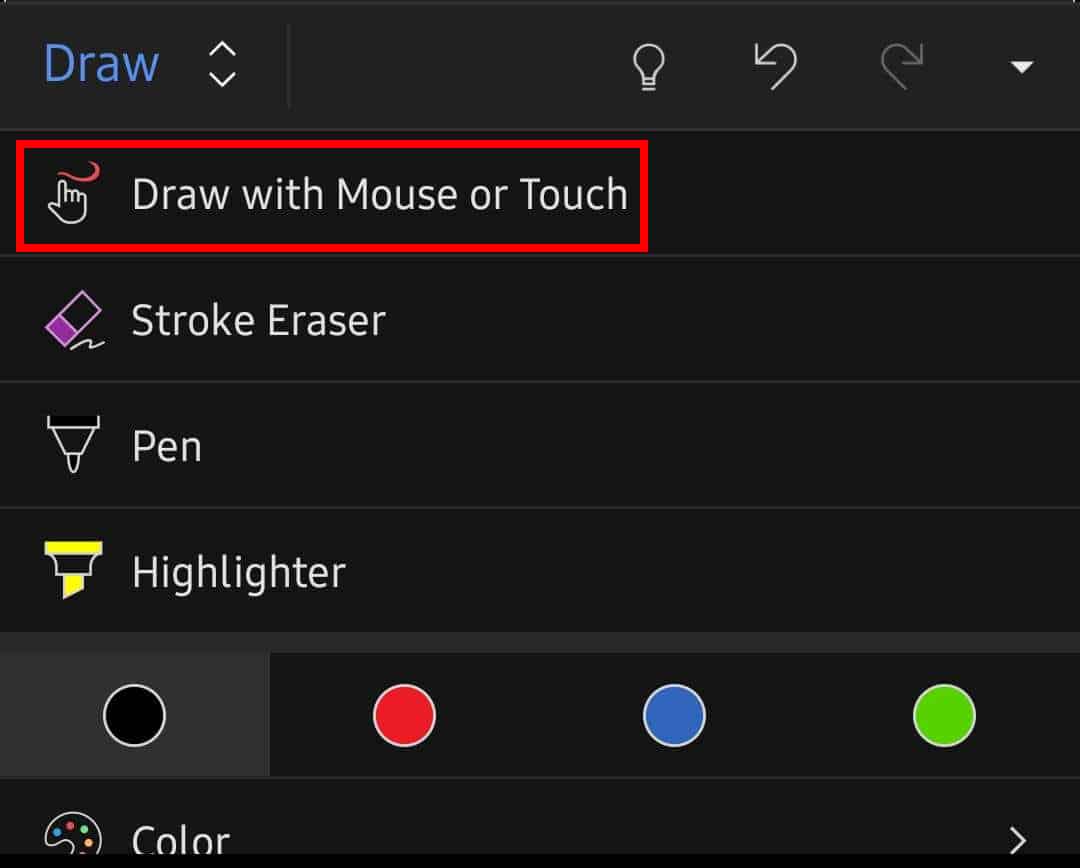
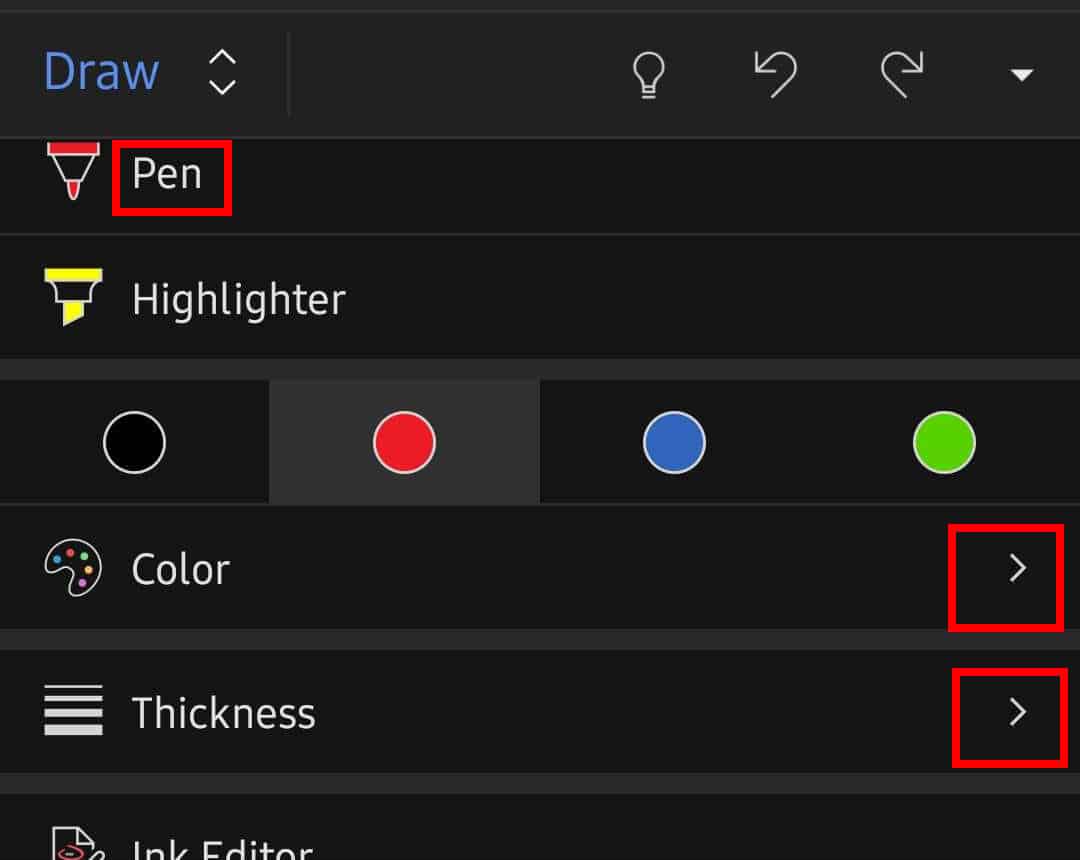
- Tap on the Pen. Choose color and thickness by clicking the Color and Thickness options.
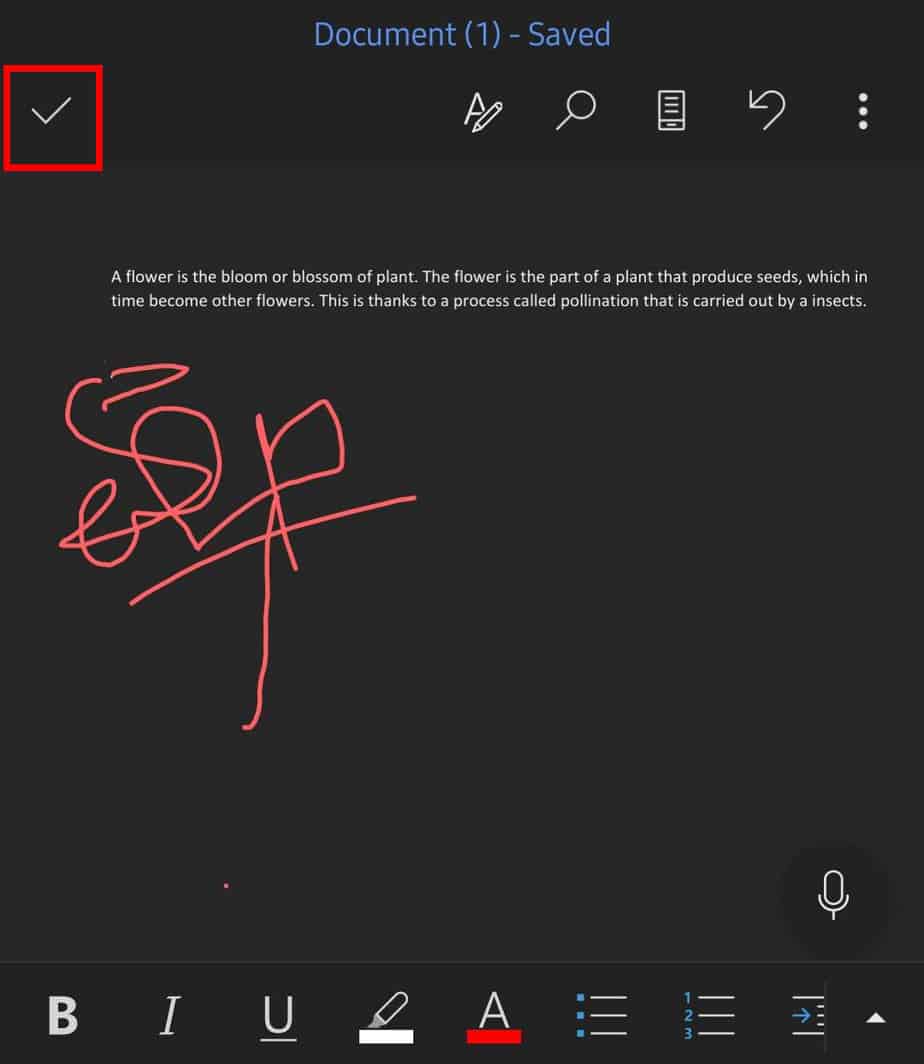
- Draw the signature. Select the Tick icon on the top left.
- Click on the More icon on the top right. Choose Save/Save as option to save the changes.
How to Reuse Signatures?
You can save the digital signatures you’ve created and reuse them in the future. If you want to save detailed information like email addresses, phone number, or job title on any signature image—Quick Parts is the easiest option.
- Click on the signature image.
- Go to the Insert option in the menu.

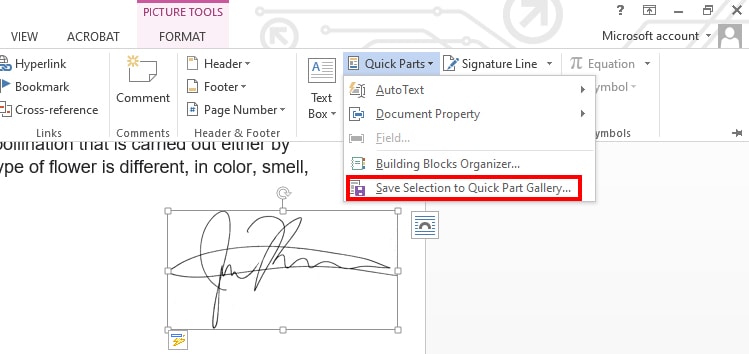
- On the Text section, select Quick Parts > Save Selection to Quick Part Gallery.
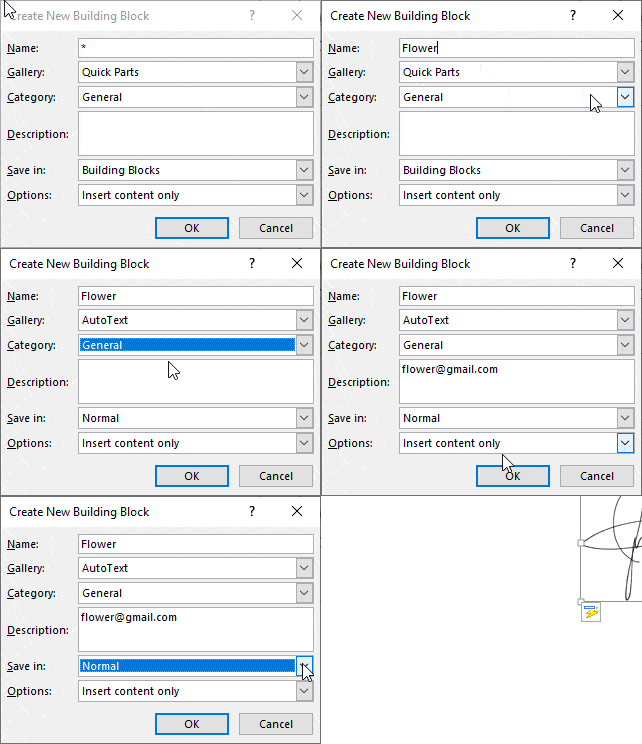
- On Create New Building block dialog, input the following information:
- Name: Type the Signer’s name
- Gallery: Drag the drop-down menu and select Autotext.
- Description: Type the email address, phone number, job title, and other information to include with signature
- Save in: Drag the drop-down menu and select Normal
- Options: Drag the drop-down menu and select Insert content only.
- After filling in all information, press Ok.
- Wherever you want to insert this info, click Insert > Quick Parts > Autotext and select your name.

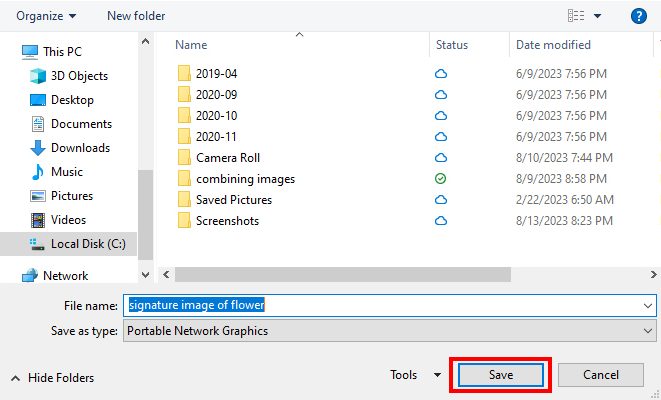
After inserting picture signatures, if you want to save the signature as an image for future use—you can save it as a PNG image.
- Right-click on the picture and select Save as Picture.
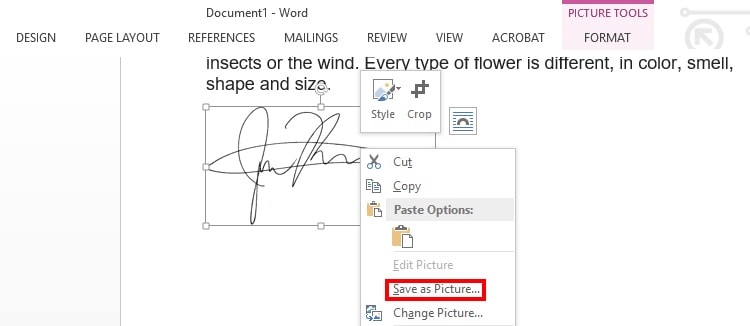
- Choose file location.
- On the File Save dialog, type File name and choose Save as type by dragging the drop-down menu. Tap on Save.
