One of the ways you can make your Word document more interactive is to add checkboxes, especially if it’s a questionnaire, form, survey, or even a shopping list. But adding a checkbox in MS Word is not the most straightforward method as the checkbox tool is not visible by default.
There are two styles and ways you can add checkboxes in MS Word. One of them is adding clickable checkboxes that are best for sharing your documents electronically.
Another way is to use checkboxes as bullet points. But, you can’t click and check off these boxes. This method is more suitable if you want to prevent edits to the checkboxes and want to make a printed copy.
Add Developer Tab (Prior Step)
You’ll first need to allow the Developer tab in the ribbon to start adding clickable checkboxes to your Word document. If you already have this tab enabled, you can skip this section. But if you haven’t, refer to the steps below:
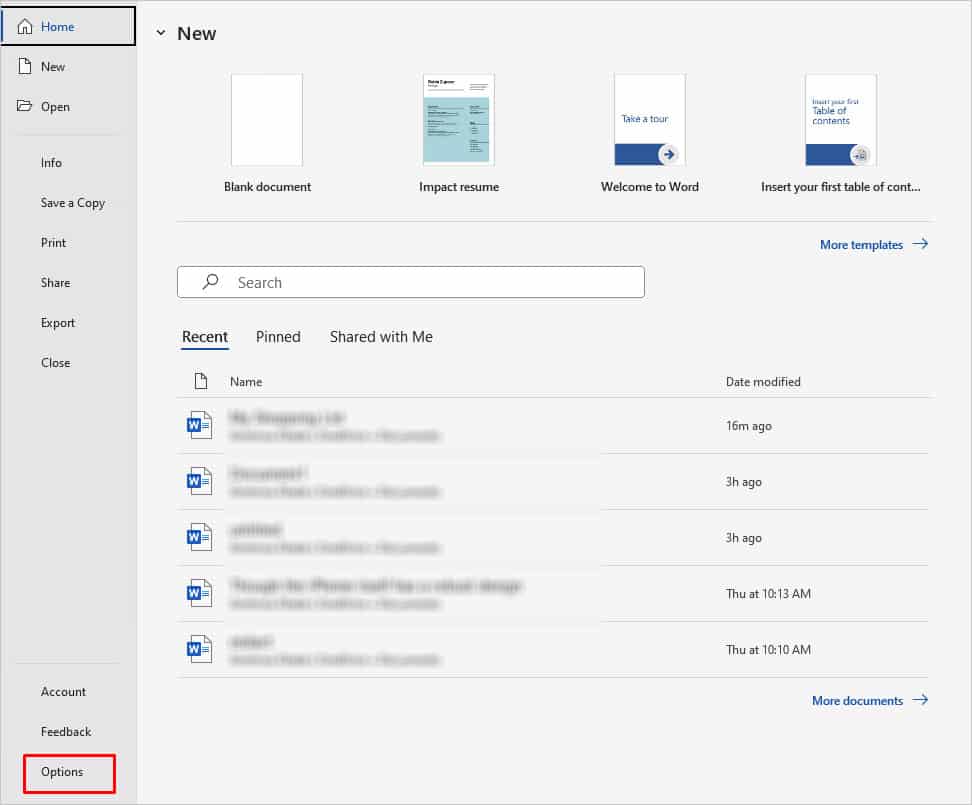
- Click on the File tab and then click on Options that’s at the bottom-left corner of the screen.
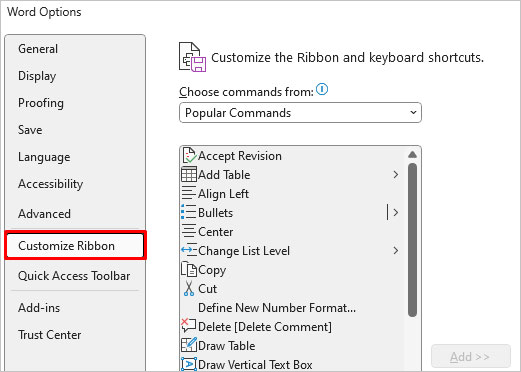
- A new Word Options window will appear. Go to Customize Ribbon from the options on the left.
- In the Customize the Ribbon section, make sure you’ve selected Main Tabs. Here, you can add new items to the ribbon. Locate and select Developer from the list.
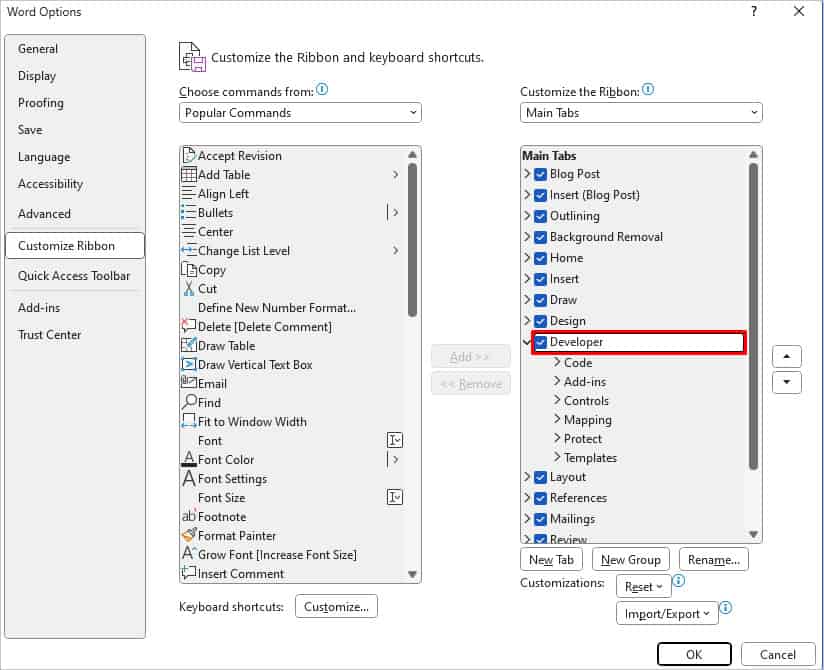
- Then, click on OK.
Add a Checkbox in Word (Clickable)
Now, you can go back to your document and find the checkbox menu from the Developer tab.
- Open the Developer tab.
- Navigate to the Controls group. Select the Checkbox icon. It looks like a green tick inside a box.
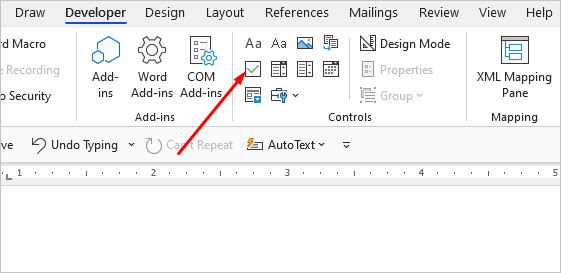
- Click on it and it will instantly appear where your cursor is placed. So, click where you want the checkbox. If you want more checkboxes, again click on the same icon.

- To tick the checkbox, simply click on it once. It will display an X icon.
- To add text next to the checkbox, press the left arrow key twice and type any text.
Add a Checkbox Using Bullet Points
If you don’t need clickable checkboxes, there’s an easier way to add checkboxes directly as bullets. These types of checkboxes are especially useful if you only want to print out the document as it is, whether for questionnaires, notebooks, or such. For this method, you won’t need to enable the Developer tab. You can simply refer to these steps:
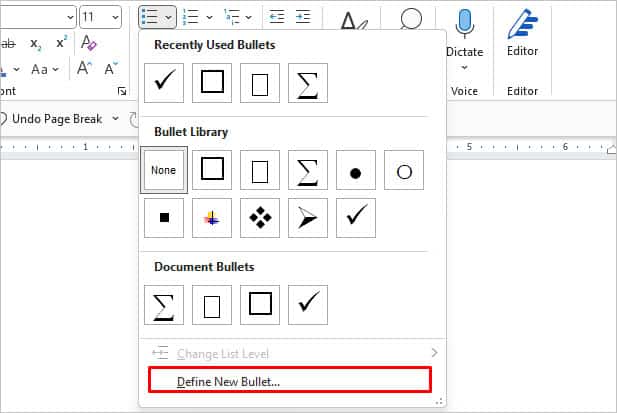
- Go to the Home tab and then click on the downward-facing arrow next to the Bullets icon.

- Then, click on Define New Bullet.
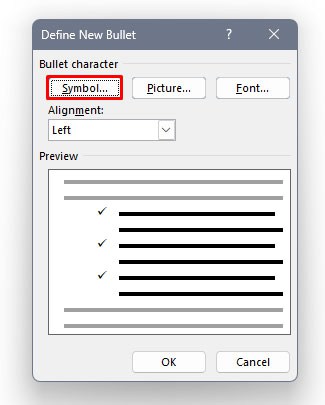
- A new window will appear. Click on Symbol in the Bullet Character section.
- In the new Symbol window, click the box next to Font and search and select Wingdings 2. Then, use the navigation arrows on the side to search for the checkbox symbol.
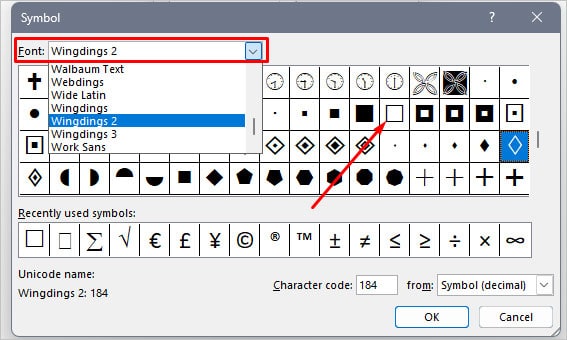
- Click on the checkbox and then click on OK.
- When you go back to the window, you’ll also get a preview of what it’ll look like. Then, click on OK.
- Now, the checkbox will appear on your document. To add a new checkbox, press Enter.
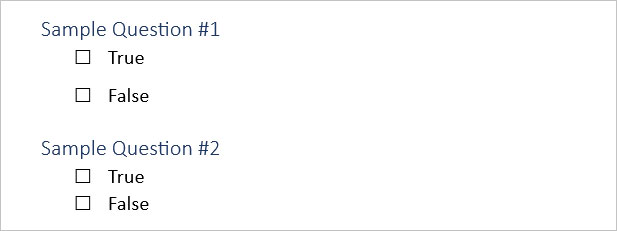
If you want to set the checkbox as your default bullet,
- Go to the Bullet library again and right-click on the checkbox. Click on Add to Library.
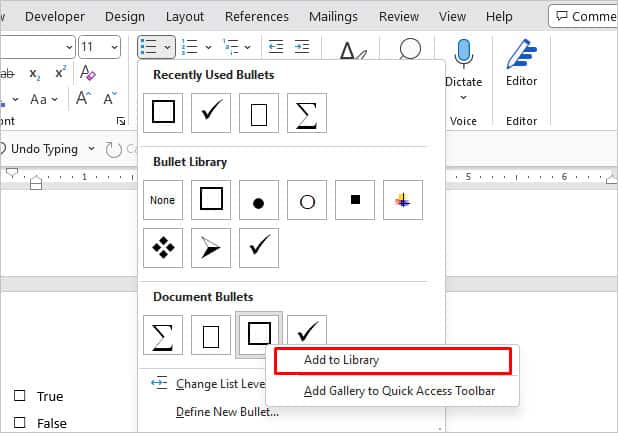
- Next time you want to add the checkbox, you can directly access the Bullets library.
Edit a Checkbox in Word
To make any changes to the checkbox, you can go to the Content Control Properties. From there, it’s simple to edit a checkbox to your liking. Here’s what you can do:
- First, you need to select or highlight the checkbox you want to edit.
- Click on the Properties menu from the Controls group.
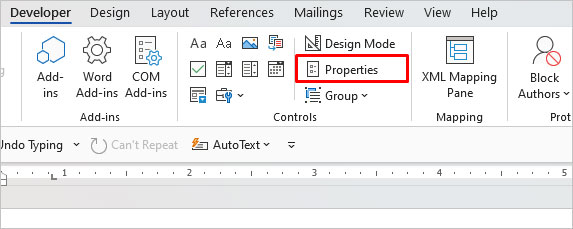
If you find that the Properties option is grayed out, you haven’t highlighted your checkbox.
- You’ll now see the Content Control Properties window. Here, you get various editing options.
Resize a Checkbox
- To resize your checkbox, click on Use a style to format text typed into the empty control. Then, click on New Style.
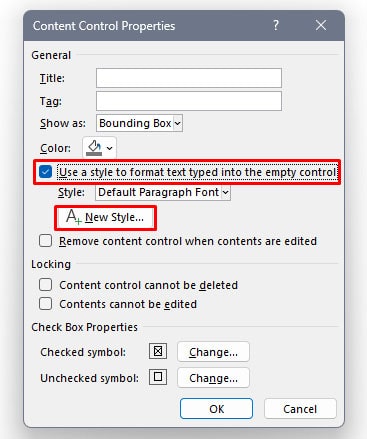
- The Create New Style from Formatting window will now open.
- Go to the Formatting section and pick a font size to adjust the size of the checkbox accordingly.
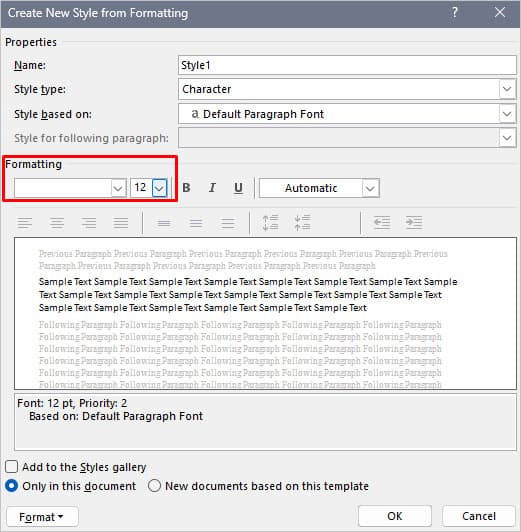
Another step you can resize a checkbox is by following these steps:
- Hover on the checkbox you want to resize and click on the gray area around it.
- Right-click on it and then click the Increase or Decrease Font Size icon.
Change Checkbox Design
- In the Content Control Properties window, navigate to the Check Box Properties section. Click on the Change option next to what you want to change. For e.g., you can change the checked symbol from ‘X’ to a tick mark.
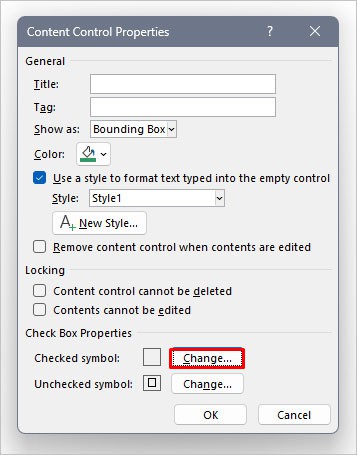
- The Symbol window will now appear. Click on Font and select Wingdings 2. Scroll the symbols to the top and click on the tick inside a box icon.
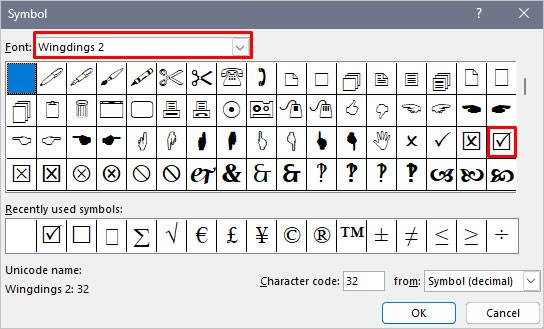
- Click on OK.
- If you want to change the border of the checkbox, click on Change next to Unchecked symbol.
- Lastly, click on OK.
Change Checkbox Color
- Click on the checkbox and hit right-click on it to open the Text Edit menu.
- Then, click on the Font Color icon.
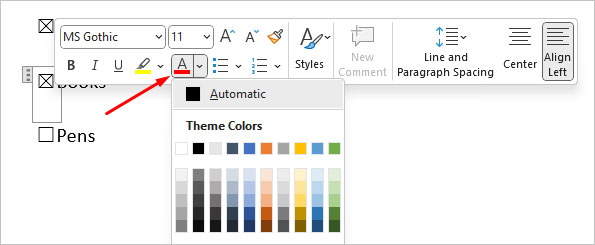
- After you pick a color, click on OK.
Move a Checkbox
- Click on a checkbox and then click on the three dots.
- Drag it to where you want to move the checkbox.
Delete a Checkbox
To remove a checkbox, you can directly press the Backspace key.