You have made a fantastic presentation and are ready to deliver it. But the complex charts and graphs on your slide may make it difficult for your audience to follow.
In this case, presenting handouts to your audience can support your presentation.
While presenting handouts, make sure that they are helpful and well-composed. Otherwise, they might only distract your audience.
In the Handout Master menu, PowerPoint provides various editing and formatting tools to help you create effective handouts. After you’ve finished creating the handouts, you can print them in a few simple steps.
Creating Custom PowerPoint Handouts
Before printing your presentation handouts, you may need to format them. You can alter the theme, font, placeholders, background, and orientation of the slide.
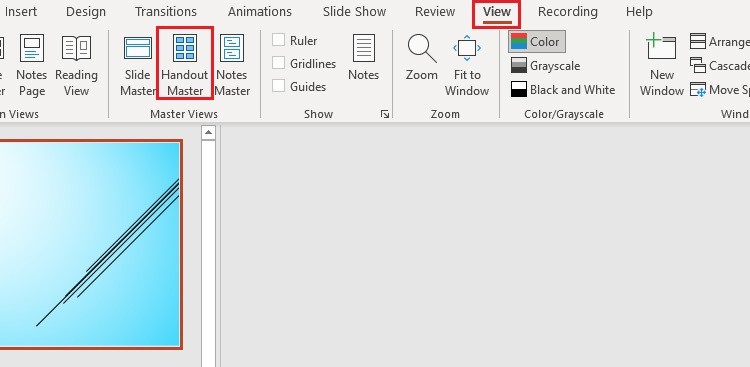
To open PowerPoint Handout Master option, go to View > Handout Master.

Here, you can format the handout, with Page Setup, Placeholders, Edit Theme and Background.
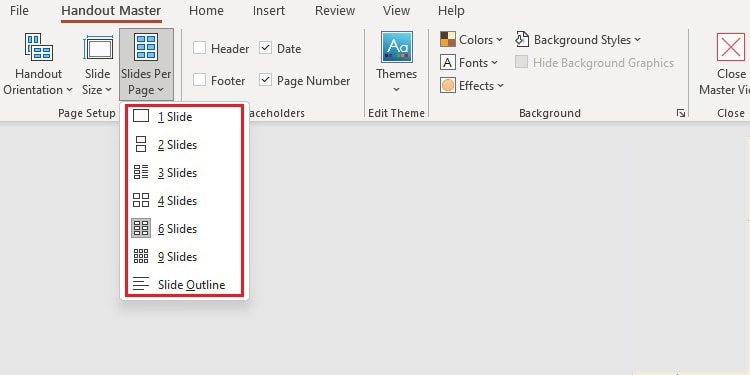
First, let’s go through the Page Setup option in the Handout master. The Page Setup group has three groups—Handout Orientation, Slide Size, and Slides Per Page. These groups allow you to set the layout and orientation of your handouts.
Setting Handout Orientation
- Open PowerPoint.
- Go to the View tab from the ribbon.
- Click on the Handout Master to create custom handouts.
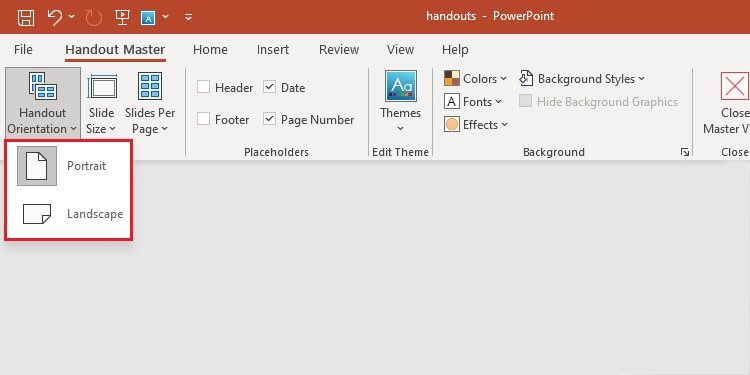
- Click on the Handouts Orientation.

- Select the Potrait or Landscape orientation as you want.
Customize Slide Size
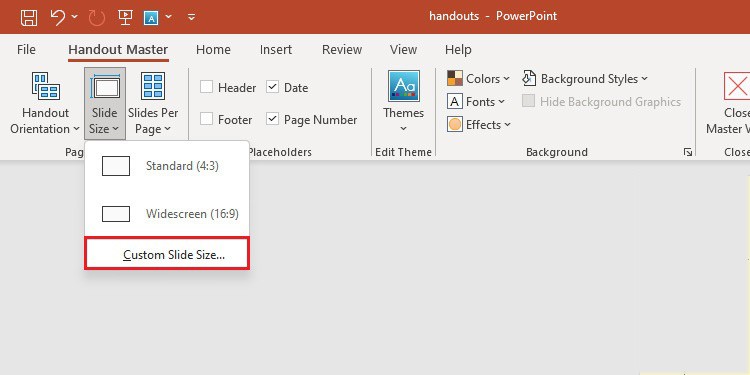
- Click on the Slide Size option.
- Choose the Standard or Widescreen option.

- Click on the Custom Slide Size to manually set the size of the slides.
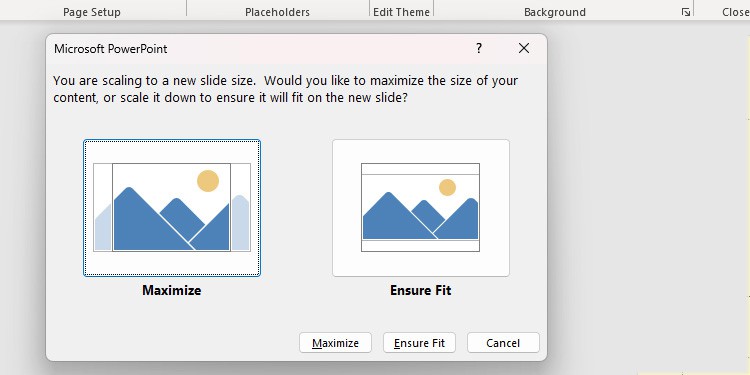
When shifting the slides to the new size, PowerPoint sometimes fails to scale the contents automatically. Then, it will prompt a message to choose the Maximize or Ensure Fit option.
Choose the Maximize option to increase the size of your slide content or Ensure Fit to decrease the size of your content.
Setting Slides Per Page
- Click on the Sides Per Page option.
- Choose any of the options as per your requirements.
Editing Placeholders and Theme
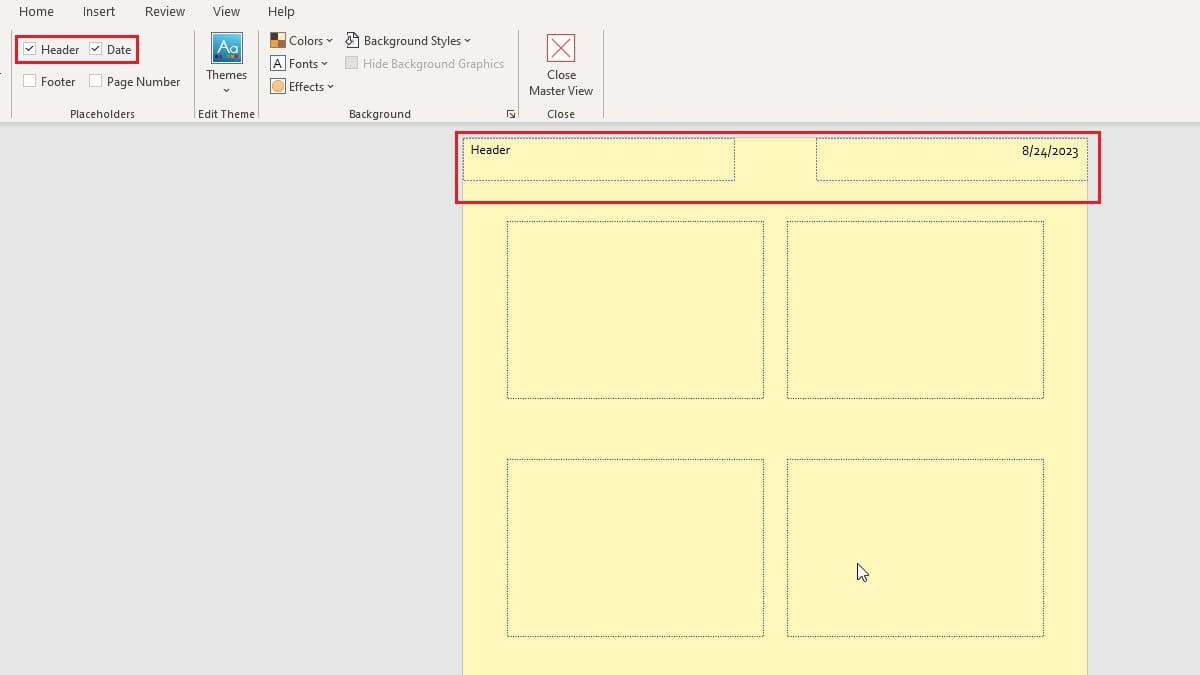
From the Placeholders option on the Handouts Master, you can insert or remove the Header, Footer, Date, and Page Number.

You can tick on the options to insert them and un-tick them to remove them from your handouts.
Changing Background
In the Background option, you can edit your handout’s colors, fonts, effects, and styles.

After all the changes and edits, you can close the Handout Master tab by clicking the “Close Master View” option.

Printing PowerPoint Handouts
Now that you have made your handouts ready after all the editing, you can begin printing those handouts. Moreover, your audiences can make some notes on printed handouts if necessary.
Here are the steps to print the handouts in PowerPoint.
- Go to File and click on Print or press Ctrl + P.
- Under Settings, change the following Slides Settings,
- Choose “Print All Slides” to print each slide on a single page.
- You can also choose to print only the current slide from the “Print Current Slide” option.
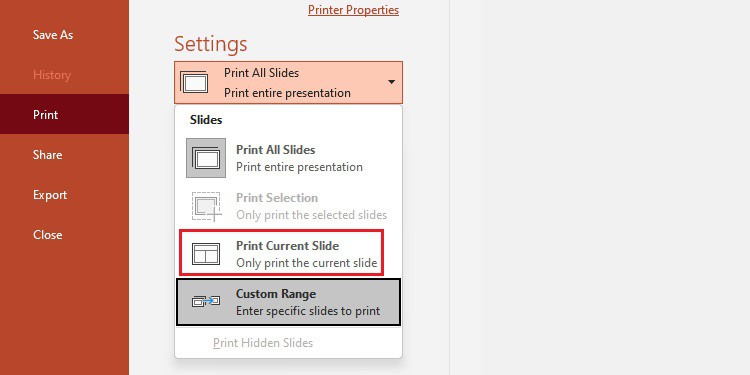
- Or, in the Slides box, you can enter the slide number to print or the slides range separated by a comma or hyphen(–).
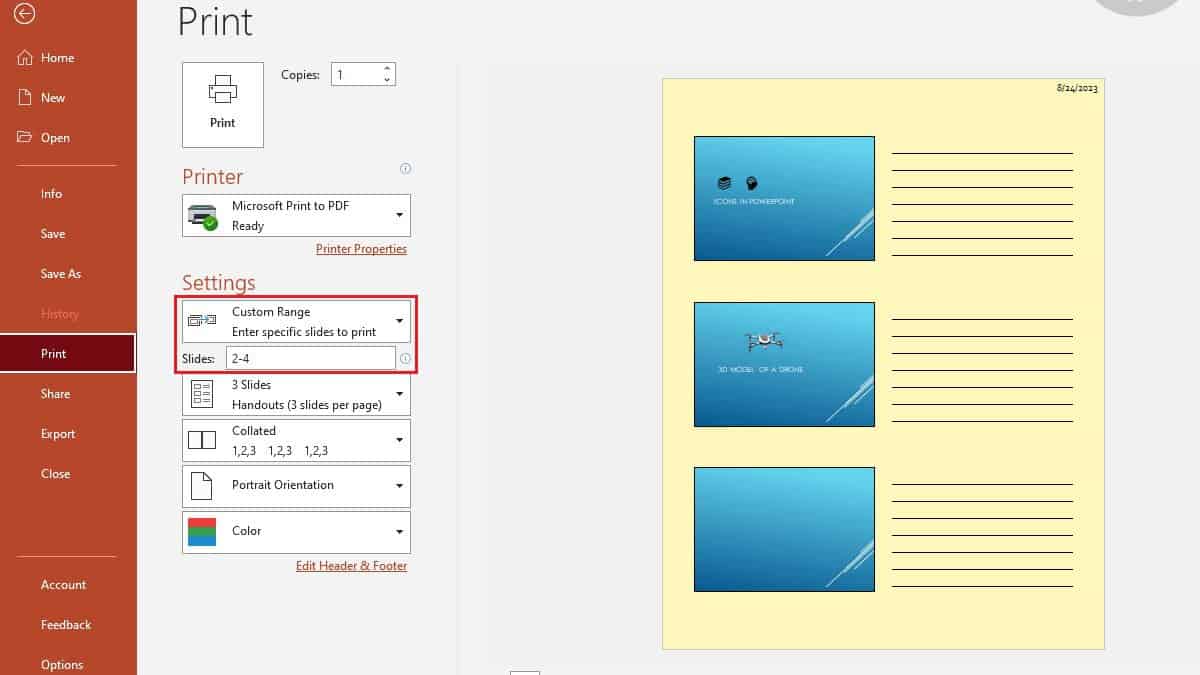
- Make changes to Layout and Handout Options,
- Select the appropriate Print Layout of the slides.
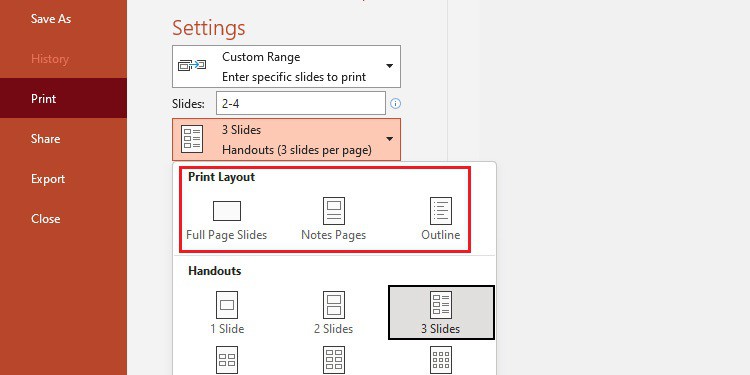
- You can also choose different handout options.
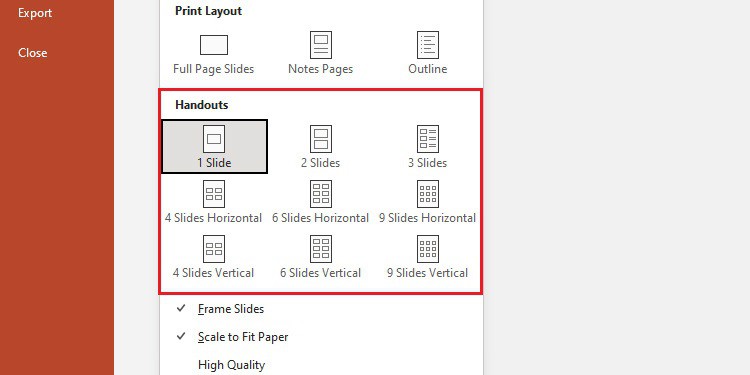
- Select the appropriate Print Layout of the slides.
- Other Settings you can change,
- Click Edit Header & Footer to edit the header and footer before printing.
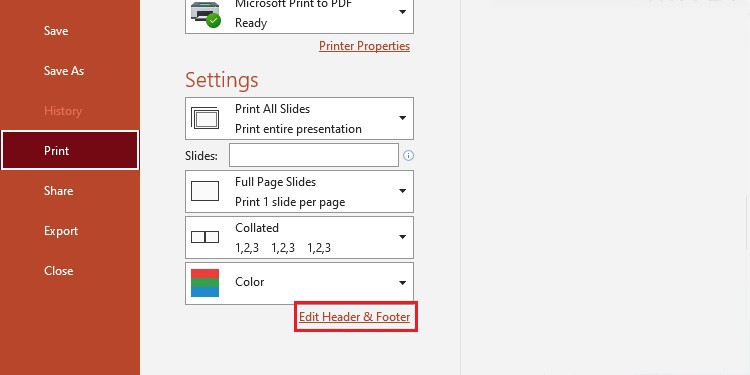
- Choose the color options Color, Greyscale, and Pure Balck and White as you want.
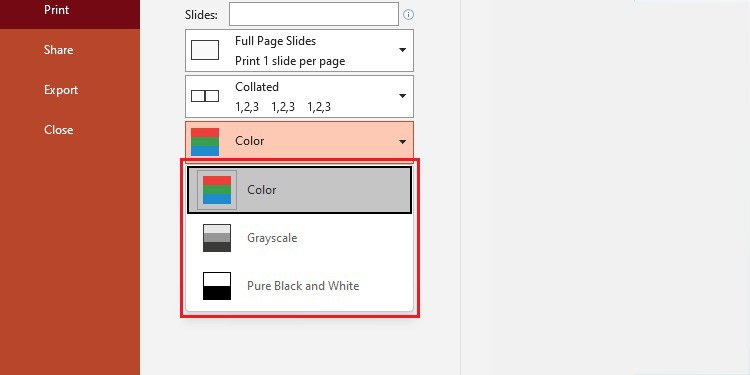
- You can also choose how many copies you want to print.
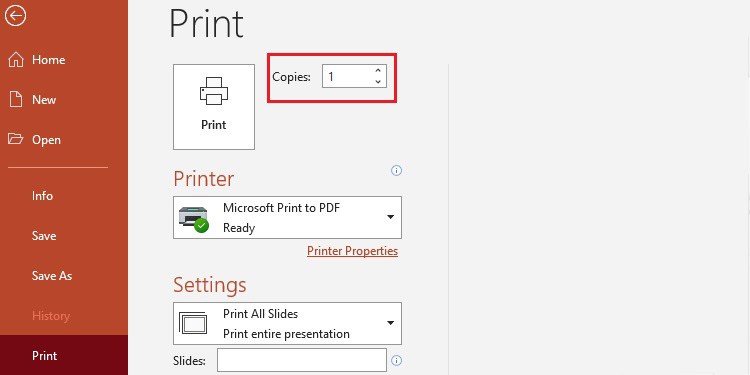
- Click Edit Header & Footer to edit the header and footer before printing.
- Click on Print to print each slide on a single page.
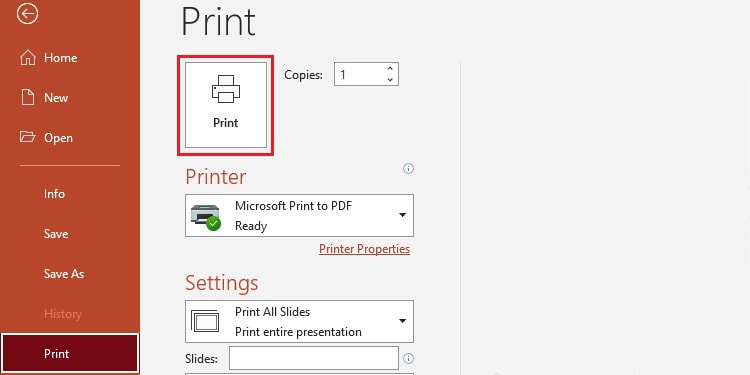
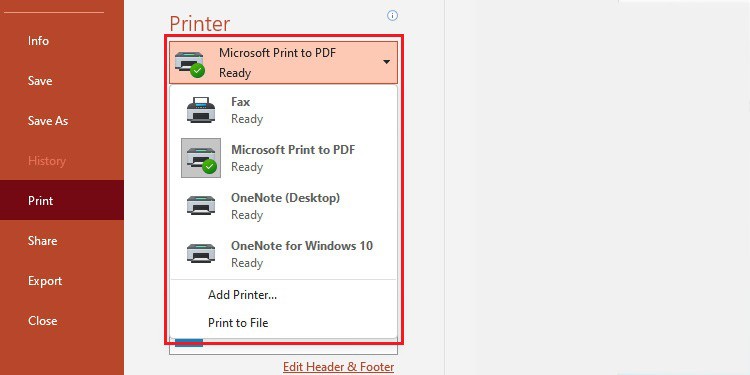
- Click on the Printer Status to choose a different printer.
